Edge-to-edge on Android: doing it right
The past Google I / O 2019 brought a lot of sensational innovations, many of which will affect the mobile development industry in the coming years. It was no less interesting to follow the emerging trends. First, mechanical control keys went down in history, smartphone screens became larger, and the side frames became more inconspicuous. Gestures replaced the on-screen system buttons, leaving more and more space for content consumption. Applications are displayed on the entire visible surface of the display, from the bottom to the top frame, without restricting yourself to the conditional boundaries of the status bar and navigation panel. We are on the verge of an Edge-to-Edge era.

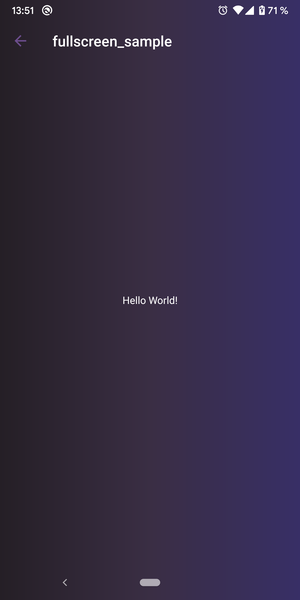
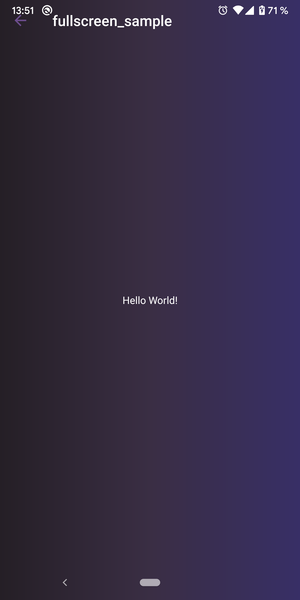
What is Edge-to-Edge? Literally understood, this means that your application should be displayed on the entire visible surface of the display, from the lower to the upper frame, without restricting yourself to the status bar and lower navigation buttons.

Edge-to-edge on the example of the Android system shell.
When it comes to Android, a simple idea is far from always easy to implement. In this article, we will talk about how to maximize the use of all available space on the screen of any device, regardless of manufacturer, version of the system and the variety of settings that device manufacturers from the Middle Kingdom (and not only) like to please users. The code presented in the article was tested on more than 30 devices by us personally, and on 231 different devices by 100 thousand users of our applications.
The problem of creating an edge-to-edge interface is not new in itself and was relevant long before I / O 2019. Surely, each of you will remember how you first google something from the category: “android transparent status bar” or “android status bar gradient” " .
The main criteria for an application to match the edge-to-edge title are:
Read more about them on material.io .

Deezer App Doesn't Worry About Edge-to-Edge
It is important to note that we are not talking about removing them completely, as in " fullscreen mode ". We leave the user the opportunity to see important system information and use familiar navigation.
An equally important requirement for a solution is scalability and extensibility. There are a number of others:
It may unexpectedly take a lot of time to find a solution for such a seemingly simple task, which will not be easy for the project manager to explain. And when QA still find the ill-fated smartphone, on which your screen does not look “according to the canons” ...
In our project, we were mistaken several times. Only a month later, after going through a long series of trial and error, did we solve the problem once and for all.
First of all, you need to understand how Android draws system panels. Starting with Android 5.0, a convenient API has been provided for working with system indents along the horizontal edges of the screen. They are called WindowInsets, and in the picture below they are colored red:

Also, developers from the Android team have added listeners that allow you to subscribe to changes in these indents, for example, when the keyboard appears. Strictly speaking, WindowInsets are the margins of your layout file from the edges of the screen. When resizing your Activity (split-screen mode, keyboard appearance), Inset will also change. Thus, to support edge-to-edge, we need to make sure that these indents are not there. A screen with null WindowInsets will look like this:
In our implementation, we will actively operate on Window and its flags.
All examples will be written in Kotlin, but you can easily implement them in Java, using utilities instead of extension functions.
The first thing to do with the root layout element is to explicitly set the flag:
This is necessary to ensure that the root View is drawn under the system elements, as well as for the correct measurements of Inset when subscribing to their change.
Now we turn to the most important thing - we remove the borders of the screen! However, this must be done very carefully. And that's why:
This behavior should not be allowed (Toolbar crawls on the Status Bar).
The removeSystemInsets () function looks like this:
The calculateDesiredBottomInset () function calculates the lower Inset with or without the keyboard, depending on the current device configuration.
The isKeyboardAppeared () method is used to check the keyboard height . We rely on the hypothesis that the keyboard cannot occupy less than a quarter of the height of the screen. If desired, you can modify the verification logic as you like.
The removeSystemInsets () method uses a listener. Actually, these are just typealias for a lambda expression. Its full code:
The next step is to set the transparency to the system bars:
Having compiled all of the above, we obtain the following method:
Now, to enable the edge-to-edge mode of the desired Activity, you just need to call the following function in the onCreate () method:
Thus, in less than 30 lines of code, we have achieved an “edge-to-edge” effect, while not violating any UX principles and without depriving the user of the usual system controls. Such an implementation may seem simple and trivial to someone, but it is it that ensures the reliable operation of your application on any devices.
You can achieve the “edge-to-edge” effect in about a hundred different ways (the number of such tips on StackOverflow is a clear confirmation of this), but many of them lead either to incorrect behavior on different versions of Android, or do not take into account parameters such as the need to display long lists, or break the screen resize when showing the keyboard.
The solution described in this article is suitable for all current devices. Actual means devices on Android Lollipop (5.0) and higher. For them, the solution above will work perfectly. But for older versions of Android, you will need your own implementation, since nothing was known about WindowInsets in those days.
The good news is that on Android KitKat (4.4), the transparency of system panels is still supported. But older versions do not support such beauty at all, you can not even try.
Let's focus on the shift of Inset in Android 4.4. This can be done in the fitSystemWindows () method. Thus, the main element in your layout should be a container with an overridden fitSystemWindows method containing exactly the same implementation as our listener in the example for current versions of Android.
On devices with Android 4.4, only partial transparency works through setting translucent flags:
These flags make the system bars translucent, adding a slight gradient to them, which, unfortunately, cannot be removed. However, the gradient can be turned into a translucent color bar using this library: https://github.com/jgilfelt/SystemBarTint . She has rescued us more than once in the past. The latest changes were made to the library 5 years ago, so it will reveal its charm only to true retrograde cities.
The whole flagging process for Kitkat will look like this:
With this in mind, we are writing a universal method that can make system bars transparent (or at least translucent), regardless of which application is running on a device with which version of Android:
Under the spoiler below, you can see how the sample presented in the article looks on some of the problematic devices:
In conclusion, I want to say that the solution to even such a seemingly simple task as setting transparency for elements of a system UI can drag you along the whole variety of pitfalls and not ultimately lead to the desired result, but rather will cause unpleasant bugs. Good thing you now have this article.
You can find a complete listing of the program and a sample of work in our git repository .
The material is inspired by Chris Banes' Becoming a master window fitter.
I express gratitude to Surf studio and Evgeny Saturov for help in preparing the material.
What is Edge-to-Edge? Literally understood, this means that your application should be displayed on the entire visible surface of the display, from the lower to the upper frame, without restricting yourself to the status bar and lower navigation buttons.
Edge-to-edge on the example of the Android system shell.
When it comes to Android, a simple idea is far from always easy to implement. In this article, we will talk about how to maximize the use of all available space on the screen of any device, regardless of manufacturer, version of the system and the variety of settings that device manufacturers from the Middle Kingdom (and not only) like to please users. The code presented in the article was tested on more than 30 devices by us personally, and on 231 different devices by 100 thousand users of our applications.
The problem of creating an edge-to-edge interface is not new in itself and was relevant long before I / O 2019. Surely, each of you will remember how you first google something from the category: “android transparent status bar” or “android status bar gradient” " .
The main criteria for an application to match the edge-to-edge title are:
- transparent Status Bar;
- transparent navigation bar.
Read more about them on material.io .
Deezer App Doesn't Worry About Edge-to-Edge
It is important to note that we are not talking about removing them completely, as in " fullscreen mode ". We leave the user the opportunity to see important system information and use familiar navigation.
An equally important requirement for a solution is scalability and extensibility. There are a number of others:
- Correctly shift the screen above the keyboard without breaking support for the adjustResize flags of Activity;
- Avoid overlaying the Status Bar and Navigation Bar on the UI elements of the application, while displaying the corresponding background under them;
- Work on all devices with current versions of Android and look identical.
Bit of theory
It may unexpectedly take a lot of time to find a solution for such a seemingly simple task, which will not be easy for the project manager to explain. And when QA still find the ill-fated smartphone, on which your screen does not look “according to the canons” ...
In our project, we were mistaken several times. Only a month later, after going through a long series of trial and error, did we solve the problem once and for all.
First of all, you need to understand how Android draws system panels. Starting with Android 5.0, a convenient API has been provided for working with system indents along the horizontal edges of the screen. They are called WindowInsets, and in the picture below they are colored red:
Also, developers from the Android team have added listeners that allow you to subscribe to changes in these indents, for example, when the keyboard appears. Strictly speaking, WindowInsets are the margins of your layout file from the edges of the screen. When resizing your Activity (split-screen mode, keyboard appearance), Inset will also change. Thus, to support edge-to-edge, we need to make sure that these indents are not there. A screen with null WindowInsets will look like this:
Implementation
In our implementation, we will actively operate on Window and its flags.
All examples will be written in Kotlin, but you can easily implement them in Java, using utilities instead of extension functions.
The first thing to do with the root layout element is to explicitly set the flag:
android:fitsSystemWindows="true"
This is necessary to ensure that the root View is drawn under the system elements, as well as for the correct measurements of Inset when subscribing to their change.
Now we turn to the most important thing - we remove the borders of the screen! However, this must be done very carefully. And that's why:
- Zeroing the bottom Inset, we risk losing the window’s reaction to the appearance of the keyboard: there are dozens of tips on StackOverflow for resetting the upper Inset, but the lower ones are delicately silent. Because of this, the NavigationBar does not come out to be completely transparent. When resetting the lower Inset, the adjustResize flag stops working.
Solution: Each time you change the Inset, determine whether the lower height of the keyboard is contained in it, and only reset it otherwise. - When resetting the Inset, the visible parts of the View will drop under the Status Bar and Navigation Bar. According to the concept of Material Design (and common sense), no active elements should be located in system areas. That is, in this area there should not be buttons, fields for entering text, checkboxes, etc.
Solution: we will add a listener to the listener, so that when changing WindowInsets, translate system indents to Activity, and respond to them internally by setting the correct paddings and margins for the View.
This behavior should not be allowed (Toolbar crawls on the Status Bar).
The removeSystemInsets () function looks like this:
fun removeSystemInsets(view: View, listener: OnSystemInsetsChangedListener) { ViewCompat.setOnApplyWindowInsetsListener(view) { _, insets -> val desiredBottomInset = calculateDesiredBottomInset( view, insets.systemWindowInsetTop, insets.systemWindowInsetBottom, listener ) ViewCompat.onApplyWindowInsets( view, insets.replaceSystemWindowInsets(0, 0, 0, desiredBottomInset) ) } }
The calculateDesiredBottomInset () function calculates the lower Inset with or without the keyboard, depending on the current device configuration.
fun calculateDesiredBottomInset( view: View, topInset: Int, bottomInset: Int, listener: OnSystemInsetsChangedListener ): Int { val hasKeyboard = isKeyboardAppeared(view, bottomInset) val desiredBottomInset = if (hasKeyboard) bottomInset else 0 listener(topInset, if (hasKeyboard) 0 else bottomInset) return desiredBottomInset }
The isKeyboardAppeared () method is used to check the keyboard height . We rely on the hypothesis that the keyboard cannot occupy less than a quarter of the height of the screen. If desired, you can modify the verification logic as you like.
private fun View.isKeyboardAppeared(bottomInset: Int) = bottomInset / resourdisplayMetrics.heightPixels.toDouble() > .25
The removeSystemInsets () method uses a listener. Actually, these are just typealias for a lambda expression. Its full code:
typealias OnSystemBarsSizeChangedListener = (statusBarSize: Int, navigationBarSize: Int) -> Unit
The next step is to set the transparency to the system bars:
window.statusBarColor = Color.TRANSPARENT window.navigationBarColor = Color.TRANSPARENT
Having compiled all of the above, we obtain the following method:
fun Activity.setWindowTransparency( listener: OnSystemInsetsChangedListener = { _, _ -> } ) { InsetUtil.removeSystemInsets(window.decorView, listener) window.navigationBarColor = Color.TRANSPARENT window.statusBarColor = Color.TRANSPARENT }
Now, to enable the edge-to-edge mode of the desired Activity, you just need to call the following function in the onCreate () method:
setWindowTransparency { statusBarSize, navigationBarSize -> // }
Thus, in less than 30 lines of code, we have achieved an “edge-to-edge” effect, while not violating any UX principles and without depriving the user of the usual system controls. Such an implementation may seem simple and trivial to someone, but it is it that ensures the reliable operation of your application on any devices.
You can achieve the “edge-to-edge” effect in about a hundred different ways (the number of such tips on StackOverflow is a clear confirmation of this), but many of them lead either to incorrect behavior on different versions of Android, or do not take into account parameters such as the need to display long lists, or break the screen resize when showing the keyboard.
A spoon of tar
The solution described in this article is suitable for all current devices. Actual means devices on Android Lollipop (5.0) and higher. For them, the solution above will work perfectly. But for older versions of Android, you will need your own implementation, since nothing was known about WindowInsets in those days.
The good news is that on Android KitKat (4.4), the transparency of system panels is still supported. But older versions do not support such beauty at all, you can not even try.
Let's focus on the shift of Inset in Android 4.4. This can be done in the fitSystemWindows () method. Thus, the main element in your layout should be a container with an overridden fitSystemWindows method containing exactly the same implementation as our listener in the example for current versions of Android.
class KitkatTransparentSystemBarsFrame @JvmOverloads constructor( context: Context, attrs: AttributeSet? = null, defStyleAttr: Int = -1 ) : FrameLayout(context, attrs, defStyleAttr), KitkatTransparentSystemBarsContainer { override var onSystemInsetsChangedListener: OnSystemInsetsChangedListener = { _, _ -> } override fun fitSystemWindows(insets: Rect?): Boolean { insets ?: return false val desiredBottomInset = InsetUtil.calculateDesiredBottomInset( this, insets.top, insets.bottom, onSystemInsetsChangedListener ) return super.fitSystemWindows(Rect(0, 0, 0, desiredBottomInset)) }
On devices with Android 4.4, only partial transparency works through setting translucent flags:
window.addFlags( WindowManager.LayoutParams.FLAG_TRANSLUCENT_STATUS or WindowManager.LayoutParams.FLAG_TRANSLUCENT_NAVIGATION )
These flags make the system bars translucent, adding a slight gradient to them, which, unfortunately, cannot be removed. However, the gradient can be turned into a translucent color bar using this library: https://github.com/jgilfelt/SystemBarTint . She has rescued us more than once in the past. The latest changes were made to the library 5 years ago, so it will reveal its charm only to true retrograde cities.
The whole flagging process for Kitkat will look like this:
fun Activity.setWindowTransparencyKitkat( rootView: KitkatTransparentSystemBarsContainer, listener: OnSystemBarsSizeChangedListener = { _, _ -> } ) { rootView.onSystemBarsSizeChangedListener = listener window.addFlags( WindowManager.LayoutParams.FLAG_TRANSLUCENT_STATUS or WindowManager.LayoutParams.FLAG_TRANSLUCENT_NAVIGATION ) }
With this in mind, we are writing a universal method that can make system bars transparent (or at least translucent), regardless of which application is running on a device with which version of Android:
when { Build.VERSION.SDK_INT >= Build.VERSION_CODES.LOLLIPOP -> setWindowTransparency(::updateMargins) Build.VERSION.SDK_INT == Build.VERSION_CODES.KITKAT -> setWindowTransparencyKitkat(root_container, ::updateMargins) else -> { /*do nothing*/ } }
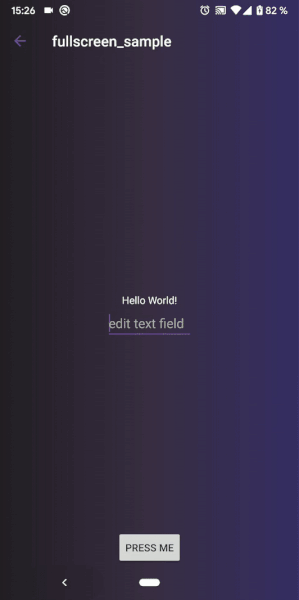
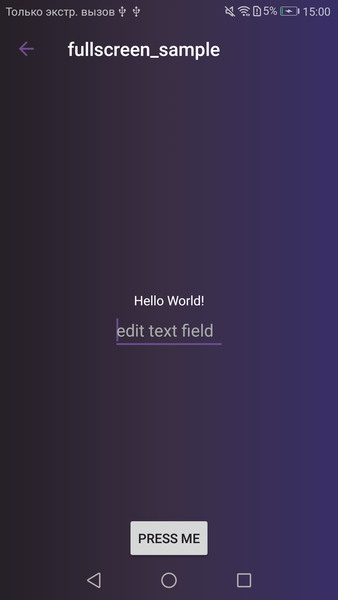
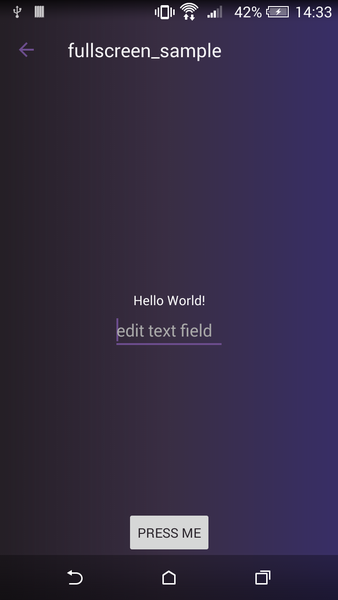
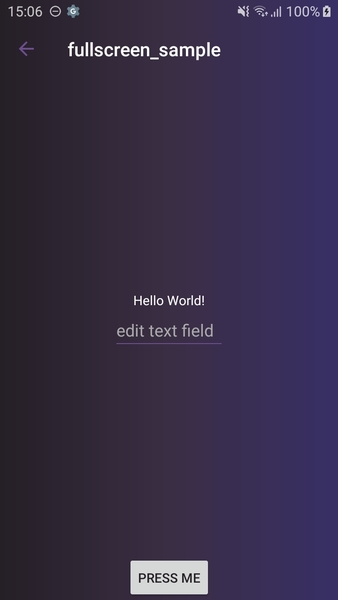
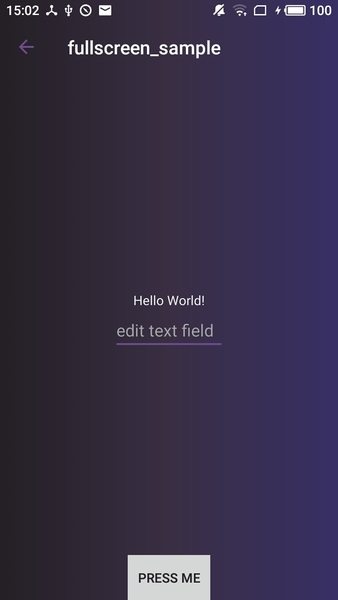
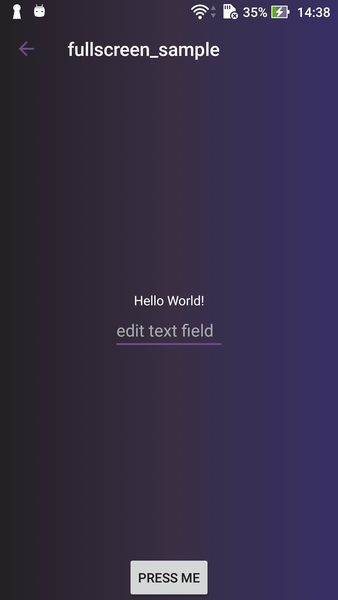
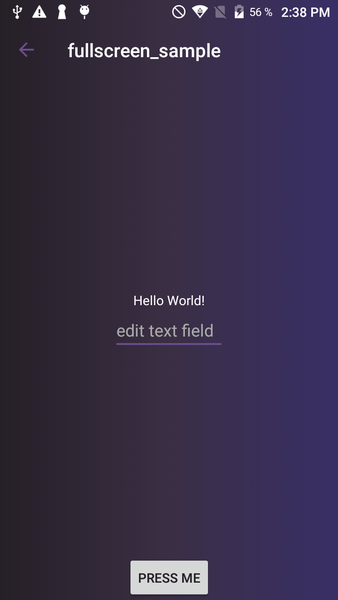
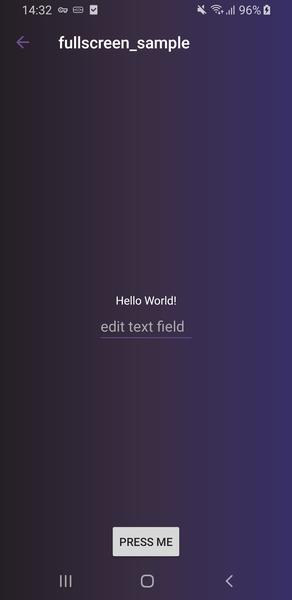
Under the spoiler below, you can see how the sample presented in the article looks on some of the problematic devices:
Screenshots
Huawei Honor 8, Android 7.0
Xiaomi Redmi Note 4, Android 6.1

HTC Desire Dual Sim, Android 4.4.2
Samsung J3, Android 7.0
Meizu M3s, Android 5.1
Asus Zenfone 3 Max, Android 6.0
Umi Rome, Android 5.0
Nexus 5X, Android 8.0

Samsung Galaxy S8, Android 9.0
Xiaomi Redmi Note 4, Android 6.1
HTC Desire Dual Sim, Android 4.4.2
Samsung J3, Android 7.0
Meizu M3s, Android 5.1
Asus Zenfone 3 Max, Android 6.0
Umi Rome, Android 5.0
Nexus 5X, Android 8.0
Samsung Galaxy S8, Android 9.0
In conclusion, I want to say that the solution to even such a seemingly simple task as setting transparency for elements of a system UI can drag you along the whole variety of pitfalls and not ultimately lead to the desired result, but rather will cause unpleasant bugs. Good thing you now have this article.
You can find a complete listing of the program and a sample of work in our git repository .
The material is inspired by Chris Banes' Becoming a master window fitter.
I express gratitude to Surf studio and Evgeny Saturov for help in preparing the material.
All Articles