Restoration and modernization of speakers Vega 50АС-106
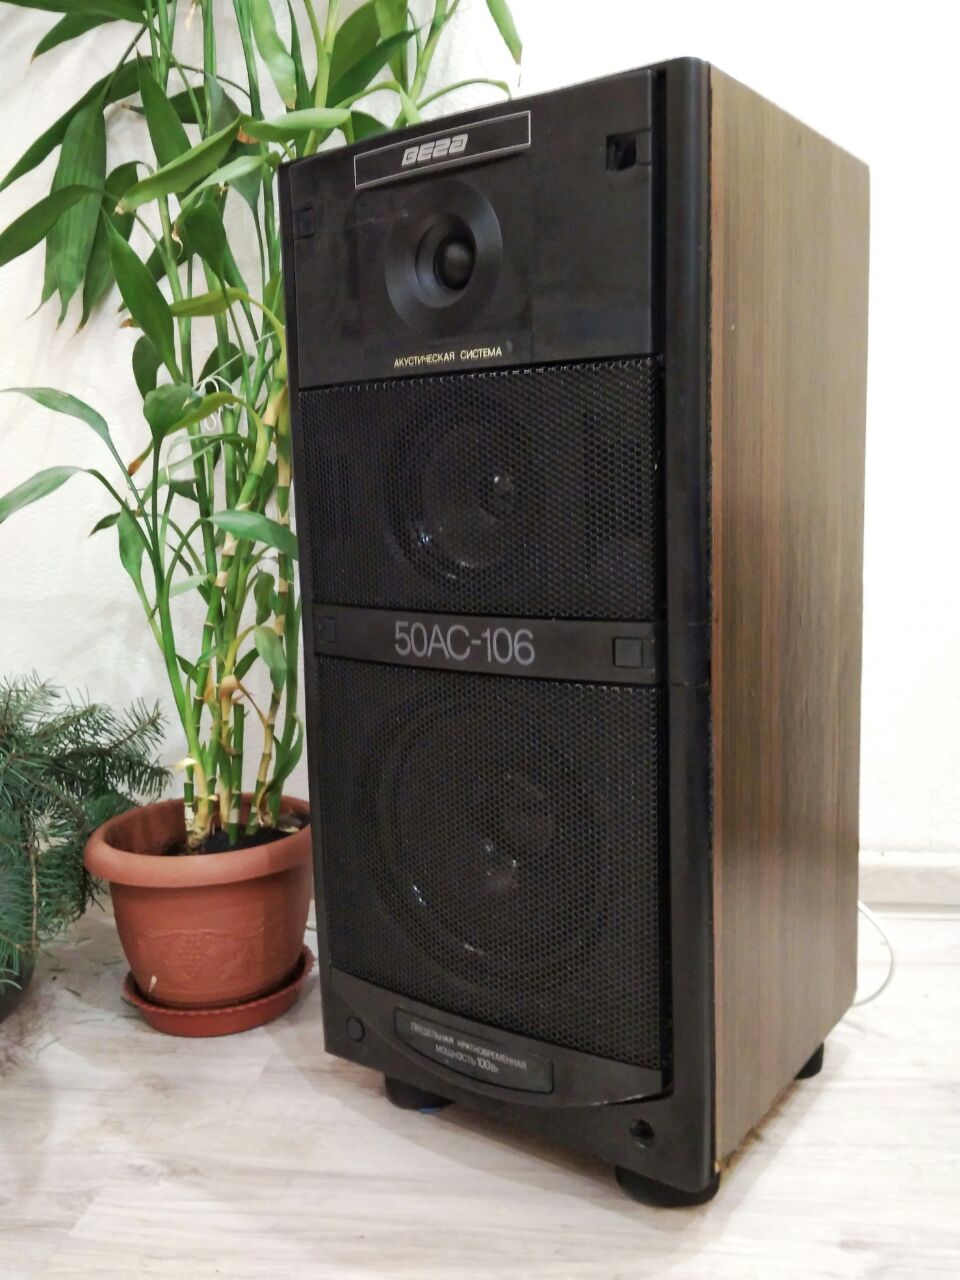
In childhood, one of my friends had Vega 50-106 speakers at home, then they sunk into their souls with their own design, because then, in the early 90s for me, boys, these speakers with their plastic covers were something cosmic perfection. Well, then we didn’t think much about the quality of music. I wanted to have such. Time passed, but those columns remained in memory, just as the desire to receive them remained. There were also opportunities for their acquisition.
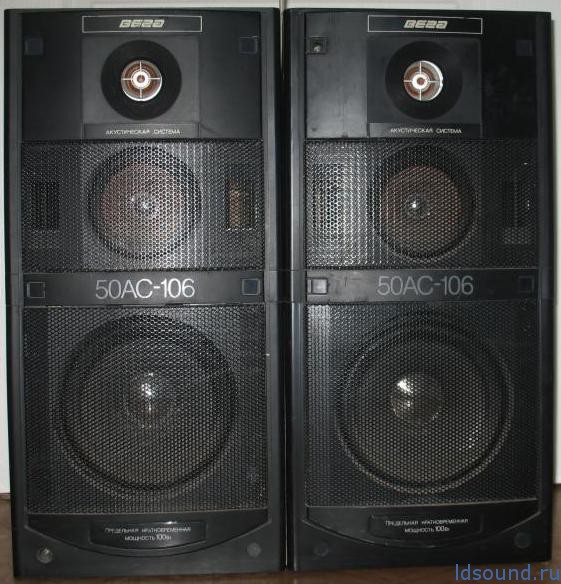
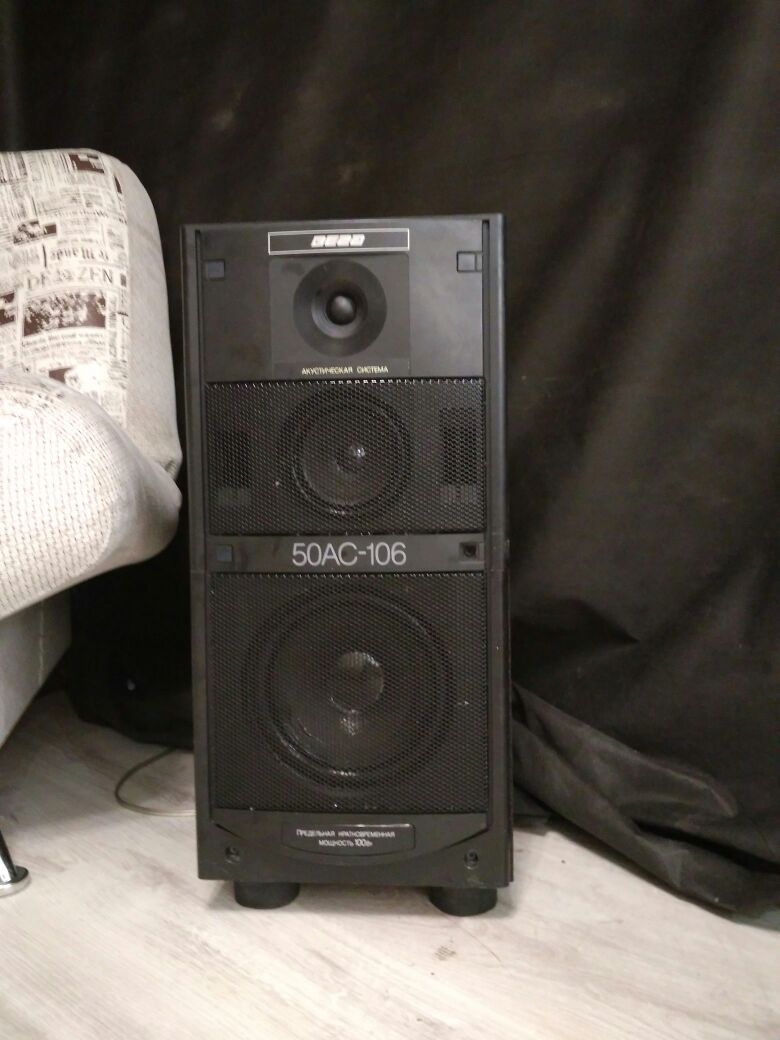
Photo is not mine, taken here
A small digression. This post does not claim to be the ultimate truth, as it does not pretend to any audiophile delights, as well as to the fact that the result beats all records. I ask you not to argue on the topic “why are you messing with them, it would be better to buy new normal ones”, I just wanted those speakers, like a memory from my childhood. To listen to music, I have Hifiman HE-400i headphones and a homemade tube amplifier for them, this set already claims some quality, although I'm not going to argue with audiophiles.
All who are interested, I ask under the cat.
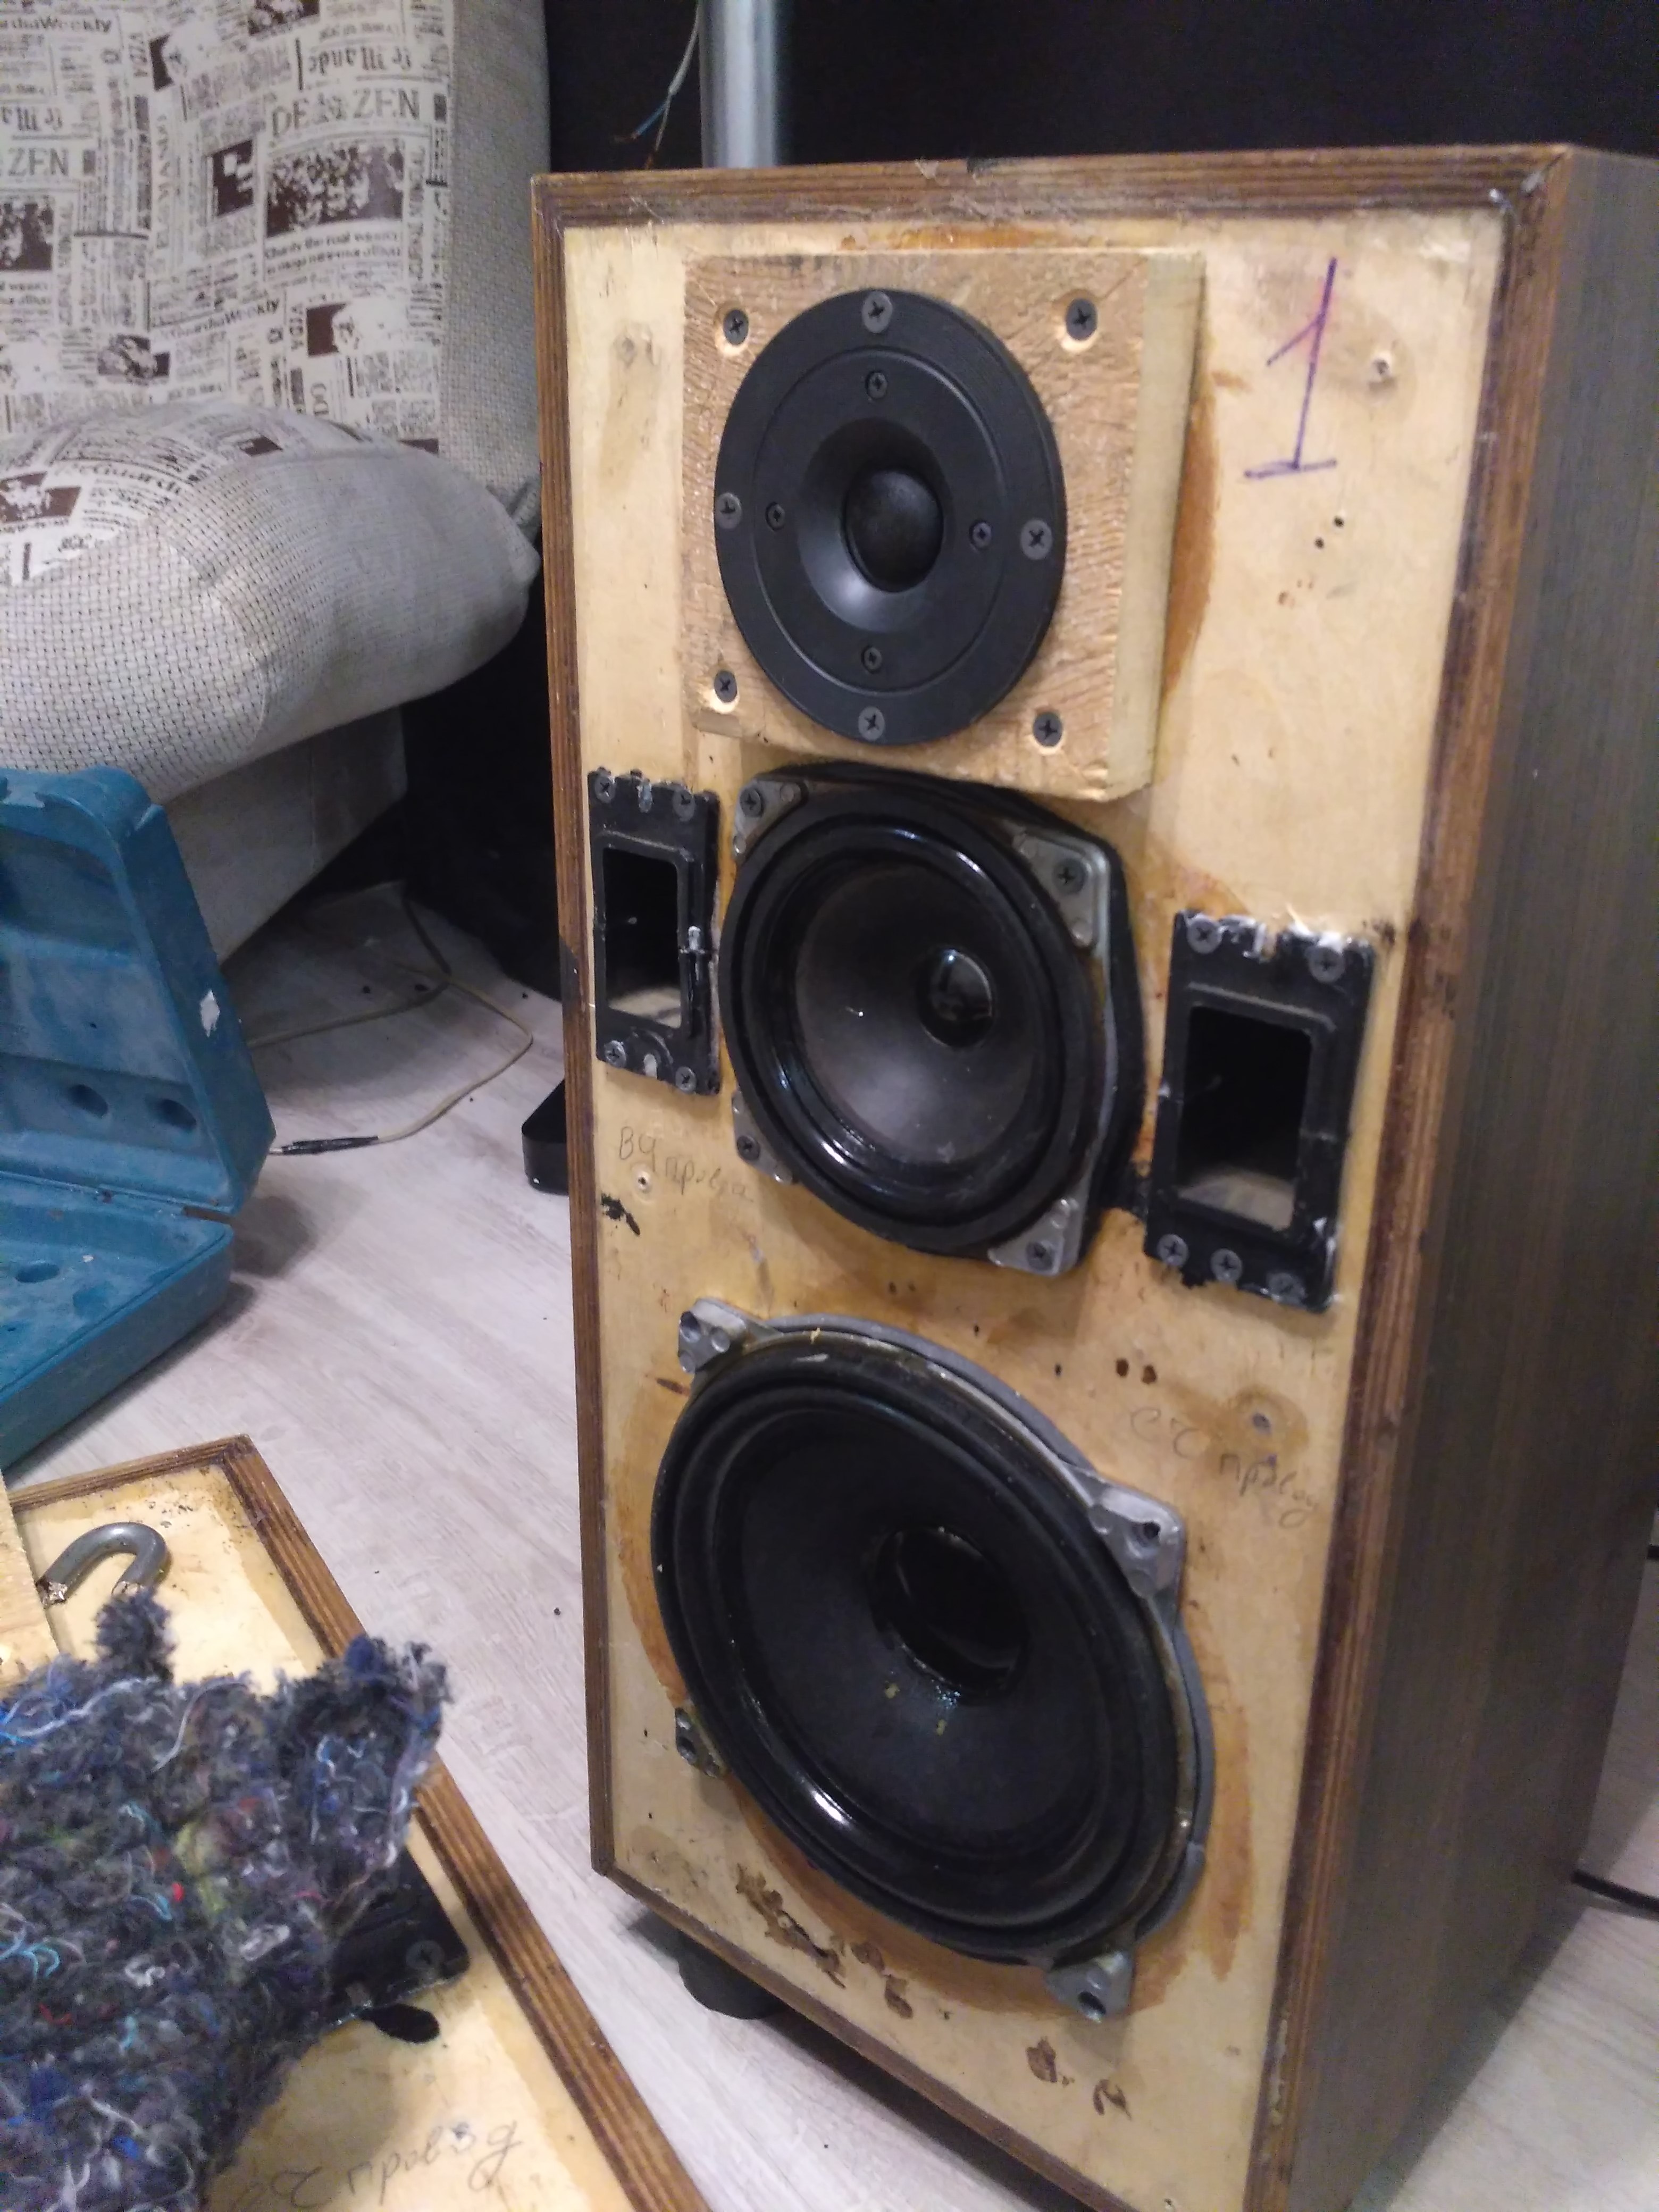
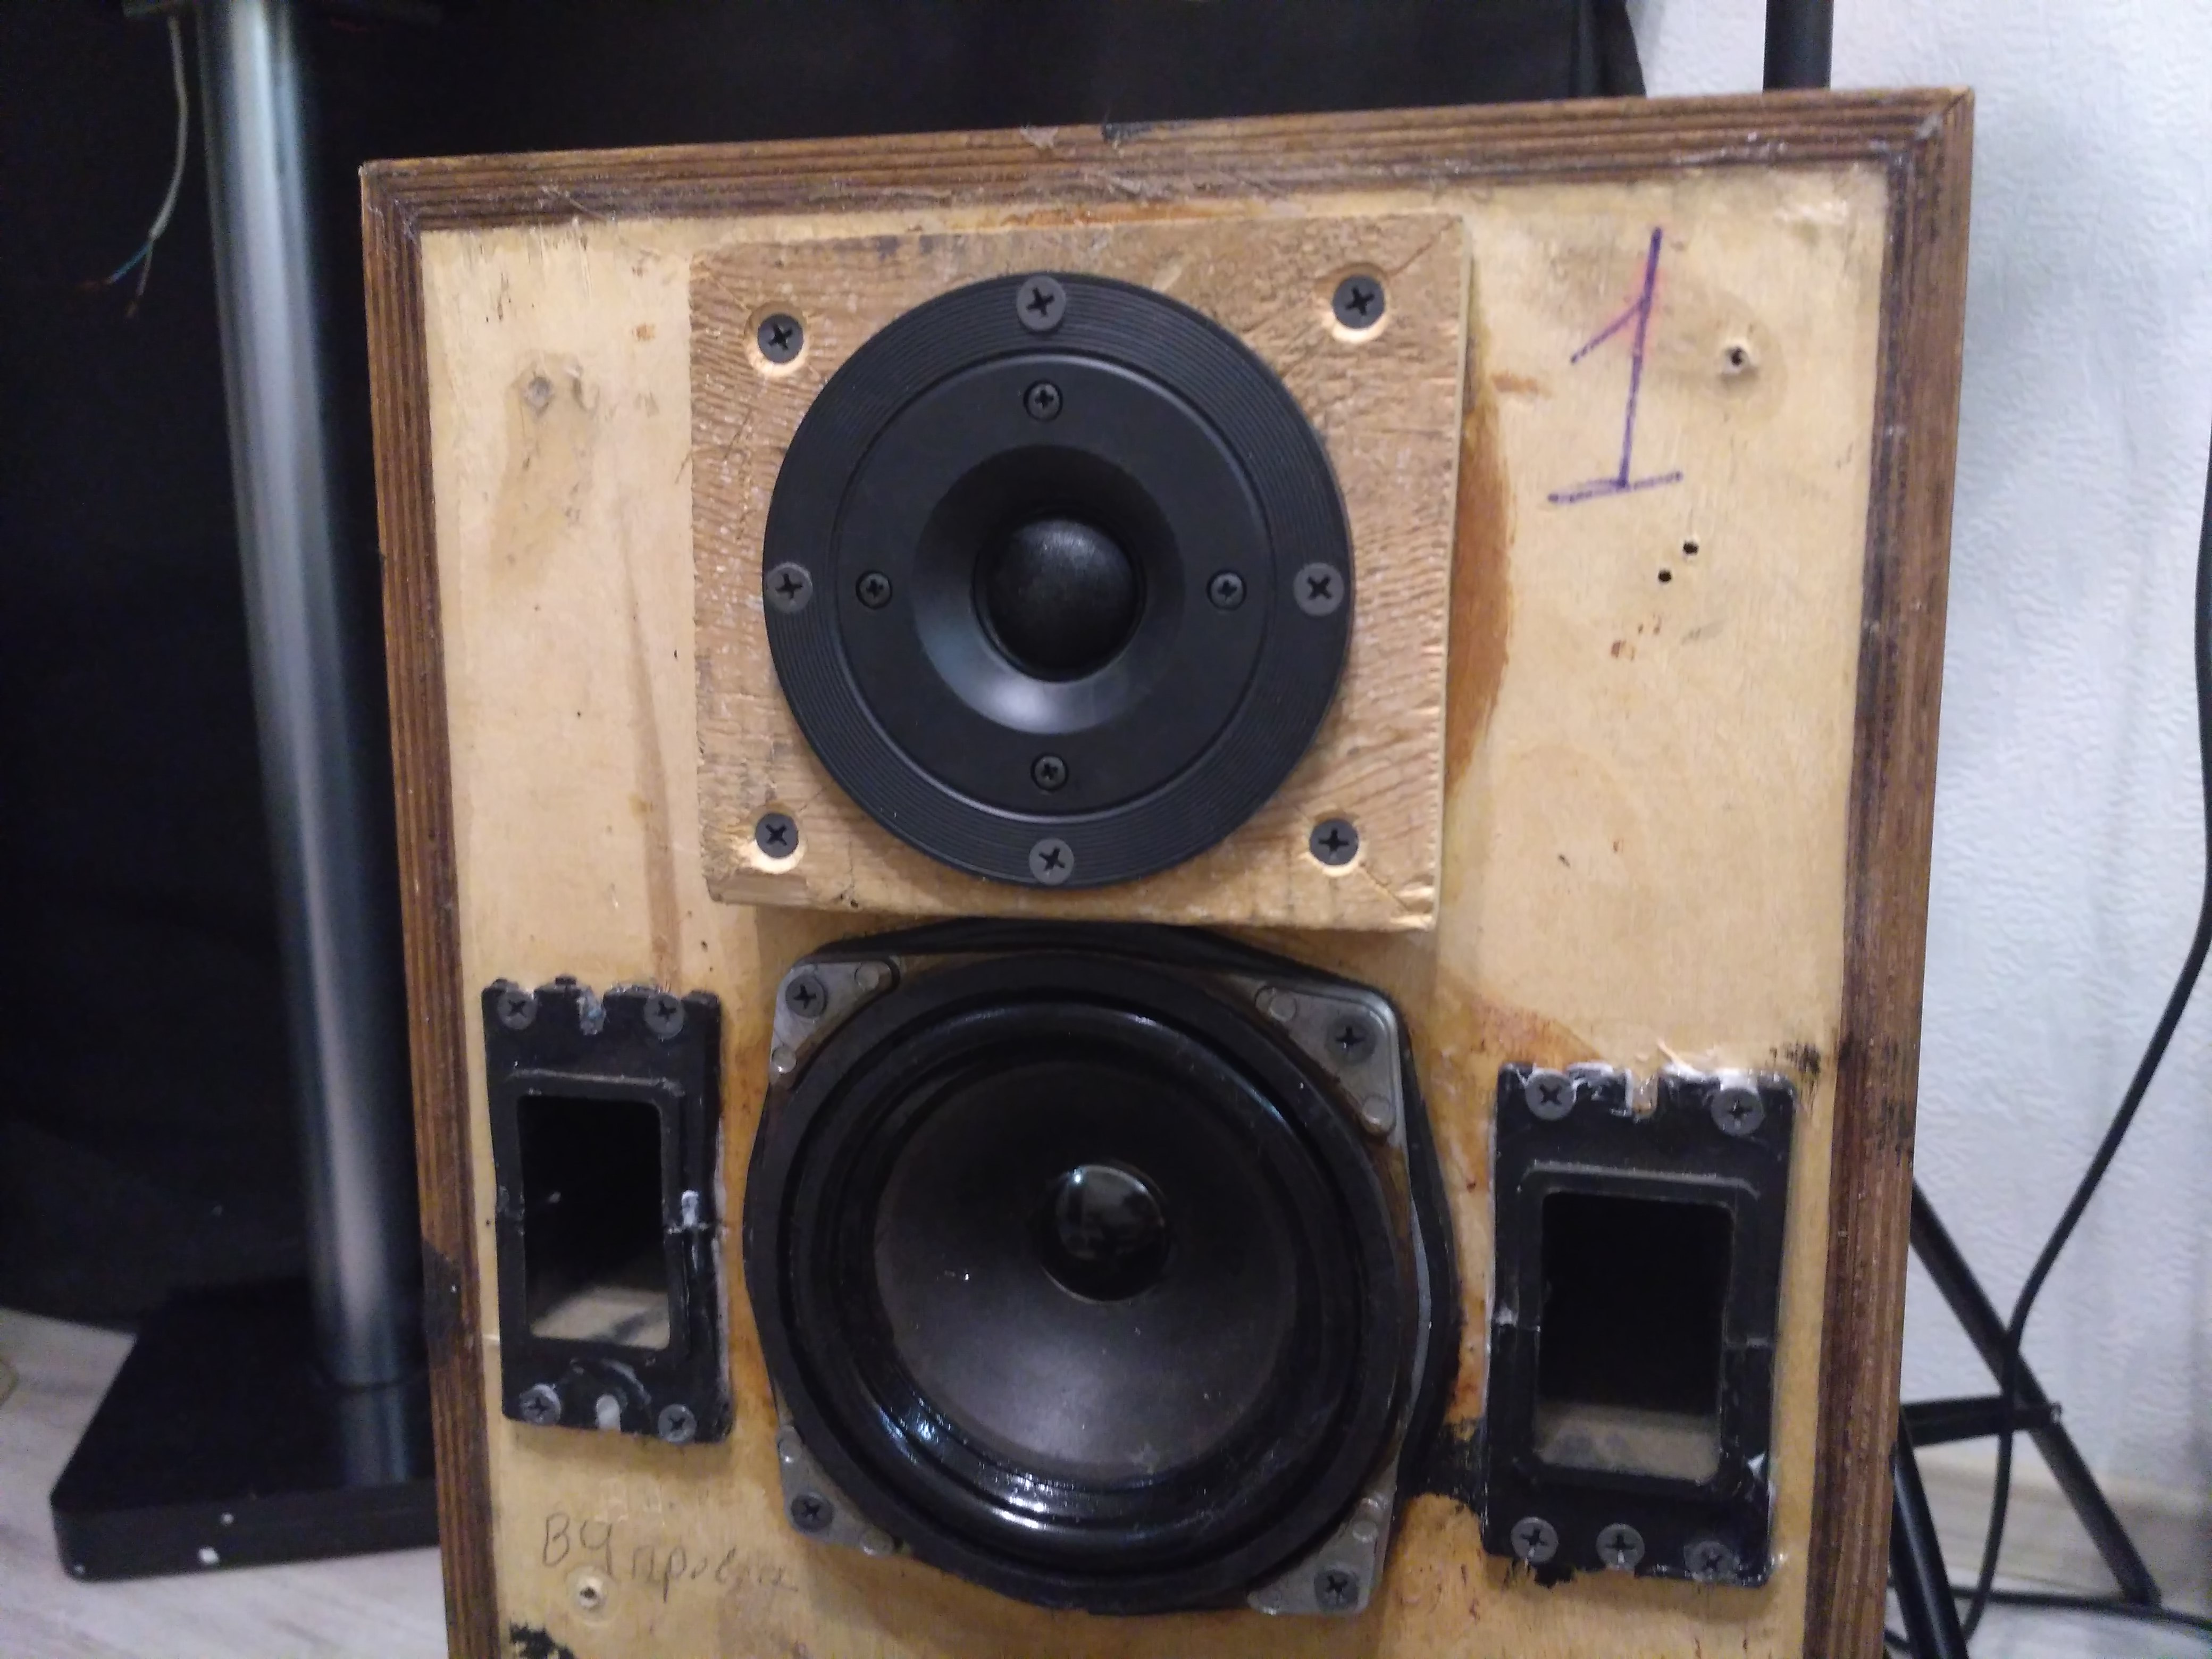
With the purchase everything turned out very simple, I found that friend from my childhood and it turned out that he had the very same speakers. Although they stand in the closet and have not been used for a dozen years. For a symbolic sum, we shook hands and the speakers went to me. Immediately upon purchase, I was told that one tweeter had burned out and required replacement. Plus, the columns were pretty dusty, and rust crept out on metal bars. Next, the speakers were connected to the amplifier to test performance. All the speakers turned out to be working except for one HF, which was confirmed by his dialing by the tester in the following. Of course, the sound of the speakers in the state as I was was not pleased. After the first inclusion of the column were completely disassembled. The case is checked for tightness of the seams, often the old Soviet columns side panels simply pasted. I was lucky, all the joints were taped tight, by the way my cases were made entirely of plywood including the back wall, which is not often the case in this model. Much more often from plywood side walls and back from a chipboard.
Then the filter was completely disassembled to verify its compliance with the original scheme, by the way, here it is:
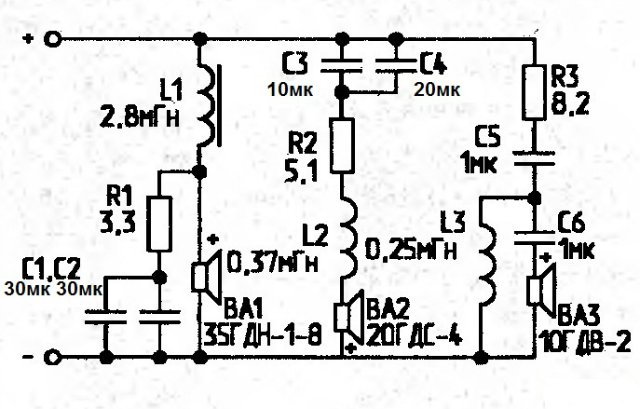
Capacitors and resistors on par matched with the circuit. All the capacitors I had had a metal-paper MBGO, which in general is not so bad, because in real structures people also encountered electrolytes. By the way, after measuring the capacitors showed deviations from the nominal within 1% which is just wonderful. But most of all I was interested in the inductance of the coils, but with them it was expected not lucky. NO ONE of the coils did not match the inductance scheme, and moreover, the coils still did not match each other in pairs of columns. For example, the inductance of the NP coils was 0.85 mH and 0.64 mH, while according to the scheme it should be 2.8 mH. MF and HF history is exactly the same. Well, okay, anyway, the scheme will be redone completely.
After the initial inspection, a rough plan was drawn up:
1. Sizing all joints, joints and holes from the inside of the columns with sealant;
2. Pasting in the case of wooden struts according to the front-back and left-right scheme;
3. Processing of all walls with rubber-bitumen mastic to reduce resonances;
4. Pasting of all walls with a layer of batting;
5. Replacing the tweeters with the manufacture of new podiums for them;
6. Complete alteration of filters with a change in the scheme and nominal details;
7. Replacing all seals under the speakers;
8. Replacing all wires;
9. Installation of ports with terminals;
10. Washing the panels and painting the grids;
11. Reduction of resonances and chatter of the front panels;
Well, once the plan is made, you can get to work.
First of all, the front panels were disassembled and washed off. Metal nets are sanded, treated with a rust converter and painted. After that, the panels were assembled back, and the metal mesh was installed in plastic on the sealant, in order to eliminate their bounce. Sealant is not visible from the outside.
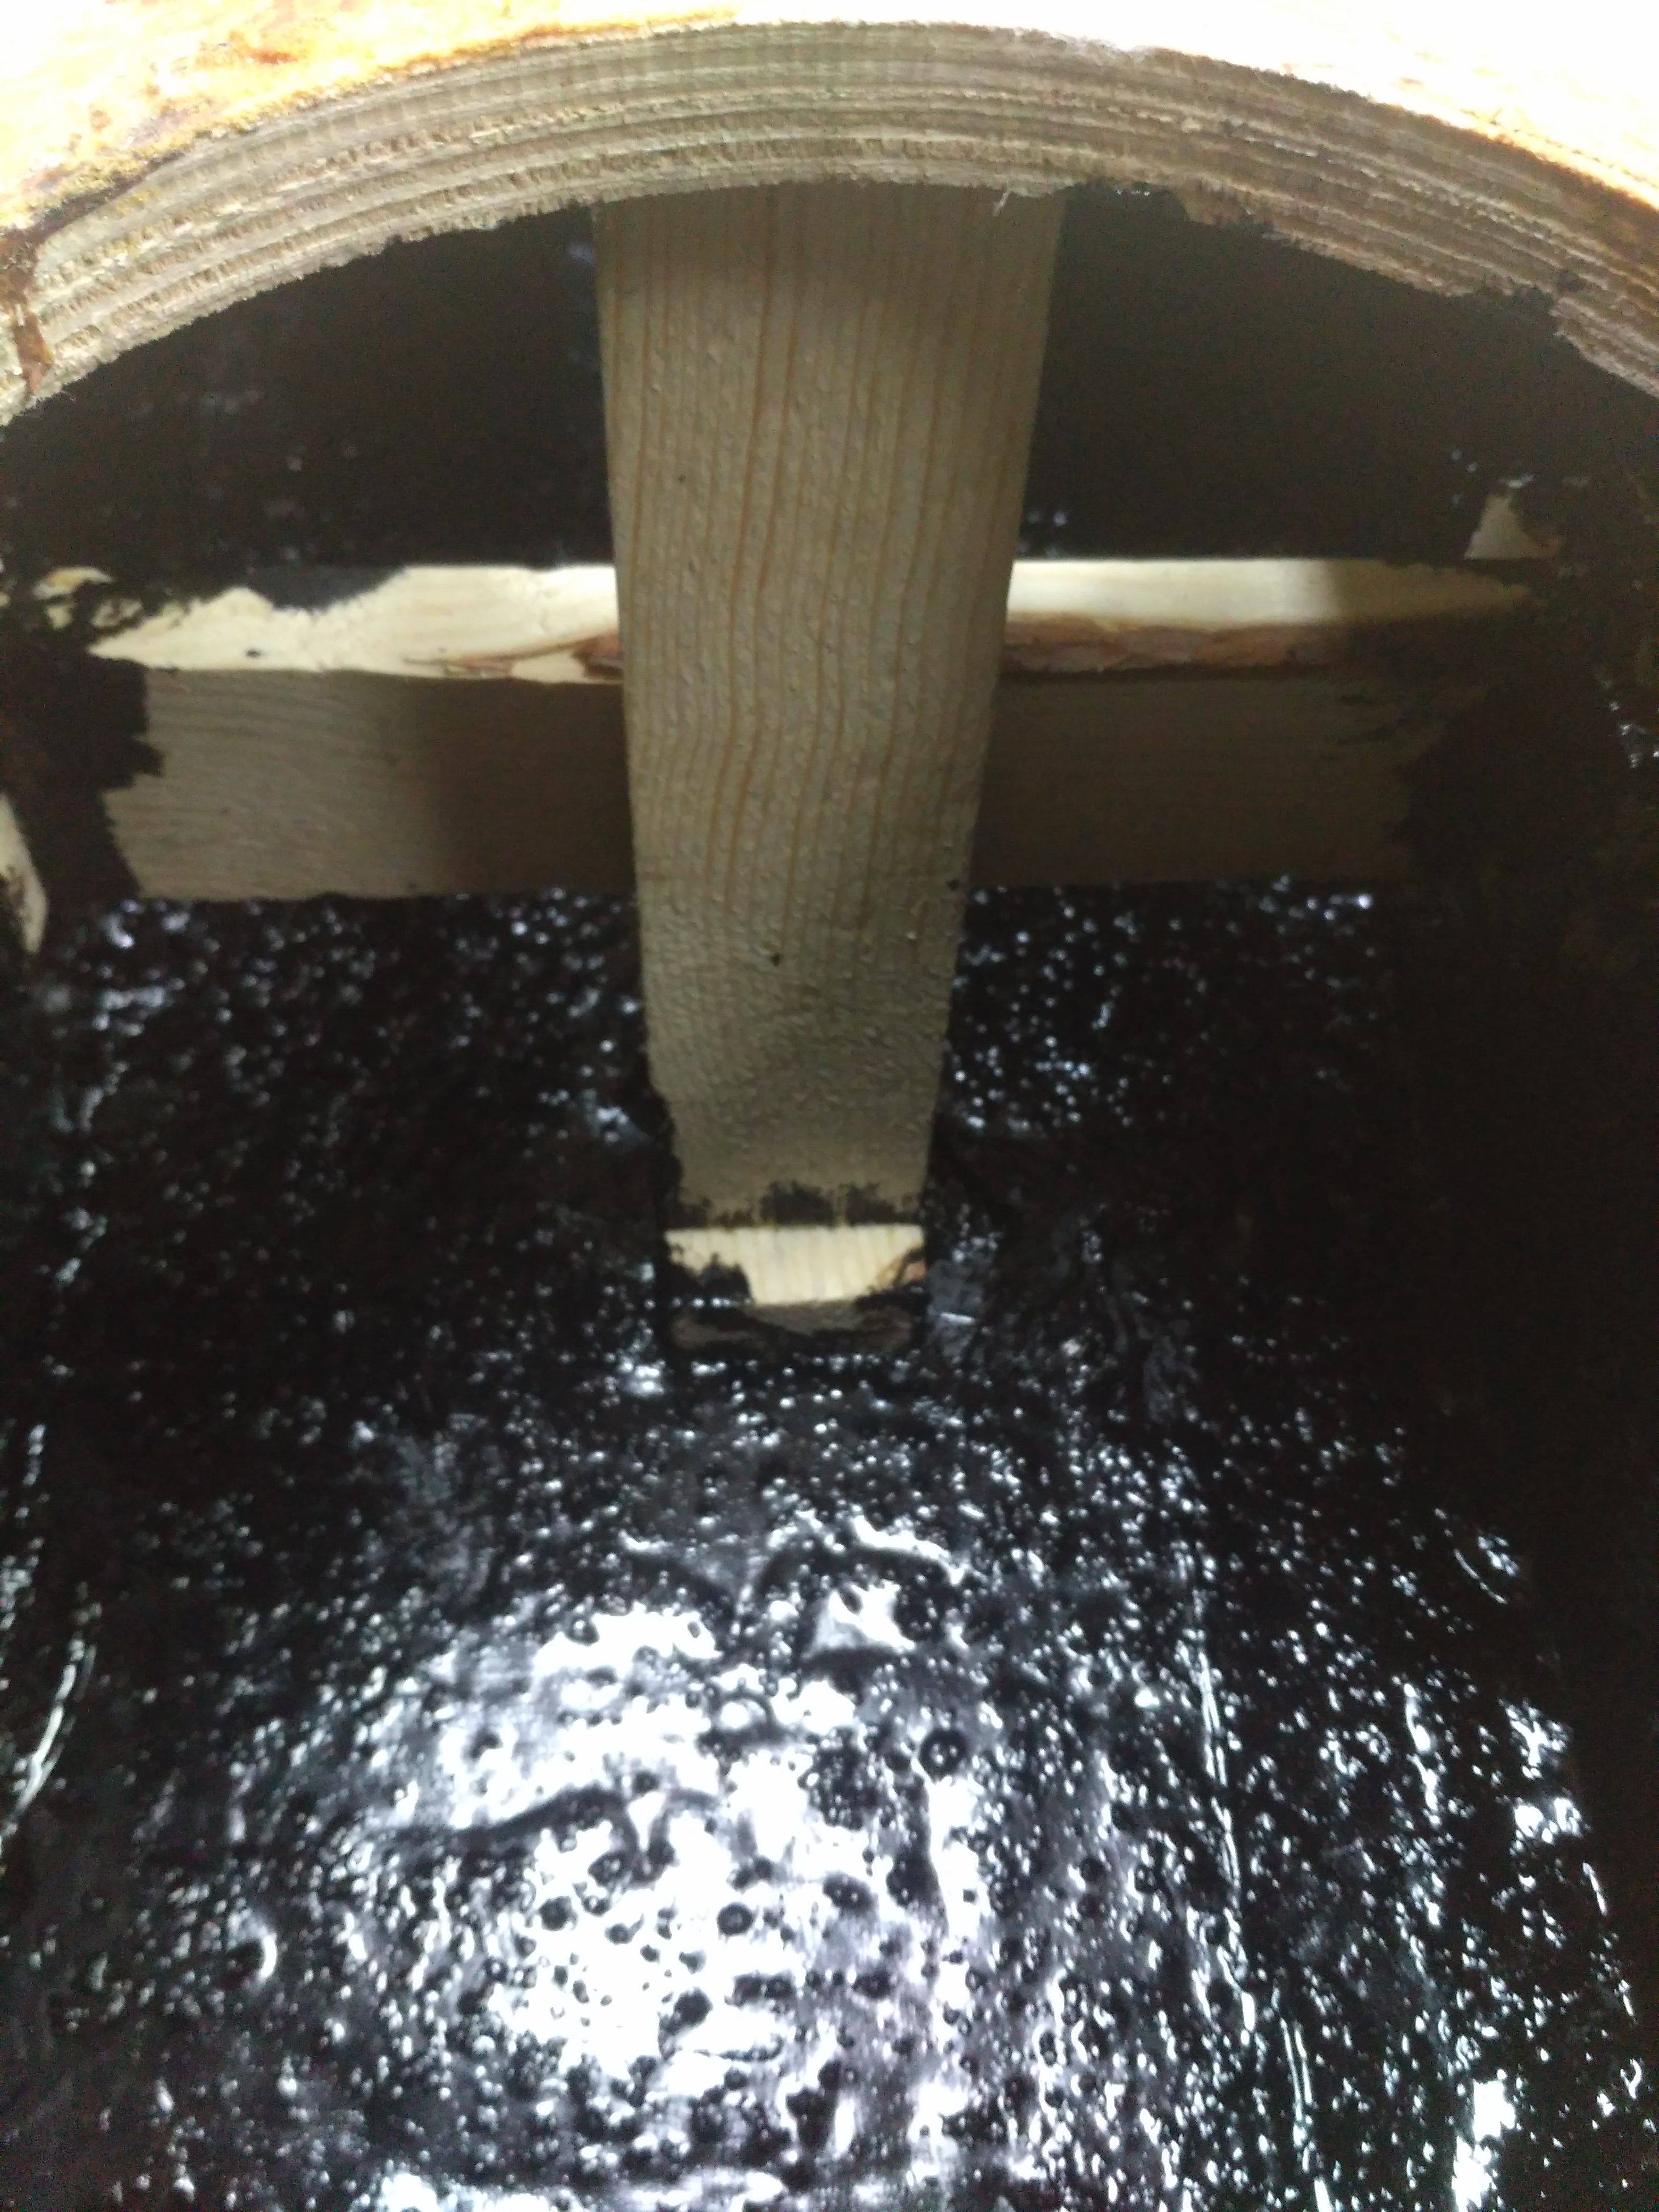
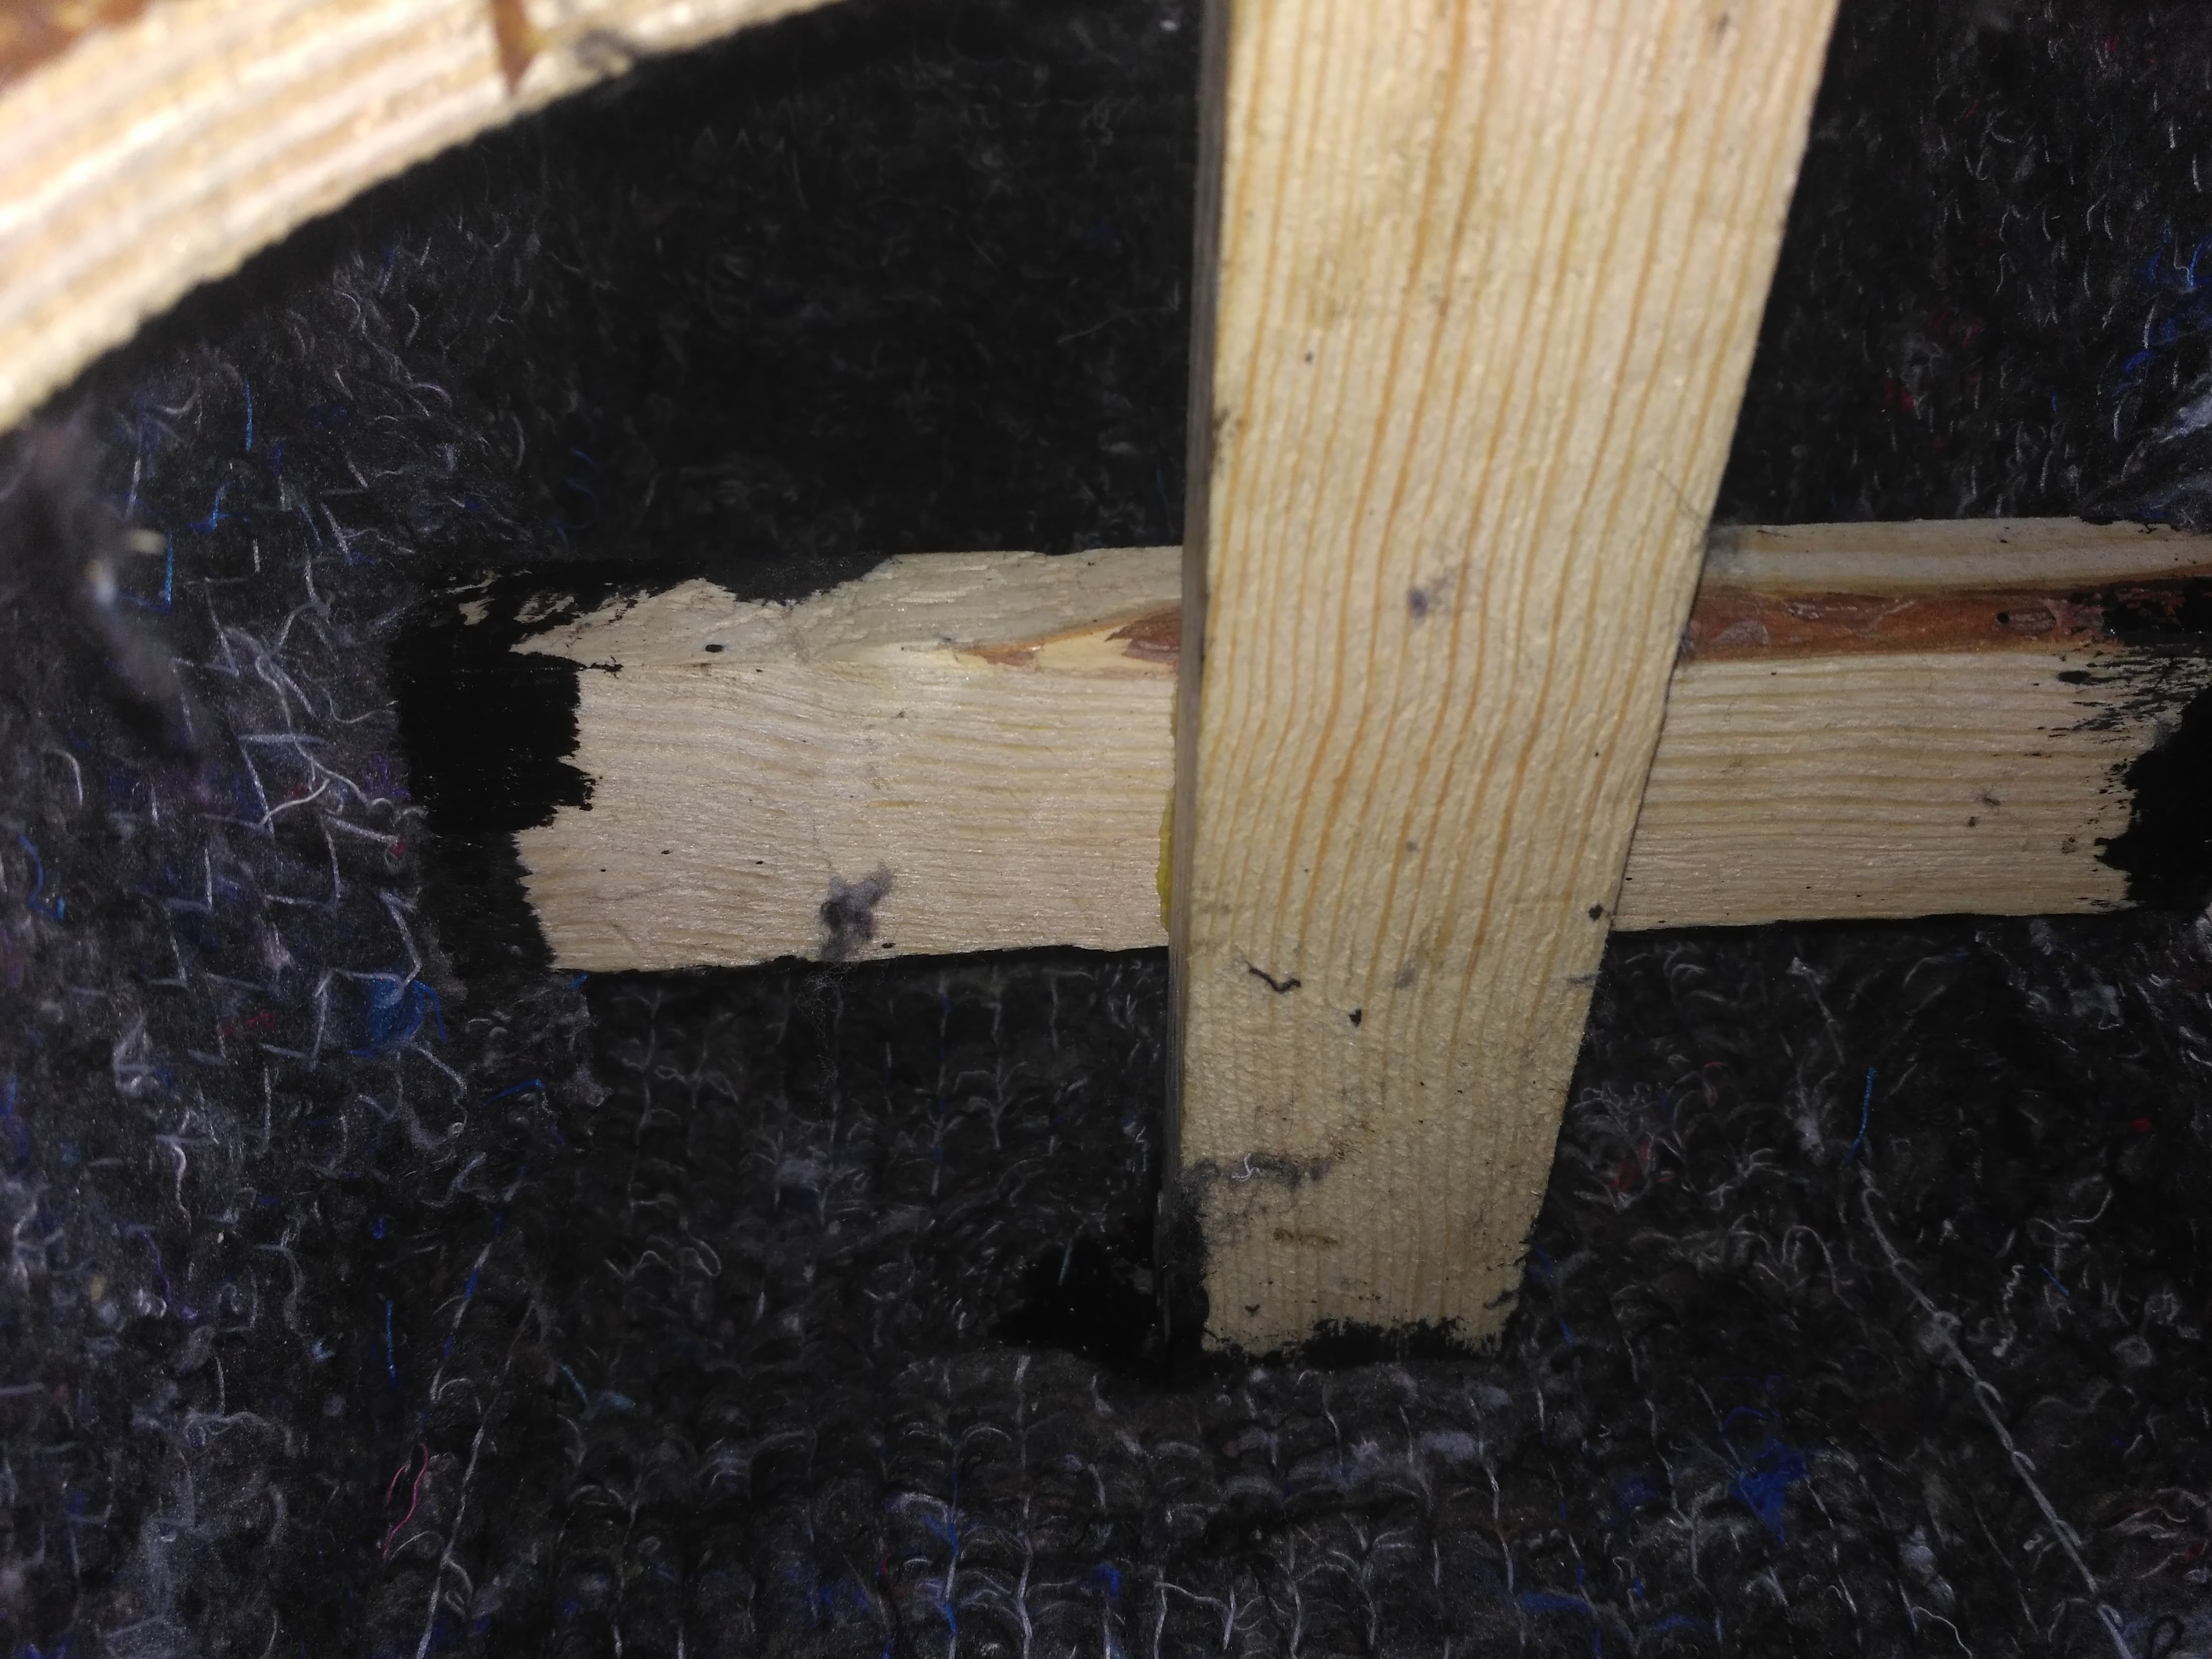
Further, all the joints of the case, the holes were carefully smeared with building silicone sealant from the inside. This is done in order to exclude any whistlers from the outgoing air. Slots in the case itself, and there was not, but still. The next step in the case were glued in two struts of dry shtaketin section 45x20 mm, they are glued between the front-rear walls and between the left-right walls, and the struts are also glued together, so that a rigid cross is obtained. Thus, we increase the rigidity of the body, because the panels here are already quite large and the wall thickness is only 12 mm. After that, the body inside is all missed on two layers of rubber-bitumen mastic.
The next stage was the tie-in of ports with screw terminals for inserting wires into the case. (photo for some reason not preserved)
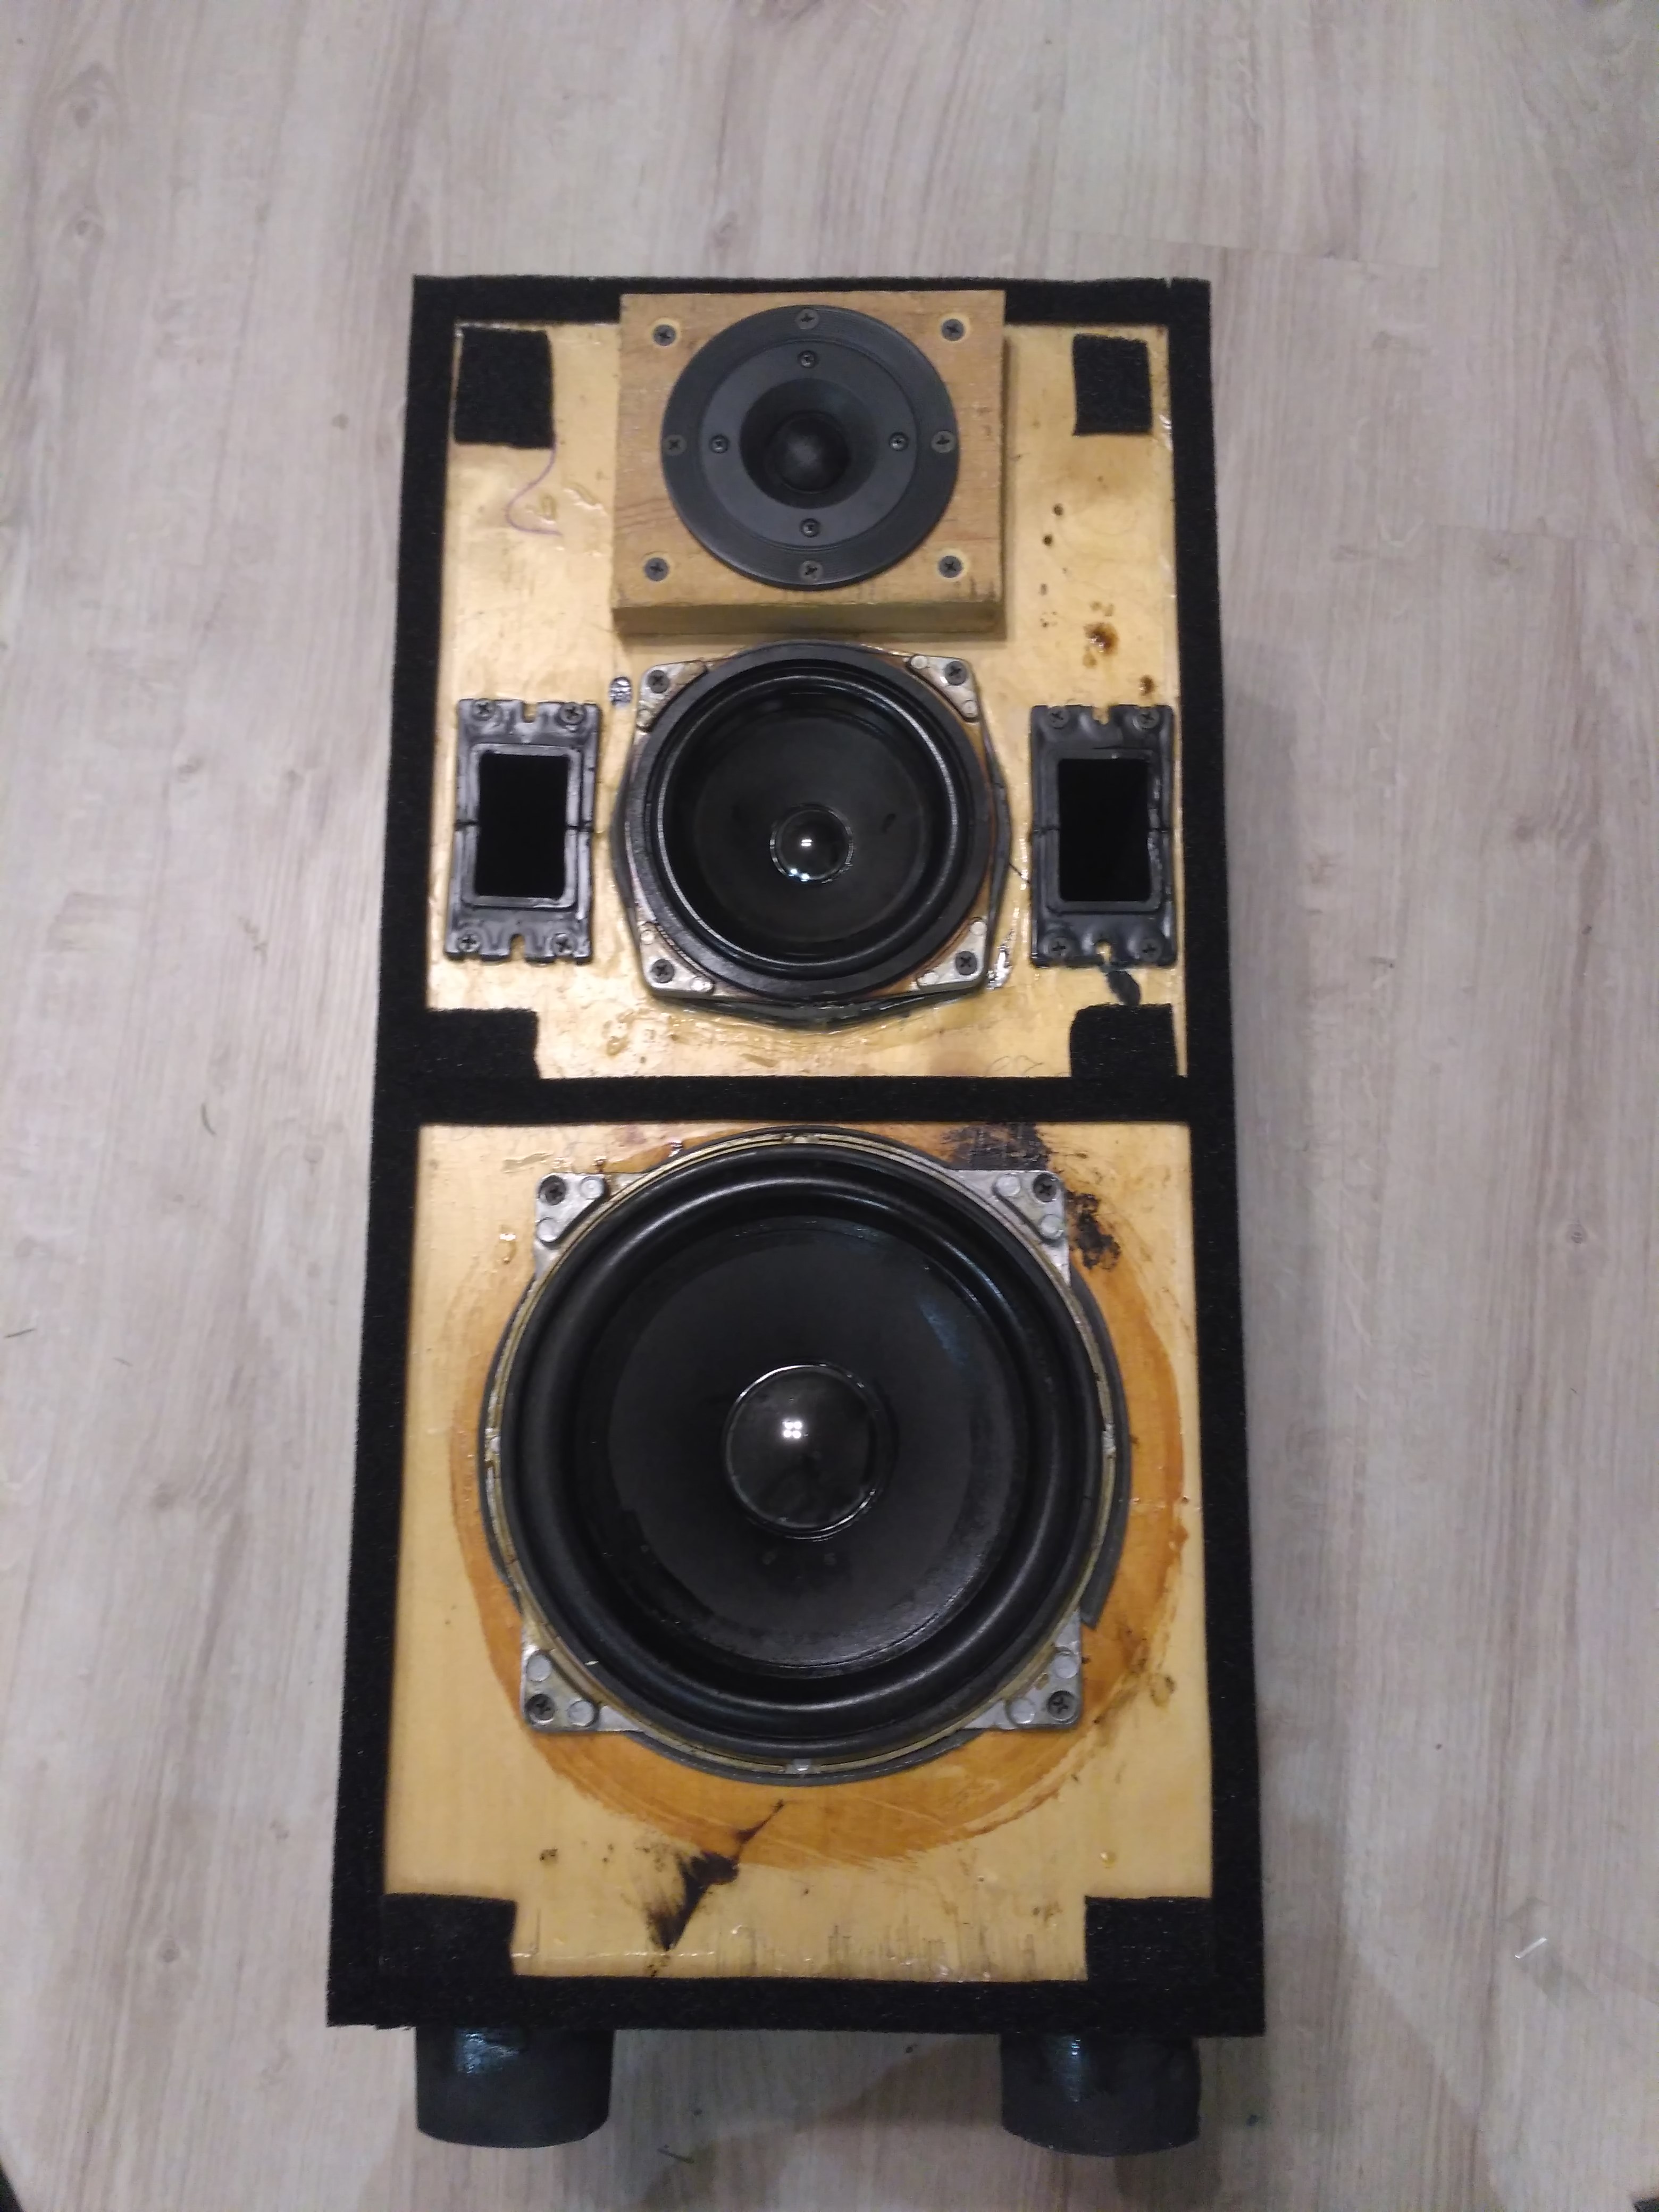
For the upholstery of the case, ordinary batting was purchased from the inside in the fabric store, where it is 6-7 mm thick, so the mats were made of three layers of batting. These mats were glued on all the walls except the front, on the same rubber-bitumen mastic and additionally fastened at the corners with a furniture stapler.
After finishing the work with the case, it is time to do the electrical part. Firstly, it was necessary to decide what to put in place to replace the native tweeters. I did not manage to find a native HF, and on the Internet they are asked for quite a few, from 700 to 1000 rubles for the old HF, I think a lot. In addition, it is widely believed on the Internet that 10GDV-2 relatives are generally not particularly good. After reading the Internet and estimating the budget, as well as the expediency of buying expensive tweeters for these speakers, our 15GD92-16, produced by Novosibirsk NOEMA were chosen. In terms of resistance and sensitivity, they are the same with 10GDV-2, and in quality, they are said to be significantly superior. By the way, thanks to NOEMA for prompt shipping and good packaging of the ordered speakers.
While the speakers were driving through the Post of Russia, I started to remake the filters. Again, at first, I dug forums for a very long time, collected opinions and eventually found a rework scheme for filters of these columns, with good reviews and sufficient justification from the author.
The scheme was taken here.
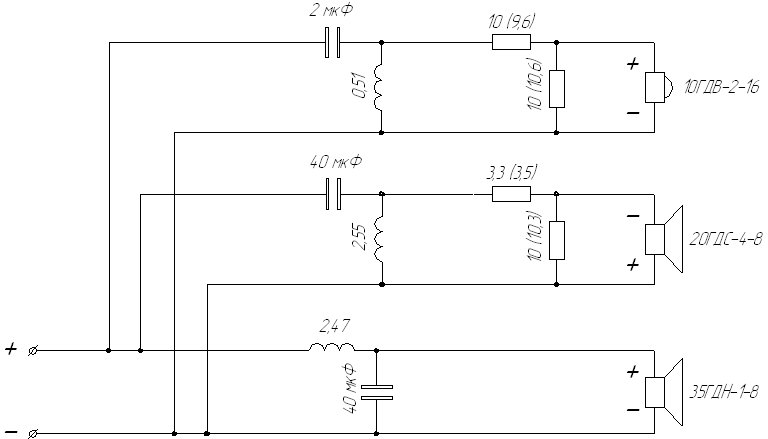
Looking ahead a bit, I’ll say that I liked the sound of the speakers with these filters.
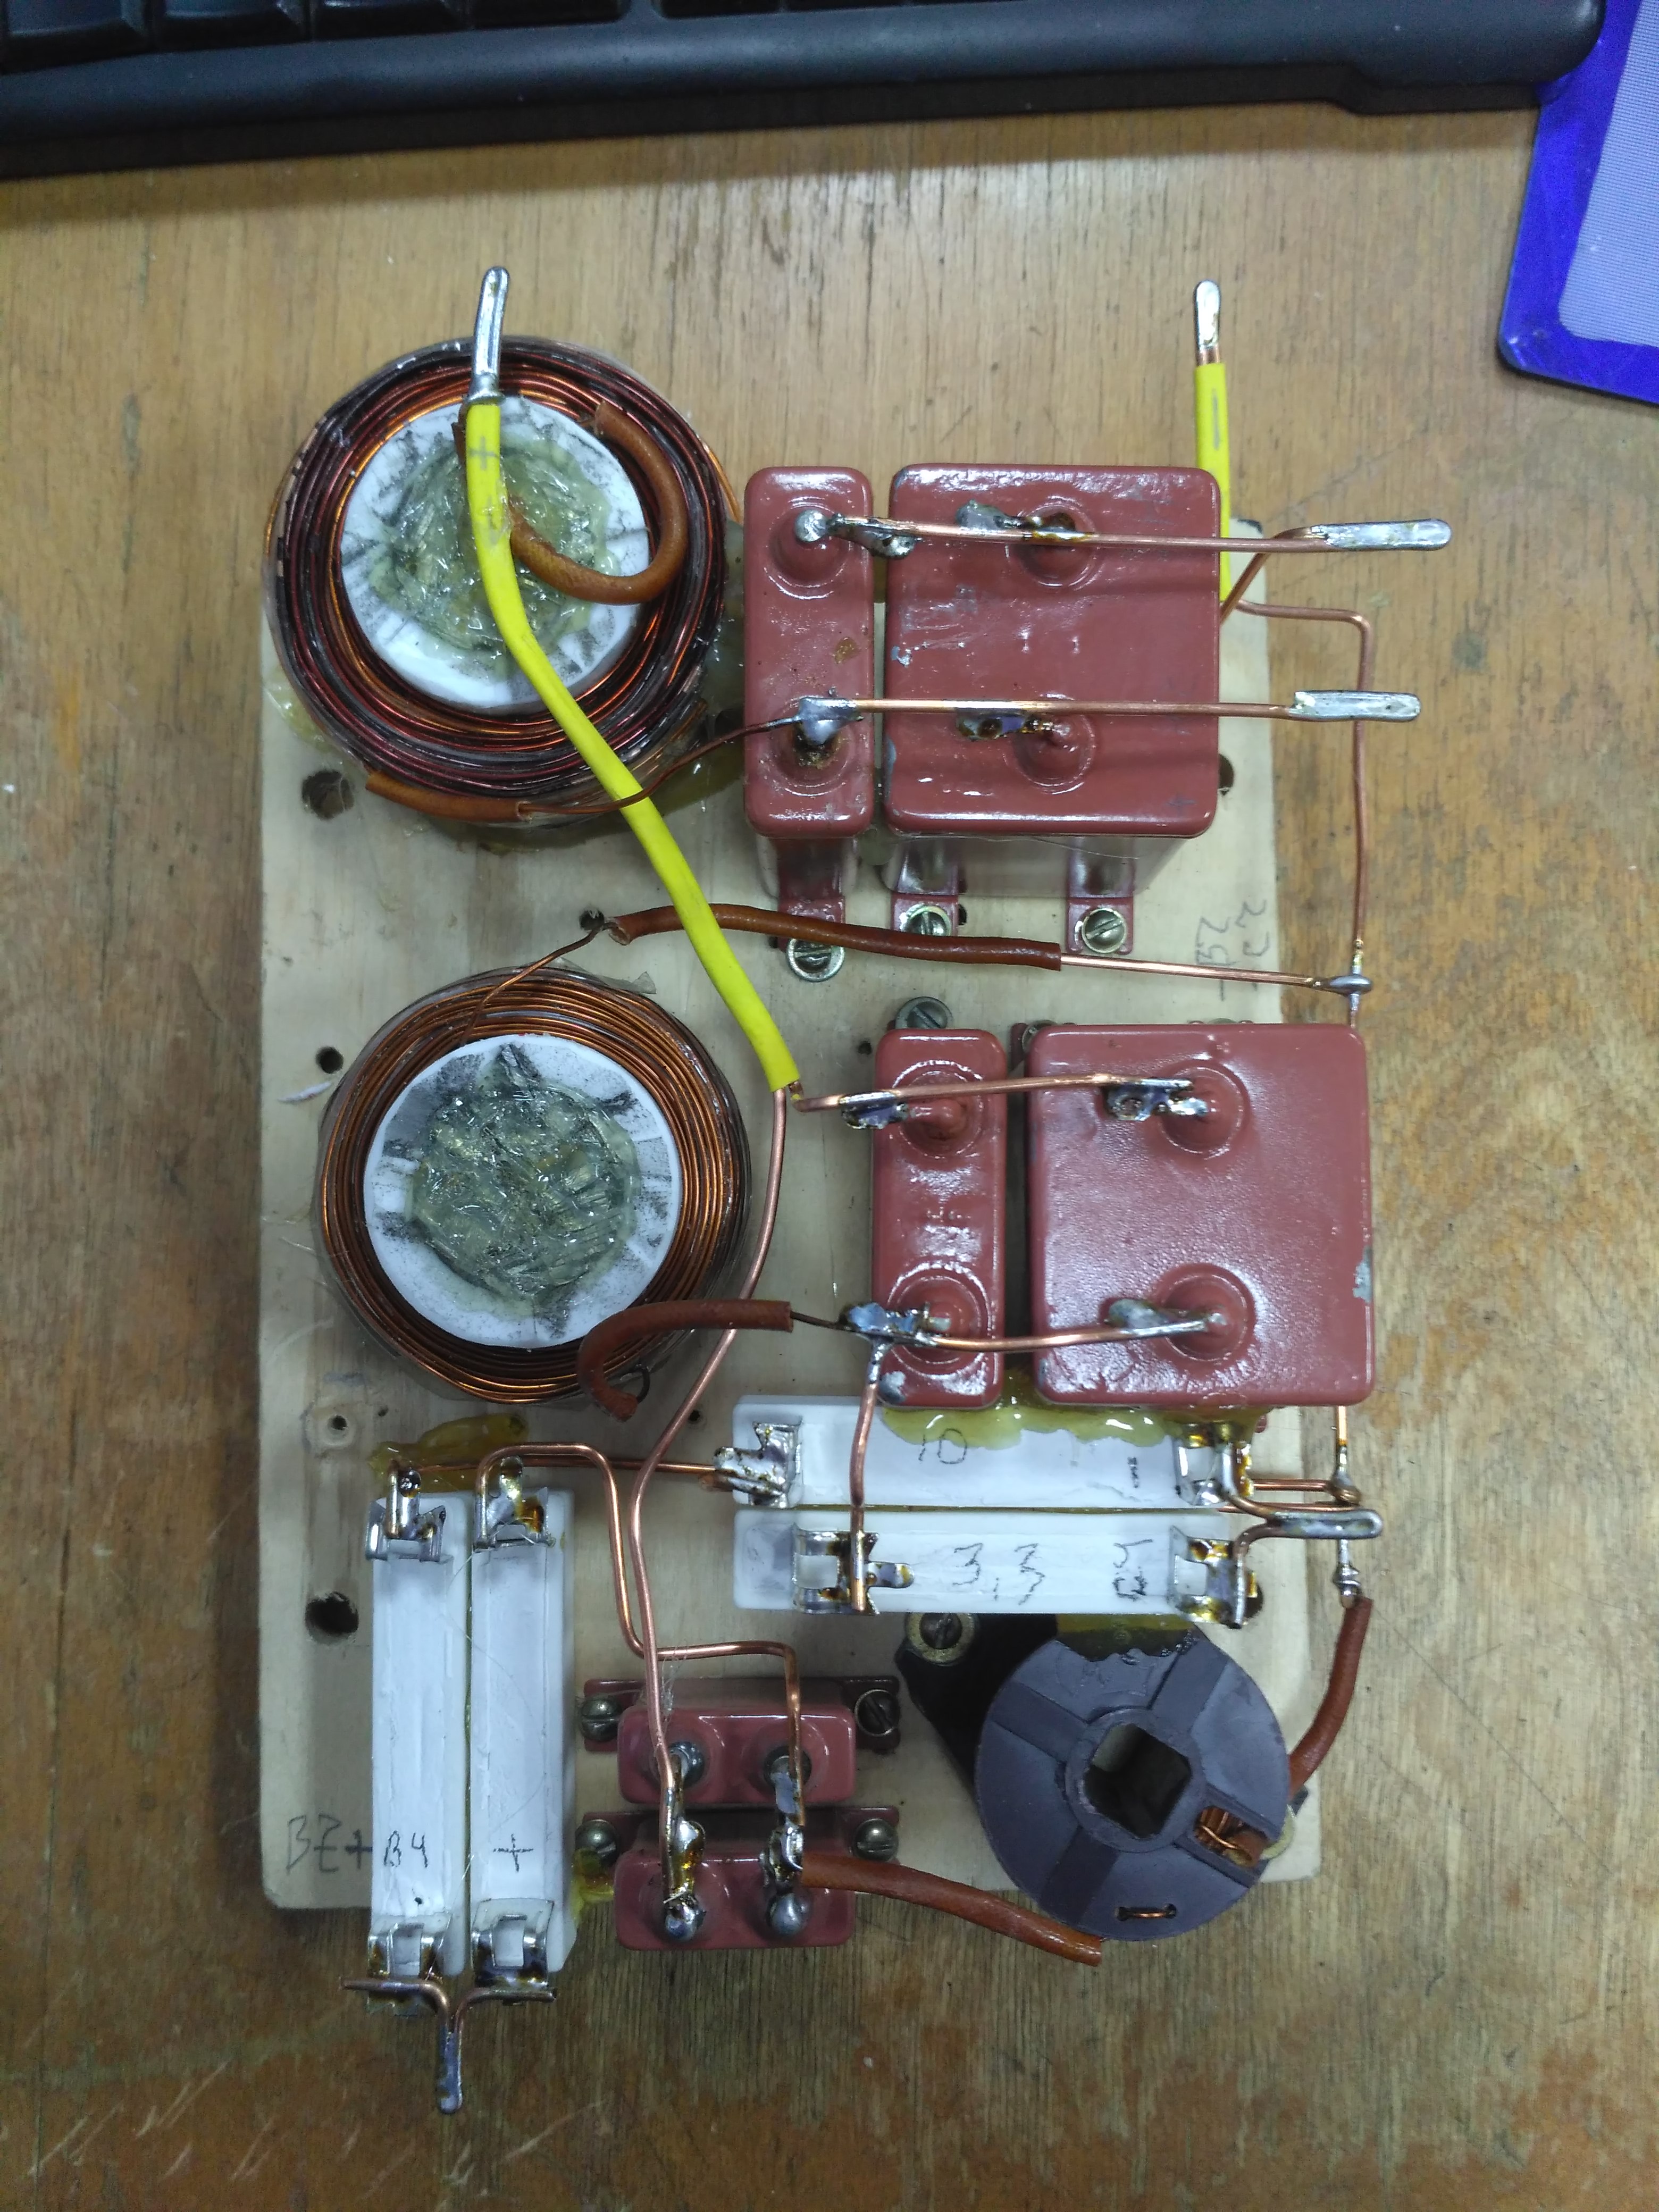
As you can see, at LF and MF here are used coils with sufficiently high inductance. It is not so easy to wind such on “air”, because at the same time it should also have a small resistance, which means you need to use a thick wire, the dimensions of the coils are not small. Therefore, it was decided to wind the coils on frames with transformer iron cores. A sanitary polypropylene pipe with a diameter of 40 mm was taken as a frame, transformer iron strips were packed inside, cut from old Soviet transformers. The coil of LF is wound by a wire with a diameter of 1.6 mm for lacquer, and SCh of 1.2 mm for lacquer. RF coils were wound on native frameworks without cores, the same wire, where it is somewhere 0.6-0.8 mm for varnish. All coils were wound with careful control of the inductance obtained using an LC-meter. This made it possible to achieve almost perfect coincidence of inductance with the circuit. The capacitors in the filters are left by the native MBGO, all resistors are ordered with a new power of 35 W, resistance of 10 Ohms and 3.3 Ohms. The 10 ohm resistors were taken with a margin and with the help of a tester, the nominal values closest to those indicated in the circuit were selected. The entire wiring of the filter is made of a solid single-core installation wire with a cross section of 2.5 mm2. This section was chosen not so much from the desire to make the wire as thick as possible, but in order for the wire to not be loose and reliable contact pads could be bent out of it.
While I was busy with filters, and it took more than one day, the speakers came. Of course, their dimensions were different from the old ones, so they had to make new podiums for them. Well, after that it came to the assembly.
The filters were installed in the case, of course they did not stand on the old place, I had to re-drill the holes and lower the filter below. The top of the filter was covered with a batting, it was specially made longer on the back wall.
Pipe reflex pipes before installation had to be glued together, as they fell apart in the hands into two halves. In the case they were inserted on the sealant and plastered with batting.
It came to the speakers. HF mounted on the podium through the gaskets. Midrange glasses are inserted into the housing on the sealant. The glasses themselves are half filled with fluffy cotton. On the speakers of the midrange and woofer pasted seals of automotive soundproofing material Splen. When attracting the speaker, it compresses the joint very well. Midrange speaker when pressed goes into reluctantly and returns slowly, which indicates the tightness of the structure.
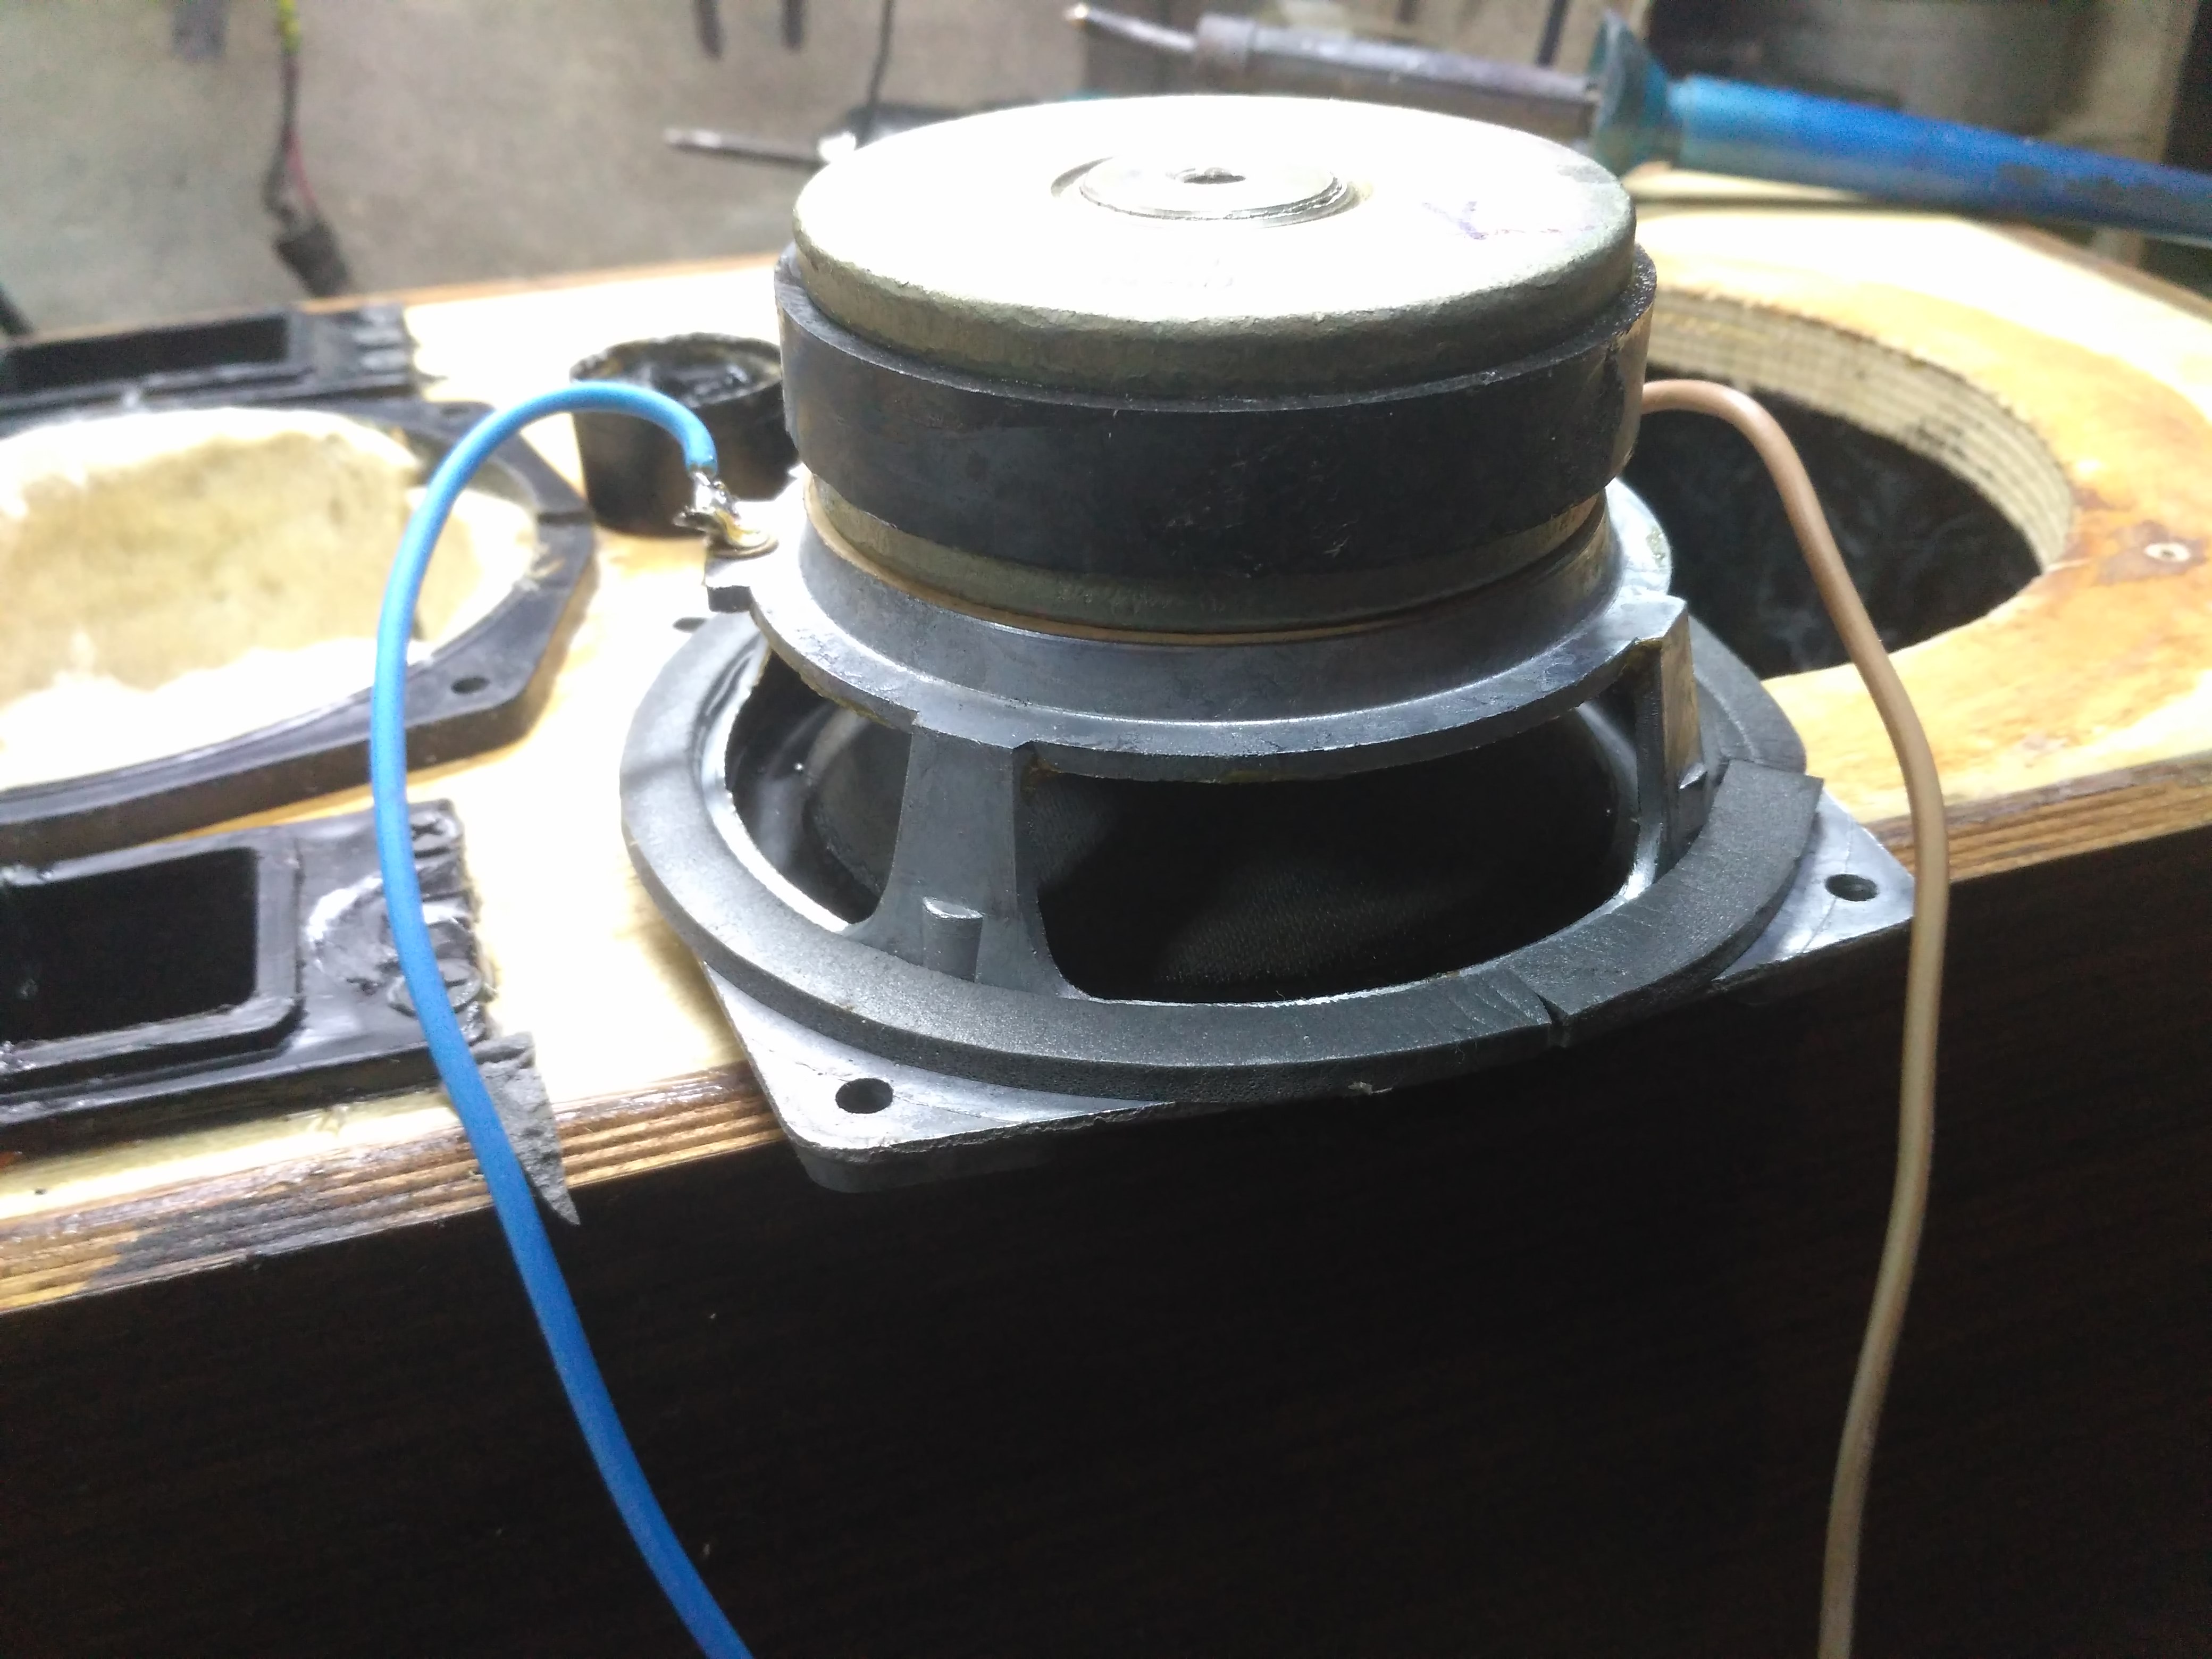
Unfortunately, the metallic shiny caps on the woofers and midrange speakers did not spare the time, they peeled off slightly. I had to paint them with acrylic paint from a can. I tried to do it as accurately as possible and as thin as possible.
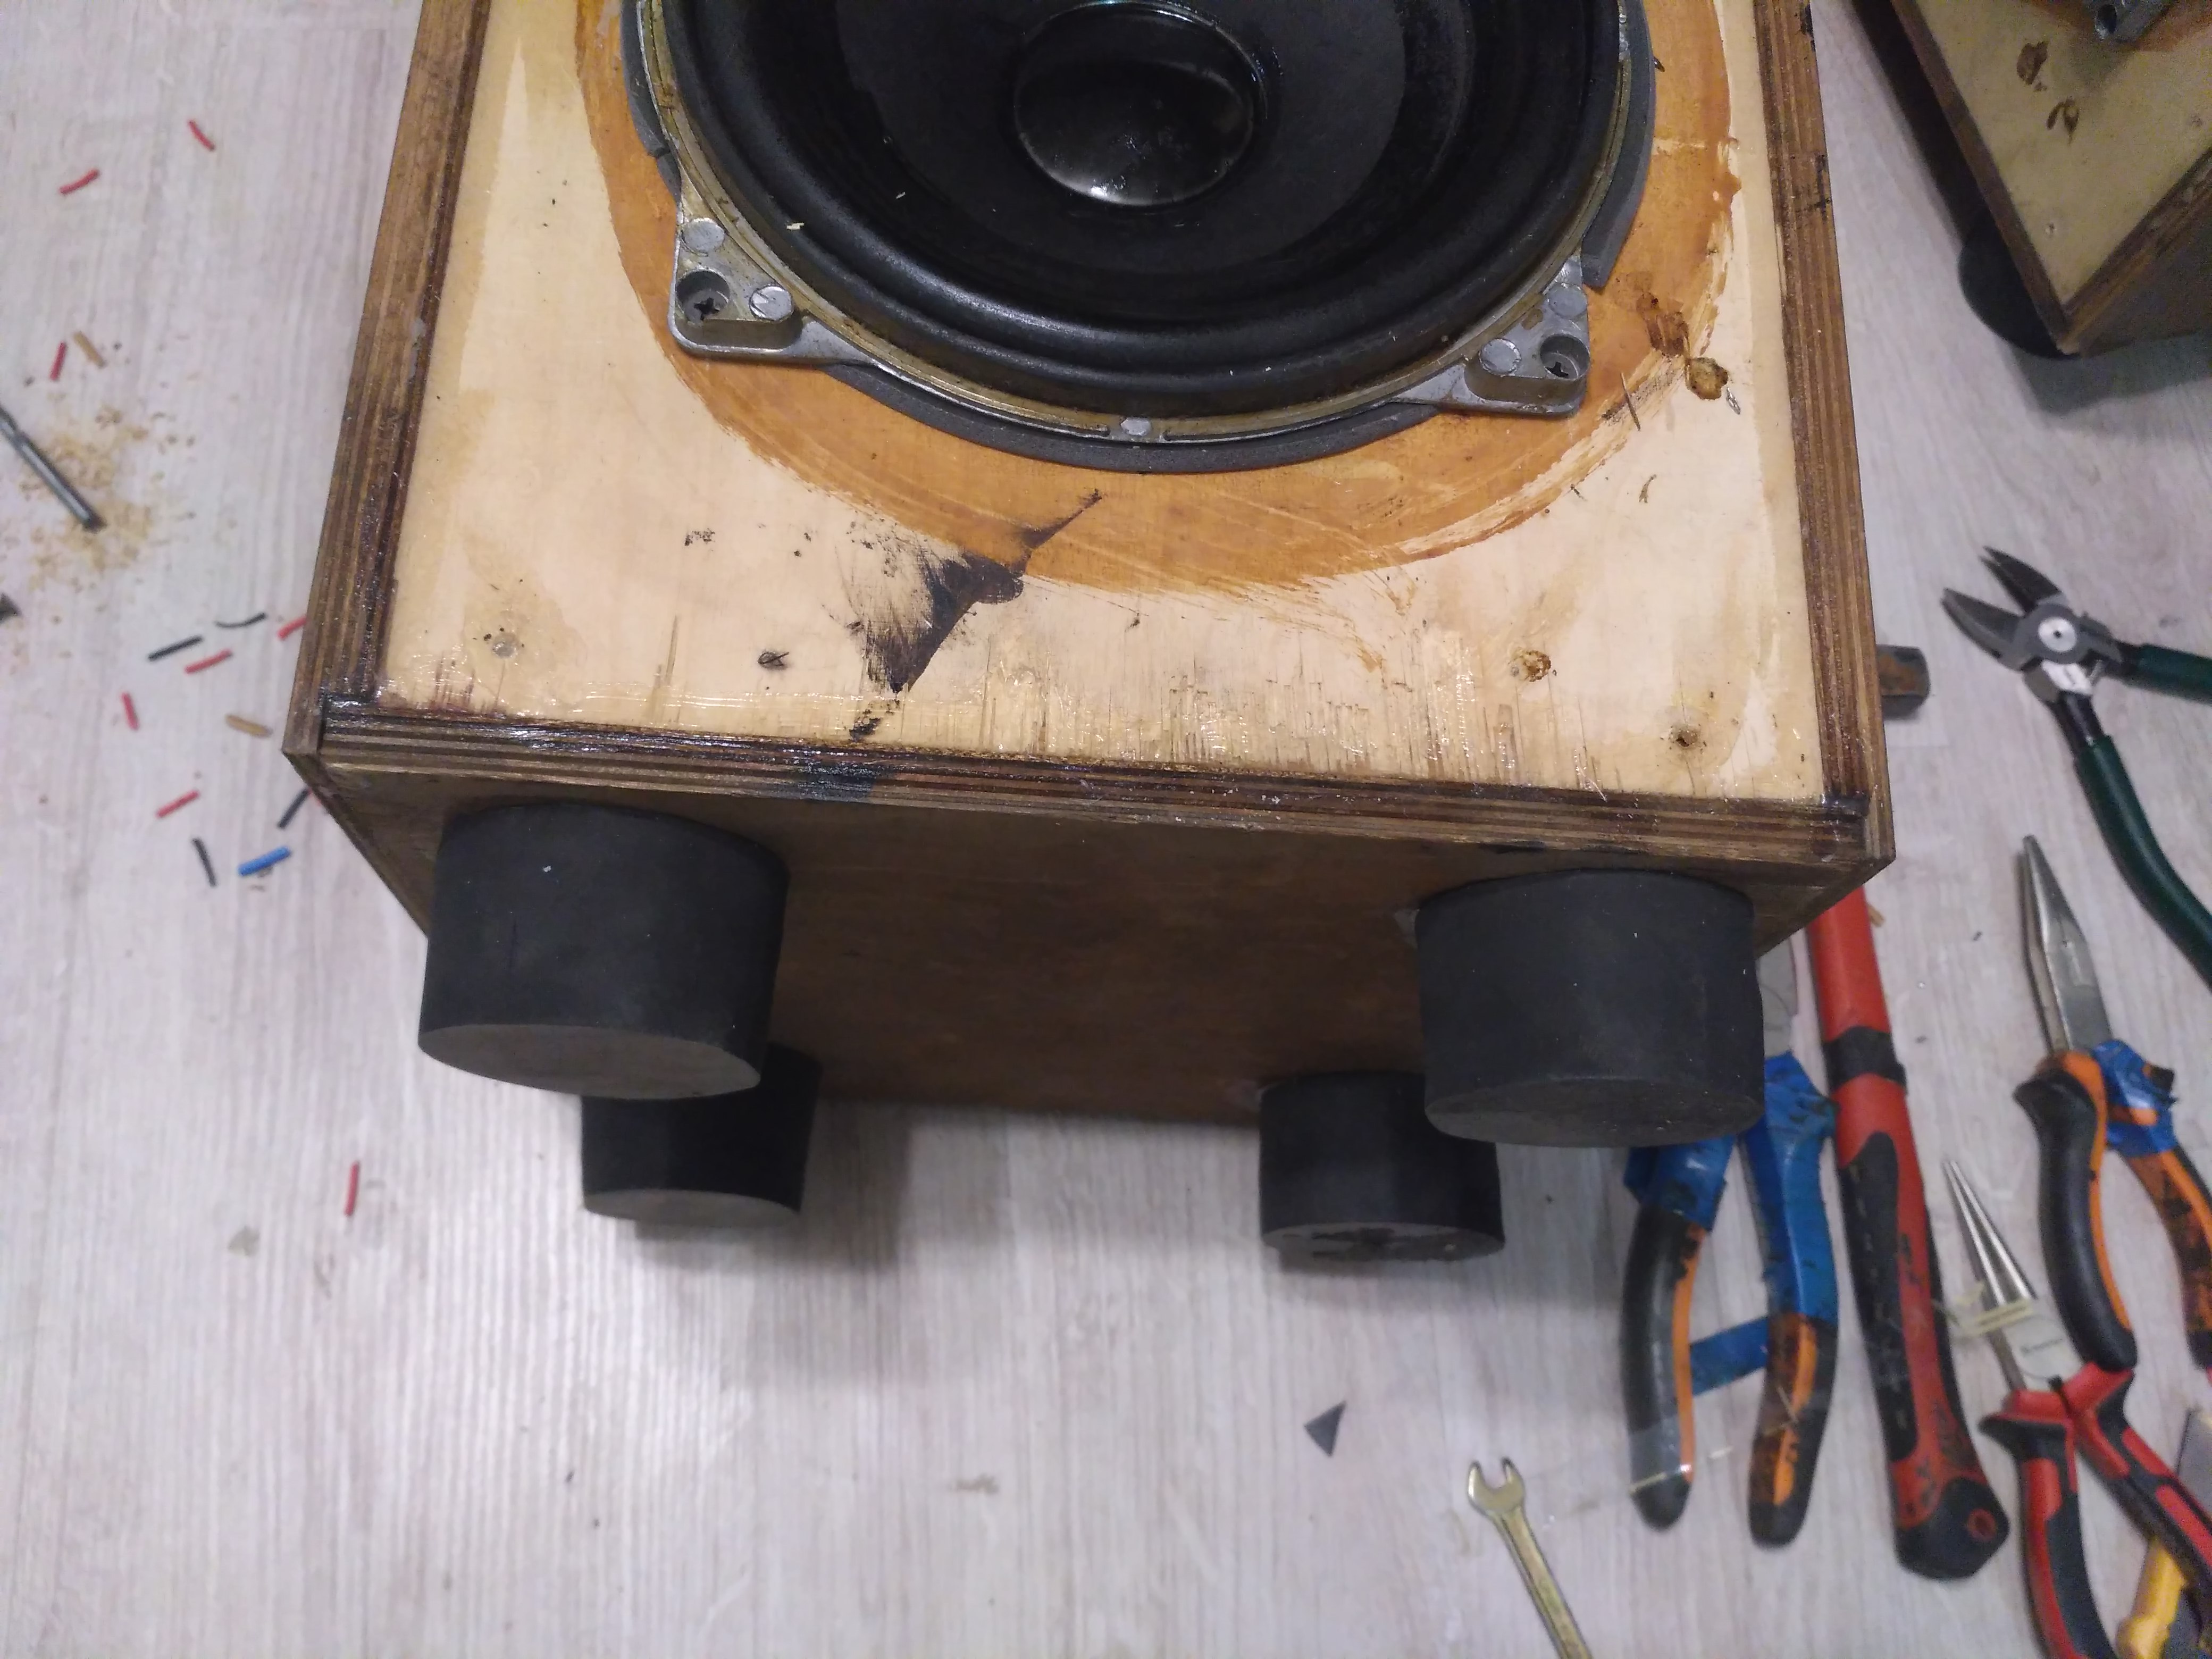
And at the end of the work with the case, the legs were cut instead of poor plastic relatives. Legs with a diameter of 7 cm were cut from a sheet of soft rubber 4 cm thick. And let the audiophiles rush at me with rotten eggs, but they work just as well as the thorns, which I refused during long reflections.
After assembly it turned out that:
After that, the whole body was covered with a colorless matte varnish.
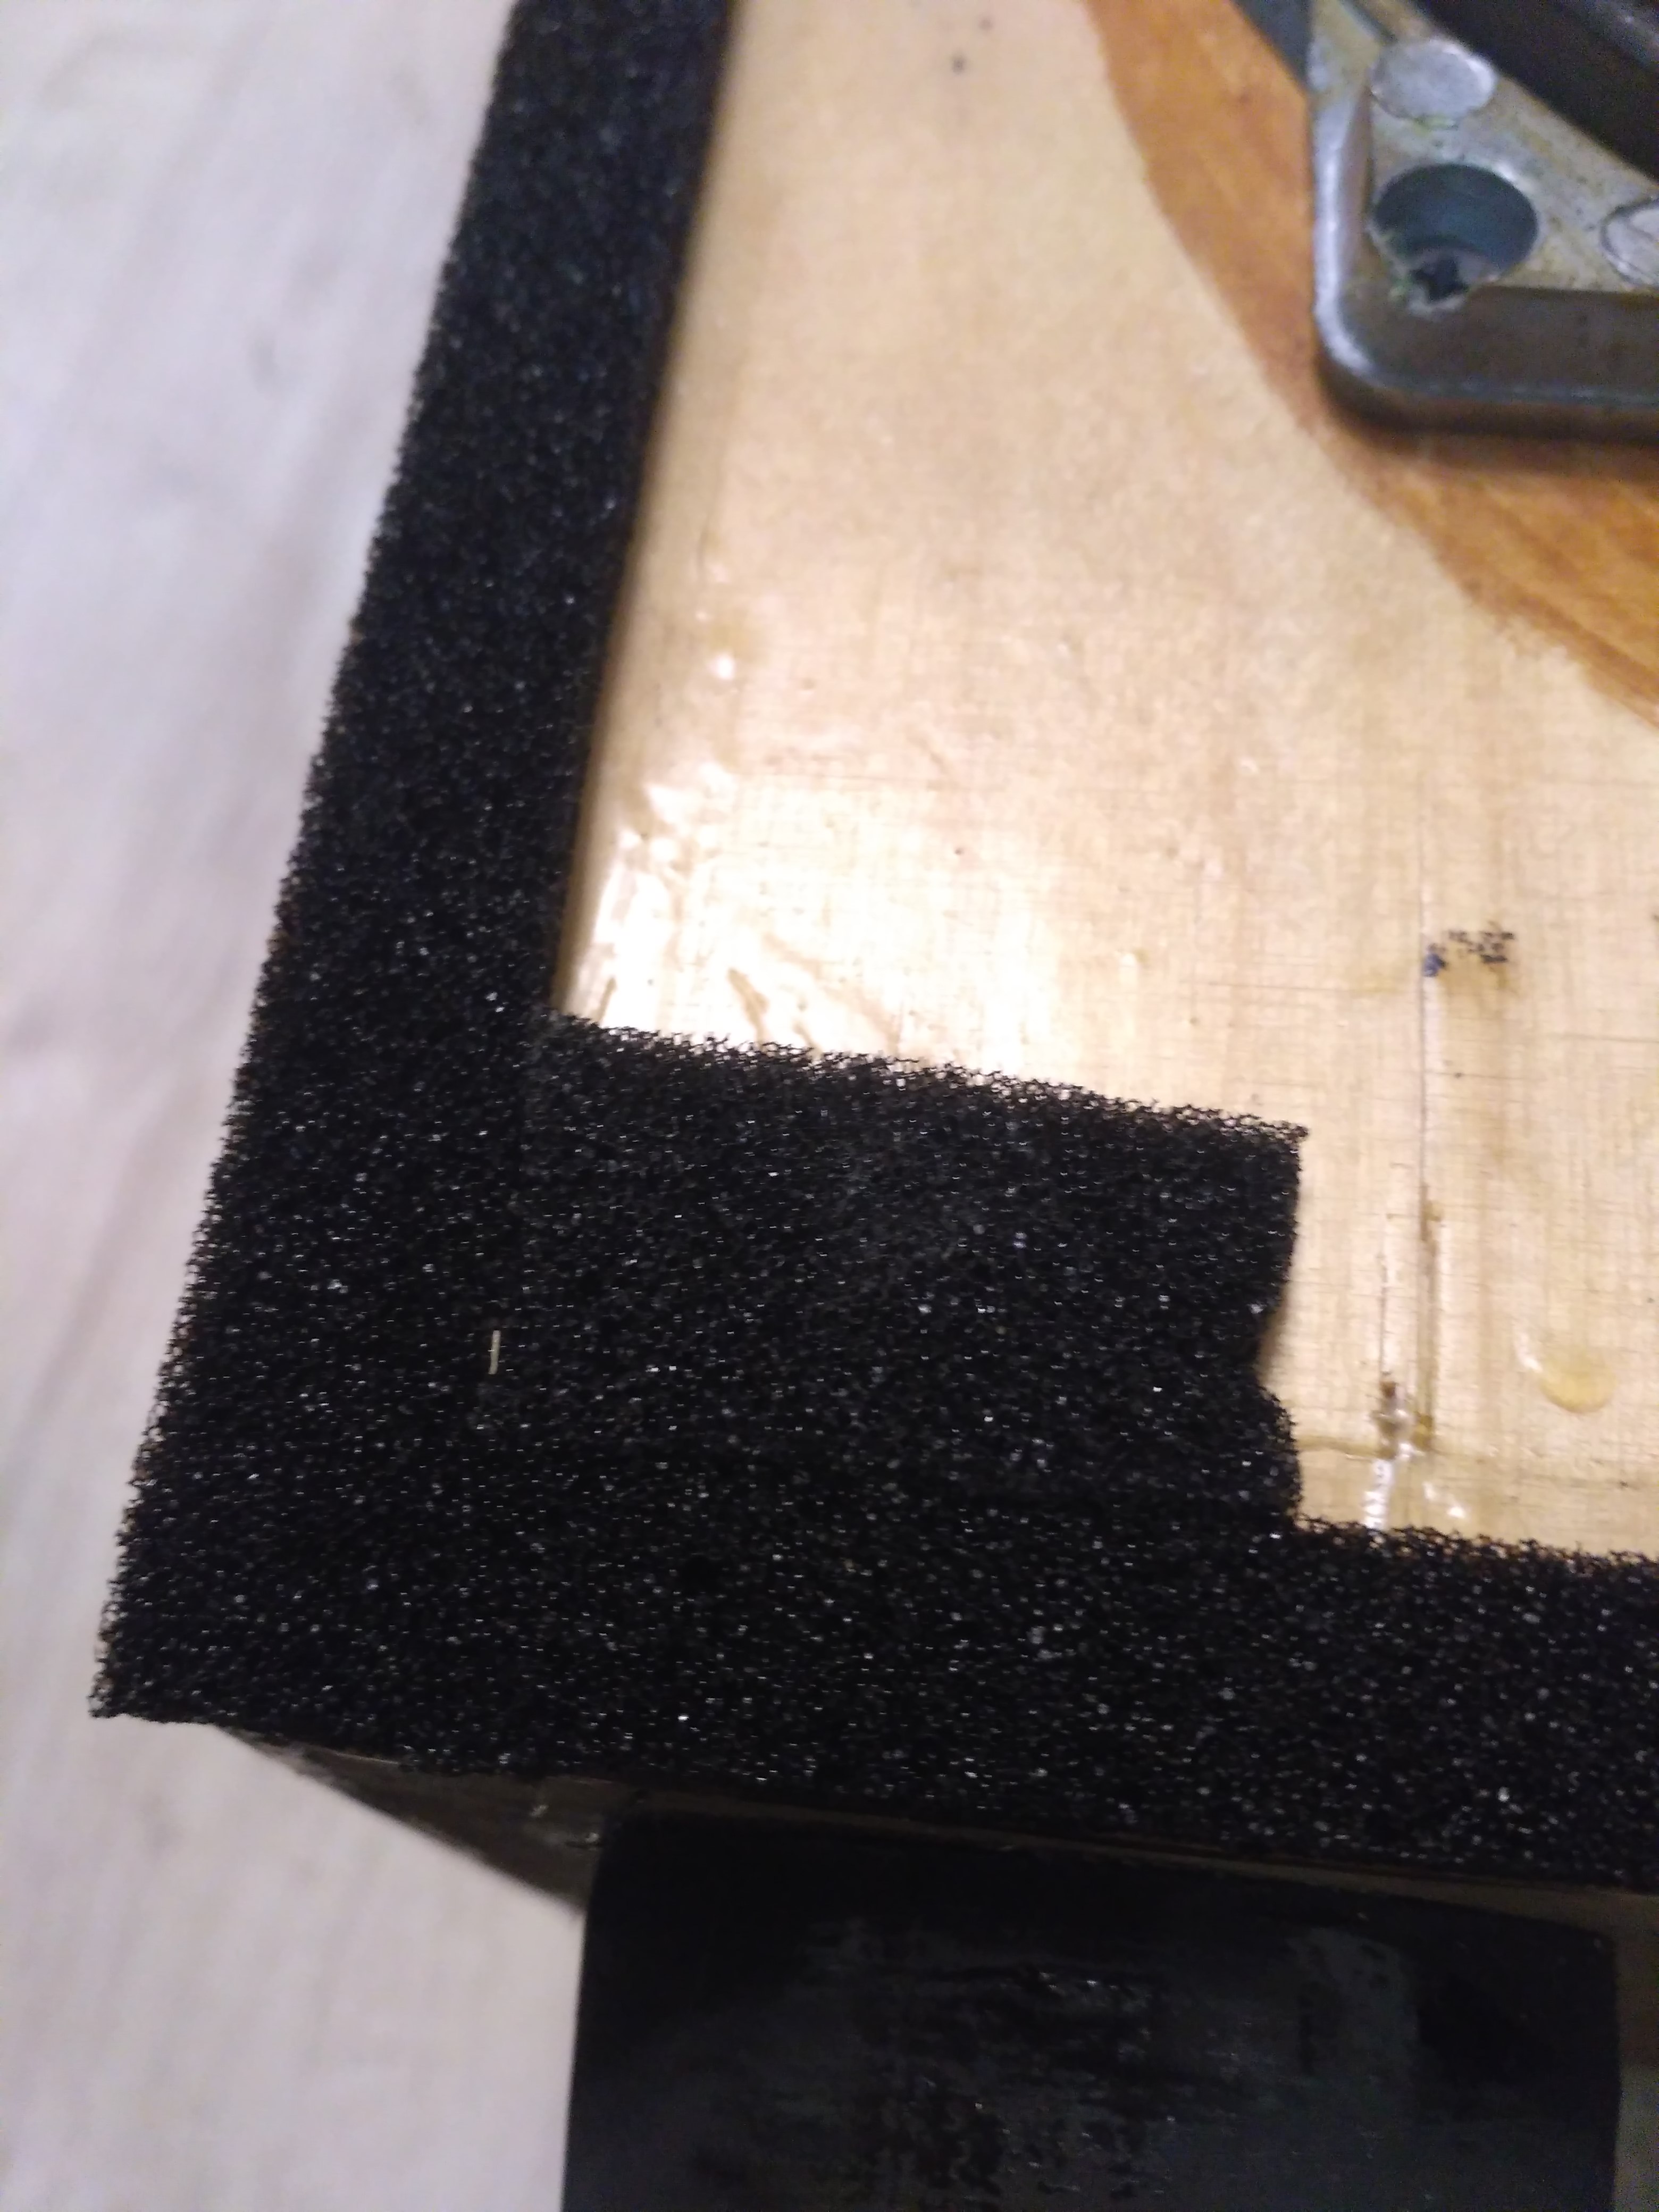
The plastic cladding panels on the inside were lined with pieces of STP Aero automobile vibration isolation, this gave them weight and completely removed all voicing. Under the panels, Madeleine's stripes were glued to the case; this is a special anti-creaking sealing material, something like impregnated foam rubber. This is done in order to press the panel as tightly as possible to the body.
This work has been completed. According to the results of listening, we can say that the speakers began to play much better than before the rework, it became pleasant to listen to them. No comparisons will be simply because I have nothing to compare with. There are speakers Microlab SOLO2 Mk2, converted into passivation. The same tracks from the same amplifier converted Vega play much better, however it is not surprising, the class of these microlabs is not at all high. Comparing Vega with Hifiman HE-400i headphones is at least silly, these are things of completely different classes and different eras.
Delivered results achieved. I paused by the very speakers from my childhood, achieved a better and more pleasant sound and had a good time with my hobby. Now these columns are in my home as the main ones, but it’s far from the fact that after some time they will not be replaced by something better, while it is quite likely that there may be other old Soviet speakers.
The budget of the entire event did not go beyond 5,000 rubles; this included the purchase of speakers, the purchase of speakers and the purchase of some materials. For this money, I think it is impossible to find something better and better sounding. By the way, for the same S90 Radio Engineering, we are asked to 10,000 :) Unleash them on the Internet :)
Thank you all for your attention!
Photo is not mine, taken here
A small digression. This post does not claim to be the ultimate truth, as it does not pretend to any audiophile delights, as well as to the fact that the result beats all records. I ask you not to argue on the topic “why are you messing with them, it would be better to buy new normal ones”, I just wanted those speakers, like a memory from my childhood. To listen to music, I have Hifiman HE-400i headphones and a homemade tube amplifier for them, this set already claims some quality, although I'm not going to argue with audiophiles.
All who are interested, I ask under the cat.
Purchase and initial inspection
With the purchase everything turned out very simple, I found that friend from my childhood and it turned out that he had the very same speakers. Although they stand in the closet and have not been used for a dozen years. For a symbolic sum, we shook hands and the speakers went to me. Immediately upon purchase, I was told that one tweeter had burned out and required replacement. Plus, the columns were pretty dusty, and rust crept out on metal bars. Next, the speakers were connected to the amplifier to test performance. All the speakers turned out to be working except for one HF, which was confirmed by his dialing by the tester in the following. Of course, the sound of the speakers in the state as I was was not pleased. After the first inclusion of the column were completely disassembled. The case is checked for tightness of the seams, often the old Soviet columns side panels simply pasted. I was lucky, all the joints were taped tight, by the way my cases were made entirely of plywood including the back wall, which is not often the case in this model. Much more often from plywood side walls and back from a chipboard.
Then the filter was completely disassembled to verify its compliance with the original scheme, by the way, here it is:
Capacitors and resistors on par matched with the circuit. All the capacitors I had had a metal-paper MBGO, which in general is not so bad, because in real structures people also encountered electrolytes. By the way, after measuring the capacitors showed deviations from the nominal within 1% which is just wonderful. But most of all I was interested in the inductance of the coils, but with them it was expected not lucky. NO ONE of the coils did not match the inductance scheme, and moreover, the coils still did not match each other in pairs of columns. For example, the inductance of the NP coils was 0.85 mH and 0.64 mH, while according to the scheme it should be 2.8 mH. MF and HF history is exactly the same. Well, okay, anyway, the scheme will be redone completely.
Work plan
After the initial inspection, a rough plan was drawn up:
1. Sizing all joints, joints and holes from the inside of the columns with sealant;
2. Pasting in the case of wooden struts according to the front-back and left-right scheme;
3. Processing of all walls with rubber-bitumen mastic to reduce resonances;
4. Pasting of all walls with a layer of batting;
5. Replacing the tweeters with the manufacture of new podiums for them;
6. Complete alteration of filters with a change in the scheme and nominal details;
7. Replacing all seals under the speakers;
8. Replacing all wires;
9. Installation of ports with terminals;
10. Washing the panels and painting the grids;
11. Reduction of resonances and chatter of the front panels;
Well, once the plan is made, you can get to work.
We cut, saw, shake, solder, paint and so on
First of all, the front panels were disassembled and washed off. Metal nets are sanded, treated with a rust converter and painted. After that, the panels were assembled back, and the metal mesh was installed in plastic on the sealant, in order to eliminate their bounce. Sealant is not visible from the outside.
Further, all the joints of the case, the holes were carefully smeared with building silicone sealant from the inside. This is done in order to exclude any whistlers from the outgoing air. Slots in the case itself, and there was not, but still. The next step in the case were glued in two struts of dry shtaketin section 45x20 mm, they are glued between the front-rear walls and between the left-right walls, and the struts are also glued together, so that a rigid cross is obtained. Thus, we increase the rigidity of the body, because the panels here are already quite large and the wall thickness is only 12 mm. After that, the body inside is all missed on two layers of rubber-bitumen mastic.
The next stage was the tie-in of ports with screw terminals for inserting wires into the case. (photo for some reason not preserved)
For the upholstery of the case, ordinary batting was purchased from the inside in the fabric store, where it is 6-7 mm thick, so the mats were made of three layers of batting. These mats were glued on all the walls except the front, on the same rubber-bitumen mastic and additionally fastened at the corners with a furniture stapler.
After finishing the work with the case, it is time to do the electrical part. Firstly, it was necessary to decide what to put in place to replace the native tweeters. I did not manage to find a native HF, and on the Internet they are asked for quite a few, from 700 to 1000 rubles for the old HF, I think a lot. In addition, it is widely believed on the Internet that 10GDV-2 relatives are generally not particularly good. After reading the Internet and estimating the budget, as well as the expediency of buying expensive tweeters for these speakers, our 15GD92-16, produced by Novosibirsk NOEMA were chosen. In terms of resistance and sensitivity, they are the same with 10GDV-2, and in quality, they are said to be significantly superior. By the way, thanks to NOEMA for prompt shipping and good packaging of the ordered speakers.
While the speakers were driving through the Post of Russia, I started to remake the filters. Again, at first, I dug forums for a very long time, collected opinions and eventually found a rework scheme for filters of these columns, with good reviews and sufficient justification from the author.
The scheme was taken here.
Looking ahead a bit, I’ll say that I liked the sound of the speakers with these filters.
As you can see, at LF and MF here are used coils with sufficiently high inductance. It is not so easy to wind such on “air”, because at the same time it should also have a small resistance, which means you need to use a thick wire, the dimensions of the coils are not small. Therefore, it was decided to wind the coils on frames with transformer iron cores. A sanitary polypropylene pipe with a diameter of 40 mm was taken as a frame, transformer iron strips were packed inside, cut from old Soviet transformers. The coil of LF is wound by a wire with a diameter of 1.6 mm for lacquer, and SCh of 1.2 mm for lacquer. RF coils were wound on native frameworks without cores, the same wire, where it is somewhere 0.6-0.8 mm for varnish. All coils were wound with careful control of the inductance obtained using an LC-meter. This made it possible to achieve almost perfect coincidence of inductance with the circuit. The capacitors in the filters are left by the native MBGO, all resistors are ordered with a new power of 35 W, resistance of 10 Ohms and 3.3 Ohms. The 10 ohm resistors were taken with a margin and with the help of a tester, the nominal values closest to those indicated in the circuit were selected. The entire wiring of the filter is made of a solid single-core installation wire with a cross section of 2.5 mm2. This section was chosen not so much from the desire to make the wire as thick as possible, but in order for the wire to not be loose and reliable contact pads could be bent out of it.
While I was busy with filters, and it took more than one day, the speakers came. Of course, their dimensions were different from the old ones, so they had to make new podiums for them. Well, after that it came to the assembly.
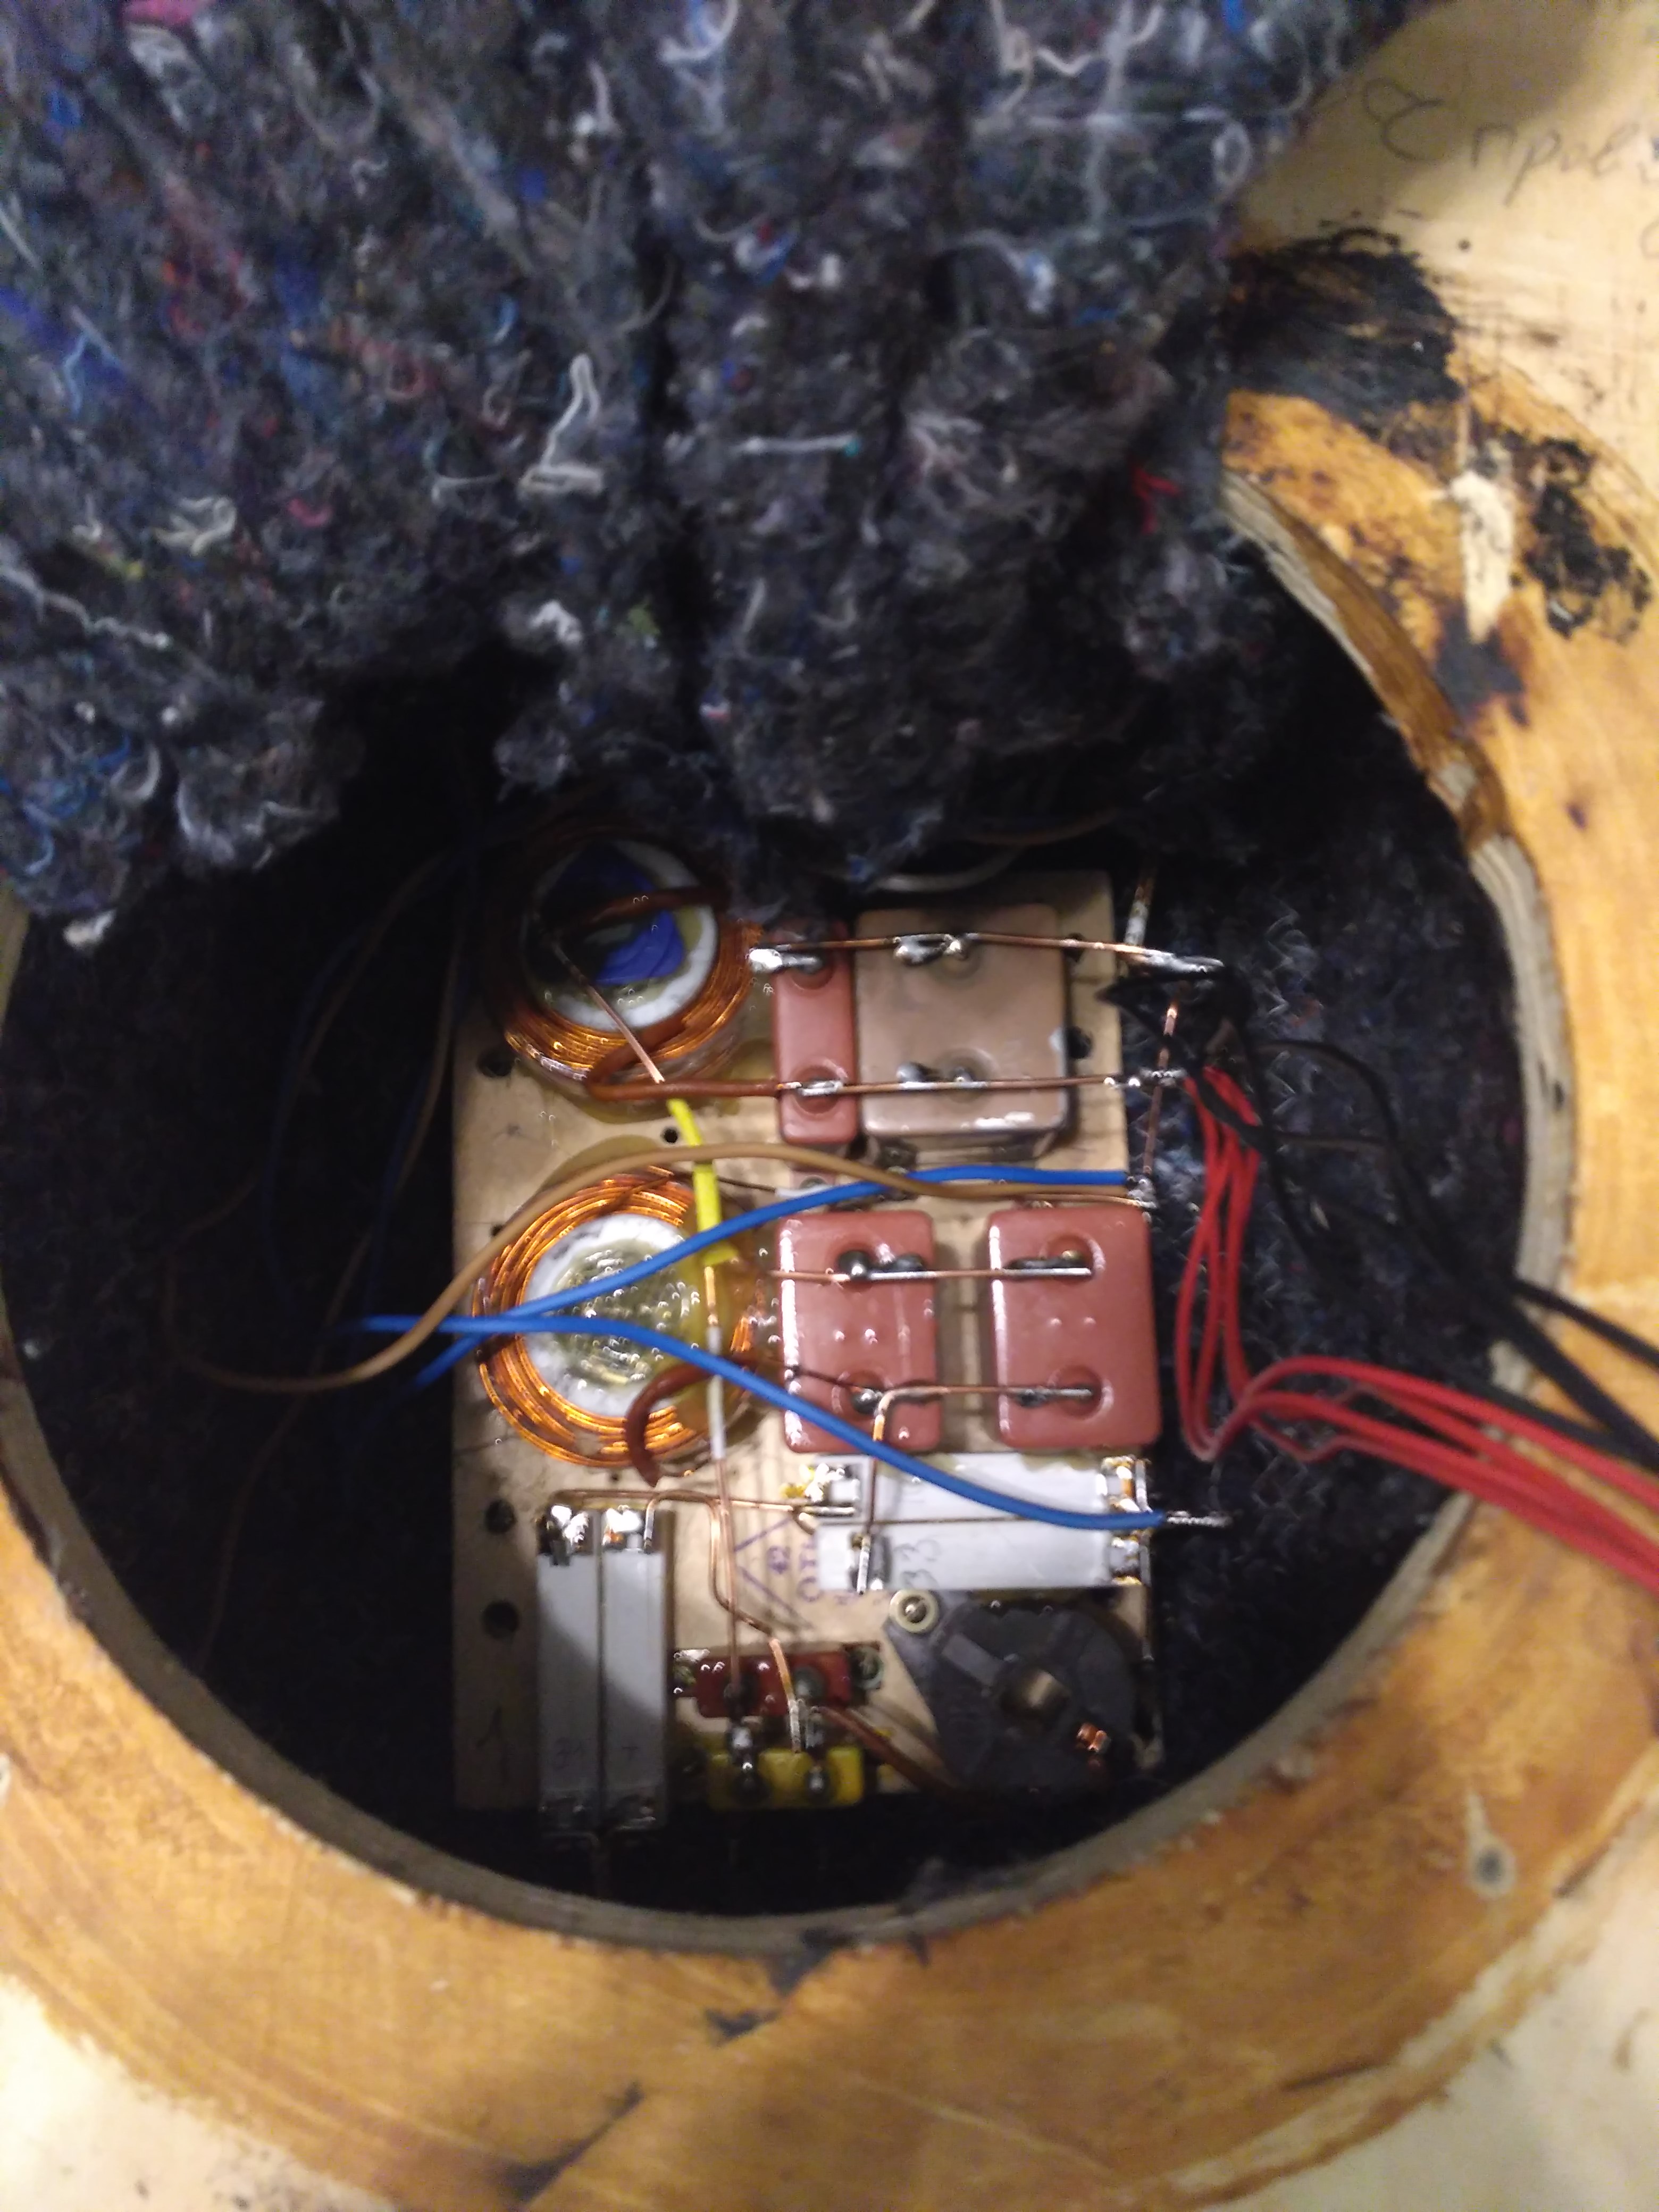
The filters were installed in the case, of course they did not stand on the old place, I had to re-drill the holes and lower the filter below. The top of the filter was covered with a batting, it was specially made longer on the back wall.
Pipe reflex pipes before installation had to be glued together, as they fell apart in the hands into two halves. In the case they were inserted on the sealant and plastered with batting.
It came to the speakers. HF mounted on the podium through the gaskets. Midrange glasses are inserted into the housing on the sealant. The glasses themselves are half filled with fluffy cotton. On the speakers of the midrange and woofer pasted seals of automotive soundproofing material Splen. When attracting the speaker, it compresses the joint very well. Midrange speaker when pressed goes into reluctantly and returns slowly, which indicates the tightness of the structure.
Unfortunately, the metallic shiny caps on the woofers and midrange speakers did not spare the time, they peeled off slightly. I had to paint them with acrylic paint from a can. I tried to do it as accurately as possible and as thin as possible.
And at the end of the work with the case, the legs were cut instead of poor plastic relatives. Legs with a diameter of 7 cm were cut from a sheet of soft rubber 4 cm thick. And let the audiophiles rush at me with rotten eggs, but they work just as well as the thorns, which I refused during long reflections.
After assembly it turned out that:
After that, the whole body was covered with a colorless matte varnish.
The plastic cladding panels on the inside were lined with pieces of STP Aero automobile vibration isolation, this gave them weight and completely removed all voicing. Under the panels, Madeleine's stripes were glued to the case; this is a special anti-creaking sealing material, something like impregnated foam rubber. This is done in order to press the panel as tightly as possible to the body.
This work has been completed. According to the results of listening, we can say that the speakers began to play much better than before the rework, it became pleasant to listen to them. No comparisons will be simply because I have nothing to compare with. There are speakers Microlab SOLO2 Mk2, converted into passivation. The same tracks from the same amplifier converted Vega play much better, however it is not surprising, the class of these microlabs is not at all high. Comparing Vega with Hifiman HE-400i headphones is at least silly, these are things of completely different classes and different eras.
Delivered results achieved. I paused by the very speakers from my childhood, achieved a better and more pleasant sound and had a good time with my hobby. Now these columns are in my home as the main ones, but it’s far from the fact that after some time they will not be replaced by something better, while it is quite likely that there may be other old Soviet speakers.
The budget of the entire event did not go beyond 5,000 rubles; this included the purchase of speakers, the purchase of speakers and the purchase of some materials. For this money, I think it is impossible to find something better and better sounding. By the way, for the same S90 Radio Engineering, we are asked to 10,000 :) Unleash them on the Internet :)
Thank you all for your attention!
All Articles