IP KVM DIY 3.0
This is the third variation on the topic of IP KVM, this time the concept has been completely revised, we will begin to build something new. There will be many interesting things, do not move away from the screen. Another unusual device will appear, discarding almost all the old components, go back to the native Arduino and play a little bit in the hacker.
For those who have just joined, a summary of the previous series:
And finally, in this article, all the disadvantages of the previous ones will be corrected. Particular emphasis will be placed on maximizing the cost of components.
By tradition, we consider the component parts of the assembled device:
1. Our old friend Atmega16u2:
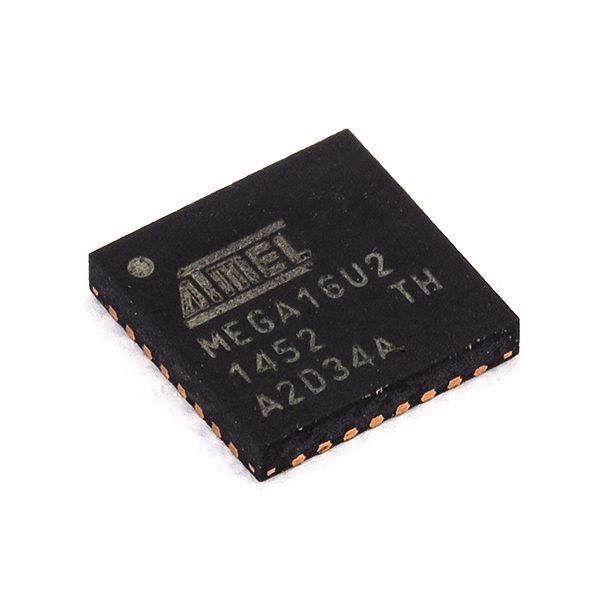
This is the only component that goes from previous articles.
2. The notorious ESP8266, in this case ESP8266-12e:
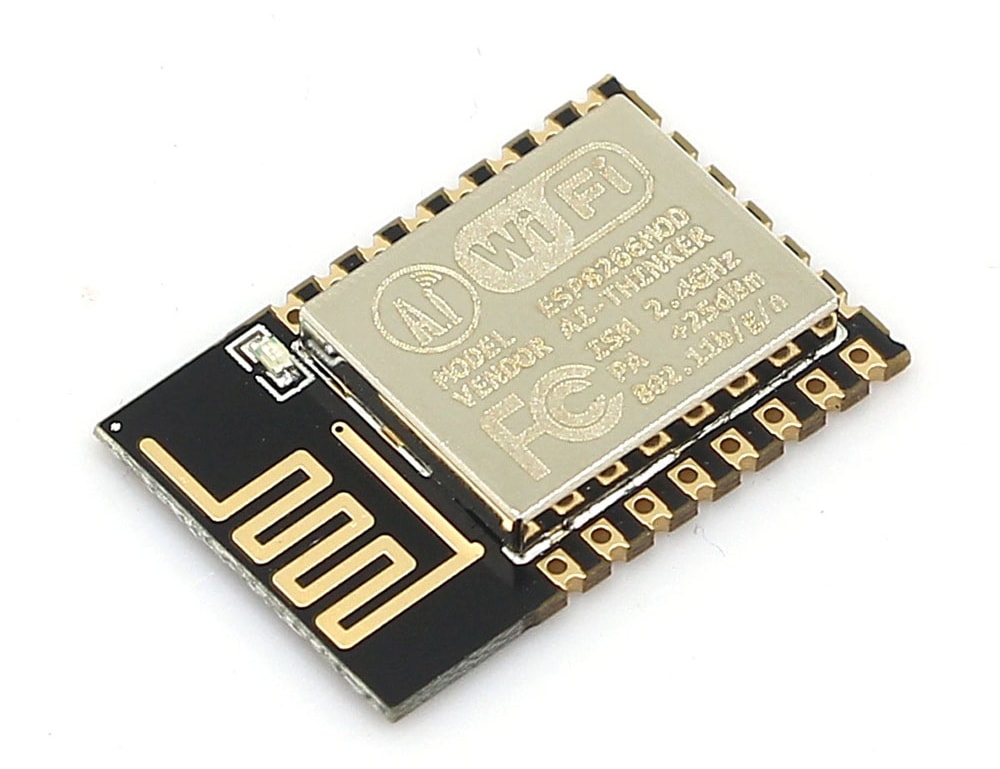
You can use another version of ESP8266, but you need to consider the number and location of ports.
3. And, in fact, the hero of the occasion LKV373A

Thanks to this device, it was possible to transmit video over a local network with high
resolution up to full HD.
So let's get started! LKV373A or HDMI Extender device for capturing images directly from the hdmi port and broadcasting to a local network, these devices are also called hdmi extenders. As planned by the manufacturers, a set of such devices should consist of a transmitter (transmitter) and a receiver (receiver), designation TX and RX, respectively. They should probably be used to bring more profit to the producer, only in a pair. But there was a man, under the nickname Danman, here is a link to his blog, which became interested in how it works. He opened the Wireshark, the traffic sent by the TX device, what did it turn out?
The video stream is transmitted without any encryption, and with the help of VLC Player you can watch it without any extra effort. But he didn’t stop there, he “felt”: he pulled the web interface, TTL, telnet, and even the firmware with the programmer. He described this in detail in his blog. In the same place the firmware which interests us first of all was laid out: IPTV_TX_PKG_v4_0_0_0_20160427.PKG. In this firmware web interface with advanced settings, and not like the standard only button to update. In addition, in this firmware there is a telnet with many commands for tuning. With this firmware, we will reconfigure the HDMI Extender for our tasks. I put the firmware and everything I needed on github here is the link , we will need it later, but for now we’re finishing up with the theory. We proceed to practice.
I fell into the hands of the same extender as Danman (y). All that will be described further is suitable for HDMI Extender LKV373A version V3.0!
We connect LKV373A to the local network, turn on the power. Now let's try to make sure that the device is visible on the
network.
192.168.1.238 is the default IP address. If the old firmware on the extender address does not change, regardless of whether there is a DHCP server on the network or not. Newer firmware versions use the default IP only if the device could not get an address from DHCP. If you received a response to a ping request, continue on. If not, do not despair, try connecting the extender directly to the LAN port of the computer and use the sniffer.
HDMI Extender found, go to the firmware. Head over to the githab and download everything posted there. Now open the web interface of the extender through the browser and see the following picture:
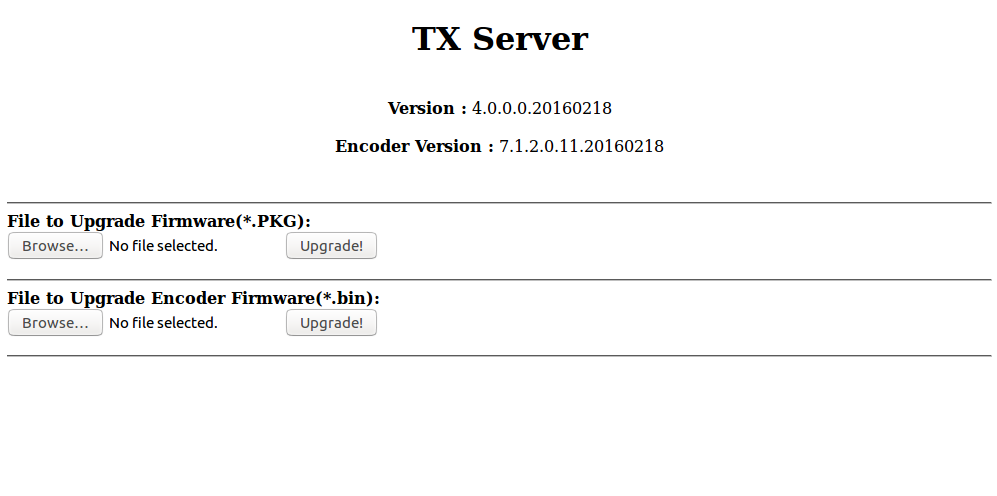
Click "Browse ...", select the firmware, the file with the name IPTV_TX_PKG_v4_0_0_0_20160427.PKG, and click "Upgrade". Tadam! The firmware is completed, now we will connect to LKV373A by telnet to reset the password.
The command to connect will look something like Telnet 192.168.1.238 9999, where 9999 is the port to connect to. CEP warns: the address obtained from DHCP can be found using the network scanner.
When connecting, the following message should appear:
We write
. In response, we get a list of commands:
To reset all settings and password, use the
command. We write the command, press enter and get the following picture:
Now we can customize the device as we need. Go to the web interface. We use the standard login: admin password: 123456 and here it is, the “desired” web interface with additional configuration items:
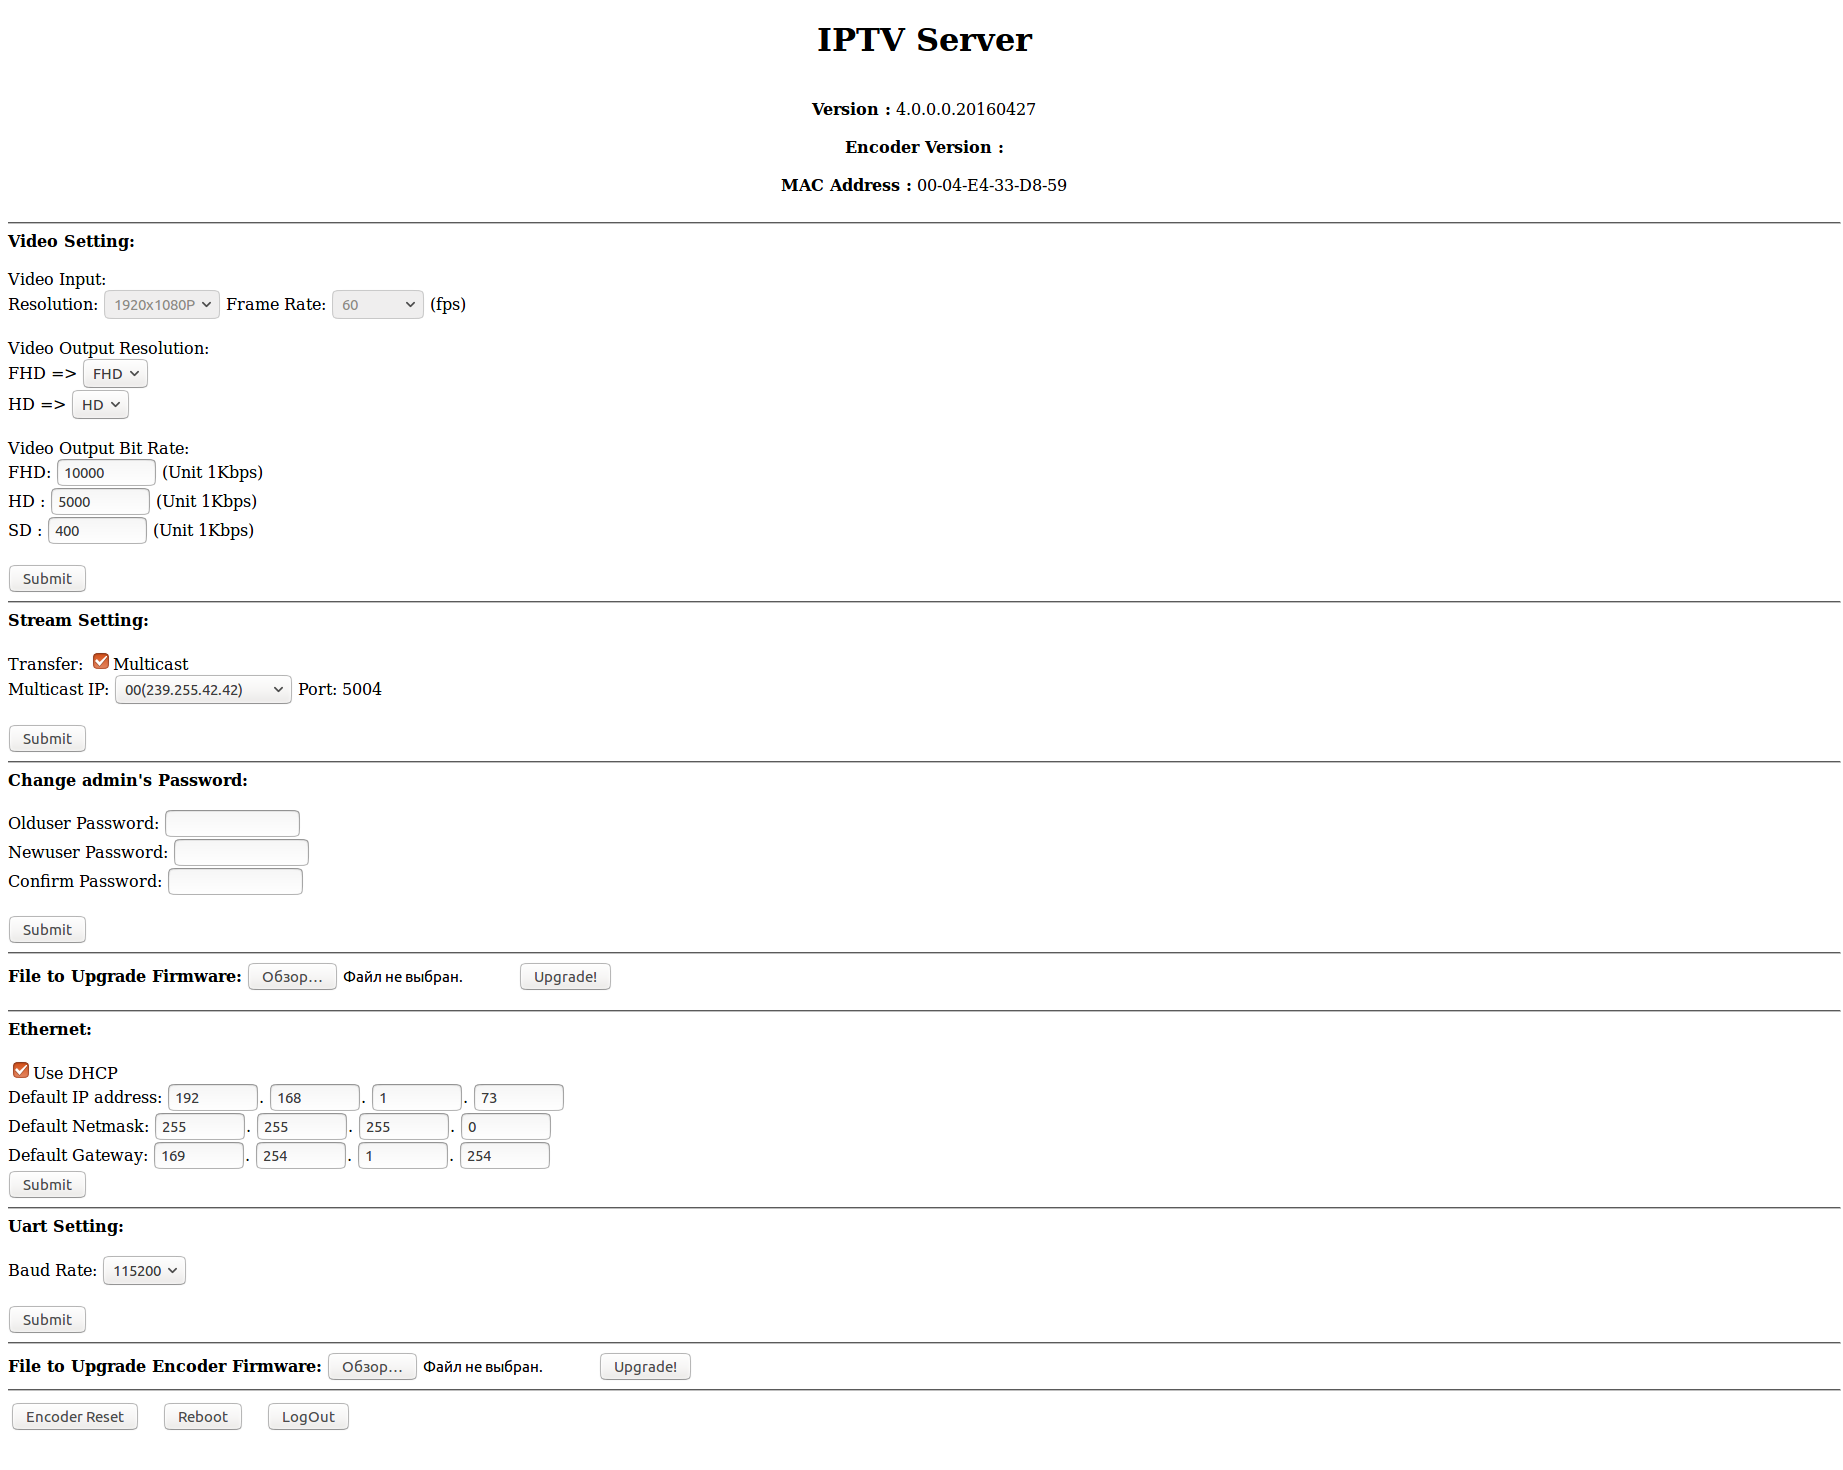
Although the possibilities in the web interface have increased, they are still not enough for our purposes. Especially, there are not enough more free settings in the part of streaming, it’s hard-coded, far from the most convenient, the list of ip-addresses to which you can stream. There is certainly a multicast, but it is better to leave it for television. Restrictions can be circumvented, about this a little later.
Here, the device was found on the network, the firmware was “rolled up”, the passwords were dropped. The transmitter is almost ready to go to the receiver.
Let's define, on the device, under control of what operating system, we will transmit the stream. I think you will not experience the agony of choice, there are only two options:
For Windows, I tried several players, but the results turned out so-so. When capturing and subsequent playback of the video stream, a delay appears, which primarily depends on the player playing the stream. On various players, the delay varied from one second to five or even more. Best of all, on Windows, VLC Player proved to be.
Let's get down to business. Launch VLC Player, in the drop-down menu “Media” select the item “Open URL ...” in the network address field, write
, put a check in the “Show advanced settings” checkbox and set its value in the “Caching” field This parameter is determined individually. The smaller the value in this field, the smaller the delay, but too small a value can lead to “artifacts” and frame drops, everything will depend on the infrastructure of the local network. The best results that could be achieved is a delay of about one second. On Linux, the results were much better about 200-300 milliseconds.
As practice shows, the best results are obtained when using a bunch of socat and mplayer programs. Ubuntu is installed on my computer, so the command for installing socat will look like this:
Mplayer is installed in the same way:
Well, and listen to the advice of Danman:
This command is needed in order to remove from the stream the so-called “Zero Length UDP Packets” - packets of zero size that “litter” the stream.
The receiver is ready, you can run the broadcast! We type in the console of the receiving computer
or
, depending on the operating system. Remember the IP address of the receiver and return to the web interface of the transmitter. Open the web interface, if you have already closed, enter your username and password and write directly in the address bar of the browser:
We substitute our IP addresses and press enter. This line will configure the HDMI Extender to broadcast the captured video to your chosen ip and turn off multicast.
We start VLC in Windows. Or in the Linux terminal we write:
Abra Cadabra! And here is our, or not ours, desktop live.

So, with the help of some hacking techniques, we forced the device to do what we required.
With the transfer of video figured out, go to the remote control.
Since HDMI Extender cost is low, about 1800 rubles, and because of the comments that, they say, a little expensive, I put forward the slogan: “Give IP KVM for 2000 rubles!”. The fidelity of this statement will be greatly influenced by the ruble exchange rate, but let's not talk about sad things, I want to believe in a bright future. To achieve the goal, we need very cheap elements, my choice fell: on the ESP8266 as a controller, and still the same Atmega (8/16/32) u2 as the actuation device.
You can certainly consider other candidates for the role of the actuator (keyboard). The firmware that emulates the keyboard is written in the LUFA library (sort of like). This library can be used for the entire AVR family with USB connectivity. From this it follows that as a keyboard emulator, you can choose, perhaps a cheaper, microcontroller. This is information for consideration, and now we will continue.
You can buy ESP8266 for about 90 rubles, Atmega (8/16/32) u2 for about 100 rubles, and even cheaper if you take in small batches of 5, or more. Of course, you will need consumables for tying microcontrollers, but their cost is extremely small, so I will not consider them.
This miracle of the Chinese industry needs no introduction, therefore I can only say that in this project I used the ESP8266-12e version. Of course, you can use other versions, only you need to consider the location of the ports, since In this version, one of the ESP8266 ports is used to power on the Atmega (8/16/32) u2, below will be indicated on the diagram.
The firmware for ESP8266 is written in the ArduinoIDE environment so let's download the latest version from the developer’s site . Next you need to add support for ESP8266 - the easiest way can be found at this link . On the same page you can find a lot of useful information, such as a diagram of the connection to power and TTL. For those who are not aware of, ESP8266 uses strictly 3.3 volts! If you are not sure of your own strength, it is better to use the board option adapted for USB, like NodeMCU:

If everything is ready, open ArduinoIDE and copy my sketch:
Let's connect the necessary library:
Select the “Sketch” tab → “Connect Library” → “Add .ZIP Library”. Select a library called “UNO-HIDKeyboard-Library-master (mod) .zip” that was downloaded from the github. Compile and fill the firmware. To download the firmware, connect the ESP8266 TTL, set the desired port in the ArduinoIDE. Settings should look something like this:
To download the firmware, you need to close the port GPIO0 to the ground, and restart the microcontroller by briefly closing the Reset port to the ground. I will not paint in detail, so as not to inflate the article, Google to help you.
The logic of the ESP8266 is as follows: When power is applied, the microcontroller tries to connect to a Wi-Fi access point for about thirty seconds:
If the connection is successful : opens port 23, to which you can connect using telnet and transmit keystrokes. In addition to keys, you can send combinations based on “Ctrl + key” that will press certain combinations. For example, if you send "Ctrl + d", CTRL + ALT + DELETE will be pressed on the managed computer.
There are also combinations for controlling ESP8266 ports, for example, you can connect a relay and use the “Ctrl + q” combination to turn the relay on and off, thereby remotely turning the controlled computer on and off. These and other combinations can look at the source.
If unsuccessful : ESP8266 switches to the access point mode, with the name “TD”, Password “testtest” and opens a small web interface, available at 192.168.4.1, in which you can configure settings for connecting via WI-FI.
Thus, the device can be easily connected to another access point. Yes, there is a fly in the ointment, for the operation of our IP KVM you will need both a LAN cable and Wi-Fi. Such will be the fee for the cheapness of the device.
We figured out ESP8266, with Atmega16u2 everything is like in previous articles, flashing it with the Flip program, the firmware is in the archive downloaded from the github.
For the correct connection of components, I attach a circuit. Just remember, this is a conditional scheme, it serves for clarity and does not claim to be ideal. Everyone is free to "beat" her as he likes.

Let me clarify some points: The transistor on the circuit is needed in order to turn on the Atmega16u2 after loading ESP8266, because when the ESP8266 is turned on, debugging information is sent to all TX ports, and if the Atmega16u2 is turned on and connected to a computer, the data stream with the volume of which is transmitted to it driver does not cope. It is not known for certain what is happening at this moment, the driver buffer supposedly overflows, the effect turns out to be extremely unpleasant: you press (program) hundreds of keys if the text editor is open there pours out a bunch of gibberish, all the service keys stick and it becomes impossible . To avoid this, the power to the Atmega16u2 must be supplied after loading the ESP8266. This moment is taken into account in the firmware.
There is, of course, an alternative to the scheme, but this is an option for the rich or lazy. And by the way, this option does not cancel the above:

The picture shows the Arduino UNO without an Atmega328p chip connected to the Chinese analog NodeMCU. The 3.3 volt line is connected to the line of the same voltage level on the Arduino, as well as the ground and the GPIO2 pin (ESP8266) are connected to the TX pin on the Arduino.
Connect via telnet to port 23 and check the performance. You can do this: On Windows, using the
command.
On Linux it will be a little more difficult:
The
command
next you need to press the control character, by default “Ctrl +]”, telnet should go into command mode, then press “l” and “Enter”. With these actions we will switch the telnet to the character mode.
Everything is ready, we can check the operation of the device created by us. Let me remind you of the possible combinations for pressing "Alt + Tab", "Ctrl + Alt + Del" and other can look in the sketch. That's all, the third incarnation of DIY IP KVM'a is ready.
In general, the device turned out to be worthy of attention, of course, it is not a competitor to serial IP KVMs with all their “buns”, but it greatly benefits in price. And for home use, and maybe not only, it is quite suitable.
I take this opportunity to thank the user DaylightIsBurning ! This kind man suggested the right direction in which to dig.
Thank you for attention. See you again!
For those who have just joined, a summary of the previous series:
- First article
Collected IP KVM on Arduino and Raspberry Pi, it turned out expensive and with poor video quality. - Second article
OrangePI and Atmega16u2, learned cheap, but the image quality is also disgusting.
And finally, in this article, all the disadvantages of the previous ones will be corrected. Particular emphasis will be placed on maximizing the cost of components.
By tradition, we consider the component parts of the assembled device:
1. Our old friend Atmega16u2:
This is the only component that goes from previous articles.
2. The notorious ESP8266, in this case ESP8266-12e:
You can use another version of ESP8266, but you need to consider the number and location of ports.
3. And, in fact, the hero of the occasion LKV373A
Thanks to this device, it was possible to transmit video over a local network with high
resolution up to full HD.
The plan of the event is as follows:
- Hide and Seek: Looking for LKV373A where he hid in the network under what ip address
- Hacker game: Fill the firmware, reset passwords and set up LKV373A
- Making new friends: ESP8266, Arduino IDE and funny pictures
- The final of the celebration. We connect all the components and transmit keystrokes via telnet
LKV373A, prehistory
So let's get started! LKV373A or HDMI Extender device for capturing images directly from the hdmi port and broadcasting to a local network, these devices are also called hdmi extenders. As planned by the manufacturers, a set of such devices should consist of a transmitter (transmitter) and a receiver (receiver), designation TX and RX, respectively. They should probably be used to bring more profit to the producer, only in a pair. But there was a man, under the nickname Danman, here is a link to his blog, which became interested in how it works. He opened the Wireshark, the traffic sent by the TX device, what did it turn out?
The video stream is transmitted without any encryption, and with the help of VLC Player you can watch it without any extra effort. But he didn’t stop there, he “felt”: he pulled the web interface, TTL, telnet, and even the firmware with the programmer. He described this in detail in his blog. In the same place the firmware which interests us first of all was laid out: IPTV_TX_PKG_v4_0_0_0_20160427.PKG. In this firmware web interface with advanced settings, and not like the standard only button to update. In addition, in this firmware there is a telnet with many commands for tuning. With this firmware, we will reconfigure the HDMI Extender for our tasks. I put the firmware and everything I needed on github here is the link , we will need it later, but for now we’re finishing up with the theory. We proceed to practice.
Transmitter
We are looking for LKV373A in the network
I fell into the hands of the same extender as Danman (y). All that will be described further is suitable for HDMI Extender LKV373A version V3.0!
We connect LKV373A to the local network, turn on the power. Now let's try to make sure that the device is visible on the
ping 192.168.1.238
network.
192.168.1.238 is the default IP address. If the old firmware on the extender address does not change, regardless of whether there is a DHCP server on the network or not. Newer firmware versions use the default IP only if the device could not get an address from DHCP. If you received a response to a ping request, continue on. If not, do not despair, try connecting the extender directly to the LAN port of the computer and use the sniffer.
Stitching
HDMI Extender found, go to the firmware. Head over to the githab and download everything posted there. Now open the web interface of the extender through the browser and see the following picture:
Click "Browse ...", select the firmware, the file with the name IPTV_TX_PKG_v4_0_0_0_20160427.PKG, and click "Upgrade". Tadam! The firmware is completed, now we will connect to LKV373A by telnet to reset the password.
The command to connect will look something like Telnet 192.168.1.238 9999, where 9999 is the port to connect to. CEP warns: the address obtained from DHCP can be found using the network scanner.
Connect via telnet
When connecting, the following message should appear:
============================== ========IPTV TX Server======== ============================== input>
We write
list
. In response, we get a list of commands:
============================== ========IPTV TX Server======== ============================== input>list set_group_id get_group_id set_dhcp get_dhcp set_uart_baudrate get_uart_baudrate set_static_ip get_static_ip set_mac_address get_mac_address get_lan_status get_hdcp get_video_lock get_ip_config set_session_key set_device_name get_device_name set_video_bitrate get_video_bitrate set_downscale_mode get_downscale_mode set_video_out_mode get_video_out_mode set_streaming_mode get_streaming_mode get_fw_version get_company_id factory_reset reboot list exit
To reset all settings and password, use the
factory_reset
command. We write the command, press enter and get the following picture:
input>factory_reset Processing factory reset! System will reboot after few seconds! Connection closed by foreign host.
Web interface
Now we can customize the device as we need. Go to the web interface. We use the standard login: admin password: 123456 and here it is, the “desired” web interface with additional configuration items:
Although the possibilities in the web interface have increased, they are still not enough for our purposes. Especially, there are not enough more free settings in the part of streaming, it’s hard-coded, far from the most convenient, the list of ip-addresses to which you can stream. There is certainly a multicast, but it is better to leave it for television. Restrictions can be circumvented, about this a little later.
Here, the device was found on the network, the firmware was “rolled up”, the passwords were dropped. The transmitter is almost ready to go to the receiver.
Receiver
Let's define, on the device, under control of what operating system, we will transmit the stream. I think you will not experience the agony of choice, there are only two options:
Windows
For Windows, I tried several players, but the results turned out so-so. When capturing and subsequent playback of the video stream, a delay appears, which primarily depends on the player playing the stream. On various players, the delay varied from one second to five or even more. Best of all, on Windows, VLC Player proved to be.
Let's get down to business. Launch VLC Player, in the drop-down menu “Media” select the item “Open URL ...” in the network address field, write
udp://@:5004
, put a check in the “Show advanced settings” checkbox and set its value in the “Caching” field This parameter is determined individually. The smaller the value in this field, the smaller the delay, but too small a value can lead to “artifacts” and frame drops, everything will depend on the infrastructure of the local network. The best results that could be achieved is a delay of about one second. On Linux, the results were much better about 200-300 milliseconds.
Linux
As practice shows, the best results are obtained when using a bunch of socat and mplayer programs. Ubuntu is installed on my computer, so the command for installing socat will look like this:
sudo apt-get install socat
Mplayer is installed in the same way:
sudo apt-get install mplayer
Well, and listen to the advice of Danman:
sudo iptables -t raw -A PREROUTING -p udp -m length --length 28 -j DROP
This command is needed in order to remove from the stream the so-called “Zero Length UDP Packets” - packets of zero size that “litter” the stream.
We go on the air!
The receiver is ready, you can run the broadcast! We type in the console of the receiving computer
ifconfig
or
ipconfig
, depending on the operating system. Remember the IP address of the receiver and return to the web interface of the transmitter. Open the web interface, if you have already closed, enter your username and password and write directly in the address bar of the browser:
http:///dev/info.cgi?action=streaminfo&udp=n&rtp=y&multicast=n&unicast=y&mcastaddr=&port=5004
We substitute our IP addresses and press enter. This line will configure the HDMI Extender to broadcast the captured video to your chosen ip and turn off multicast.
We start VLC in Windows. Or in the Linux terminal we write:
socat UDP-RECV:5004 - | mplayer –
Abra Cadabra! And here is our, or not ours, desktop live.
So, with the help of some hacking techniques, we forced the device to do what we required.
With the transfer of video figured out, go to the remote control.
Transfer of control
Selection of components
Since HDMI Extender cost is low, about 1800 rubles, and because of the comments that, they say, a little expensive, I put forward the slogan: “Give IP KVM for 2000 rubles!”. The fidelity of this statement will be greatly influenced by the ruble exchange rate, but let's not talk about sad things, I want to believe in a bright future. To achieve the goal, we need very cheap elements, my choice fell: on the ESP8266 as a controller, and still the same Atmega (8/16/32) u2 as the actuation device.
You can certainly consider other candidates for the role of the actuator (keyboard). The firmware that emulates the keyboard is written in the LUFA library (sort of like). This library can be used for the entire AVR family with USB connectivity. From this it follows that as a keyboard emulator, you can choose, perhaps a cheaper, microcontroller. This is information for consideration, and now we will continue.
You can buy ESP8266 for about 90 rubles, Atmega (8/16/32) u2 for about 100 rubles, and even cheaper if you take in small batches of 5, or more. Of course, you will need consumables for tying microcontrollers, but their cost is extremely small, so I will not consider them.
ESP8266
This miracle of the Chinese industry needs no introduction, therefore I can only say that in this project I used the ESP8266-12e version. Of course, you can use other versions, only you need to consider the location of the ports, since In this version, one of the ESP8266 ports is used to power on the Atmega (8/16/32) u2, below will be indicated on the diagram.
Firmware
The firmware for ESP8266 is written in the ArduinoIDE environment so let's download the latest version from the developer’s site . Next you need to add support for ESP8266 - the easiest way can be found at this link . On the same page you can find a lot of useful information, such as a diagram of the connection to power and TTL. For those who are not aware of, ESP8266 uses strictly 3.3 volts! If you are not sure of your own strength, it is better to use the board option adapted for USB, like NodeMCU:
If everything is ready, open ArduinoIDE and copy my sketch:
Sketch
#include <ESP8266WiFi.h> #include <WiFiClient.h> #include <ESP8266WebServer.h> #include <ESP8266mDNS.h> #include <SoftwareSerial.h> #include <HIDKeyboard.h> #define MAX_SRV_CLIENTS 3 HIDKeyboard keyboard; const char* host = "esp8266"; const char* ssid = ""; const char* pass = ""; int rebootdev = 0; int modeswitch = 0; // , ESP8266 #define Port1 15 #define Port2 14 #define Port3 12 #define Port4 4 #define Port5 5 // String ColorB1; String ColorB2; String ColorB3; String ColorB4; String ColorB5; ESP8266WebServer server(80); WiFiClient serverClients[MAX_SRV_CLIENTS]; const char* serverIndex = "<form method='POST' action='/update' enctype='multipart/form-data'><input type='file' name='update'><input type='submit' value='Update'></form><a href='/'>BACK</a>";//Update // void handleRedirect(){ String content = "<html><head><meta http-equiv='refresh' content='0;/'><head></html>"; server.send(200, "text/html", content); } // WI-FI void handleLogin(){ String msg = ""; if (server.hasArg("SSID") && server.hasArg("PASSAP")){ if ((server.arg("SSID") != NULL) && (server.arg("PASSAP") != NULL)){ String header = "HTTP/1.1 301 OK\r\r\nLocation: /\r\nCache-Control: no-cache\r\n\r\n"; server.sendContent(header); String web_ssid = server.arg("SSID"); String web_pass = server.arg("PASSAP"); ssid = web_ssid.c_str();// C pass = web_pass.c_str(); Serial.println(); Serial.print("SSID "); Serial.println(ssid); Serial.print("Pass "); Serial.println(pass); WiFi.begin(ssid, pass); digitalWrite(LED_BUILTIN, LOW); ESP.reset(); return; } msg = "Wrong ssid/password! try again."; Serial.println("Login Failed"); } String content = "<html><body><form action='/' method='POST'>Enter the access point name and password <br>";// SSID content += "Name AP:<input type='text' name='SSID' placeholder='SSID'><br>"; content += "Password:<input type='password' name='PASSAP' placeholder='password'><br><br>"; content += "<input type='submit' name='SUBMIT' value='Connect to WI-FI'></form><b><font color='red'>" + msg + "</font></b><br>"; content += "Firmware update <a href='/upload'>UPDATE</a></body></html>"; server.send(200, "text/html", content); } void handleNotFound(){ String message = "File Not Found\n\n"; message += "URI: "; message += server.uri(); message += "\nMethod: "; message += (server.method() == HTTP_GET)?"GET":"POST"; message += "\nArguments: "; message += server.args(); message += "\n"; for (uint8_t i=0; i<server.args(); i++){ message += " " + server.argName(i) + ": " + server.arg(i) + "\n"; } server.send(404, "text/plain", message); } // int controlPin(int UsePin){ if (UsePin > 0){ int StPort; if (digitalRead(UsePin) == 1) {// digitalWrite(UsePin, LOW); StPort = 0; } else { digitalWrite(UsePin, HIGH); StPort = 1; } digitalWrite(LED_BUILTIN, HIGH);// Serial.print("Port "); Serial.print(UsePin); Serial.print("="); Serial.println(StPort); delay(500); digitalWrite(LED_BUILTIN, LOW); return(StPort); } return(-1); } // int clientConnect(int Seconds){ Serial.print("connection "); for (int i=0; i <= Seconds; i++){ WiFi.begin(ssid, pass); digitalWrite(LED_BUILTIN, LOW); delay(250); digitalWrite(LED_BUILTIN, HIGH); delay(250); Serial.print(" "); Serial.print("."); if (WiFi.status() == WL_CONNECTED) return(0); } return(1); Serial.println(); } void setup(void){ Serial.begin(115200); delay(1000); pinMode(LED_BUILTIN, OUTPUT); digitalWrite(LED_BUILTIN, HIGH); //uint8_t i = 0; if (modeswitch == 0) WiFi.mode(WIFI_STA);// modeswitch = 0 Serial.println(); Serial.println(); if (clientConnect(30) != 0) modeswitch = 1;// if (modeswitch == 1){ Serial.println(""); Serial.println("WiFi switch AP mode"); //WiFi.mode(WIFI_AP_STA); + . WiFi.mode(WIFI_AP); WiFi.softAP("TD", "testtest"); Serial.print("AP mode ip adress "); Serial.println(WiFi.softAPIP()); digitalWrite(LED_BUILTIN, LOW); } if (modeswitch != 1){ WiFiServer server(23); Serial.println(); Serial.print("Client mod ip address: "); Serial.println(WiFi.localIP()); digitalWrite(LED_BUILTIN, LOW); } MDNS.begin(host); pinMode(Port1, OUTPUT); pinMode(Port2, OUTPUT); pinMode(Port3, OUTPUT); pinMode(Port4, OUTPUT); pinMode(Port5, OUTPUT); if (modeswitch == 1){ // server.on("/", handleLogin);// (SSID) // server.on("/upload", HTTP_GET, [](){ server.sendHeader("Connection", "close"); server.send(200, "text/html", serverIndex); }); server.on("/update", HTTP_POST, [](){ server.sendHeader("Connection", "close"); int uperror = Update.hasError(); Serial.printf("UPERR %u\nRebooting...\n",Update.hasError()); if (uperror == 0) server.send(200, "text/html", "Firmware update successfully <a href='/'>BACK</a>"); else server.send(200, "text/html", "Update error <a href='/'>BACK</a>"); ESP.restart(); },[](){ HTTPUpload& upload = server.upload(); if(upload.status == UPLOAD_FILE_START){ Serial.setDebugOutput(true); WiFiUDP::stopAll(); Serial.printf("Update: %s\n", upload.filename.c_str()); if (upload.filename == NULL) { Serial.printf("ERROR: zero file size"); server.send(200, "text/html", "<html> zero file size <a href='/upload'>BACK</a></html>"); return(-1); } uint32_t maxSketchSpace = (ESP.getFreeSketchSpace() - 0x1000) & 0xFFFFF000; if(!Update.begin(maxSketchSpace)){//start with max available size Update.printError(Serial); } } else if(upload.status == UPLOAD_FILE_WRITE){ if(Update.write(upload.buf, upload.currentSize) != upload.currentSize){ Update.printError(Serial); } } else if(upload.status == UPLOAD_FILE_END){ if(Update.end(true)){ //true to set the size to the current progress Serial.printf("Update Success: %u\nRebooting...\n", upload.totalSize); } else { Update.printError(Serial); } Serial.setDebugOutput(false); } yield(); }); // server.on("/PoRt1", [] { controlPin(Port1); handleRedirect();// }); server.on("/PoRt2", [] { controlPin(Port2); handleRedirect(); }); server.on("/PoRt3", [] { controlPin(Port3); handleRedirect(); }); server.on("/PoRt4", [] { controlPin(Port4); handleRedirect(); }); server.on("/PoRt5", [] { controlPin(Port5); handleRedirect(); }); server.on("/reboot", [] { rebootdev = 1;// handleRedirect(); }); server.onNotFound(handleNotFound);// //server.begin(); MDNS.addService("http", "tcp", 80); Serial.println(); Serial.println("HTTP server started"); } server.begin(); } void loop(void){ uint8_t i; if (modeswitch == 1) server.handleClient(); delay(100); if (modeswitch != 1){ if (WiFi.status() != WL_CONNECTED) clientConnect(30); else { digitalWrite(5, HIGH);// ATMEGA16U2 digitalWrite(LED_BUILTIN, LOW); } } WiFiServer server(23); server.setNoDelay(true); server.begin(); keyboard.begin(); while(WiFi.status() == WL_CONNECTED) { if (server.hasClient()){ for(i = 0; i < MAX_SRV_CLIENTS; i++){ //find free/disconnected spot if (!serverClients[i] || !serverClients[i].connected()){ if(serverClients[i]) serverClients[i].stop(); serverClients[i] = server.available(); Serial.println("New client: "); Serial.print(i); continue; } } //no free/disconnected spot so reject WiFiClient serverClient = server.available(); serverClient.stop(); } //check clients for data for(i = 0; i < MAX_SRV_CLIENTS; i++){ if (serverClients[i] && serverClients[i].connected()){ if(serverClients[i].available()){ //get data from the telnet client and push it to the UART String bufkey; while(serverClients[i].available()) bufkey += (serverClients[i].read());// if (bufkey != 0) { bufkey = bufkey.substring(0, 8);// int key = bufkey.toInt();// switch (key){ case 277980: keyboard.pressSpecialKey(F1); break; case 277981: keyboard.pressSpecialKey(F2); break; case 277982: keyboard.pressSpecialKey(F3); break; case 277983: keyboard.pressSpecialKey(F4); break; case 27914953: keyboard.pressSpecialKey(F5); break; case 27914955: keyboard.pressSpecialKey(F6); break; case 27914956: keyboard.pressSpecialKey(F7); break; case 27914957: keyboard.pressSpecialKey(F8); break; case 27915048: keyboard.pressSpecialKey(F9); break; case 27915049: keyboard.pressSpecialKey(F10); break; case 27915051: keyboard.pressSpecialKey(F11); break; case 27915052: keyboard.pressSpecialKey(F12); break; case 1310: keyboard.pressSpecialKey(ENTER); break; case 130: keyboard.pressSpecialKey(ENTER); break; case 27: keyboard.pressSpecialKey(ESCAPE); break; case 8: keyboard.pressSpecialKey(BACKSPACE); break; case 9: keyboard.pressSpecialKey(TAB); break; case 32: keyboard.pressSpecialKey(SPACEBAR); break; case 27915012: keyboard.pressSpecialKey(INSERT); break; case 27914912: keyboard.pressSpecialKey(HOME); break; case 27915312: keyboard.pressSpecialKey(PAGEUP); break; case 27915212: keyboard.pressSpecialKey(END); break; case 27915412: keyboard.pressSpecialKey(PAGEDOWN); break; case 279167: keyboard.pressSpecialKey(RIGHTARROW); break; case 279168: keyboard.pressSpecialKey(LEFTARROW); break; case 279166: keyboard.pressSpecialKey(DOWNARROW); break; case 279165: keyboard.pressSpecialKey(UPARROW); break; case 127: keyboard.pressSpecialKey(DELETE); break; case 27915112: keyboard.pressSpecialKey(DELETE); break; case 4: keyboard.pressSpecialKey((LCTRL | ALT), DELETE); break; //CTRL+ALT+DELETE Ctrl + d case 6: keyboard.pressSpecialKey(ALT, F4); break; //alt+f4 Ctrl + f case 19: keyboard.pressSpecialKey(ALT | SHIFT); break;// Ctrl+s case 2: keyboard.pressSpecialKey(LCTRL | SHIFT); break;// Ctrl+b // case 17: controlPin(Port1); break;//Ctrl+q case 23: controlPin(Port2); break;//Ctrl+w case 5: controlPin(Port3); break;//Ctrl+e case 18: controlPin(Port4); break;//Ctrl+r case 20: controlPin(Port5); break;//Ctrl+t default: keyboard.pressKey(key); break;// } keyboard.releaseKey();// Serial.print(" string: "); Serial.print(key);// Serial.print(" KEY: "); Serial.write(bufkey.toInt()); bufkey = '0';// } } } } //check UART for data if(Serial.available()){ size_t len = Serial.available(); uint8_t sbuf[len]; Serial.readBytes(sbuf, len); //push UART data to all connected telnet clients for(i = 0; i < MAX_SRV_CLIENTS; i++){ if (serverClients[i] && serverClients[i].connected()){ serverClients[i].write(sbuf, len); delay(1); } } } } }
Let's connect the necessary library:
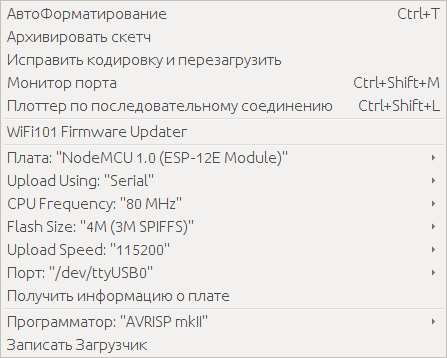
Select the “Sketch” tab → “Connect Library” → “Add .ZIP Library”. Select a library called “UNO-HIDKeyboard-Library-master (mod) .zip” that was downloaded from the github. Compile and fill the firmware. To download the firmware, connect the ESP8266 TTL, set the desired port in the ArduinoIDE. Settings should look something like this:
To download the firmware, you need to close the port GPIO0 to the ground, and restart the microcontroller by briefly closing the Reset port to the ground. I will not paint in detail, so as not to inflate the article, Google to help you.
The logic of the ESP8266 is as follows: When power is applied, the microcontroller tries to connect to a Wi-Fi access point for about thirty seconds:
If the connection is successful : opens port 23, to which you can connect using telnet and transmit keystrokes. In addition to keys, you can send combinations based on “Ctrl + key” that will press certain combinations. For example, if you send "Ctrl + d", CTRL + ALT + DELETE will be pressed on the managed computer.
There are also combinations for controlling ESP8266 ports, for example, you can connect a relay and use the “Ctrl + q” combination to turn the relay on and off, thereby remotely turning the controlled computer on and off. These and other combinations can look at the source.
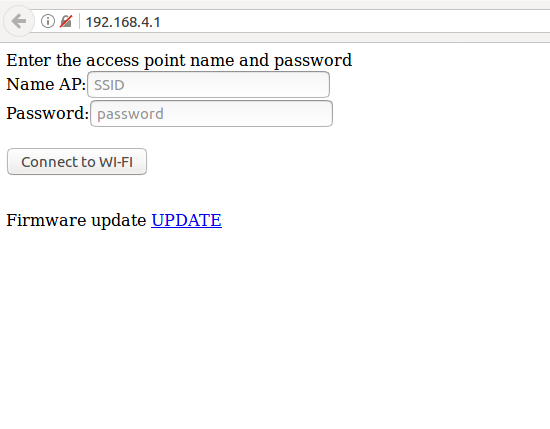
If unsuccessful : ESP8266 switches to the access point mode, with the name “TD”, Password “testtest” and opens a small web interface, available at 192.168.4.1, in which you can configure settings for connecting via WI-FI.
Thus, the device can be easily connected to another access point. Yes, there is a fly in the ointment, for the operation of our IP KVM you will need both a LAN cable and Wi-Fi. Such will be the fee for the cheapness of the device.
We figured out ESP8266, with Atmega16u2 everything is like in previous articles, flashing it with the Flip program, the firmware is in the archive downloaded from the github.
Connection of components
For the correct connection of components, I attach a circuit. Just remember, this is a conditional scheme, it serves for clarity and does not claim to be ideal. Everyone is free to "beat" her as he likes.
Let me clarify some points: The transistor on the circuit is needed in order to turn on the Atmega16u2 after loading ESP8266, because when the ESP8266 is turned on, debugging information is sent to all TX ports, and if the Atmega16u2 is turned on and connected to a computer, the data stream with the volume of which is transmitted to it driver does not cope. It is not known for certain what is happening at this moment, the driver buffer supposedly overflows, the effect turns out to be extremely unpleasant: you press (program) hundreds of keys if the text editor is open there pours out a bunch of gibberish, all the service keys stick and it becomes impossible . To avoid this, the power to the Atmega16u2 must be supplied after loading the ESP8266. This moment is taken into account in the firmware.
There is, of course, an alternative to the scheme, but this is an option for the rich or lazy. And by the way, this option does not cancel the above:
The picture shows the Arduino UNO without an Atmega328p chip connected to the Chinese analog NodeMCU. The 3.3 volt line is connected to the line of the same voltage level on the Arduino, as well as the ground and the GPIO2 pin (ESP8266) are connected to the TX pin on the Arduino.
Final check
Connect via telnet to port 23 and check the performance. You can do this: On Windows, using the
telnet [ip- ESP8266]
command.
On Linux it will be a little more difficult:
The
telnet [ip- ESP8266]
command
telnet [ip- ESP8266]
next you need to press the control character, by default “Ctrl +]”, telnet should go into command mode, then press “l” and “Enter”. With these actions we will switch the telnet to the character mode.
$ telnet 192.168.***.*** Trying 192.168.***.***... Connected to 192.168.***.***. Escape character is '^]'. ^] telnet> l
Everything is ready, we can check the operation of the device created by us. Let me remind you of the possible combinations for pressing "Alt + Tab", "Ctrl + Alt + Del" and other can look in the sketch. That's all, the third incarnation of DIY IP KVM'a is ready.
Let's sum up
Pros:
- Probably the most important plus is the price, it turned out to meet the 2000 rubles.
- The quality of the video is now no complaints should be, no problem, you can stream up to Full HD
- The ability to expand functionality by adding up to four relays or other actuators.
Minuses:
- The need to connect via Wi-Fi and Lan cable
- When used with VGA, an adapter is needed, which naturally affects the cost
In general, the device turned out to be worthy of attention, of course, it is not a competitor to serial IP KVMs with all their “buns”, but it greatly benefits in price. And for home use, and maybe not only, it is quite suitable.
I take this opportunity to thank the user DaylightIsBurning ! This kind man suggested the right direction in which to dig.
Thank you for attention. See you again!
All Articles