はじめに
機械学習(ML)に対する私の情熱の初期の経験を思い出して、私は多くの努力が本当に良いモデルを構築することに費やされたと言うことができます。 モデルの改善方法を理解するためにこの分野の専門家と相談し、必要な機能について考え、提案したすべてのヒントが考慮されるようにしました。 しかし、それでも問題が発生しました。
実際のプロジェクトにモデルを実装する方法は? このスコアについてはアイデアがありませんでした。 ここまで研究したすべての文献は、モデルの改善のみに焦点を当てていました。 私は彼らの開発の次のステップを見ませんでした。

それが、私が今このガイドを書いている理由です。 私の時代に遭遇した問題に直面してほしいのですが、すぐに解決できました。 この記事の終わりまでに、PythonのFlaskフレームワークを使用して機械学習モデルを実装する方法を紹介します。
内容
- 機械学習モデルの実装オプション。
- APIとは何ですか?
- Python環境のインストールとFlaskに関する基本情報。
- 機械学習モデルの作成。
- 機械学習モデルの保存:シリアル化と逆シリアル化。
- Flaskを使用してAPIを作成します。
機械学習モデルの実装オプション。
ほとんどの場合、機械学習モデルの実際の使用は、自動化された電子メール配信システムまたはチャットボットのほんの小さなコンポーネントであっても、開発の中心的な部分です。 実装の障壁が乗り越えられないと思われる場合があります。
たとえば、ほとんどのML専門家は科学研究にRまたはPythonを使用します。 ただし、まったく異なるテクノロジースタックを使用するソフトウェアエンジニアは、これらのモデルを使用します。 この問題を解決できる2つのオプションがあります。
オプション1:開発エンジニアが使用する言語ですべてのコードを書き換えます。 ある程度論理的に聞こえますが、開発されたモデルを複製するには多くの時間と労力がかかります。 最終的には、時間の無駄になります。 JavaScriptなどのほとんどの言語には、MLを操作するのに便利なライブラリがありません。 したがって、このオプションを使用しないのは合理的なソリューションです。
オプション2:APIを使用します。 ネットワークAPIは、異なる言語のアプリケーションを扱う問題を解決しました。 フロントエンドの開発者が機械学習モデルを使用してWebアプリケーションを作成する必要がある場合、APIについて説明している宛先サーバーのURLを取得するだけで済みます。
APIとは何ですか?
簡単に言えば、API(アプリケーションプログラミングインターフェース)は2つのプログラム間の一種のコントラクトであり、ユーザープログラムが特定の形式で入力データを提供する場合、開発者のプログラム(API)はそれを通過させ、ユーザーに必要な出力データを提供します。
APIが開発者の間で非常に人気のある選択肢である理由をよく説明している記事を自分で読むことができます。
ほとんどの大規模なクラウドサービスプロバイダーと、小規模で機械に焦点を当てた集中学習企業は、すぐに使用できるAPIを提供しています。 彼らは機械学習を理解していないが、このテクノロジーをソリューションに統合したい開発者のニーズを満たしています。
たとえば、これらのAPIプロバイダーの1つは、 Google Vision APIを備えたGoogleです。
開発者が行う必要があるのは、Googleが提供するSDKを使用してREST(Representational State Transfer)APIを呼び出すだけです。 Google Vision APIを使用してできることをご覧ください。
いいですね。 この記事では、PythonフレームワークであるFlaskを使用して独自のAPIを作成する方法を説明します。
注 :Flaskは、この目的のための唯一のネットワークフレームワークではありません。 また、Django、Falcon、Hug、およびこの記事で言及されていない他の多くのものもあります。 たとえば、Rにはplumberというパッケージがあります
Python環境のインストールとFlaskに関する基本情報。
1)Anacondaを使用して仮想環境を作成します。 Python用の独自の仮想環境を作成し、依存関係の必要な状態を維持する必要がある場合、Anacondaはこのための優れたソリューションを提供します。 次はコマンドラインで動作します。
- Python用のminicondaインストーラーがあります。
wget https://repo.continuum.io/miniconda/Miniconda3-latest-Linux-x86_64.sh
-
bash Miniconda3-latest-Linux-x86_64.sh
- 一連の質問に従います。
-
source .bashrc
-
conda
と入力すると、使用可能なコマンドとヘルプのリストが表示されます。 - 新しい環境を作成するには、次を入力します
conda create --name <environment-name> python=3.6
- 指示される手順に従い、最後に次を入力します
source activate <environment-name>
- 必要なPythonパッケージをインストールします。 最も重要なのは、 フラスコとgunicornです。
2) gunicornを使用して、シンプルな「Hello world」Flaskアプリケーションを作成しようとします。
- お気に入りのテキストエディターを開き、フォルダーに
hello-world.py
ファイルを作成します - 次のコードを記述します。
"""Filename: hello-world.py """ from flask import Flask app = Flask(__name__) @app.route('/users/<string:username>') def hello_world(username=None): return("Hello {}!".format(username))
- ファイルを保存して、ターミナルに戻ります。
- APIを開始するには、ターミナルで実行します:
gunicorn --bind 0.0.0.0:8000 hello-world:app
- 以下が得られれば、あなたは正しい軌道に乗っています。

- ブラウザで、次を入力します
https://localhost:8000/users/any-name

やった! 初めてのFlaskプログラムを作成しました! これらの簡単な手順の経験があるため、ローカルにアクセスできるネットワークエンドポイントを作成できます。
Flaskを使用すると、モデルをラップしてWeb APIとして使用できます。 より複雑なネットワークアプリケーション(JavaScriptなど)を作成する場合は、いくつかの変更を追加する必要があります。
機械学習モデルの作成。
import os import json import numpy as np import pandas as pd from sklearn.externals import joblib from sklearn.model_selection import train_test_split, GridSearchCV from sklearn.base import BaseEstimator, TransformerMixin from sklearn.ensemble import RandomForestClassifier from sklearn.pipeline import make_pipeline import warnings warnings.filterwarnings("ignore")
- データセットをフォルダーに保存します。
!ls /home/pratos/Side-Project/av_articles/flask_api/data/
test.csv training.csv
data = pd.read_csv('../data/training.csv')
list(data.columns)
['Loan_ID', 'Gender', 'Married', 'Dependents', 'Education', 'Self_Employed', 'ApplicantIncome', 'CoapplicantIncome', 'LoanAmount', 'Loan_Amount_Term', 'Credit_History', 'Property_Area', 'Loan_Status']
data.shape
(614, 13)
ul>
列でnull / Nan値を見つけます。
for _ in data.columns: print("The number of null values in:{} == {}".format(_, data[_].isnull().sum()))
The number of null values in:Loan_ID == 0 The number of null values in:Gender == 13 The number of null values in:Married == 3 The number of null values in:Dependents == 15 The number of null values in:Education == 0 The number of null values in:Self_Employed == 32 The number of null values in:ApplicantIncome == 0 The number of null values in:CoapplicantIncome == 0 The number of null values in:LoanAmount == 22 The number of null values in:Loan_Amount_Term == 14 The number of null values in:Credit_History == 50 The number of null values in:Property_Area == 0 The number of null values in:Loan_Status == 0
- 次のステップは、トレーニングとテスト用のデータセットを作成することです。
red_var = ['Gender','Married','Dependents','Education','Self_Employed','ApplicantIncome','CoapplicantIncome',\ 'LoanAmount','Loan_Amount_Term','Credit_History','Property_Area'] X_train, X_test, y_train, y_test = train_test_split(data[pred_var], data['Loan_Status'], \ test_size=0.25, random_state=42)
- 実験の後でもすべての前処理ステップが正しく完了し、予測中に何も見落とさないようにするために、前処理用の独自のScikit-learnエバリュエーター(前処理Scikit-learnエスティメーター)を作成します。
作成方法を理解するには、 以下をお読みください。
from sklearn.base import BaseEstimator, TransformerMixin class PreProcessing(BaseEstimator, TransformerMixin): """Custom Pre-Processing estimator for our use-case """ def __init__(self): pass def transform(self, df): """Regular transform() that is a help for training, validation & testing datasets (NOTE: The operations performed here are the ones that we did prior to this cell) """ pred_var = ['Gender','Married','Dependents','Education','Self_Employed','ApplicantIncome',\ 'CoapplicantIncome','LoanAmount','Loan_Amount_Term','Credit_History','Property_Area'] df = df[pred_var] df['Dependents'] = df['Dependents'].fillna(0) df['Self_Employed'] = df['Self_Employed'].fillna('No') df['Loan_Amount_Term'] = df['Loan_Amount_Term'].fillna(self.term_mean_) df['Credit_History'] = df['Credit_History'].fillna(1) df['Married'] = df['Married'].fillna('No') df['Gender'] = df['Gender'].fillna('Male') df['LoanAmount'] = df['LoanAmount'].fillna(self.amt_mean_) gender_values = {'Female' : 0, 'Male' : 1} married_values = {'No' : 0, 'Yes' : 1} education_values = {'Graduate' : 0, 'Not Graduate' : 1} employed_values = {'No' : 0, 'Yes' : 1} property_values = {'Rural' : 0, 'Urban' : 1, 'Semiurban' : 2} dependent_values = {'3+': 3, '0': 0, '2': 2, '1': 1} df.replace({'Gender': gender_values, 'Married': married_values, 'Education': education_values, \ 'Self_Employed': employed_values, 'Property_Area': property_values, \ 'Dependents': dependent_values}, inplace=True) return df.as_matrix() def fit(self, df, y=None, **fit_params): """Fitting the Training dataset & calculating the required values from train eg: We will need the mean of X_train['Loan_Amount_Term'] that will be used in transformation of X_test """ self.term_mean_ = df['Loan_Amount_Term'].mean() self.amt_mean_ = df['LoanAmount'].mean() return self
-
y_train
およびy_test
をnp.array
変換しnp.array
。
y_train = y_train.replace({'Y':1, 'N':0}).as_matrix() y_test = y_test.replace({'Y':1, 'N':0}).as_matrix()
パイプラインを作成して、実行するすべての前処理ステップがscikit-learn評価者の作業であることを確認してみましょう。
pipe = make_pipeline(PreProcessing(), RandomForestClassifier())
pipe
Pipeline(memory=None, steps=[('preprocessing', PreProcessing()), ('randomforestclassifier', RandomForestClassifier(bootstrap=True, class_weight=None, criterion='gini', max_depth=None, max_features='auto', max_leaf_nodes=None, min_impurity_decrease=0.0, min_impurity_split=None, min_samples_leaf=1, min_samples_split=2, min_weight_fraction_leaf=0.0, n_estimators=10, n_jobs=1, oob_score=False, random_state=None, verbose=0, warm_start=False))])
適切なハイパーパラメーター(多項式オブジェクトの次数とエッジのアルファ)を検索するには、グリッド検索(グリッド検索)を実行します。
- param_gridを定義します。
param_grid = {"randomforestclassifier__n_estimators" : [10, 20, 30], "randomforestclassifier__max_depth" : [None, 6, 8, 10], "randomforestclassifier__max_leaf_nodes": [None, 5, 10, 20], "randomforestclassifier__min_impurity_split": [0.1, 0.2, 0.3]}
- グリッド検索を開始します。
grid = GridSearchCV(pipe, param_grid=param_grid, cv=3)
- パイプライン推定器のトレーニングデータを調整します。
grid.fit(X_train, y_train)
GridSearchCV(cv=3, error_score='raise', estimator=Pipeline(memory=None, steps=[('preprocessing', PreProcessing()), ('randomforestclassifier', RandomForestClassifier(bootstrap=True, class_weight=None, criterion='gini', max_depth=None, max_features='auto', max_leaf_nodes=None, min_impurity_decrease=0.0, min_impu..._jobs=1, oob_score=False, random_state=None, verbose=0, warm_start=False))]), fit_params=None, iid=True, n_jobs=1, param_grid={'randomforestclassifier__n_estimators': [10, 20, 30], 'randomforestclassifier__max_leaf_nodes': [None, 5, 10, 20], 'randomforestclassifier__min_impurity_split': [0.1, 0.2, 0.3], 'randomforestclassifier__max_depth': [None, 6, 8, 10]}, pre_dispatch='2*n_jobs', refit=True, return_train_score=True, scoring=None, verbose=0)
- グリッド検索が選択したパラメーターを見てみましょう。
print("Best parameters: {}".format(grid.best_params_))
Best parameters: {'randomforestclassifier__n_estimators': 30, 'randomforestclassifier__max_leaf_nodes': 20, 'randomforestclassifier__min_impurity_split': 0.2, 'randomforestclassifier__max_depth': 8}
- 計算:
print("Validation set score: {:.2f}".format(grid.score(X_test, y_test)))
Validation set score: 0.79
- テストスイートをダウンロードします。
test_df = pd.read_csv('../data/test.csv', encoding="utf-8-sig") test_df = test_df.head()
grid.predict(test_df)
array([1, 1, 1, 1, 1])
パイプラインは、次の重要なステップである機械学習モデルのシリアル化に進むのに十分なようです。
機械学習モデルの保存:シリアル化と逆シリアル化。
「コンピューターサイエンスでは、データストレージのコンテキストで、シリアル化とは、データ構造またはオブジェクトの状態を保存された形式(たとえば、ファイルまたはメモリバッファー)に変換し、後で同じまたは別のコンピューター環境で再構築するプロセスです。」
Pythonでは、オブジェクトを保存し、後で元の状態で取得するための標準的な方法は、酸洗いです。 わかりやすくするために、簡単な例を示します。
list_to_pickle = [1, 'here', 123, 'walker'] #Pickling the list import pickle list_pickle = pickle.dumps(list_to_pickle)
list_pickle
b'\x80\x03]q\x00(K\x01X\x04\x00\x00\x00hereq\x01K{X\x06\x00\x00\x00walkerq\x02e.'
次に、缶詰オブジェクトを再度アンロードします。
loaded_pickle = pickle.loads(list_pickle)
loaded_pickle
[1, 'here', 123, 'walker']
缶詰のオブジェクトをファイルに保存して使用できます。 この方法は、Rプログラミングなどの
.rda
ファイルの作成に似ています。
注:シリアル化のためのこの保存方法が気に入らない人もいます。 代わりに
h5py
使用できます。
カスタムクラス(クラス)があり、トレーニングの進行中にインポートする必要があるため、
dill
モジュールを使用してクラスエバリュエーターをグリッドオブジェクトにパッケージ化します。
モデルをトレーニングするためのすべてのコードを含む個別の
training.py
ファイルを作成することをお勧めします。 (例はこちらにあります )。
-
dill
をインストールする
!pip install dill
Requirement already satisfied: dill in /home/pratos/miniconda3/envs/ordermanagement/lib/python3.5/site-packages
import dill as pickle filename = 'model_v1.pk'
with open('../flask_api/models/'+filename, 'wb') as file: pickle.dump(grid, file)
モデルは上記で選択したディレクトリに保存されます。 モデルを一時停止すると、Flaskラッパーでラップできます。 ただし、この前に、缶詰ファイルが機能することを確認する必要があります。 それをロードして、予測を行いましょう。
with open('../flask_api/models/'+filename ,'rb') as f: loaded_model = pickle.load(f)
loaded_model.predict(test_df)
array([1, 1, 1, 1, 1])
前処理手順に従って、新しく到着したデータがパイプラインの一部になるようにしたので、単にpredict()を実行する必要があります。 scikit-learnライブラリを使用すると、パイプラインを簡単に操作できます。 最初の実装がワイルドに思えても、鑑定士とパイプラインがあなたの時間と神経の世話をします。
Flaskを使用してAPIを作成する
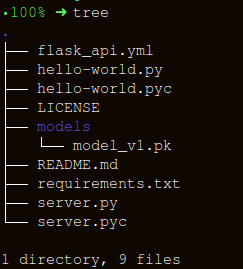
フォルダ構造をできる限りシンプルにしましょう。
ラッパー
apicall()
関数を作成するには、3つの重要な部分があります。
-
request
データの受信(予測が行われる); - 缶詰の鑑定士をロードします。
- JSON形式での予測の翻訳と応答
status code: 200
受信status code: 200
;
HTTPメッセージは、ヘッダーと本文から作成されます。 一般に、本文のコンテンツはJSON形式で送信されます。 予測を受信するためのパッケージとして、受信データを(
POST url-endpoint/
)送信します。
注:形式の互換性のために、プレーンテキスト、XML、cvs、または画像を直接送信できますが、この場合はJSONを使用することをお勧めします。
"""Filename: server.py """ import os import pandas as pd from sklearn.externals import joblib from flask import Flask, jsonify, request app = Flask(__name__) @app.route('/predict', methods=['POST']) def apicall(): """API Call Pandas dataframe (sent as a payload) from API Call """ try: test_json = request.get_json() test = pd.read_json(test_json, orient='records') #To resolve the issue of TypeError: Cannot compare types 'ndarray(dtype=int64)' and 'str' test['Dependents'] = [str(x) for x in list(test['Dependents'])] #Getting the Loan_IDs separated out loan_ids = test['Loan_ID'] except Exception as e: raise e clf = 'model_v1.pk' if test.empty: return(bad_request()) else: #Load the saved model print("Loading the model...") loaded_model = None with open('./models/'+clf,'rb') as f: loaded_model = pickle.load(f) print("The model has been loaded...doing predictions now...") predictions = loaded_model.predict(test) """Add the predictions as Series to a new pandas dataframe OR Depending on the use-case, the entire test data appended with the new files """ prediction_series = list(pd.Series(predictions)) final_predictions = pd.DataFrame(list(zip(loan_ids, prediction_series))) """We can be as creative in sending the responses. But we need to send the response codes as well. """ responses = jsonify(predictions=final_predictions.to_json(orient="records")) responses.status_code = 200 return (responses)
実行後、次を入力します:
gunicorn --bind 0.0.0.0:8000 server:app
https:0.0.0.0:8000/predict
APIのローカル起動の予測とキューのデータを生成しましょう
import json import requests
"""Setting the headers to send and accept json responses """ header = {'Content-Type': 'application/json', \ 'Accept': 'application/json'} """Reading test batch """ df = pd.read_csv('../data/test.csv', encoding="utf-8-sig") df = df.head() """Converting Pandas Dataframe to json """ data = df.to_json(orient='records')
data
'[{"Loan_ID":"LP001015","Gender":"Male","Married":"Yes","Dependents":"0","Education":"Graduate","Self_Employed":"No","ApplicantIncome":5720,"CoapplicantIncome":0,"LoanAmount":110.0,"Loan_Amount_Term":360.0,"Credit_History":1.0,"Property_Area":"Urban"},{"Loan_ID":"LP001022","Gender":"Male","Married":"Yes","Dependents":"1","Education":"Graduate","Self_Employed":"No","ApplicantIncome":3076,"CoapplicantIncome":1500,"LoanAmount":126.0,"Loan_Amount_Term":360.0,"Credit_History":1.0,"Property_Area":"Urban"},{"Loan_ID":"LP001031","Gender":"Male","Married":"Yes","Dependents":"2","Education":"Graduate","Self_Employed":"No","ApplicantIncome":5000,"CoapplicantIncome":1800,"LoanAmount":208.0,"Loan_Amount_Term":360.0,"Credit_History":1.0,"Property_Area":"Urban"},{"Loan_ID":"LP001035","Gender":"Male","Married":"Yes","Dependents":"2","Education":"Graduate","Self_Employed":"No","ApplicantIncome":2340,"CoapplicantIncome":2546,"LoanAmount":100.0,"Loan_Amount_Term":360.0,"Credit_History":null,"Property_Area":"Urban"},{"Loan_ID":"LP001051","Gender":"Male","Married":"No","Dependents":"0","Education":"Not Graduate","Self_Employed":"No","ApplicantIncome":3276,"CoapplicantIncome":0,"LoanAmount":78.0,"Loan_Amount_Term":360.0,"Credit_History":1.0,"Property_Area":"Urban"}]'
"""POST <url>/predict """ resp = requests.post("http://0.0.0.0:8000/predict", \ data = json.dumps(data),\ headers= header)
resp.status_code
200
"""The final response we get is as follows: """ resp.json()
{'predictions': '[{"0":"LP001015","1":1},{...
おわりに
この記事では、予測を提供する実用的なAPIを作成する途中で、MLソリューションを開発済みアプリケーションに直接統合することに一歩近づきました。 製品のプロトタイピングに役立ち、製品を真に機能させるのに役立つ非常にシンプルなAPIを作成しましたが、製品を製品に送信するには、機械学習の分野ではなくなった調整を行う必要があります。
APIを作成する際に留意すべき点がいくつかあります。
- スパゲッティコードから高品質のAPIを作成することはほとんど不可能であるため、機械学習の知識を活用して、便利で便利なAPIを作成します。
- モデルとAPIコードのバージョン管理を使用してみてください。 Flaskはバージョン管理ツールのサポートを提供しないことに注意してください。 MLモデルの保存と追跡は困難な作業であり、便利な方法を見つけてください。 これを行う方法について説明している記事がここにあります。
- scikit-learnモデルの仕様により、エバリュエーターとトレーニングコードが隣接していることを確認する必要があります(前処理または他の同様のタスクにカスタムエバリュエーターを使用している場合)。 したがって、既定のモデルには、その横にクラスエバリュエーターがあります。
次の論理的なステップは、そのようなAPIを小さな仮想マシンにデプロイするためのメカニズムを作成することです。 これにはさまざまな方法がありますが、次の記事でそれらを取り上げます。
この記事のコードと説明
有用なソース:
[1] データをピクルスにしないでください。
[2] Scikit Learn互換トランスフォーマーの構築 。
[3] Flaskでのjsonifyの使用 。
[4] Flask-QuickStart。
こちらがそのような資料です。 この出版物が気に入ったら、私たちを購読し、5年の経験を持つ開発者およびデータ科学者-Alexander Nikitinが 3月12日に開催するトピック「Metric Classification Algorithms」に関する無料のオープンウェビナーにサインアップします。