ネットワークから同じデータをロードすることは実用的ではないため、ユーザーにとってデータの保存は非常に重要です。 ローカルに保存する方が賢明です。
この記事では、Flutter-eでSQLiteを使用してこれを行う方法を示します。
なぜSQLiteなのか?
SQLiteは、モバイルデバイスにデータを保存する最も一般的な方法です。 この記事では、sqfliteパッケージを使用してSQLiteを使用します。 Sqfliteは、SQLiteデータベースをFlutterに接続するために最も一般的に使用される関連ライブラリの1つです。
1.依存関係を追加する
このプロジェクトでは、 pubspec.yamlファイルを開きます。 依存関係の下に、sqfliteとpath_providerの最新バージョンを追加します。
dependencies: flutter: sdk: flutter sqflite: any path_provider: any
2. DBクライアントを作成する
次に、新しいDatabase.dartファイルを作成します。 その中で、シングルトンを作成します。
シングルトンが必要な理由:このパターンを使用して、クラスエンティティが1つだけであることを確認し、グローバルエントリポイントを提供します。
1.このクラス内でのみ使用できるプライベートコンストラクターを作成します。
class DBProvider { DBProvider._(); static final DBProvider db = DBProvider._(); }
2.データベースをセットアップする
次のステップでは、データベースオブジェクトを作成し、まだ作成されていない場合はデータベースオブジェクトを作成するゲッターを提供します(遅延初期化)
static Database _database; Future<Database> get database async { if (_database != null) return _database; // if _database is null we instantiate it _database = await initDB(); return _database; }
データベースにオブジェクトが割り当てられていない場合は、initDB関数を呼び出してデータベースを作成します。 この関数では、データベースを保存し、目的のテーブルを作成するためのパスを取得します
initDB() async { Directory documentsDirectory = await getApplicationDocumentsDirectory(); String path = join(documentsDirectory.path, "TestDB.db"); return await openDatabase(path, version: 1, onOpen: (db) { }, onCreate: (Database db, int version) async { await db.execute("CREATE TABLE Client (" "id INTEGER PRIMARY KEY," "first_name TEXT," "last_name TEXT," "blocked BIT" ")"); }); }
3.モデルクラスを作成する
データベース内のデータはDart Mapsに変換されます。 toMapメソッドとfromMapメソッドを使用してモデルクラスを作成する必要があります。
モデルクラスを作成するには、このサイトを使用します
私たちのモデル:
/// ClientModel.dart import 'dart:convert'; Client clientFromJson(String str) { final jsonData = json.decode(str); return Client.fromJson(jsonData); } String clientToJson(Client data) { final dyn = data.toJson(); return json.encode(dyn); } class Client { int id; String firstName; String lastName; bool blocked; Client({ this.id, this.firstName, this.lastName, this.blocked, }); factory Client.fromJson(Map<String, dynamic> json) => new Client( id: json["id"], firstName: json["first_name"], lastName: json["last_name"], blocked: json["blocked"], ); Map<String, dynamic> toJson() => { "id": id, "first_name": firstName, "last_name": lastName, "blocked": blocked, }; }
4. CRUD操作
作成する
rawInsertの使用:
newClient(Client newClient) async { final db = await database; var res = await db.rawInsert( "INSERT Into Client (id,first_name)" " VALUES (${newClient.id},${newClient.firstName})"); return res; }
挿入の使用:
newClient(Client newClient) async { final db = await database; var res = await db.insert("Client", newClient.toMap()); return res; }
新しいIDとして大きなIDを使用する別の例
newClient(Client newClient) async { final db = await database; //get the biggest id in the table var table = await db.rawQuery("SELECT MAX(id)+1 as id FROM Client"); int id = table.first["id"]; //insert to the table using the new id var raw = await db.rawInsert( "INSERT Into Client (id,first_name,last_name,blocked)" " VALUES (?,?,?,?)", [id, newClient.firstName, newClient.lastName, newClient.blocked]); return raw; }
読む
IDでクライアントを取得
getClient(int id) async { final db = await database; var res =await db.query("Client", where: "id = ?", whereArgs: [id]); return res.isNotEmpty ? Client.fromMap(res.first) : Null ; }
条件を持つすべてのクライアントを取得する
getAllClients() async { final db = await database; var res = await db.query("Client"); List<Client> list = res.isNotEmpty ? res.map((c) => Client.fromMap(c)).toList() : []; return list; }
ブロックされた顧客のみを取得する
getBlockedClients() async { final db = await database; var res = await db.rawQuery("SELECT * FROM Client WHERE blocked=1"); List<Client> list = res.isNotEmpty ? res.toList().map((c) => Client.fromMap(c)) : null; return list; }
更新する
既存のクライアントを更新する
updateClient(Client newClient) async { final db = await database; var res = await db.update("Client", newClient.toMap(), where: "id = ?", whereArgs: [newClient.id]); return res; }
クライアントのロック/ロック解除
blockOrUnblock(Client client) async { final db = await database; Client blocked = Client( id: client.id, firstName: client.firstName, lastName: client.lastName, blocked: !client.blocked); var res = await db.update("Client", blocked.toMap(), where: "id = ?", whereArgs: [client.id]); return res; }
削除する
1つのクライアントを削除する
deleteClient(int id) async { final db = await database; db.delete("Client", where: "id = ?", whereArgs: [id]); }
すべてのクライアントを削除
deleteAll() async { final db = await database; db.rawDelete("Delete * from Client"); }
デモ

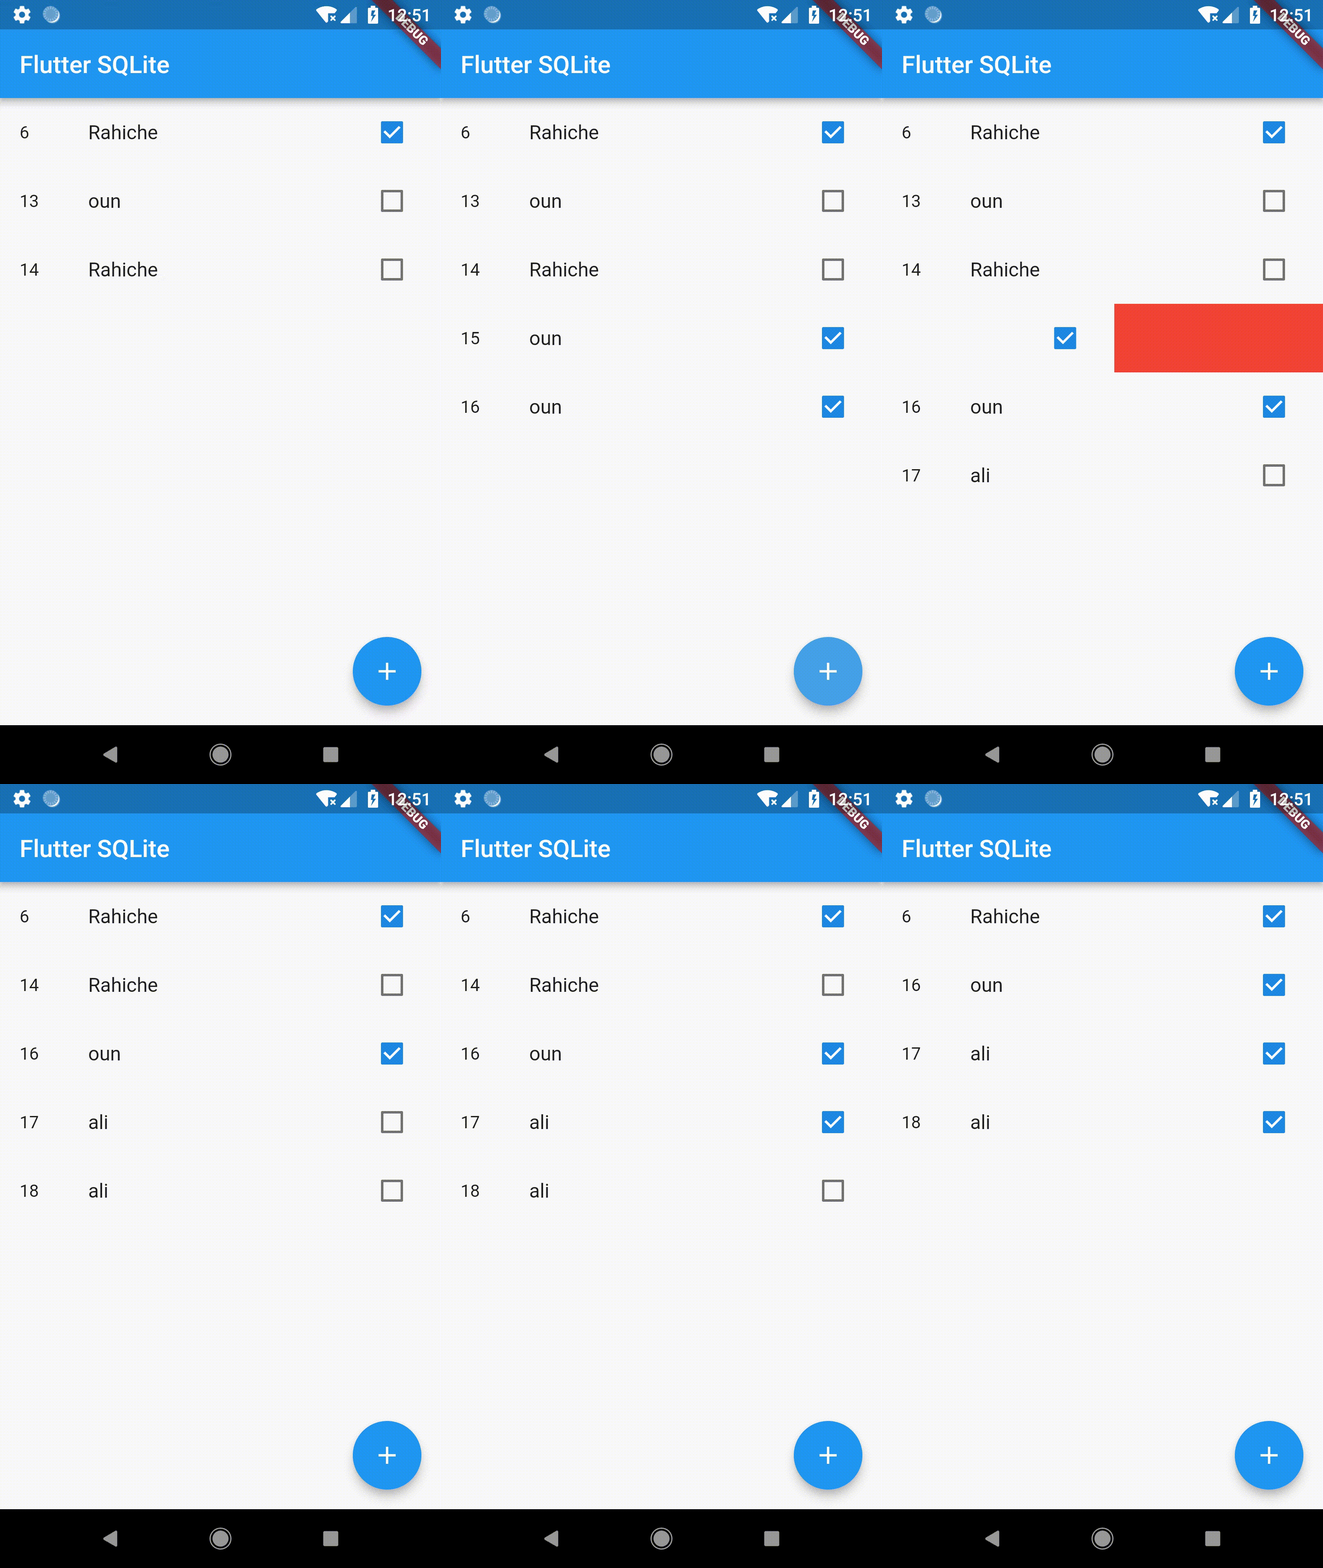
デモでは、データベースを表示する簡単なアプリケーションを作成します。
まず、画面を構成します
Widget build(BuildContext context) { return Scaffold( appBar: AppBar(title: Text("Flutter SQLite")), body: FutureBuilder<List<Client>>( future: DBProvider.db.getAllClients(), builder: (BuildContext context, AsyncSnapshot<List<Client>> snapshot) { if (snapshot.hasData) { return ListView.builder( itemCount: snapshot.data.length, itemBuilder: (BuildContext context, int index) { Client item = snapshot.data[index]; return ListTile( title: Text(item.lastName), leading: Text(item.id.toString()), trailing: Checkbox( onChanged: (bool value) { DBProvider.db.blockClient(item); setState(() {}); }, value: item.blocked, ), ); }, ); } else { return Center(child: CircularProgressIndicator()); } }, ), floatingActionButton: FloatingActionButton( child: Icon(Icons.add), onPressed: () async { Client rnd = testClients[math.Random().nextInt(testClients.length)]; await DBProvider.db.newClient(rnd); setState(() {}); }, ), ); }
注:
1. FutureBuilderは、データベースからデータを取得するために使用されます
2.テストクライアントを初期化するFAB
List<Client> testClients = [ Client(firstName: "Raouf", lastName: "Rahiche", blocked: false), Client(firstName: "Zaki", lastName: "oun", blocked: true), Client(firstName: "oussama", lastName: "ali", blocked: false), ];
3.データがない場合、CircularProgressIndicatorが表示されます。
4.ユーザーがチェックボックスをクリックすると、クライアントはブロック/ロック解除されます
新しい機能を追加するのは非常に簡単です。たとえば、スワイプしたときにクライアントを削除する場合は、次のようにListTileをDismissibleウィジェットでラップするだけです。
return Dismissible( key: UniqueKey(), background: Container(color: Colors.red), onDismissed: (direction) { DBProvider.db.deleteClient(item.id); }, child: ListTile(...), );

BLoCパターンを使用するためのリファクタリング
この記事では多くのことを行いましたが、実際のアプリケーションでは、UIレイヤーで状態を初期化することはお勧めできません。 ロジックをUIから分離します。
Flutterには多くのパターンがありますが、カスタマイズに最も柔軟なBLoCを使用します。
BLoCを作成する
class ClientsBloc { ClientsBloc() { getClients(); } final _clientController = StreamController<List<Client>>.broadcast(); get clients => _clientController.stream; dispose() { _clientController.close(); } getClients() async { _clientController.sink.add(await DBProvider.db.getAllClients()); } }
注:
注:
1. getClientsは、データベース(クライアントテーブル)から非同期にデータを受信します。 テーブルを更新する必要があるときはいつでもこのメソッドを使用するため、コンストラクタの本体に配置する価値があります。
2.ブロードキャストイベントを複数回リッスンするためにStreamController.broadcastを作成しました。 この例では、耳を傾けるのは一度だけなので、これは実際には重要ではありませんが、将来これを実装することをお勧めします。
3.スレッドを閉じることを忘れないでください。 このようにして、記念を防ぎます。 この例では、StatefulWidgetのdisposeメソッドを使用してそれらを閉じます
今、コードを見てください
blockUnblock(Client client) { DBProvider.db.blockOrUnblock(client); getClients(); } delete(int id) { DBProvider.db.deleteClient(id); getClients(); } add(Client client) { DBProvider.db.newClient(client); getClients(); }
そして最終的に最終結果

ソースはここにあります-Github