はじめに
このガイドは主に、Dockerで実行されるUbuntuイメージを使用するリモートサーバーとして、展開の基本を学び、リモートUNIXシステムでローカルに作業するためのアルゴリズムに精通したい初心者を対象としています。
ミーナとは? これは、リモートサーバー上で操作を展開および自動化するためのツールであり、まず第一に、このソリューションの利点は実行速度です。 Minaは、deploy.rbファイルからリモートサーバーで生成され、その後実行されるbashスクリプトをデプロイするため、非常に高速に動作します。
たとえば、カピストラーノは、sshセッションで各コマンドを個別に実行するため、速度が劣る場合があり、minaは1つのセッションのみを必要とする1つのbashスクリプトですべてを実行します。
必要条件
このガイドでは、Ubuntuを使用しており、次のソフトウェアが既にインストールされていることを前提としています。
Railsアプリケーションの準備
Railsアプリケーションを作成する手順については詳しく検討しません。最適なオプションは、デプロイする独自のアプリケーションを用意することです。 または、テストケースgithub.com/rails-guides/mina-deploy-exampleを使用できます
SSH / Rbenv / Ruby&Railsをインストールします
これで、Dockerがインストールされ、Ubuntuのイメージが作成されました。 すべてが正しく行われている場合、docker imagesコマンドを呼び出すと、次の情報が表示されます。
root@root:~$ docker images | grep ubuntu ubuntu latest 0ef2e08ed3fa 6 weeks ago 130MB
コンソールで次の一連の操作を開始します。
docker run -d -it -p 2222:22 ubuntu:16.04 docker ps // container_id docker attach container_id
最初のコマンドは、バックグラウンドでUbuntuイメージを起動し、ssh接続用のポートを開きます。 次に、一意のコンテナ識別子を使用して、アタッチを介してシステムに接続します。
rootとしてログインした後、最新の更新を取得し、sshサーバーをインストールして起動する必要があります。
apt-get update apt-get install openssh-server service ssh start
ユーザーシステムにデプロイヤーを追加し、minaを設定するときに使用します。
adduser deployer
システムはいくつかのデータ(first_nameなど)を入力するように要求しますが、これらの手順はスキップできます。 パスワードとして123を使用し、次にssh経由で接続して、すべてが正しく行われることを確認します。
ssh -p 2222 deployer@0.0.0.0
! 「警告:リモートホストの識別が変更されました」という警告が表示される場合
指定されたソケット(0.0.0.0:2222)でknown_hostファイルからキーを削除します。
ssh-keygen -f "/home/USER/.ssh/known_hosts" -R [0.0.0.0]:2222
その後、再接続すると、次が表示されます。
deployer@e2cad98fb69d:~$
SSHは正常に動作します。 rootユーザーに戻り、rbenv / ruby / railsをインストールする必要があります。 まず、rbenvをインストールするにはgitが必要です。
apt-get install git
公式のインストールドキュメントの手順に従ってください。
github.com/rbenv/rbenv#installation
rubyを使用するには、次のライブラリをプレインストールする必要があります。
apt-get install bzip2 apt-get install -y libssl-dev libreadline-dev zlib1g-dev apt-get install build-essential
rubyバージョン2.3.1とRoR 4.2.7.1が必要です。 Rubyバージョンをグローバルに定義することを忘れないでください。
rbenv install -v 2.3.1 rbenv global 2.3.1 gem install rails -v 4.2.7.1
Postgres / Nginxのインストール
apt-get install postgresql postgresql-contrib service postgresql start
postgresユーザーのパスワードを定義します(すべて同じ123)
su - postgres psql \password create database mina_deploy_example; //
Nginxは、Unixのようなオペレーティングシステムで実行されるWebサーバーおよびメールプロキシサーバーです。
apt-get install nginx
インストール後、構成ファイルを次のように変更します。
nano /etc/nginx/sites-available/default
upstream mysite { server unix:///home/deployer/mina-deploy-example/shared/tmp/sockets/puma.sock fail_timeout=0; } server { listen 80; listen [::]:80; root /home/deployer/mina-deploy-example/current/public; location ~ ^/assets/ { expires max; gzip_static on; gzip_vary on; add_header Cache-Control public; break; } location ~ ^/system/ { expires max; gzip_static on; gzip_vary on; add_header Cache-Control public; break; } location / { proxy_pass http://mysite; # match the name of upstream directive which is defined above proxy_set_header Host $host; proxy_set_header X-Forwarded-For $proxy_add_x_forwarded_for; } location ~ ^/(500|404|422).html { root /home/deployer/mina-deploy-example/current/public; } error_page 500 502 503 504 /500.html; error_page 404 /404.html; error_page 422 /422.html; client_max_body_size 4G; keepalive_timeout 10; }
Gitリポジトリを構成する
mina経由でデプロイするには、githubでリポジトリを作成し、gitユーザーを設定し、sshキーを生成してリポジトリに追加する必要があります。 例として、githubを使用します
ssh -p 2222 deployer@0.0.0.0 git config --global user.name "Some User" git config --global user.email "someuser@example.com" ssh-keygen -t rsa -b 4096 -C "someuser@example.com" ssh -T git@github.com
公開鍵をコピーします
cat ~/.ssh/id_rsa.pub
GitHub→リポジトリ→設定→左側のキーのデプロイを選択→デプロイキーの追加をクリックして、コピーした値を貼り付けます。
minaでデプロイする
プロジェクトディレクトリに移動し、Gemfileに追加します
gem 'mina' gem 'mina-puma', require: false gem 'mina-nginx', require: false
configフォルダーでdeploy.rbファイルを作成します。これは、アプリケーションをデプロイするときにminaによって使用されます。 構成ファイルは、いくつかの主要部分で構成されています。
require 'mina/bundler' require 'mina/rails' require 'mina/git' require 'mina/rbenv' require 'mina/nginx' require 'mina/puma' set :application_name, 'mina-deploy-example' set :domain, '127.0.0.1' set :port, '2222' set :user, 'deployer' set :shared_dirs, fetch(:shared_dirs, []).push('tmp', 'log', 'public/uploads', 'public/system') set :shared_files, fetch(:shared_files, []).push('config/puma.rb', 'config/database.yml', 'config/secrets.yml') set :deploy_to, '/home/deployer/mina-deploy-example' set :repository, 'git@github.com:rails-guides/mina-deploy-example.git' set :branch, 'master' set :rails_env, 'production'
上部では、依存関係を接続し、bashスクリプトの作成とコマンドの実行に使用するアプリケーションドメイン、ポート、ユーザーを設定します。 shared_dirsとshared_filesで宣言されたファイルとディレクトリにシンボリックリンクが作成されます。
この部分は、mina setupを呼び出すときに実行されるコマンドを定義します。
task :environment do invoke :'rbenv:load' end task setup: :environment do command %{mkdir -p "#{fetch(:shared_path)}/log"} command %{chmod g+rx,u+rwx "#{fetch(:shared_path)}/log"} command %{mkdir -p "#{fetch(:shared_path)}/config"} command %{chmod g+rx,u+rwx "#{fetch(:shared_path)}/config"} command %{touch "#{fetch(:shared_path)}/config/puma.rb"} command %{touch "#{fetch(:shared_path)}/config/database.yml"} command %{touch "#{fetch(:shared_path)}/config/secrets.yml"} command %{mkdir -p "#{fetch(:shared_path)}/tmp/sockets"} command %{chmod g+rx,u+rwx "#{fetch(:shared_path)}/tmp/sockets"} command %{mkdir -p "#{fetch(:shared_path)}/tmp/pids"} command %{chmod g+rx,u+rwx "#{fetch(:shared_path)}/tmp/pids"} end
そして主要な部分は、アプリケーションがデプロイされるたびに実行されるものです。
task deploy: :environment do deploy do invoke :'git:clone' invoke :'deploy:link_shared_paths' on :build do invoke :'bundle:install' invoke :'rails:db_migrate' invoke :'rails:assets_precompile' invoke :'deploy:cleanup' end on :launch do invoke :'puma:restart' end end end
プロジェクトディレクトリのconfigフォルダーで、puma.rbファイルを作成する必要があります。
directory '/home/deployer/mina-deploy-example/current' rackup '/home/deployer/mina-deploy-example/current/config.ru' environment 'production' daemonize true pidfile '/home/deployer/mina-deploy-example/shared/tmp/pids/puma.pid' state_path '/home/deployer/mina-deploy-example/shared/tmp/sockets/puma.state' bind 'unix:///home/deployer/mina-deploy-example/shared/tmp/sockets/puma.sock' activate_control_app 'unix:///home/deployer/mina-deployexample/shared/tmp/sockets/pumactl.sock'
この構成により、サーバーをUNIXソケットにバインドすることにより、バックグラウンドおよび運用環境でサーバーを起動できます。 このリポジトリでpumaをセットアップするためのコマンドの良い説明とgithub.com/puma/puma/blob/master/examples/config.rbの公式ドキュメントを見つけることができます。
フォルダー/ home / deployer / mina-deploy-example / shared / configにdatabase.ymlとsecrets.ymlを作成します
production: host: localhost database: mina_deploy_example adapter: postgresql encoding: unicode username: postgres password: 123
production: secret_key_base: SECRET_KEY_BASE
特定の依存関係がないことをバンドラーが常に誓う方法を確認しないようにするには、次のgemとライブラリをインストールします。
gem install bundler apt-get install ruby-dev gem install json -v '1.8.6' gem install pg -v '0.20.0' apt-get install postgresql postgresql-contrib libpq-dev gem install uglifier apt-get install nodejs apt-get install imagemagick
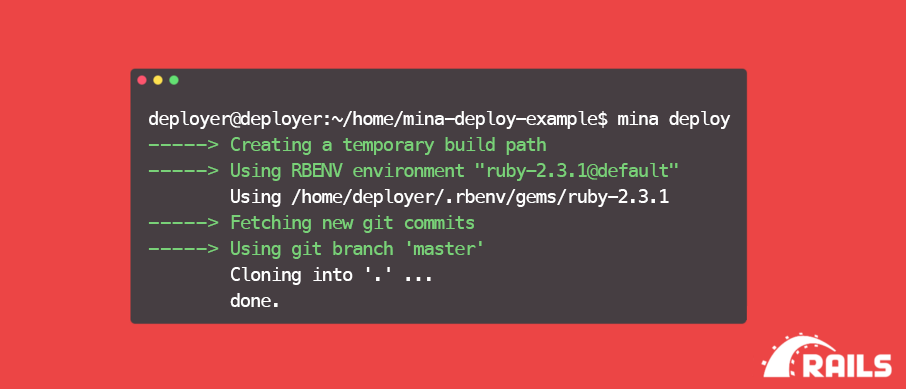
次に、アプリケーションをデプロイしてpumaを実行します
mina deploy mina puma:start
sshトンネルをnginxポートに転送します
sudo ssh -f -N -L 80:localhost:80 deployer@0.0.0.0 -p 2222
アドレスhttp:// localhost:80にアクセスすると、新しい記事が表示されます。 すべての手順が正しく完了すると、新しい記事を作成して画像を追加すると、すべてが正しく表示されます。