はじめに
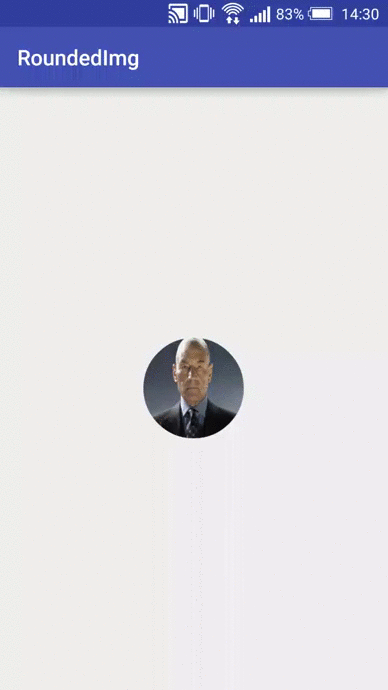
現在、Instagramアプリケーションがインストールされているモバイルデバイスには多くのユーザーがいます。 このアプリケーションには素晴らしい機能があります-お気に入りの画像を共有してください。 そして、あなたが好きな投稿を送りたいユーザーを選択すると、丸いアバターが表示されます。それをクリックすると、アニメーションが表示され、強調表示されます。 この要素の実装を繰り返したかった。
初期段階
android.widget.ImageViewの後継である新しいクラスを作成します。
public class MyView extends ImageView { public MyView(Context context, AttributeSet attrs) { super(context, attrs); } }
Paintオブジェクトを初期化してグラフィックオブジェクトを描画するinit()メソッドを作成します。
public MyView(Context context, AttributeSet attrs) { super(context, attrs); init(); } private void init() { redBorder = new Paint(); redBorder.setAntiAlias(true); redBorder.setColor(Color.RED); redBorder.setStrokeWidth(redStrokeWidth); redBorder.setStyle(Paint.Style.STROKE); imgPaint = new Paint(); imgPaint.setAntiAlias(true); imgPaint.setFilterBitmap(true); imgPaint.setDither(true); }
Paint redBoardオブジェクトは、選択時に表示される赤いフレームを描画します。 setAntiAlias(true)フラグは、アンチエイリアスを提供します。 次に、赤色(setColor(Color.RED))、アウトライン幅setStrokeWidth(redStrokeWidth)、redStrokeWidth通常変数(private int redStrokeWidth = 10;)を設定し、描画スタイルsetStyle(Paint.Style.STROKE)を設定し、グラフィックプリミティブのアウトラインを描画します。
Paint imgPaintオブジェクトは、ユーザーのアバターを丸める役割を果たします。 setFilterBitmap(true)フラグは、フィルタリングが変換中にビットマップに影響を与えることを示します。 setDither(true)フラグは色を滑らかにするために使用され、視覚的なアーティファクトを減らすことができます。
画像変換
必要なすべての変換を実行するイメージを取得します。
@Override protected void onSizeChanged(int w, int h, int oldw, int oldh) { super.onSizeChanged(w, h, oldw, oldh); decrement = (w * decrementFactor)/100; bitmapPosition = decrement /2; Drawable drawable = getDrawable(); if (drawable != null) { Bitmap bitmap = ((BitmapDrawable)drawable).getBitmap(); roundBitmap = getRoundedCroppedBitmap(bitmap, getWidth() - decrement); } else { Bitmap bitmap = BitmapFactory.decodeResource(getResources(), R.mipmap.ic_launcher); roundBitmap = getRoundedCroppedBitmap(bitmap, getWidth() - decrement); } }
なぜなら 強調表示するときは、赤いフレームを描画して画像からインデントする必要があります。この場合、要素の合計サイズの15%になる変数decrementFactorを入力します(private int decrementFactor = 15;)。 つまり 要素自体のサイズはwで、その中の画像は15%小さくなります。 また、イメージを配置するときに使用されるbitmapPosition変数の値を計算します。 画像を確認します。 画像がインストールされている場合は、それに対して変換を行い(getRoundedCroppedBitmap()メソッド)、そうでない場合はロゴを取得します。
getRoundedCroppedBitmap()メソッドは、画像を丸めます。
private Bitmap getRoundedCroppedBitmap(Bitmap bitmap, int radius) { Bitmap finalBitmap = bitmap.createScaledBitmap(bitmap, radius , radius, false); Bitmap output = Bitmap.createBitmap(finalBitmap.getWidth(), finalBitmap.getHeight(), Bitmap.Config.ARGB_8888); Rect rect = new Rect(0, 0, output.getWidth(), output.getHeight()); Canvas canvas = new Canvas(output); canvas.drawCircle( finalBitmap.getWidth() / 2, finalBitmap.getHeight() / 2, finalBitmap.getWidth() / 2, imgPaint); imgPaint.setXfermode(new PorterDuffXfermode(PorterDuff.Mode.SRC_IN)); canvas.drawBitmap(finalBitmap, rect, rect, imgPaint); return output; }
createScaledBitmap()メソッドを使用して、新しい画像を形成するスケーリングされた画像に基づいて画像のサイズを変更します。これはメソッドの結果です。 Rect rectオブジェクトを作成し、それに基づいてビットマップを描画します。 キャンバスを取得し、円を一周し、ペイントオブジェクトのXfermodeモードを変更します。これは、既にペイントされたカラーの上に新しいカラーを適用する方法に影響します。
つまり 画像を必要なサイズに変更しました。 彼らはこの画像の上に円を描き、画像の上に円を重ねて、円の中にあるものが見えるようになると言った。
結果の要素を描画します。
@Override protected void onDraw(Canvas canvas) { canvas.drawBitmap(roundBitmap, bitmapPosition, bitmapPosition, null); if (imgSelected) { canvas.drawCircle(getWidth() / 2, getHeight() / 2, getWidth() / 2 - redStrokeWidth, redBorder); } }
要素がクリックに応答し始めるために、メソッドを再定義します:
@Override public boolean onTouchEvent(MotionEvent event) { switch (event.getAction()) { case MotionEvent.ACTION_DOWN: Animation scale = AnimationUtils.loadAnimation(getContext(), R.anim.scale); startAnimation(scale); break; case MotionEvent.ACTION_UP: imgSelected = !imgSelected; invalidate(); Animation scale2 = AnimationUtils.loadAnimation(getContext(), R.anim.scale_2); startAnimation(scale2); break; } return true; }
押すと、要素がわずかに減少します。 削減するアニメーションを記述するxml-fileをロードします。
<scale xmlns:android="http://schemas.android.com/apk/res/android" android:fromXScale="1.0" android:toXScale="0.9" android:fromYScale="1.0" android:toYScale="0.9" android:duration="200" android:pivotX="50%" android:pivotY="50%" android:fillAfter="true"> </scale>
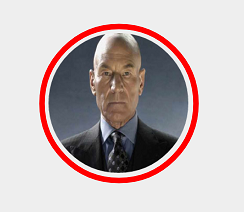
そして、ユーザーが指を離したら、赤いフレームを描き、要素をわずかに増やします。
<scale xmlns:android="http://schemas.android.com/apk/res/android" android:fromXScale="1.0" android:toXScale="1.1" android:fromYScale="1.0" android:toYScale="1.1" android:duration="200" android:pivotX="50%" android:pivotY="50%" android:fillAfter="true"> </scale>
おわりに
結果は、シンプルなアニメーションを備えたかわいい要素です。
プロジェクトコードはgitで入手できます。
コメントさせていただきます。 ありがとう