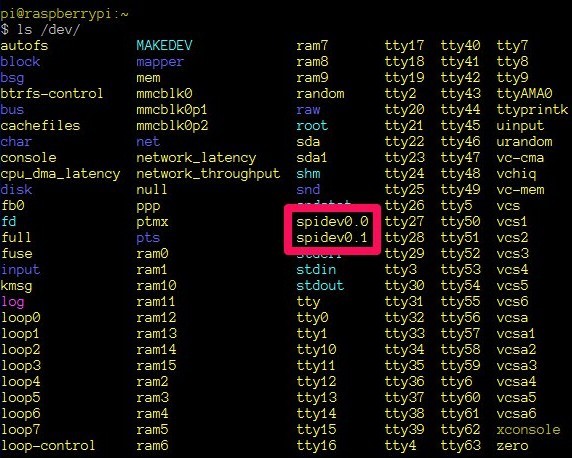
ハードウェアSPIを有効にするには、 / etc / modprobe.d / raspi-blacklist.confファイルの「 blacklist spi-bcm2708 」行をコメント化して、Piを再起動する必要があります。 SPIが有効になっていることを確認するには、 / devディレクトリのリストを実行します。
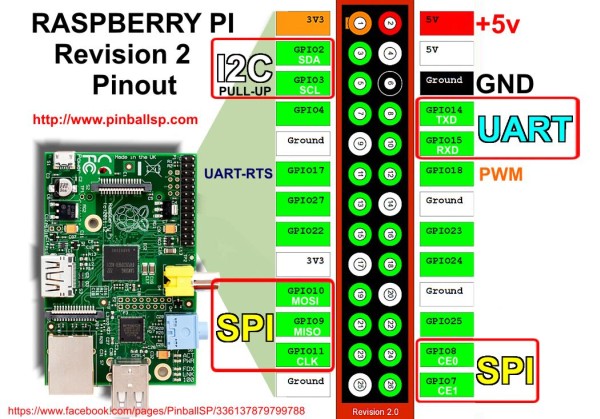
GPIOコネクタ上のSPI信号の場所:
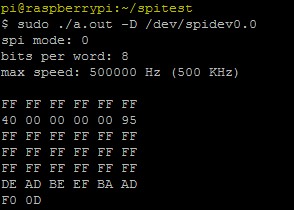
SPIの正しい動作を確認するには、MOSIとMISOを互いに閉じて、次のコマンドを実行する必要があります。
$ wget https://raw2.github.com/torvalds/linux/master/Documentation/spi/spidev_test.c $ gcc spidev_test.c $ sudo ./a.out -D /dev/spidev0.0
正しい結果は次のとおりです。
SPIを操作するためのPythonモジュールは、 ここから入手できます 。 モジュールのインストールは次のように実行されます。
$ git clone https://github.com/doceme/py-spidev $ cd py-spidev/ $ sudo python setup.py install
py-spidevモジュールの主な機能。
- SpiDev([バス]、[クライアント]) 。 指定されたSPIデバイスインターフェイスに(オプションで)接続されている新しいSPIオブジェクトを返します。
- open(バス、デバイス) 指定したSPIデバイスにオブジェクトを接続します。 open(X、Y)は/ dev / spidev-XYを開きます
- xfer2([値]) 。 SPIトランザクションを実行します。 CSはブロック間でアクティブに保持されます。
- close() 。 オブジェクトをインターフェイスから切断します。
PythonのSPIを使用した例:
nrf = spidev.SpiDev(0, 0) nrf.xfer2([0x1, 0x8]) nrf.close()