
すべてのHabraコミュニティへのご挨拶!
今日は、新製品の例であるQCamplrを使用して、iOSデバイスのカメラを操作する方法について説明します。
この投稿では、カメラをセットアップし、さらに作業するための画像を取得する基本的な側面について説明します。
ステップ1:フレームワークをインポートする
私はすでにXcode 5でObjective-Cの新しい構文機能を使い始めました。
#import
@import
iOSカメラを使用するには、 AVFoundation.frameworkが必要です。また、 CoreMedia 、 CoreVideo、 ImageIOの機能も必要になる場合があります 。 後でエラーが発生しないように、これらすべてのフレームワークを今すぐインポートすることをお勧めします。
@import AVFoundation; @import CoreMedia; @import CoreVideo; @import ImageIO;
ステップ2:プロパティとメソッドを宣言する
@property (nonatomic, strong, readonly) AVCaptureSession *captureSession; @property (nonatomic, strong, readonly) AVCaptureDevice *captureDevice; @property (nonatomic, strong, readonly) AVCaptureVideoPreviewLayer *captureVideoPreviewLayer; @property (nonatomic, strong, readonly) AVCaptureDeviceInput *captureDeviceInput; @property (nonatomic, strong, readonly) AVCaptureStillImageOutput *captureStillImageOutput; + (QCCameraManager *)sharedManager; - (void)setupCaptureSessionWithSessionPreset:(NSString *)sessionPreset captureDevice:(AVCaptureDevice *)captureDevice captureViewLayer:(CALayer *)captureViewLayer; - (void)captureStillImageWithCompletionHandler:(void (^)(UIImage *capturedStillImage))completionHandler; - (BOOL)toggleCaptureDevice; - (AVCaptureDevice *)captureDeviceWithPosition:(AVCaptureDevicePosition)captureDevicePosition; - (BOOL)configureFocusModeOnDevice:(AVCaptureDevice *)captureDevice withFocusMode:(AVCaptureFocusMode)focusMode focusPointOfInterest:(CGPoint)focusPointOfInterest; - (BOOL)configureExposureModeOnDevice:(AVCaptureDevice *)captureDevice withExposureMode:(AVCaptureExposureMode)exposureMode exposurePointOfInterest:(CGPoint)exposurePointOfInterest; - (BOOL)configureWhiteBalanceModeOnDevice:(AVCaptureDevice *)captureDevice withWhiteBalanceMode:(AVCaptureWhiteBalanceMode)whiteBalanceMode; - (BOOL)configureFlashModeOnDevice:(AVCaptureDevice *)captureDevice withFlashMode:(AVCaptureFlashMode)flashMode; - (BOOL)configureTorchModeOnDevice:(AVCaptureDevice *)captureDevice withTorchMode:(AVCaptureTorchMode)torchMode torchLevel:(CGFloat)torchLevel; - (BOOL)configureLowLightBoostOnDevice:(AVCaptureDevice *)captureDevice withLowLightBoostEnabled:(BOOL)lowLightBoostEnabled;
すべてのプロパティにはreadonlyキーワードがあります 。 誰にも直接変更させたくないのですが、iOSデバイスのカメラから写真を撮影するために必要なメインのAVFoundationスタックからアクティブなセッションやその他のプロパティにすばやくアクセスする必要がある場合があります。
次に、11の方法を発表しました。これについては、次のステップで詳しく説明します。
これで、.mファイルを安全に開き、カメラの実装の記述を開始できます。
ステップ3:シングルトン
実際のところ、iOSデバイスがサポートするアクティブなAVCaptureSessionは1つだけです 。 複数のセッションを同時に作成して実行しようとすると、 コンソールにエラーが表示されます。 また、アプリケーションの任意のクラスからカメラプロパティにアクセスする必要がある場合も多くあります。そのため、 シングルトンを作成します。 ARCをサポートしているため、 次のようなシングルトンを作成します。
+ (QCCameraManager *)sharedManager { static dispatch_once_t dispatchOncePredicate; __strong static QCCameraManager *cameraManager = nil; dispatch_once(&dispatchOncePredicate, ^{ cameraManager = [[QCCameraManager alloc] init]; }); return cameraManager; }
ステップ4:AVFoundationスタックを作成してカスタマイズする
- (void)setupCaptureSessionWithSessionPreset:(NSString *)sessionPreset captureDevice:(AVCaptureDevice *)captureDevice captureViewLayer:(CALayer *)captureViewLayer { [self setCaptureSession:[[AVCaptureSession alloc] init]]; if([[self captureSession] canSetSessionPreset:sessionPreset]) { [[self captureSession] setSessionPreset:sessionPreset]; } else { [[self captureSession] setSessionPreset:AVCaptureSessionPresetHigh]; } [self setCaptureDevice:captureDevice]; [self setCaptureDeviceInput:[[AVCaptureDeviceInput alloc] initWithDevice:[self captureDevice] error:nil]]; if(![[[self captureSession] inputs] count]) { if([[self captureSession] canAddInput:[self captureDeviceInput]]) { [[self captureSession] addInput:[self captureDeviceInput]]; } } [self setCaptureStillImageOutput:[[AVCaptureStillImageOutput alloc] init]]; [[self captureStillImageOutput] setOutputSettings:[[NSDictionary alloc] initWithObjectsAndKeys:AVVideoCodecJPEG, AVVideoCodecKey, nil]]; if ([[self captureSession] canAddOutput:[self captureStillImageOutput]]) { [[self captureSession] addOutput:[self captureStillImageOutput]]; } [self configureWhiteBalanceModeOnDevice:[self captureDevice] withWhiteBalanceMode:AVCaptureWhiteBalanceModeContinuousAutoWhiteBalance]; [self configureLowLightBoostOnDevice:[self captureDevice] withLowLightBoostEnabled:YES]; [self setCaptureVideoPreviewLayer:[[AVCaptureVideoPreviewLayer alloc] initWithSession:[self captureSession]]]; [[self captureVideoPreviewLayer] setVideoGravity:AVLayerVideoGravityResizeAspectFill]; [[self captureVideoPreviewLayer] setBounds:[captureViewLayer bounds]]; [[self captureVideoPreviewLayer] setFrame:[captureViewLayer bounds]]; [captureViewLayer setMasksToBounds:YES]; [captureViewLayer insertSublayer:[self captureVideoPreviewLayer] atIndex:0]; }
ここではすべてが非常に簡単です。
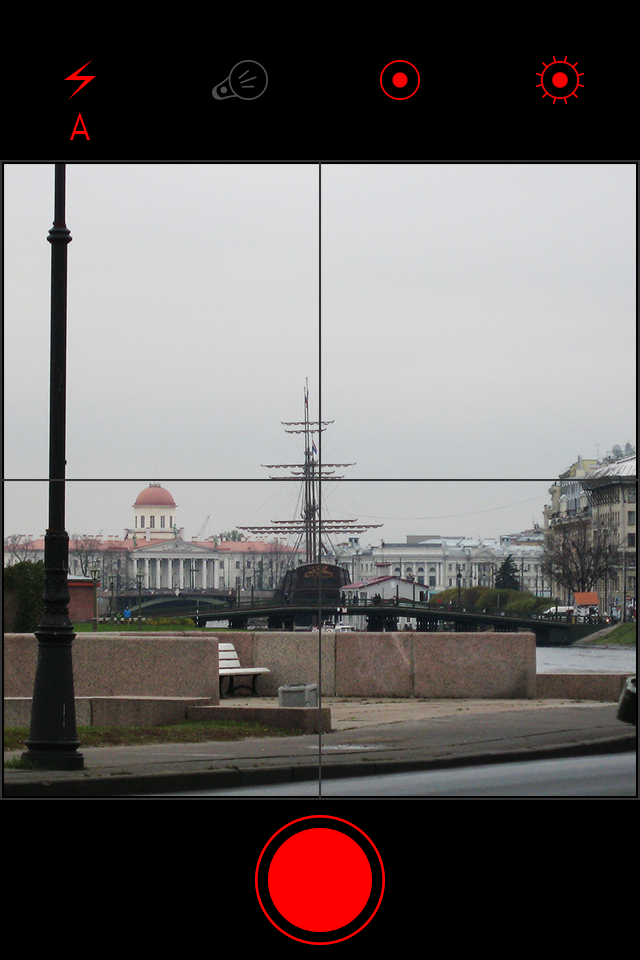
- セッションを作成し、そのプリセットを設定します。これは、画像が画面に表示されて直接撮影されたときに受け取る画像の品質と解像度に影響します。
- 撮影に使用するデバイスを選択します。この場合、デフォルトでは常にリアカメラです
- 次に、セッションに入力を添付する必要があります。 カメラの画像を画面にリアルタイムで表示するために必要になります。 セッションは1つの入力のみをサポートし、 出力の数は1つに限定されません。 「この入力をセッションにアタッチできますか?」などのチェックは、常に実行する必要があります!
- ほぼ同じことを行いますが、 出力を接続するだけで、カメラから実際の画像を撮影して取得するために必要になります。 「この出力をセッションにアタッチできますか?」などのチェックを常に実行する必要があります!
- さらに、ユーザーにアクセスを許可しないカメラオプションの小さな構成を実行します。 それらについては後ほど詳しく説明します。
- 最後に、 入力デバイスからリアルタイムで画像が表示されるレイヤーを作成します 。 このメソッドに引数として渡したレイヤーのサブレイヤーとしてレイヤーを追加します。
セッションが作成されました! セッションを開始するには、 captureSessionプロパティでstartRunningメソッドを呼び出す必要があります。セッションを中断するには、 stopRunningメソッドを呼び出す必要があります。
これは、コントローラーでこのメソッドを呼び出すように見える場合があります。
[[QCCameraManager sharedManager] setupCaptureSessionWithSessionPreset:AVCaptureSessionPresetPhoto captureDevice:[AVCaptureDevice defaultDeviceWithMediaType:AVMediaTypeVideo] captureViewLayer:[[self view] layer]]; [[[[QCCameraManager sharedManager] captureSession] startRunning];
ステップ5:カメラをセットアップする
- (BOOL)configureTorchModeOnDevice:(AVCaptureDevice *)captureDevice withTorchMode:(AVCaptureTorchMode)torchMode torchLevel:(CGFloat)torchLevel { if([captureDevice hasTorch] && [captureDevice isTorchAvailable]) { if([captureDevice torchMode] != torchMode) { if([captureDevice isTorchModeSupported:torchMode]) { if(!(([captureDevice isTorchActive]) && (torchMode == AVCaptureTorchModeOn))) { if([captureDevice lockForConfiguration:nil]) { if((torchMode == AVCaptureTorchModeOn) && (torchLevel >= 0.0f)) { [captureDevice setTorchModeOnWithLevel:torchLevel error:nil]; } else { [captureDevice setTorchMode:torchMode]; } [captureDevice unlockForConfiguration]; } else { return NO; } } } else { return NO; } } return YES; } else { return NO; } } - (BOOL)configureFlashModeOnDevice:(AVCaptureDevice *)captureDevice withFlashMode:(AVCaptureFlashMode)flashMode { if([captureDevice isFlashAvailable] && [captureDevice isFlashModeSupported:flashMode]) { if([captureDevice flashMode] != flashMode) { if([captureDevice lockForConfiguration:nil]) { [captureDevice setFlashMode:flashMode]; [captureDevice unlockForConfiguration]; } else { return NO; } } return YES; } else { return NO; } } - (BOOL)configureWhiteBalanceModeOnDevice:(AVCaptureDevice *)captureDevice withWhiteBalanceMode:(AVCaptureWhiteBalanceMode)whiteBalanceMode { if([captureDevice isWhiteBalanceModeSupported:whiteBalanceMode]) { if([captureDevice whiteBalanceMode] != whiteBalanceMode) { if([captureDevice lockForConfiguration:nil]) { [captureDevice setWhiteBalanceMode:whiteBalanceMode]; [captureDevice unlockForConfiguration]; } else { return NO; } } return YES; } else { return NO; } } - (BOOL)configureFocusModeOnDevice:(AVCaptureDevice *)captureDevice withFocusMode:(AVCaptureFocusMode)focusMode focusPointOfInterest:(CGPoint)focusPointOfInterest { if([captureDevice isFocusModeSupported:focusMode] && [captureDevice isFocusPointOfInterestSupported]) { if([captureDevice focusMode] == focusMode) { if([captureDevice lockForConfiguration:nil]) { [captureDevice setFocusPointOfInterest:focusPointOfInterest]; [captureDevice setFocusMode:focusMode]; [captureDevice unlockForConfiguration]; } else { return NO; } } return YES; } else { return NO; } } - (BOOL)configureExposureModeOnDevice:(AVCaptureDevice *)captureDevice withExposureMode:(AVCaptureExposureMode)exposureMode exposurePointOfInterest:(CGPoint)exposurePointOfInterest { if ([captureDevice isExposureModeSupported:exposureMode] && [captureDevice isExposurePointOfInterestSupported]) { if([captureDevice exposureMode] == exposureMode) { if([captureDevice lockForConfiguration:nil]) { [captureDevice setExposurePointOfInterest:exposurePointOfInterest]; [captureDevice setExposureMode:exposureMode]; [captureDevice unlockForConfiguration]; } else { return NO; } } return YES; } else { return NO; } } - (BOOL)configureLowLightBoostOnDevice:(AVCaptureDevice *)captureDevice withLowLightBoostEnabled:(BOOL)lowLightBoostEnabled { if([captureDevice isLowLightBoostSupported]) { if([captureDevice isLowLightBoostEnabled] != lowLightBoostEnabled) { if([captureDevice lockForConfiguration:nil]) { [captureDevice setAutomaticallyEnablesLowLightBoostWhenAvailable:lowLightBoostEnabled]; [captureDevice unlockForConfiguration]; } else { return NO; } } return YES; } else { return NO; } }
可能なすべてのカメラ設定は独自の方法で実行され、すべて同じ原理で動作します。 知っておく必要があるのは、パラメーターを変更する前にlockForConfiguration:メソッドを呼び出す必要があり、構成プロセスを完了した後、 unlockForConfigurationメソッドを呼び出す必要があることだけです。
QCamplrでは 、ユーザーがフラッシュ、懐中電灯(夜景)、フォーカス、露出の4つのオプションを構成できるようにします。
ステップ5:写真を撮る
- (void)captureStillImageWithCompletionHandler:(void (^)(UIImage *capturedStillImage))completionHandler { if(![[self captureStillImageOutput] isCapturingStillImage]) { [[NSNotificationCenter defaultCenter] postNotificationName:@"QCCameraManagedWillCaptureStillImageNotification" object:nil userInfo:nil]; [[self captureStillImageOutput] captureStillImageAsynchronouslyFromConnection:[[self captureStillImageOutput] connectionWithMediaType:AVMediaTypeVideo] completionHandler:^(CMSampleBufferRef imageDataSampleBuffer, NSError *error) { if (imageDataSampleBuffer) { UIImage *capturedStillImage = [[UIImage alloc] initWithData:[AVCaptureStillImageOutput jpegStillImageNSDataRepresentation:imageDataSampleBuffer]]; completionHandler([capturedStillImage croppedImageFromCaptureDevice:[self captureDevice]]); } }]; } }
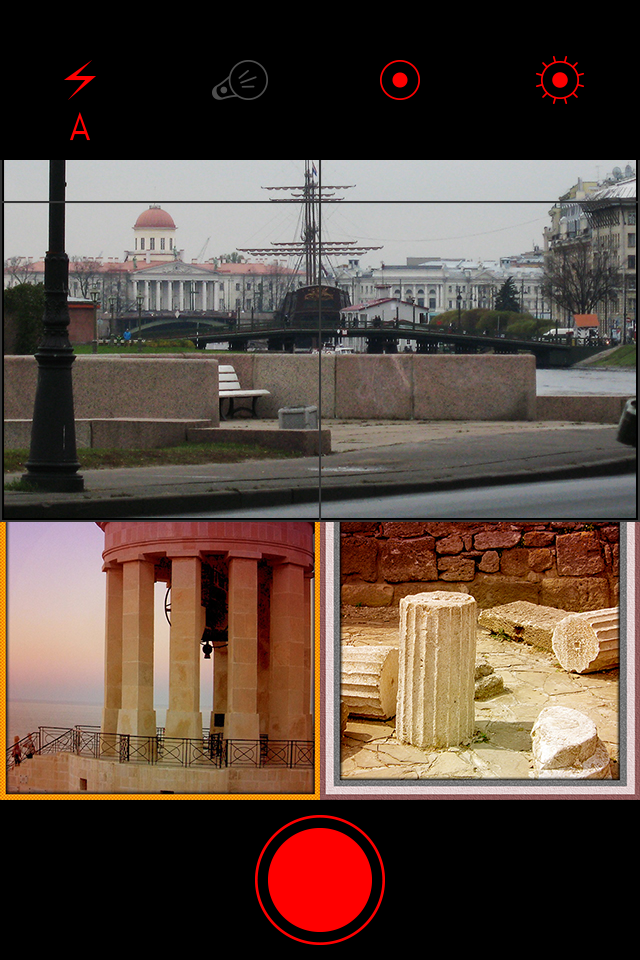
このメソッドは、QCamplrの大きな赤い「トグル」をクリックすると呼び出されます。 completionHandlerには、クラスUIImageのオブジェクトでラップされたjpegイメージがあります。
現在、カメラの使用を支援するヘルパーメソッドがいくつかあります。
方法#1
次の方法を使用して、フロントカメラまたはリアカメラにアクセスできます。
- (AVCaptureDevice *)captureDeviceWithPosition:(AVCaptureDevicePosition)captureDevicePosition { NSArray *captureDevices = [AVCaptureDevice devicesWithMediaType:AVMediaTypeVideo]; for(AVCaptureDevice *captureDevice in captureDevices) { if([captureDevice position] == captureDevicePosition) { return captureDevice; } } return nil; }
方法#2
この方法を使用して、前面カメラから背面カメラに切り替えることができます。
- (BOOL)toggleCaptureDevice { if ([[AVCaptureDevice devicesWithMediaType:AVMediaTypeVideo] count] > 1) { AVCaptureDeviceInput *captureDeviceInput = [self captureDeviceInput]; if([[[self captureDeviceInput] device] position] == AVCaptureDevicePositionBack) { [self setCaptureDeviceInput:[[AVCaptureDeviceInput alloc] initWithDevice:[self captureDeviceWithPosition:AVCaptureDevicePositionFront] error:nil]]; } else if([[[self captureDeviceInput] device] position] == AVCaptureDevicePositionFront) { [self setCaptureDeviceInput:[[AVCaptureDeviceInput alloc] initWithDevice:[self captureDeviceWithPosition:AVCaptureDevicePositionBack] error:nil]]; } else if([[[self captureDeviceInput] device] position] == AVCaptureDevicePositionUnspecified) { return NO; } [self setCaptureDevice:[[self captureDeviceInput] device]]; [[self captureSession] beginConfiguration]; [[self captureSession] removeInput:captureDeviceInput]; if([[self captureSession] canAddInput:[self captureDeviceInput]]) { [[self captureSession] addInput:[self captureDeviceInput]]; } else { [[self captureSession] addInput:captureDeviceInput]; } [[self captureSession] commitConfiguration]; return YES; } else { return NO; } }
便利なリンク
AVFoundationドキュメント
公式サイトQCamplr
PSこの記事が、デバイスのカメラでの作業の自由度と柔軟性を高めたいが、どこから始めればよいのか分からなかったすべての人々に役立つことを願っています。 皆さんにもっと質の高いコードと、私たちのハードビジネスでの幸運を祈っています!