保護された構成プロバイダーとは何ですか? これは、web.config構成ファイルの特定のセクションのコンテンツを暗号化および復号化できるクラスです。 これは通常、ユーザー名、パスワード、データベース接続文字列、暗号化キーなどの機密情報を保護するために、完成したプロジェクトをホスティングに展開するときに使用されます。
configProtectedDataセクションに登録されます。
<configuration> <configProtectedData defaultProvider="SampleProvider"> <providers> <add name="SampleProvider" type="System.Configuration.RsaProtectedConfigurationProvider, System.Configuration, Version=2.0.0.0, Culture=neutral, PublicKeyToken=b03f5f7f11d50a3a, processorArchitecture=MSIL" keyContainerName="SampleKeys" useMachineContainer="true" /> </providers> </configProtectedData> </configuration>
appSettingsおよびconnectionStringsセクションで使用されます:
<appSettings configProtectionProvider="SampleProvider"> <EncryptedData> ... </EncryptedData> </appSettings> <connectionStrings configProtectionProvider="SampleProvider"> <EncryptedData> ... </EncryptedData> </connectionStrings>
このクラスの機能を非標準で使用してみましょう。つまり、1つのプロジェクトのフレームワーク内の構成にブランチを作成します。1つのWebサイト内のアプリケーションの仮想ディレクトリの名前に応じて構成プロファイルを作成します。
これは何のためですか? まず、同じプロジェクトに基づいてサイトのテストルーラーを展開しますが、データベースへの接続線が異なり、appSettingsセクションとconnectionStringsセクションに他の設定があります。
言い換えると、たとえば、いくつかの同一のサイトを、異なる設定だけで共通のコードを使用して展開する必要がある場合に、人生を大幅に簡素化できます。 たとえば、異なるサブジェクト名またはデータベース接続文字列を使用します。
このようなプロバイダーを作成してインストールします。
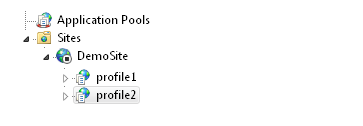
IISマネージャーで、「DemoSite」サイトを作成します。このサイトは、今のところ空のフォルダーにリンクします。 次に、web.configがあるプロジェクトのルートフォルダーを参照する2つのアプリケーション(仮想ディレクトリ)を作成します。
web.configファイルで、appSettingsおよびconnectionStringsセクションを変更して、次のようなものを取得します。
<?xml version="1.0" encoding="UTF-8"?> <configuration xmlns="http://schemas.microsoft.com/.NetConfiguration/v2.0"> ... <appSettings configProtectionProvider="DemoConfigurationProvider"> <EncryptedData> <profile1> ... </profile1> <profile2> ... </profile2> <defaultSettings> ... </defaultSettings> </EncryptedData> </appSettings> ... <connectionStrings configProtectionProvider="DemoConfigurationProvider"> <EncryptedData> <profile1> ... </profile1> <profile2> ... </profile2> <defaultSettings> ... </defaultSettings> </EncryptedData> </connectionStrings> ... <configProtectedData> <providers> <add name="DemoConfigurationProvider" type="Renascence.DemoConfigurationProvider,DemoConfigurationProvider" /> </providers> </configProtectedData> </configuration>
これで、セクションprofile1とprofile2が構成に表示され、クラスDemoConfigurationProviderをプロバイダーとして指定しました。
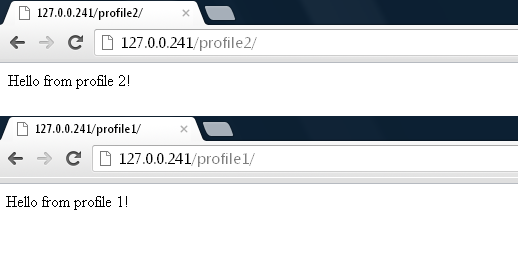
これらの操作後、これらのプロファイルを使用してサイトにアクセスできます。 このようなもの: localhost / DemoSite / profile1またはlocalhost / DemoSite / profile2 したがって、セクションprofile1およびprofile2の対応する設定が適用されます。
アイデアが明確で、誰かに役立つことを願っています。 次に、DemoConfigurationProviderクラスを実装するだけです。
この記事ではこのクラスを詳細に検討せず、ソーステキストを含む完成したデモプロジェクトへのリンクを提供します。
デモプロジェクトを開始すると、次のようなものが得られます。
ダウンロード: githubのデモ