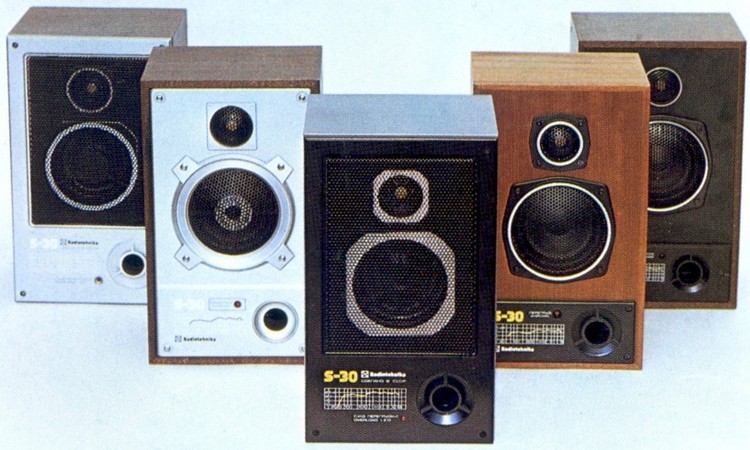
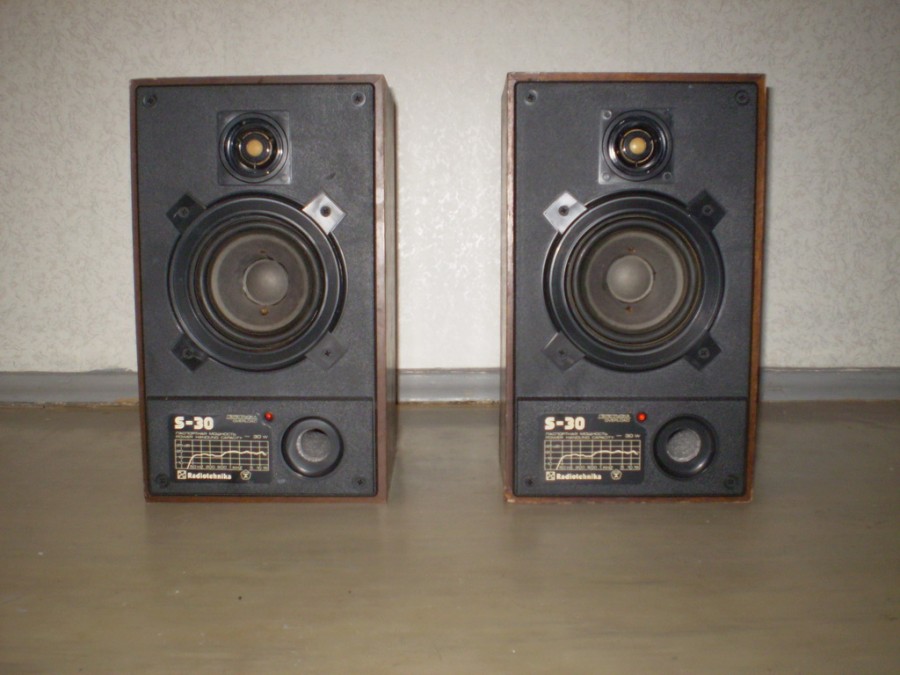
So, some time after moving to a new city, I found a pair of S-30 speakers near the doors of my house. In their appearance, it was immediately noticeable that they managed to work on them. But, unfortunately, one of them did not have a speaker. Without any back thought, I took a serviceable column - it will suddenly come in handy, but for now, it will serve as a nightstand. What was my surprise when a couple of days later I found another set of S-30 at the entrance. But this time, I got completely untouched, Soviet-era columns. Then I already began to understand that without a normal amp I could not continue.
Within a couple of weeks, I became the proud owner of the Lyubava-85-stereo amplifier, an analog of Radio-101. The first audition took place in despondency and hopelessness ... Scoop speakers wheezed, snorted from all the cracks, rattled the panels, spat on the decomposed foam rubber and smelled badly. Since I was already refining the Sven subwoofer, what to do with the speakers was clear to me from the very beginning. To throw out? Not! Remodel!
First of all, I went to a hardware store and purchased there:
- Silicone sealant (our everything)
- Felt (insulating, expensive, in the garden department)
- Several pipes for warming water pipes
- PVA glue
- Vata
- 4m 1.0 audio cable, etc. for soldering
- 20 black 2cm screws
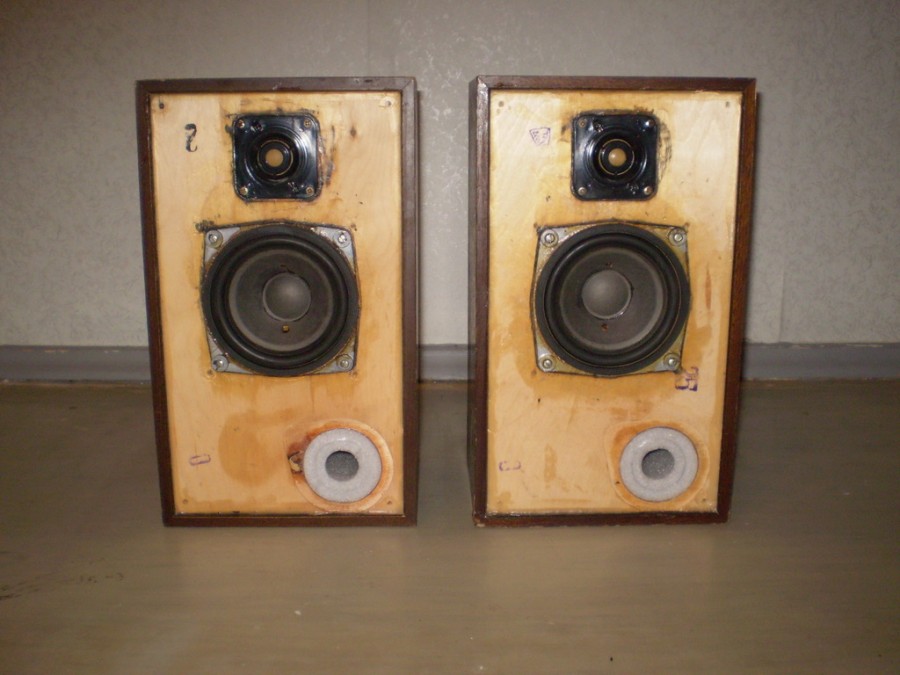
Then came the moment of disassembling the columns. Here I really regretted that I did not take the second column without a speaker. It turns out that they were pretty well modified, and it would be enough to put the missing spare part from the Soviet counterpart. Well, nothing, I thought, we can do better!
He unscrewed the terrible shiny screws from the front panel, yes, of course, they were already ripped off! I had to torment. He removed the grilles, speakers, hmm, plasticine still held on, but they knew how to do it in the USSR ... In the first improved column, the new plasticine already began to turn into some kind of snot, but in appearance it took no more than 5 years. I noticed the location of the plus and minus on the speakers and tweeters and marked them with a marker, since no marks “+” and “-” were found on the speakers. I cut the wires leading into the case and removed the rear roofs with filter boards. Socks with cotton wool immediately into the furnace, well, or you can smoke.
Unfortunately, I started taking photographs only at the stage of pasting with felt.
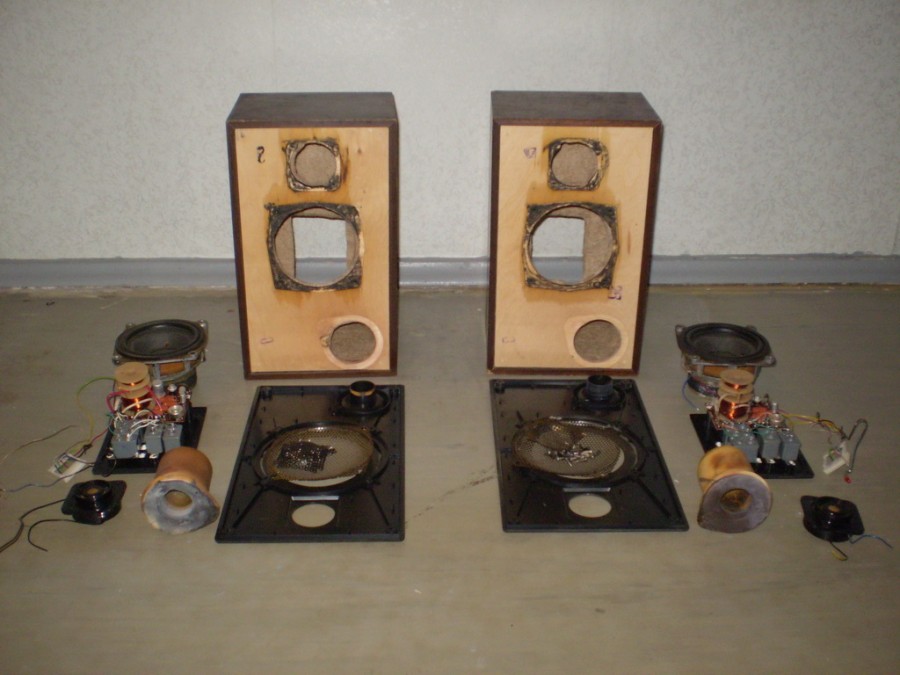
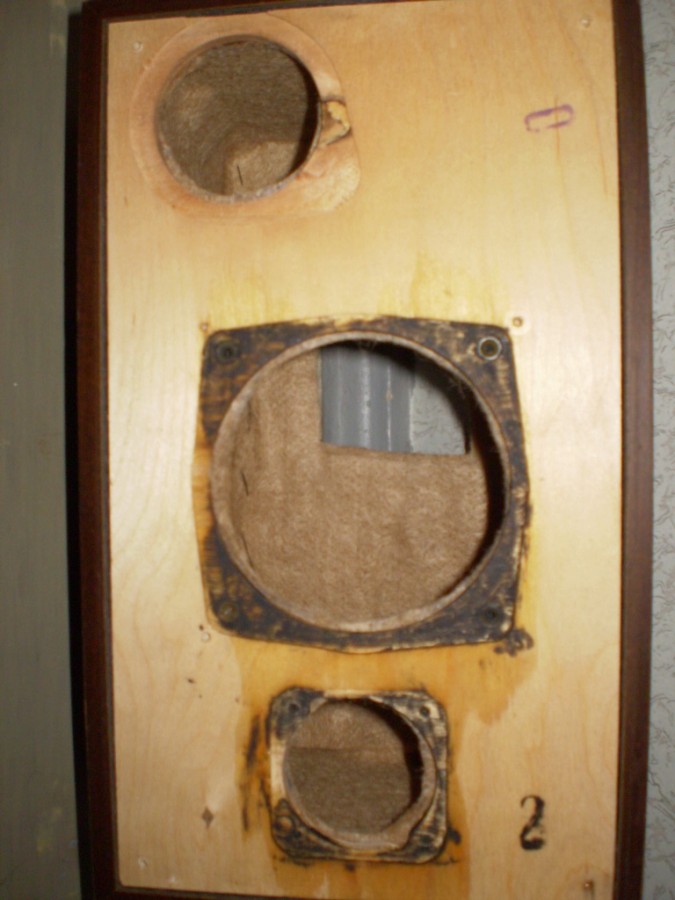
A screwdriver is a knife in the teeth, and after an hour fuss, the wooden case of the column is cleaned of black plasticine, which, after many years, has acquired the more interesting property of dirtying everything like a wax. It is better not to clean the back covers from plasticine, but simply align it and fill in the excess adhesive mass of the grooves in the plastic removed from the body - so, later, it will be easier to achieve a more tight fit to the body.
Then he took a magical silicone sealant and missed all the joints of the walls from the inside. He measured the internal dimensions of the case (if my memory serves me, then they are 325 height, 180 width and 145 depth), cut out the necessary pieces from the felt and cut out the corresponding holes in them. In my opinion, for damping the side walls, one 5mm layer of felt is enough, since they have a good thickness. But on the front and back thin wall you need at least 2 layers of felt. So I did. I glued everything with the help of PVA.
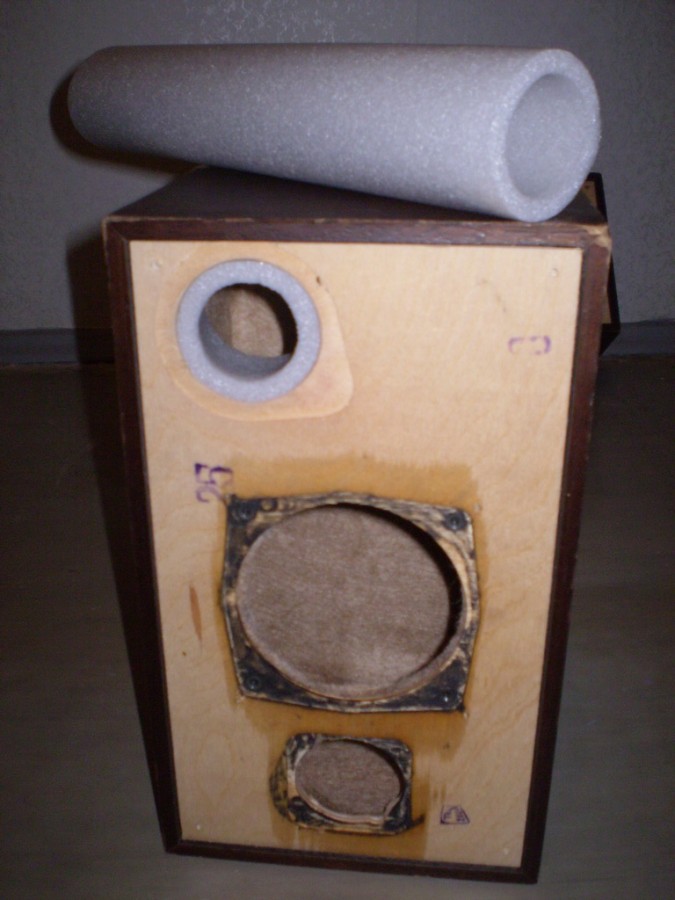
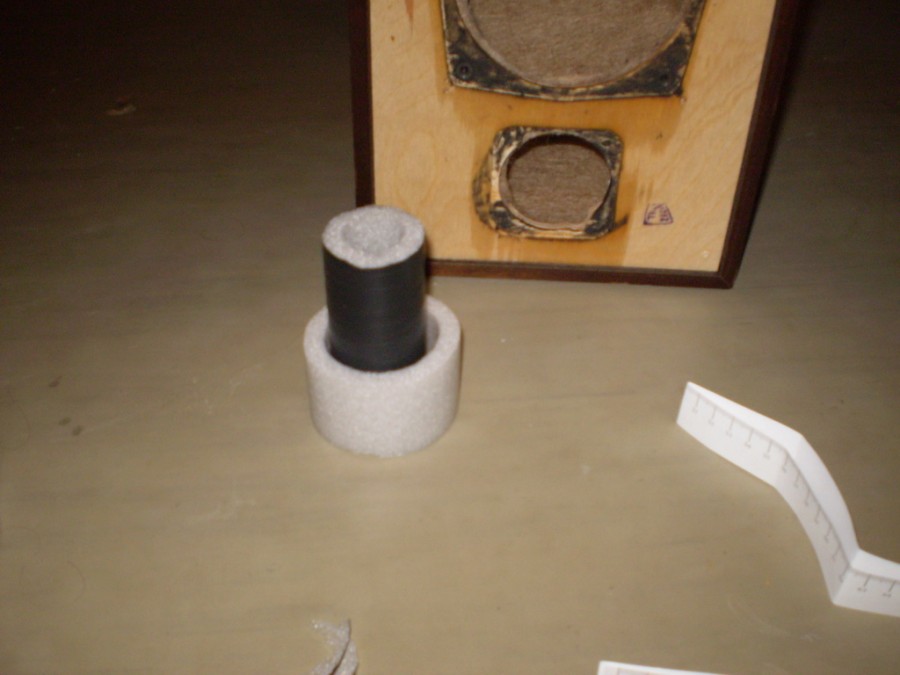
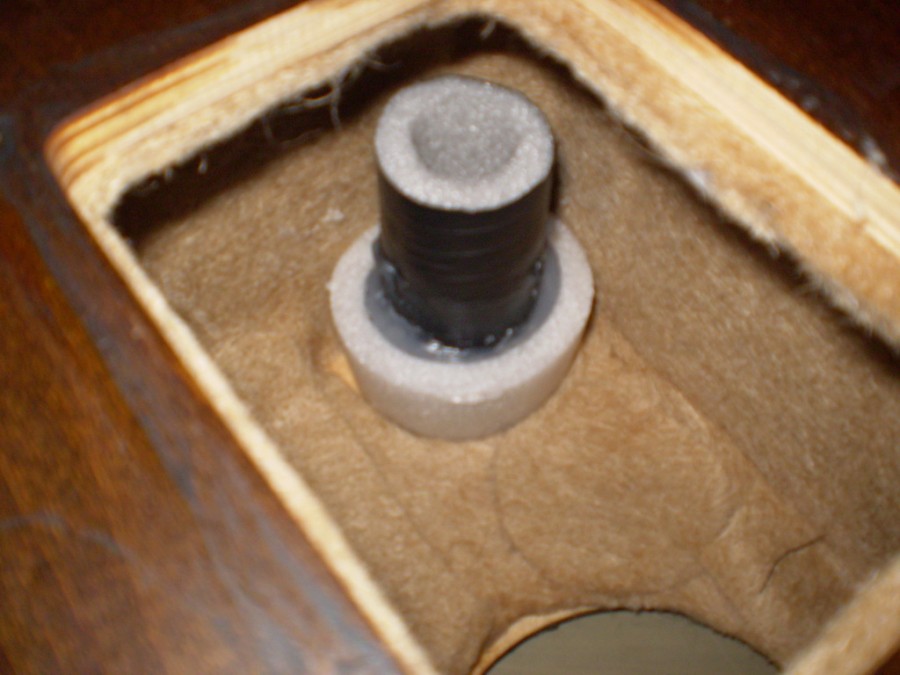
Next, you need to figure out the bass reflex tunnels. The original ones are made of rotten and dried up foam rubber, and have 80mm length and 30mm diameter. Plus, on top of that, there is a protrusion on the front plastic cover that goes inside the bass reflex, and serves as an excellent conductor of vibration. Foam pornography was thrown out; instead, insulation pipes for water pipes were used. The task was to make a system of rings with an external diameter of 65 mm, an internal 30 mm and with a long internal channel of 100 mm (I don’t know why, intuitively decided to make phasics 10 cm long). I only had two rings to achieve the desired parameters. I glued it together, smearing everything with silicone sealant, and insulating tape was wound on top - so that it was. Later it turned out that the inner tube had to be made protruding from the body by 5 mm, for a more snug fit to the front plastic panel.
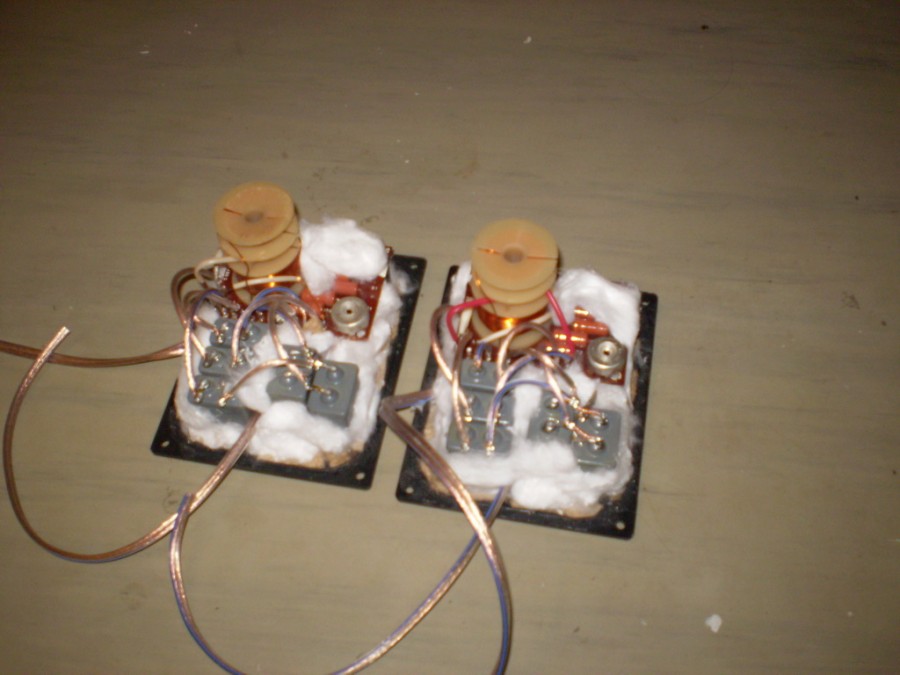
Now, the turn of the most difficult, in my opinion, stage has come - refinement of the filter. First, you need to decide if you need an overload indicator, it blinks pretty cool. But I decided that if it does not make the sound better, then it means that it is superfluous in the circuit.
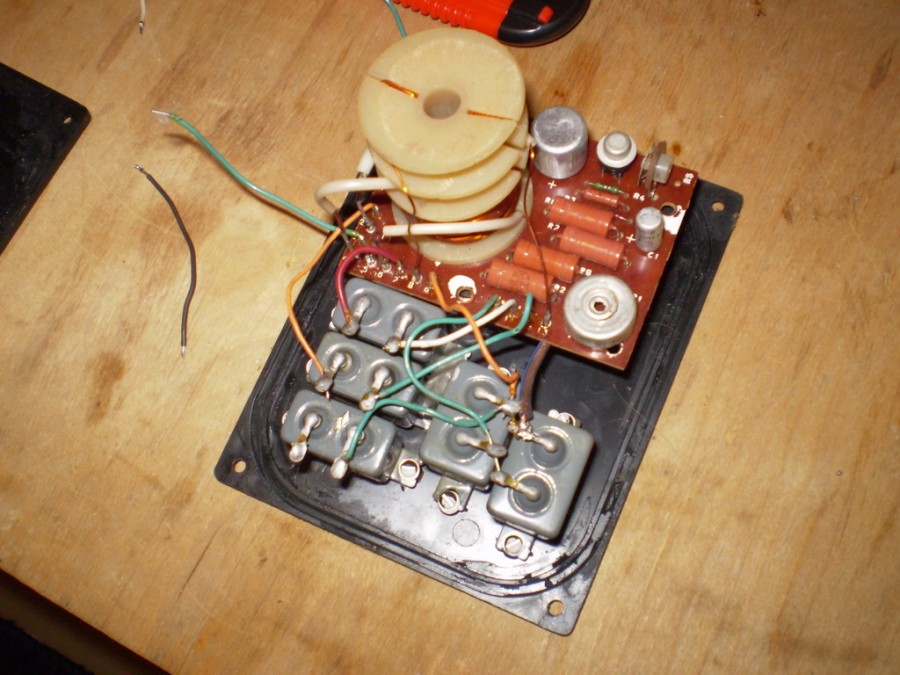
I soldered the elements responsible for the indication of overload - VD1, VD2, C1, C2, R3, R4, R5. All seven elements are compactly located in the upper right corner of the board, if you look at the photo above. Only, it is almost invisible VD1, which is located to the left of C1. If you are too lazy to solder all this, you can carefully remove the elements with wire cutters, just look so that there is no kz.
Of course, the original thin metal wires are not suitable here, and I replaced them with “acoustic from oxygen-free” copper. I started the wires that go to the speakers directly to the board, bypassing the signal paths, if possible. Here's what happened.

At this stage, be sure to connect the speakers to the filter and check whether everything works as it should. In my case, at the last moment of the assembly it turned out that one of the tweeters was silent. A quick inspection showed that the filter is naughty ... A slightly less cursory inspection over the next two hours revealed a pattern of operation and not operation of the filter with the squeaker regarding their position to the constellation of small and large amplifiers. In general, this nonsense was corrected only by soldering the third board from the spare column.
Further, it was necessary to somehow strengthen the weakest point in the column body - the plastic cover on which the filter is located. I removed all the elements from it, glued felt inserts on it, and covered them with a layer of cotton wool on top. I put the filter back on all this, and then once again reinforced the entire structure with cotton wool, placing it in the formed gaps and cavities. It turned out very impressive, reliable and dull.
It’s clear that you can’t install speakers directly on a tree. I read tips on how to make rubber gaskets, but I didn’t have it at hand and I cheated a little by filling in the recesses made in the case under the speakers with silicone sealant. Aligning it and letting it dry, I got perfect gaskets. And do not forget about the holes for the bolts.
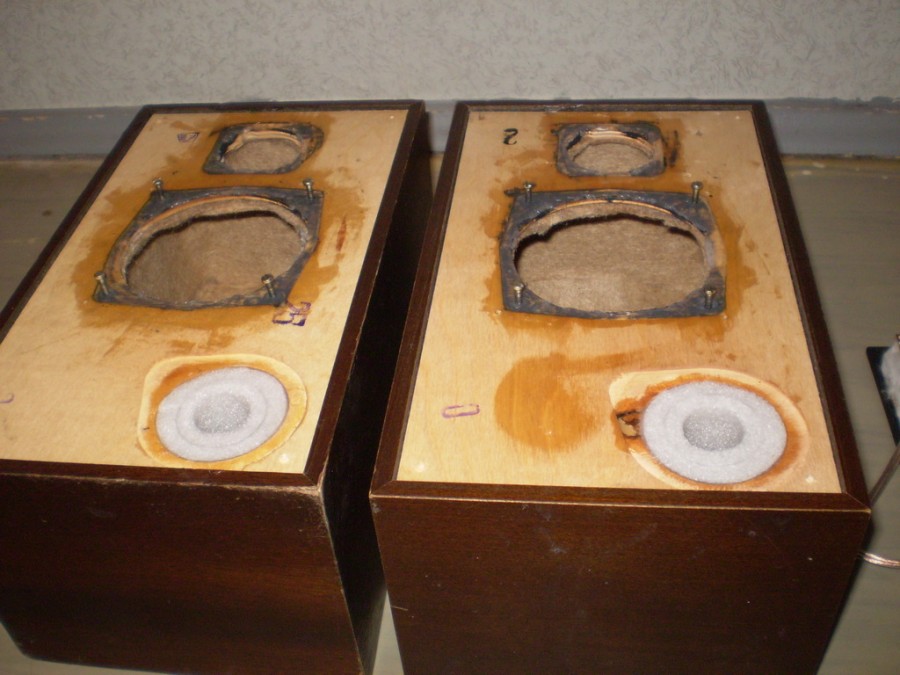
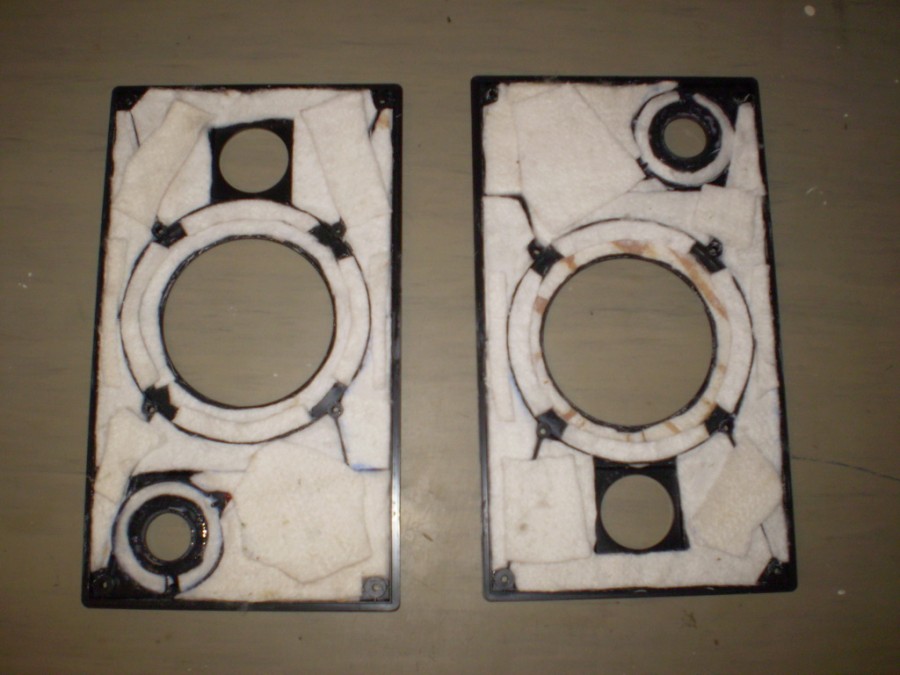
Now it’s the turn of the front panels, which are unsuccessfully inscribed in the speaker casing. The following atrocities were committed over plastic - the pipes that went inside the phasics were sawn off, and all ... uh ... semicircular pegs were broken off, providing a snug fit to the body and signature rattling.
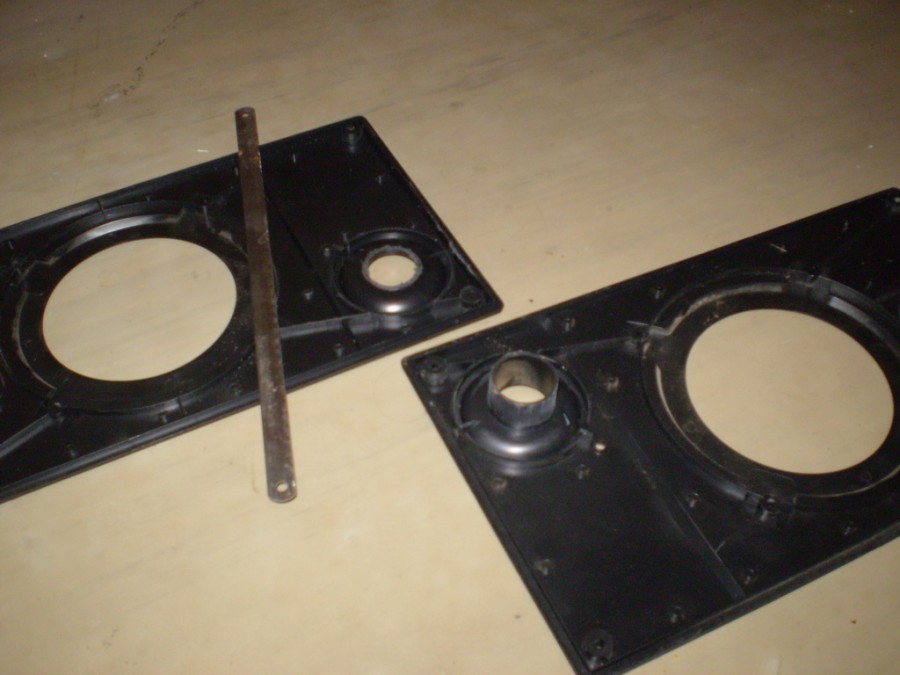

In the previously read guides on remaking the S-30, the damping of the plastic was done by gluing a damper to the speaker body, on top of which the panel itself was mounted. I did not like this option, since it does not exclude the rattling of plastic, and the front wall of the column body was already quite well reinforced. Therefore, sound insulation, by gluing felt (in places up to 3 layers), underwent ill-fated panels ... Do not forget to put in place the LEDs for overload indication, for beauty, or for this very indication, someone like ... I have it so that the eye pleases.
Well, there came a tremulous moment of assembling all the components into a single whole - the miracle of sound technology called S-30. He put the rear panels with filters in their place, on the sealant, of course, filled the cavities around the filter elements with cotton.

I soldered the wires to the speakers and put the latter into the holes allotted for them in the case, again, using magic silicone sealant. At this stage, you must definitely check the case for leaks. Through the opening of the phase inverter, we drive air into the inside of the column and listen to see if it siphons from the slots. I have a siphon, I missed the external joints between the front wooden panel and the side walls with sealant. Everything, tightness has become perfect. Now it is possible to install front panels reinforced with felt with the already inscribed S-30 inscription, and only black self-tapping screws !! ... In the end, something like that turned out ...

The sound ... It is beautiful ... It may be just a little blurry soft bottoms, but that is what I achieved by installing rough tubes of phase inverters. In general, these columns, so far, the best that I had in sounding, I can’t stop rejoicing.

Perhaps it all cost two nights of work and spent 400 rubles.
PS I apologize for the quality of the photos, they were made almost 10 years ago on a slurry soap dish.