Developers make life easier for people, while Gradle makes it easier for developers. If you are writing on Android, this article is for you. Read about what kind of beast this Gradle (spoiler: he is an elephant), as well as how to work with him.
Gradle is an automatic build system that is used to simplify working with Java. Using (conditionally) standardized tools, it helps developers build the right product without losing its uniqueness. After all, the process of working with Gradle is not just a choice of a template. But first things first.

Where to download Gradle
You can download Gradle on the official website . We recommend downloading and installing everything manually (so that life does not seem raspberry). For instructions and all the necessary links, see Installing Gradle> Installing Manually . By the way, we recommend reading everything. That's all. Seriously.
On this page you need to select the system version and click on "binary-only". Then - unzip the zip archive and set the PATH environment variable as described in the instructions. If everything is done correctly, after installation the gradle -v command should display the version of the selected system.
Sometimes it turns out that during the definition, the system finds Gradle in an unexpected place. On Windows, this is solved as follows:
for% i in (gradle.bat) do echo . % ~ $ PATH: i
How to work with Gradle
Gradle is not platform specific. In addition, the system uses different programming languages. The most popular are Groovy DSL and Kotlin (but you can write on others). The first option will be used in the article, since this is the standard task description language in Gradle.
Before you begin, pay attention to the terms: "task" and "plug-in", again. After all, it is on them that all work with the system is based. Plugins provide and create tasks. Tasks are the actions that need to be done. Everything is very simple.
You can read more about this in the plugin instructions: JavaCompile (add new tasks), SourceSet (add new domain objects). Plugins also work with conventions and extend objects. For example, using the plugin, you can add new DSL elements and / or configure them.
The "Core Plugins" set is automatically created when you install Gradle. At the first stages, it is recommended to use the "Utility" category, namely the "Build Init Plugin" plugin. It provides tasks for initializing a project in the system. You can select the type of project from the list on the site.
Let it be java-application .
Task: gradle init --type java-application
After that, new files will appear in the folder. Among them:
- the gradle folder (attention, not .gradle) and the gradlew.bat file are wrappers, wrappers;
- build.gradle file - a script where libraries, frameworks, plugins and tasks of a specific project are indicated.
The last file will display the plugin section. This plugin already has tasks attached to it. Their list can be viewed using the gradle tasks command.
Tasks
Shown in blocks by their functions. Each is given a brief description. Understanding requires knowledge of English at a basic level. If you are not in this group, any translator will do. There are no complex language constructs in build.gradle.
After selecting a task and its successful completion, you will see a green inscription "BUILD SUCCESSFUL" at the bottom. This means that (you are lucky) everything went smoothly. Also at the bottom of the system will give a brief report.
If the status is "executed" - the task is really completed. If "up-to-date" - no. This does not mean that some kind of failure has occurred. In the case of such a status, the task does not require a solution in principle, i.e., its object is already up to date.
This happened because Gradle automatically generated " Up-to-date checks " - an incremental build whose purpose is to optimize the system. Therefore, tasks that are already completed or do not require action are not being worked out.
You can disable this build. Manually. To do this, you must complete the task with the --rerun-tasks flag. If everything is done correctly, the status of all tasks will change to "executed".
Gradle also allows you to view logs at various levels. For example, the gradle run -i command will allow you to read informational messages about the system operation, the run -q command will enable silence mode, run -d will show all log messages, etc. A complete list of logs and additional information about the logging system can be found here .
Dependencies
Dependency Management - Specifies the libraries or frameworks that the project needs. Gradle must include these dependencies at some point in order to build the application correctly (or in general) at the end. The gradle init command for java-application in the build script automatically invokes information about 2 configurations.
Implementation is responsible for transitivity: its dependencies will be invisible to users. TestImplementation extends the previous configuration. Thus, they work in conjunction.
To better understand dependencies and how to work with them, read the " Managing Dependency Configurations " chapter in the official manual. By the way, the " API and implementation separation " explains in detail about the API and implementation, as well as the difference between them.
If you need to include the dependency in the final artifact, you need to specify all the information necessary for the manifest of the jar file in the settings of the jar task. How to do it right, you can see, for example, here .
Next, you need to include the dependencies in the jar. This is necessary for compilation.
Too complicated? Use the " Gradle Shadow Plugin ".
The gradle --console plain dependencies command displays a list of all configurations and their dependencies in a list. The system also offers developers a filter that excludes dependencies from the list (gradle - console plain dependencies | find "-") - some are more convenient.
The most common types of dependencies:
- external - loaded from external repositories;
- design - depend on the module in a specific project;
- file - are connected as jar or aar archives.
Which of these to use, the developer decides.
For Java, everything is well-defined in Dependency management .
Life hacks
Despite the fact that Gradle is a popular and current system of automatic assembly, many people have problems with it. Here are some suggestions that can make life easier for an android developer:
Use the console. Finding commands is sometimes problematic, and when you change build.gradle, the system may crash or, in general, reload the project. Therefore, experts recommend calling Gradle directly from the console.
Vrapper usually goes with the project. Linux and macOS can be accessed directly. On Windows, call a bat file instead of a wrapper.
Gradle stores the cache for 1 day. This can be reconfigured. You need to edit the code:
// build.gradle configurations.all { resolutionStrategy.cacheChangingModulesFor - , 'hours' resolutionStrategy.cacheDynamicVersionsFor - , 'minutes' }
- –refresh-dependencies - a useful command that will start updating all dependencies in Gradle. It may come in handy if some data in the cache is corrupted, as it verifies. It is convenient to use if the cache data is damaged, as it is verified and updated (if different).
Use CI (Continuous Integration) when working with an automatic build system. Let unit tests run for all commits. Also, experts recommend connecting unit tests. This can be done in Android Studio.
This combination will detect errors earlier. And although it will slow down the startup process, the developer will be able to relax in the future. So life hack for the future.
Try again. Scary? (Us, too) Actually, synchronization does not always need to be restarted immediately. First, experts recommend checking the system as a whole. For example, using any simple command - this will help to understand what are the chances of success for the next synchronization.
Set up your IntelliJ IDEA development environment with Gradle. This will optimize the work process, as well as use the magic list.
Tip for those who work with Gradle from the command line of Android Studio. Check for the error “Starting a Gradle Daemon, 1 incompatible could not be reused” (# 68374709). This is a scourge of the system, which the developers have not yet fixed.
One of Gradle's main problems is "Gradle build failed". We can do without unnecessary words if you already know this. If not, good luck.
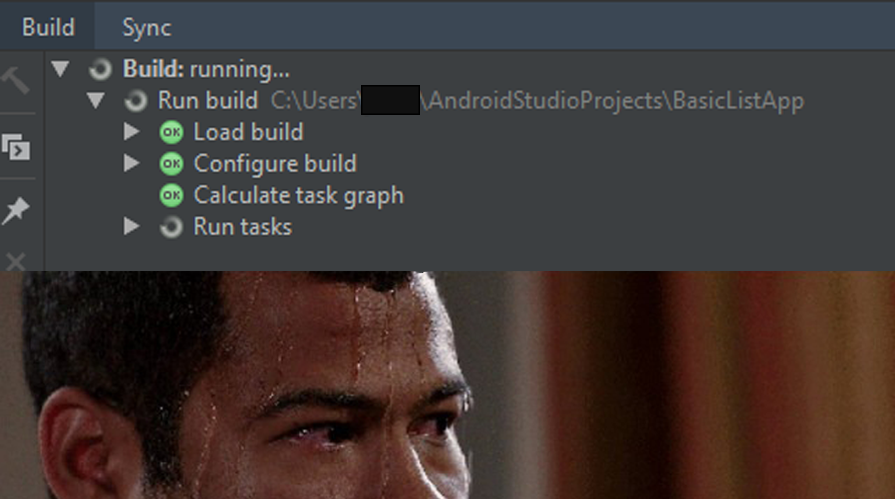
However, Gradle's main problem is different. The time it takes the system to build has long been a (very sad) legend in specialist circles. It is impossible to speed up the work, at least not significantly.
So you have to wait anyway.
You can, for example, fly somewhere into space, as in Interstellar.

Output
Gradle is a good solution, despite all the disadvantages. Automatic assembly will save you time and energy (no matter how ironic it sounds after the previous paragraph). And also - to make your application cleaner. The system will notice any error and will not allow you to finish the work until it is fixed (at any cost).