I decided that the time taken to launch the project can be reduced, and the main part of the process can be automated. At the same time, I collected the best practices and tools that we used, and prepared a project template that we use when starting new projects. Such a template should save the developer’s time to configure a new project, as well as provide a common project structure that every team member will get used to, so that he no longer has to think and study the structure of a new project for him. Now it is always the same.
Each tool or approach added to the template deserves a separate article, but I would like to try to summarize each paragraph and give a brief explanation of why I included them in this article.
Cocoapods
I do not think Cocoapods requires submission. This is a library for managing external dependencies for iOS projects. It has existed for a long time and is reliable and field-proven in thousands (if not millions) of projects. There are also alternative dependency managers, for example: Carthage , but I decided to continue with Cocoapods, because it has the widest range of supported open source projects. Using Cocoapods is very simple, and it comes with a search index that makes it easy to find packages that can come in handy at any time.
A template project is provided with a simple Podfile that contains Swiftlint and R.swift. The template also includes a gemfile for managing the version of Cocoapods used for dependency management. This solution is often ignored by developers, but it prevents problems that arise when your team developers install dependencies using different versions of Cocoapods. Gemfile forcibly uses the same version of Cocoapods for the entire team.
Swiftlint
Swiftlint is a very useful tool for enforcing certain rules and writing style for each developer on the same team. This system could be considered as an automated code verification system that warns the developer about dangerous moments, such as, for example, force casts, force tries, etc., but in addition to the above, this system applies a general style of writing code, monitoring so that all developers follow the same rules related to the "code style", for example: indents or intervals. This approach has huge advantages, not only saving time on code verification, but also making the project files recognizable, which increases their readability and, as a result, their understanding by all members of the development team. This link provides a list of all the rules. In the Swiftlint template, it is installed using Cocoapods and is included in the “Compilation Phases” step, so it will show a warning to the developer each time the project is compiled.
R.swift
R.swift is a tool for obtaining strongly typed, automatically filled resources such as images, font segments, and localizations. He performs all of the above actions by scanning the project and creating the classes necessary to obtain resources. The biggest advantage of this library is that when using resources it makes program code:
- Fully typed - fewer casts and assumptions about which method will be returned
- Compile time checked - no longer invalid lines that cause the application to stop working during code execution
- Autocompleted - no need to guess the name image / nib / storyboard again
Consider the following code using the official string API:
let icon = UIImage(named: “custom-icon”)
If you make a mistake in the name of the image, you will get zero. If any member of your team changes the name of the image resource, this code will return zero or its execution will be stopped if you force the image to expand. When using R.swift, it looks like this:
let icon = R.image.customIcon()
Now you can be sure that the icon really exists (the compiler will warn you if it is not, thanks to the compilation time checks), and you will be clearly sure that you will not make a typo in the name of the icon, because you will use autocomplete.
R.swift is installed through Cocoapods and integrates into the template in the Compilation Phase and will generate Swift shell classes for each compilation. This means that if you add a file / image / localization / font / color / pen, etc., all this will be available through R.swift after compiling the project.
Separate AppDelegate file for tests
Very often they forget about the good practice of using a separate TestAppDelegate class when running tests. Why is this a good idea? Typically, the AppDelegate class does a lot of work when the application starts. It can have window configuration logic, configure the basic display of the application user interface, execute registration logic to receive notifications, have a database connection setup code, and even sometimes make server API calls. Unit tests should not have side effects. You really do not want to make random API calls and customize the entire user interface structure of your application just to run unit tests?
TestAppDelegate is also an appropriate choice to get the code that you want to run only once during the execution of the test suite. It may contain code that generates mock objects, network request stubs, etc.
The template contains the main.swift file, which is the main entry point for the application. There are methods in this file that test the environment of the application, and if it is a test environment, they call TestAppDelegate.
Compiler performance profiling flags
Swift is a great language, easier to use and more secure than Objective-C (IMO). But when it was first introduced, it had one big flaw - compilation time. Back in the days when I was working on a project in Swift, which had about 40 thousand lines of Swift code (a medium-sized project). The code was very heavy, with settings and type inference, and compiling a clean assembly took almost 5 minutes. If you make even small changes, the project is recompiled and it takes about 2 minutes to see the changes. This was one of the worst experiences I've ever experienced, and because of this, I almost stopped using Swift.
Then the only solution was to try to profile the compilation time of the project and change your code so that the compiler works faster. To help solve such problems, Apple introduces some unofficial compiler flags that warn the developer that it takes too long to compile the method body or determine the type of expression. I added these flags to the template project to warn about the long compilation time of your application.
Nowadays, compilation time has decreased significantly, and developers very rarely have to optimize their code just to reduce compilation time. But it’s better to know everything in advance than to try to solve this problem when the project becomes too large.
Dev / Staging / Production configurations
Another good approach (or, one might say, a necessity) is to have a separate configuration and environment variables for development environments, final testing and publication of the application. Currently, almost every application should work with a server, and usually such servers are deployed in several environments. The development environment is used for daily deployment by developers to test their code. The final testing environment is used to create stable releases or for testing by testers and customers.
One way to support multiple environments in an iOS project is to add configurations at the project level.

Project Level Configurations
Having defined the configurations, you can create a Configuration.plist file containing variables for each environment.

Configuration.plist
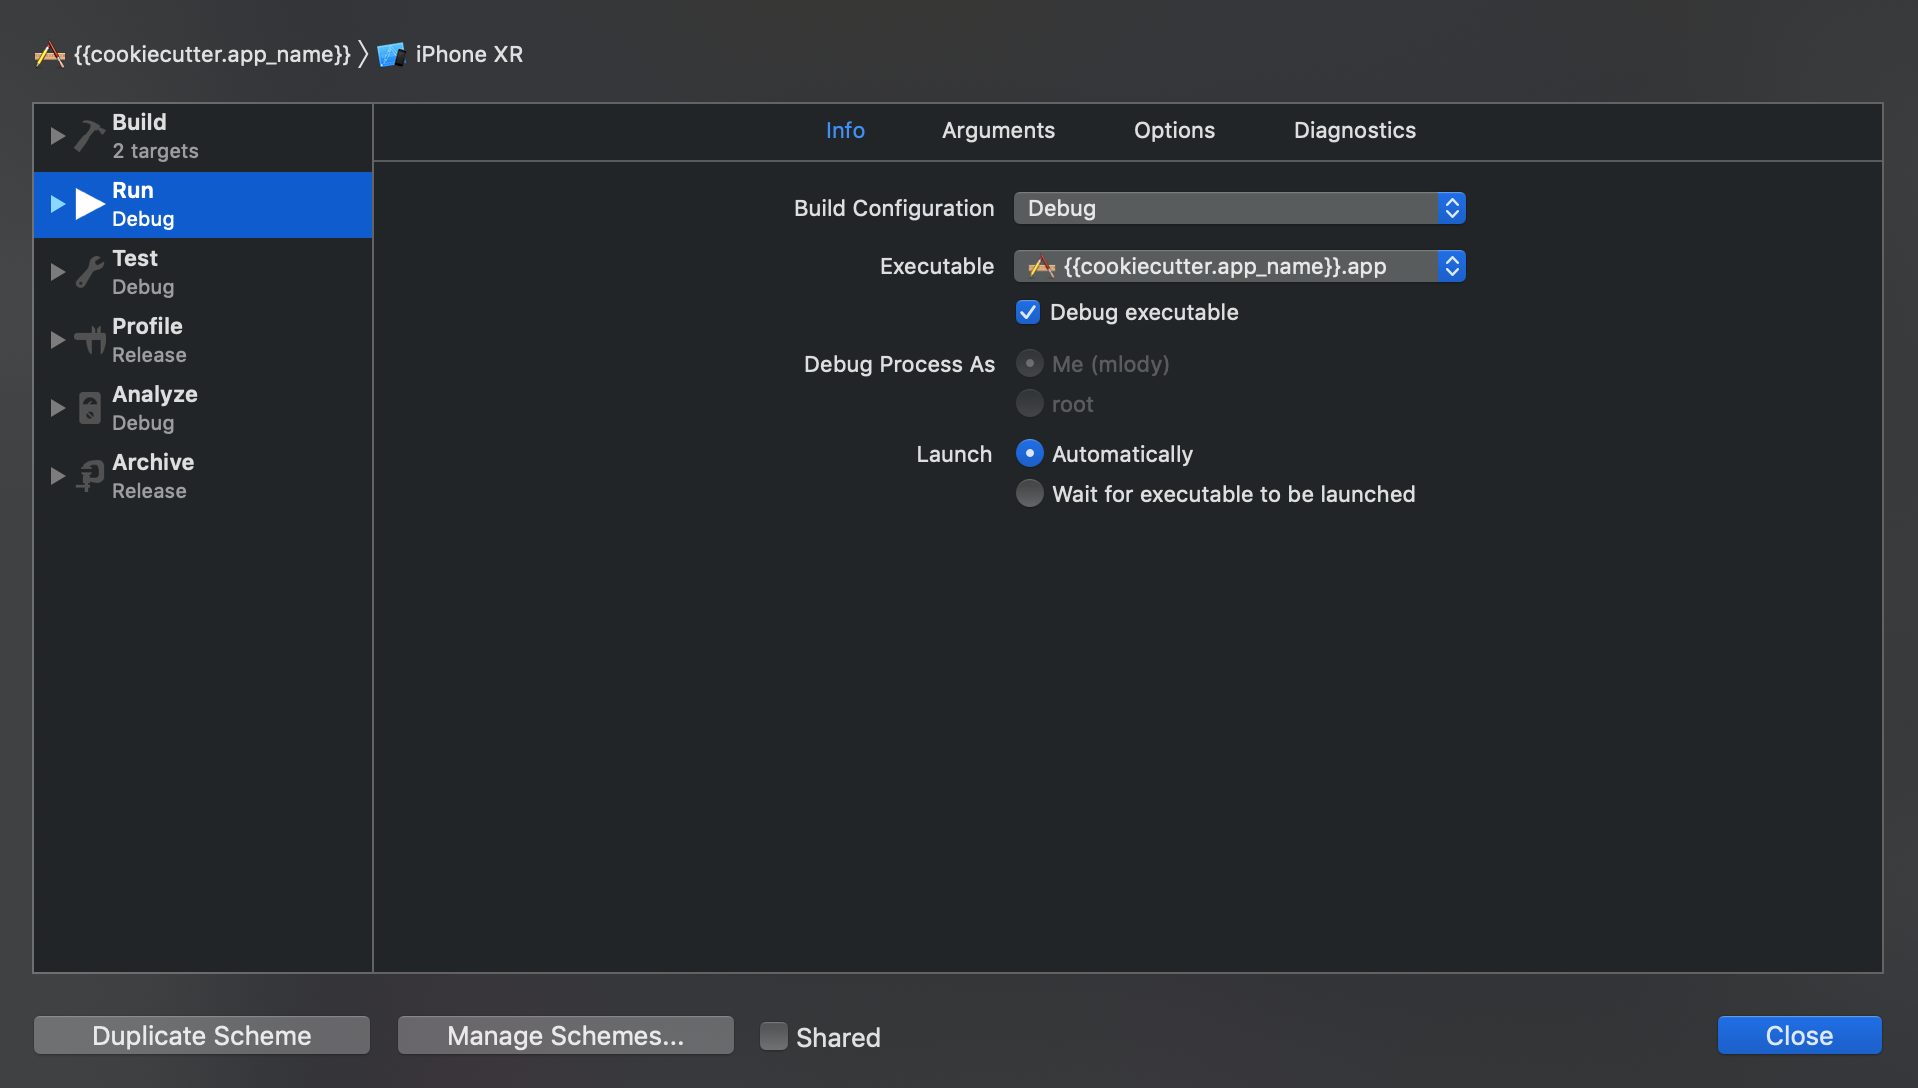
When starting a project, it is possible to indicate which configuration should be used. You can do this in the assembly diagram.
Then you need to add another property to the Info.plist project file. The value of this property will be dynamically substituted at runtime in the name of the current configuration.
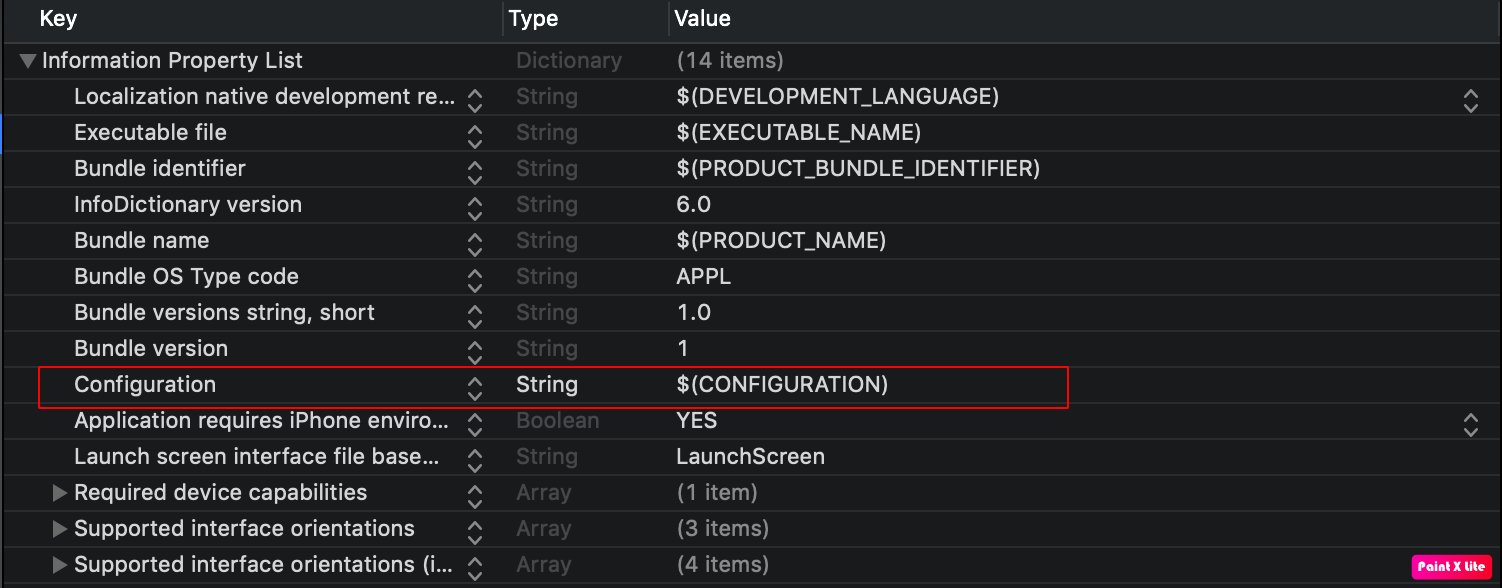
All of this is pre-configured in the template.
It remains only to write a class that can extract these variables at runtime depending on the configuration selected in the assembly scheme. The template contains the ConfigurationManager class, which can retrieve variables for the current environment. You can also check the implementation of this class on Github to see how it works.
Readme
Each project must contain a Readme file, which at least contains instructions for installing dependencies and starting the project. It should also contain descriptions of the project architecture and modules. Unfortunately, developers do not like to write documentation (the readme file is part of this work), and I saw a project that has been developed for months, and it even had a Readme file. To remove the burden of writing a readme file, the template contains a standard readme file that covers the installation and structure of the project. When setting up a new project using templates, you automatically include the Readme file.
Gitignore
Currently, most projects use GIT as a version control system. When using GIT, developers do not want to ignore some files or folders in the project, such as the build folder or the derived data folder. To save the developer from having to find a gitignore file suitable for his iOS project, the template contains the standard gitignore provided by the members of Github.
Base classes for handling external links and notifications
Nowadays, almost every application should handle external links and notifications. To do this, the developer must write some standard code in the AppDelegate class. This template contains a description of how to do this, it also contains base classes that facilitate working with external links and notifications.
Output
To summarize, the described template contains the best approaches and integrates useful third-party tools. All this should save your team development time spent on setting up a new project, as well as provide a common and solid foundation for the rest of the project. Let this template serve you and your team for the benefit!