Cryptographic workstation based on public key standards. Issue SSL certificates. Epilogue
 So we got to the creation of self-signed certificates.
Where do self-signed certificates apply? Of course, with a self-signed certificate, you will not be able to register on the State Services website or submit a signed declaration to the Federal Tax Service. But for internal corporate workflow they can be used. You can also use them to protect personal mail correspondence, in VPN networks, etc. But most often they use self-signed SSL certificates to provide secure access via the https protocol to Web applications. OpenSSL remains the most popular means of creating self-signed certificates. The procedure for obtaining SSL certificates using the same OpenSSL is well described here . But there you will not find mentioning GOST certificates, PKCS # 11 tokens, etc. Here we look at a simple graphical interface that allows you to obtain certificates based on GOST R 34.10-2012 and without any use of OpenSSL.
So, click the "Self-Signed Certificate" button:

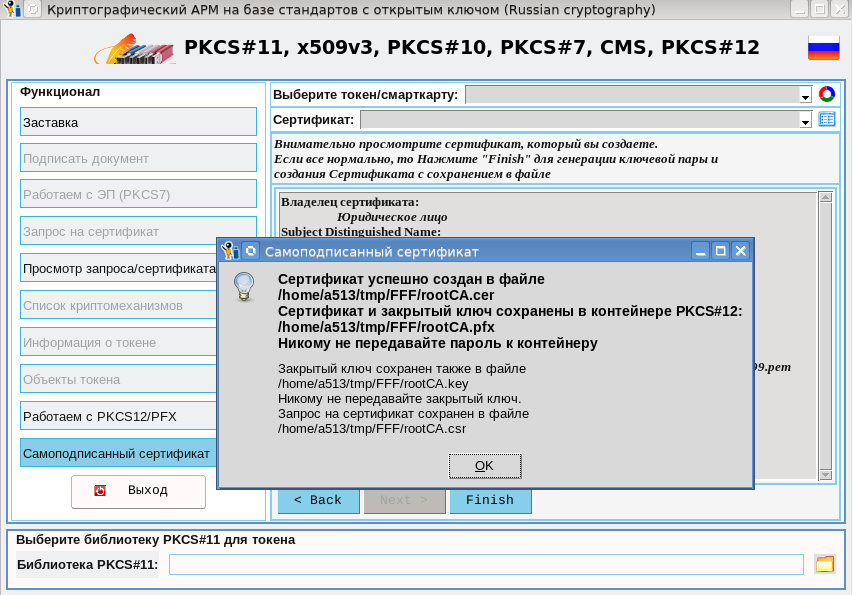
As you can see, this tab is not much different from the same tab when creating a certificate request . Here appeared the buttons for selecting the type of generated certificate "Certificate Type":
- user certificate (User button);
- root certificate (CA button);
- SSL certificate (SSL button).
Naturally, you need to start work by issuing a root certificate, on the basis of which all other certificates will then be issued. When creating a root certificate, do not forget to enable the "Certificate Signature" checkbox in the key assignment (use):

We omit the filling of the main fields of the certificate, they are no different from filling the same fields for the request, and immediately go to the final pages. Here is the first one:
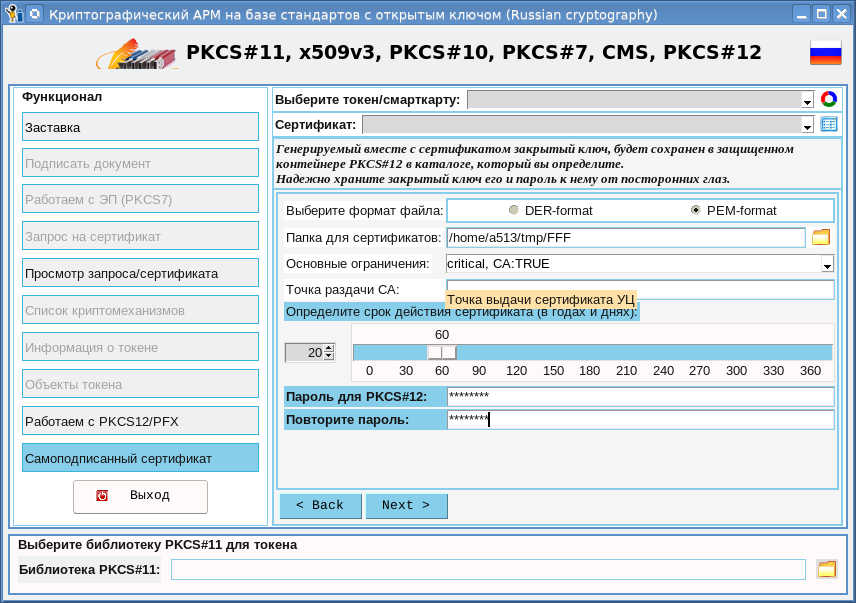
On this page you must select the folder in which the root certificate and its private key will be saved. This folder will then need to be specified when issuing other certificates. You must also determine the validity period of the certificate. You can also specify the point at which you can obtain the root certificate. Upon release, the certificate and private key will be packaged in so many of PKCS # 12's favorite secure container . In this regard, you must set a password for the container. As a result, after clicking the “Finish” button, a root certificate will be received:
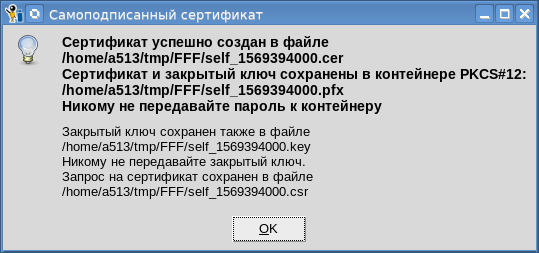
When issuing the certificate, we get four files in the specified directory:
- rootCA.cer with the certificate itself in the format (PEM / DER) that you selected;
- rootCA.csr with a certificate request;
- rootCA.pfx password-protected PKCS # 12 container with certificate and private key;
- rootCA.key with the private key in the format (PEM / DER) that you selected.
The rootCA.key file, if you are not going to use it, it is better to immediately destroy it. Otherwise, store it in a place inaccessible to other people. Also hide the password for the rooCA.pfx container from prying eyes.
Now that we have the root certificate, we can start issuing user certificates, including SSL certificates:
After choosing the type of certificate (SSL certificate), the type of key, its parameters and how it (key) will be used, go to the next page:
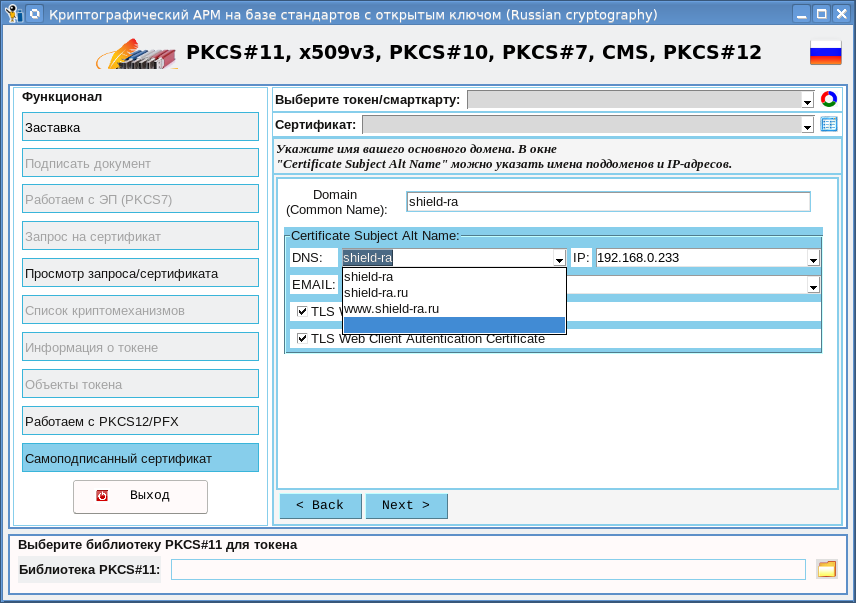
This page sets the primary domain name, which will be entered in the Common Name field, and you can also specify additional (alternative) domain names. You can also specify IP addresses where your domain can be located. All this is done for the sake of the " coveted green castle ."
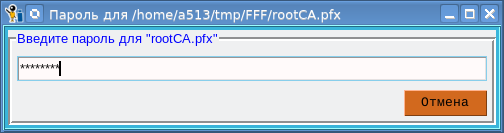
Having dealt with domains, IP-addresses go to the following tabs. Everything is as usual there. The only difference is that after clicking the “Finish” button, the password for the rootCA.pfx root container will be requested:
After successfully entering the password, we also get four files:
All comments regarding the password and private key made above in relation to the root certificate apply to the rest of the certificate. All certificates we have issued. What's next?
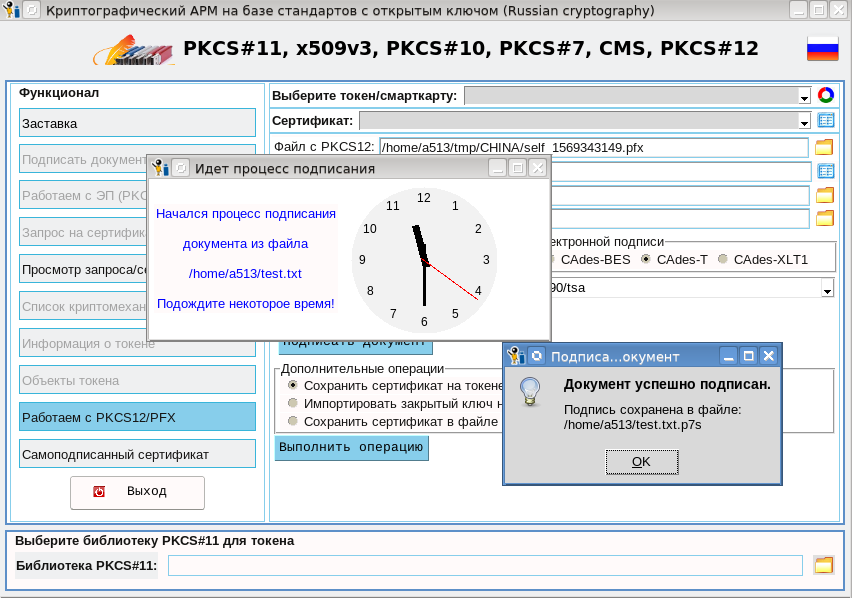
Use them. If these are user certificates, then you can use them in the same utility through PKCS # 12 containers , in the document flow for signing documents, for example:
As for SSL certificates, they must be used for their intended purpose to organize a secure channel with a Web application. As such an application, we took a CA where access to its resources for administrators is organized according to GOST https. The CA is deployed on the basis of Apache2-2.4.10 with the mod_ssl module, which supports Russian encryption systems. On the server (we have it Linux), put the received SSL certificate (<your directory> /self_xxx.cer) and its private key (<your directory> /sel_xxx.key) in the / etc / ssl folder and write the paths to them in the file / etc / apache2 / sites-available / default-ssl:
... SSLCertificateFile < >/self_xxx.cer SSLCertificateKeyFile < >/self_xxx.key ....
Restart apache2:
#service pache2 restart #
In the workplace (I have Linux) in a browser with Russian cryptography support, install our root certificate (<your directory> /rootCA.cer) with confidence in it. On the working computer, add the following line to the / etc / hosts file:
192.168.0.233 www.shield-ra.ru shield-ra.ru shield-ra
and go to one of these addresses:
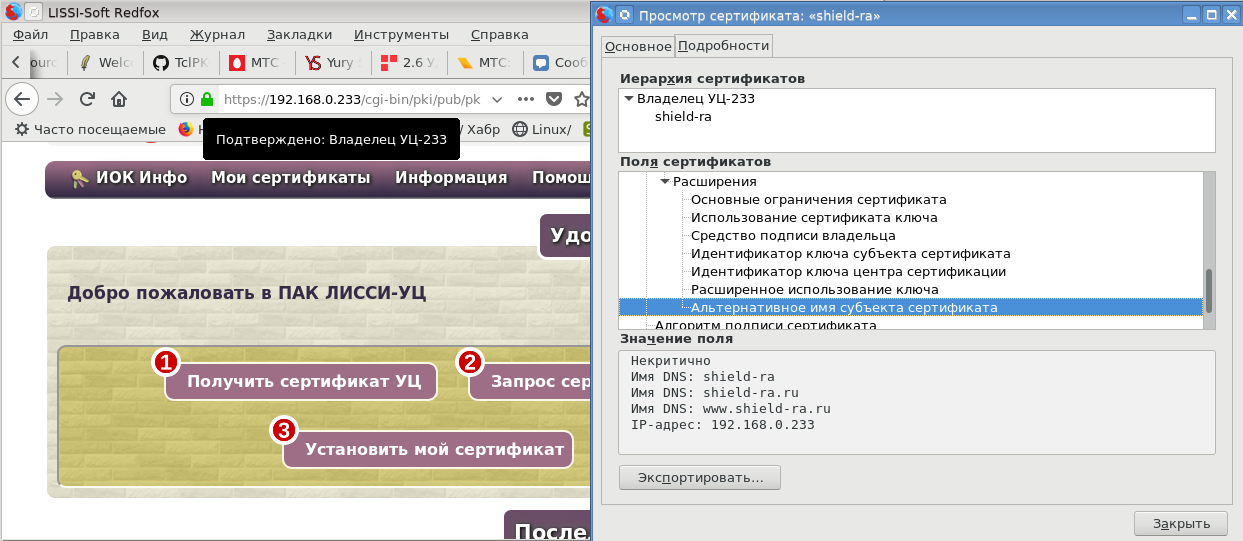
Lit, lit "the longed for green lock."
Check the remaining addresses:
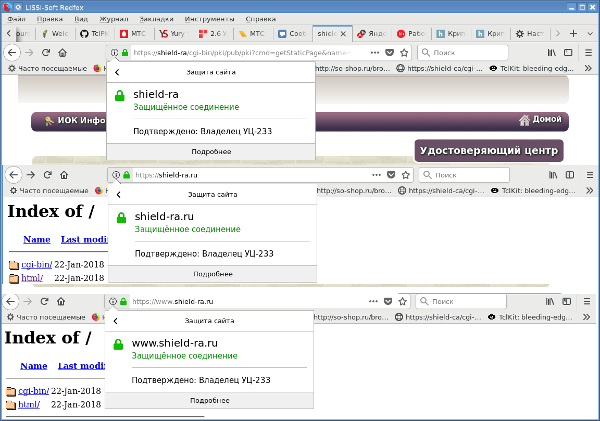
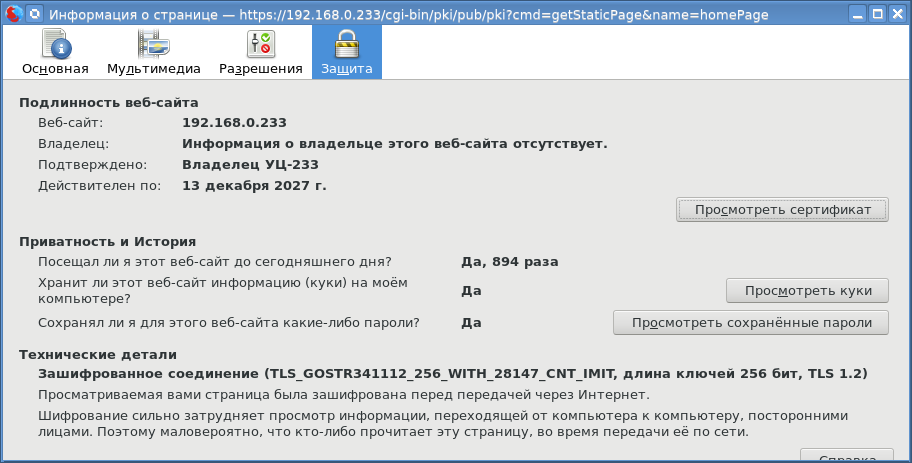
Green around. And finally, let's see which cipher suite we used:
To create self-signed certificates for previously created certificate requests, the functionality of the "View Request / Certificate" page has been expanded:
As you can see from the screenshot, now you can not only view the request, but also issue a certificate on it. The rootCA.pfx container is used as the root certificate. When you click the "Issue" button, a window with a request appears, having looked at which you can click the "Issue Certificate" button:
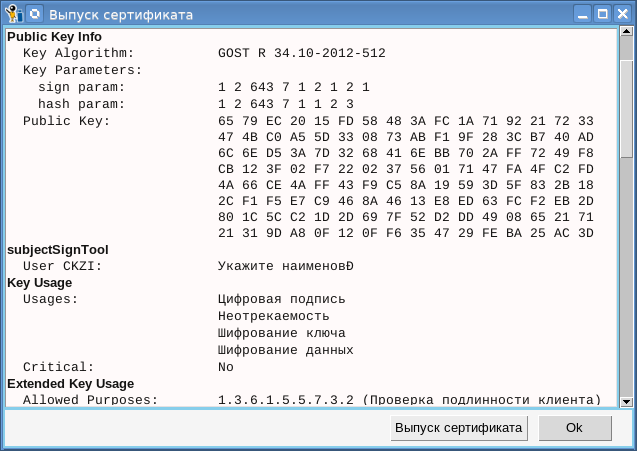
After clicking the button, the password for the root container will be requested and a certificate will be issued:
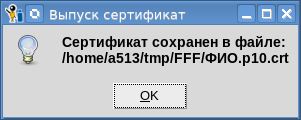
By the way, you can view the received certificate on the same page (button "Certificate file").
So, our cryptographic utility cryptoarmpkcs allows you to:
- work with PKCS # 11 tokens with support for Russian cryptography;
- create certificate requests;
- create and verify an electronic signature (up to CAdes XLT1) using PKCS # 11 tokens;
- create an electronic signature (up to CAdes XLT1) using PKCS # 12 containers;
- issue self-signed certificates;
- View certificates and requests.
Probably, something is missing in it, tell me, we will take into account. Thank you for your patience.
PS Now you can download updated versions directly from the utility. To do this, just move the mouse cursor over the heading "PKCS # 11, X509v3 ..." and click the "About" button in the menu that appears.
All Articles