Install 3CX from Amazon AWS Marketplace

We think Amazon's cloud services do not require additional submission. But until recently, installing the 3CX PBX on AWS was difficult, especially for novice engineers. Therefore, we passed certification and placed 3CX as a turnkey solution , which is quickly deployed on AWS according to the BYOL principle (Bring Your Own License). This will allow experienced professionals to run 3CX faster using the AWS infrastructure skills, and novice administrators will not make random errors
Starting 3CX comes down to three simple steps:
- Obtain a free 3CX license and register for Amazon AWS
- Installing a VM PBX Instance
- Documentation 3CX setup
Let's take a closer look at these steps.
Obtaining a 3CX License
Register for 3CX or contact your local partner . By e-mail you will receive a free 3CX license, which for the first 40 days will work with all the features of the Pro edition .
Installing a VM PBX Instance
If you do not already have an account on Amazon, go through the registration process. At one stage, you will receive an automatic call from Amazon, in response to which you must enter the verification PIN. Then go to the AWS console .
Go to the Amazon AWS marketplace and search for the 3CX keyword.

Click Continue to Subscribe , and then Continue to Configuration to configure a new instance.
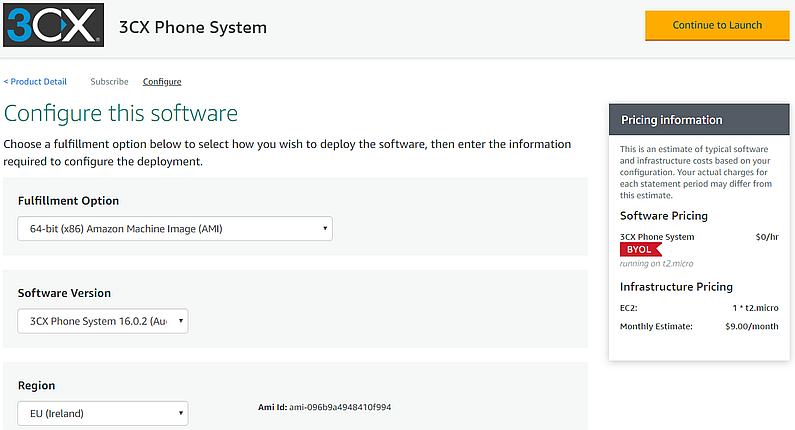
Then, on the Configure this software page, verify that the Software Version of the system is 3CX 16 or higher. Confirm or select your region . Pay attention to the monthly cost of hosting.
Next, click Continue to Launch . On the Launch this software page, pay attention to the Configuration Details and set the required VM options in the EC2 Instance Type , VPC Settings, and Subnet Settings sections.
If the virtual machine is not assigned a public IP address, go to the VPC Dashboard> Subnets section and make sure that the VPC (Virtual Private Cloud) assigned to this VM has the Auto-assign public IPv4 address option enabled.
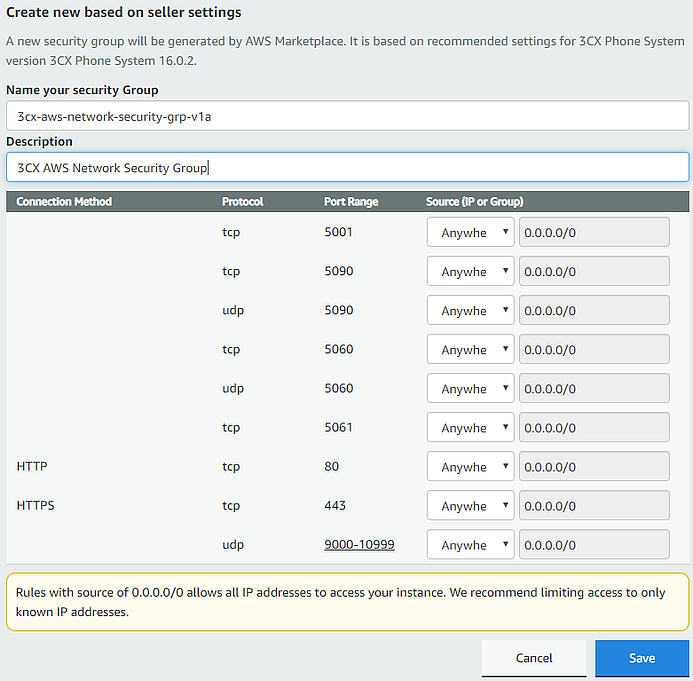
In the Security Group Settings section, click Create New Based On Seller Settings , specify a name, description, and click Save to create a new security group.
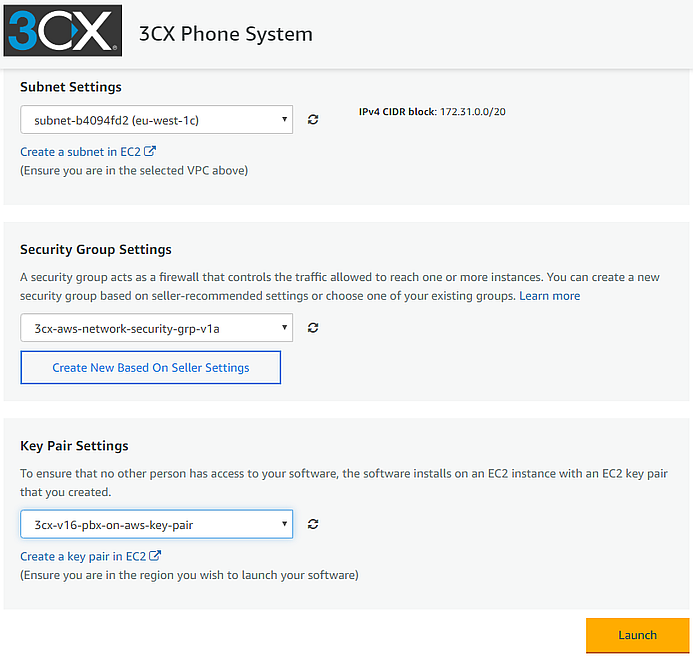
In the Key Pair Settings section, select an existing key pair or create a new one by clicking Create a key pair in EC2 . Indicate the name and click Create to download the certificate file (save the file in a safe place, because it is impossible to obtain it again). After creating a pair, return to the Launch this software page, click on the update icon near the pair field and select the pair you just created.
Then click Launch to install the new instance.
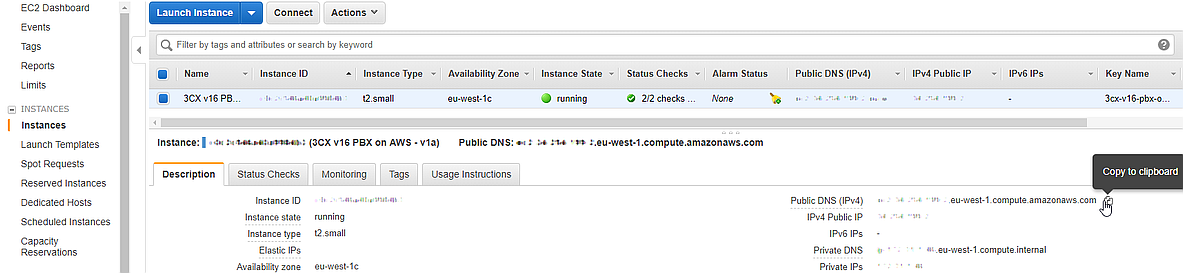
After installing the VM, go to the EC2 Console > Instances section and click on the Instance ID of the created VM. Optionally, you can rename the VM by clicking Edit next to the name.
Copy the public DNS name of VM Public DNS (IPv4) and open it in a browser, for example,
example.eu-west-1.compute.amazonaws.com . Log in with your 3CX username. Password = Instance ID of the created virtual machine.
Then continue to configure the new PBX according to the documentation. During setup, set the 3TX HTTPS web services port to 5001 or 443 , and always set the HTTP port to 5000 .
All Articles