What is a PSD iPhone layout and how to use it?
Customers are much more likely to approve or purchase a design if they can imagine how it will look in reality. And in a world where fast-paced business solutions are the norm, it is more important than ever for designers to be able to quickly present a realistic layout of created design.
In this short tutorial, we will take a look at the three-step process of finding, understanding, and using layout files for your design.
You can find almost everything you need on the Internet, and this is also true for device layout files. There are many free and paid layouts, and we recommend that you check both options to decide for yourself which one is best for your needs.
Once you find what you are looking for, download the file. Most layout files contain a folder that usually contains sets of the following files: .psd, .jpg, and .txt or .pdf. Let's analyze the purpose of each of them:
The .psd file is the source file in which you will work and edit the content to subsequently insert your design there.
A .jpg file is a preview of the layout, designed to see how the layout may look with the design inside it.
.Txt or .pdf - describes the details of the file, such as the author of the layout, licensing information and its composition.
As an example, we will take this iPhone X mockup as an example:

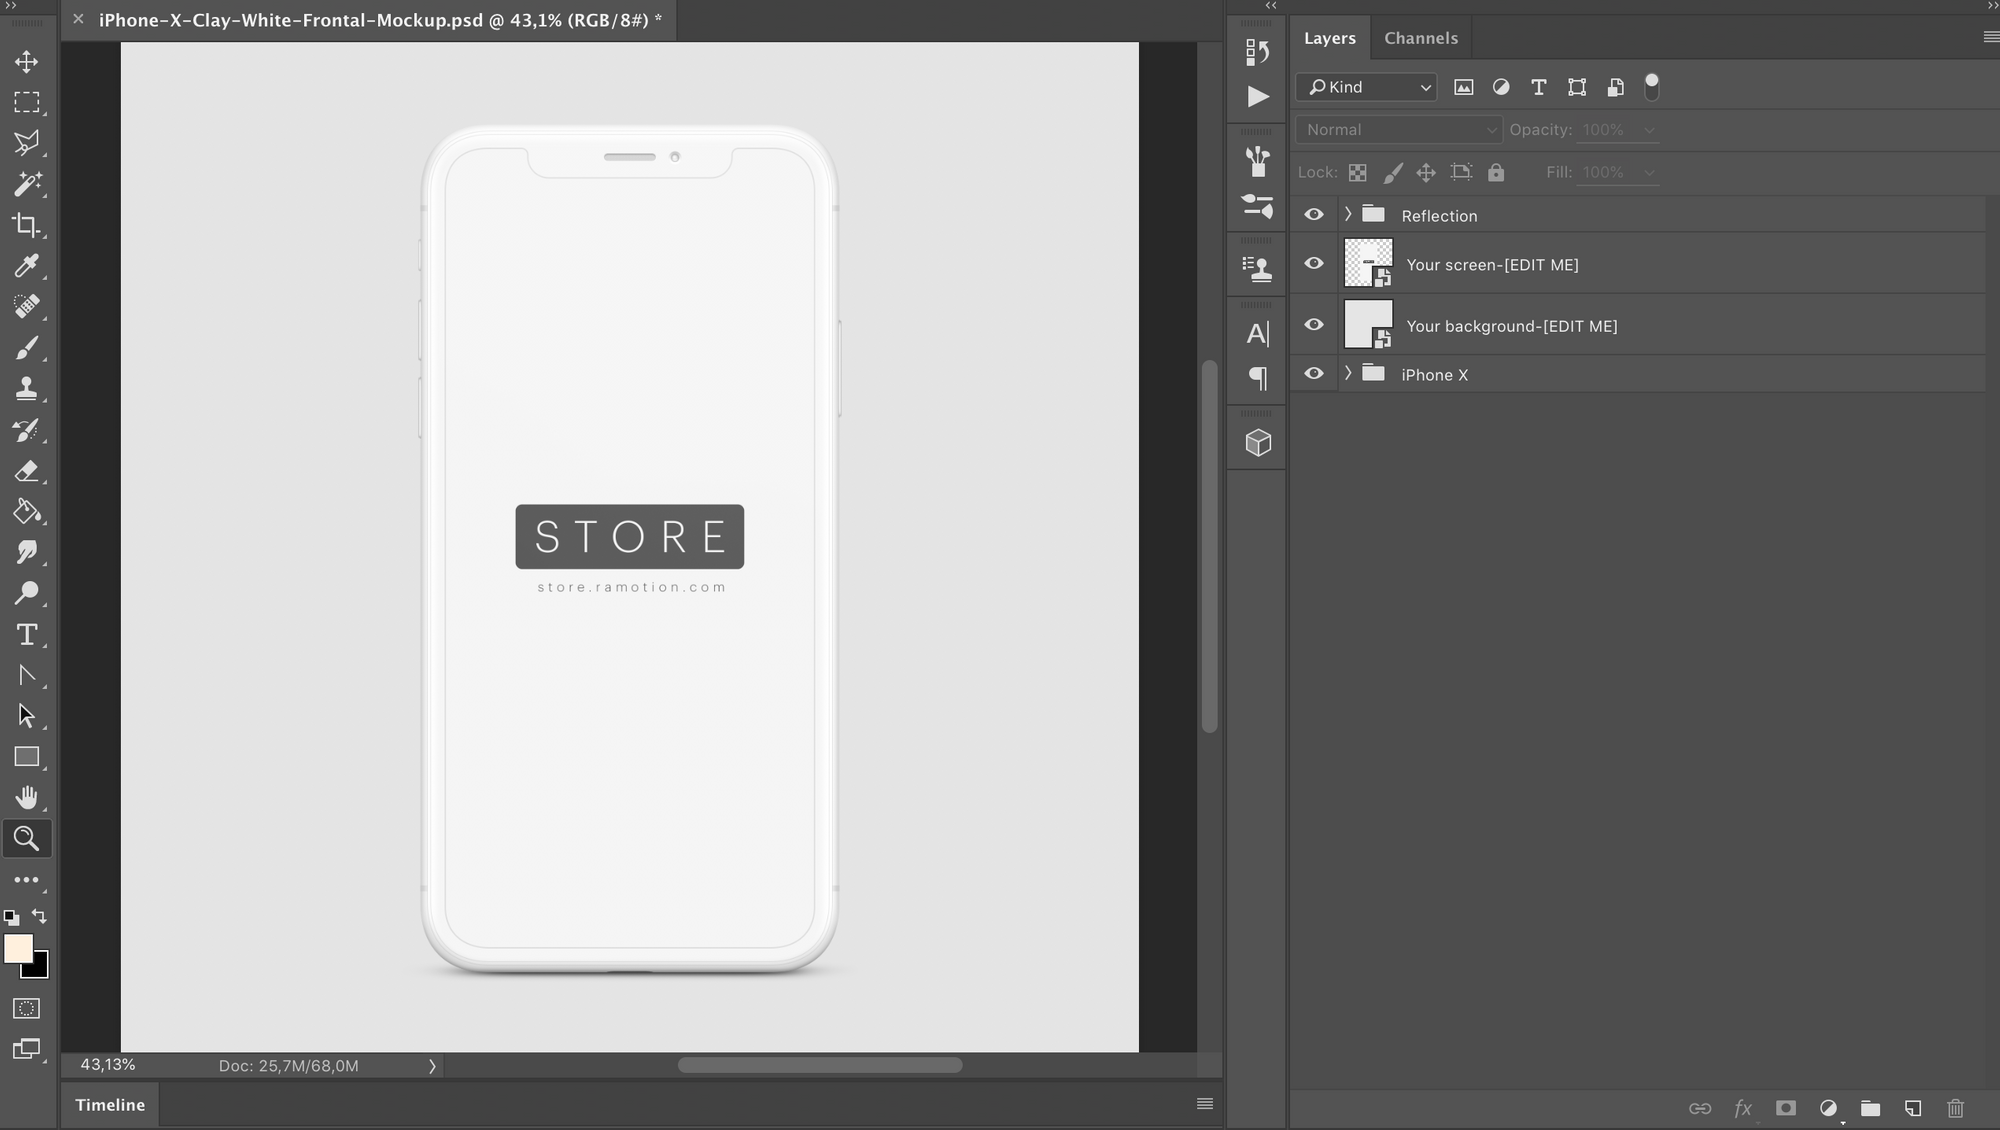
When we downloaded and unzipped the layout file, it was time to open it in Adobe Photoshop and familiarize ourselves with the layout layers.
Understanding how to edit layers is important, as you will replace the template in the layout with your own design.
Most layouts consist of at least three layers: the background color, the object itself, and the space for the logo. Of course, the layers may vary depending on the number of objects in the layout, as well as how simple or complex the design you want to eventually insert into this layout.
To edit a smart object, click on it, after which you will go to the editing screen.
A smart object is an object that never loses its quality - no matter how you resize it. It consists of vector or bitmap images, which are image data layers created in Illustrator or Photoshop file format. It is designed to safely store image characteristics regardless of changes made, hence the word “smart”.
Smart objects are non-rasterized files. What does this mean?
Rasterization is an action aimed at converting a vector image (Illustrator file), consisting of points and curves, into a computer or print version with pixel graphics. Some tools, such as eraser, fill and filters, work only with rasterized files.
Smart objects are not rasterized because the rasterization process means that you can no longer scale an image without losing quality.
To find a smart object, find the small icon above the layer, usually located in the lower right corner. When you hover over it, the pop-up text indicates that you are on a smart object.
Finally, the last step is to insert the design you created into the layout.
In the editing window containing the smart object, just drag your design onto the screen to replace the contents of the layout with your own work.

Next, click "Save" and return to the original PSD file to see the changes.
In our case, the updated file will look like this:

Layouts will help your client visualize how his design will look in the real world. Layouts are incredibly easy to find and use, and they can significantly affect the perception of your design by customers and users.
Do you find the use of such device mockups useful in design and advertising?
In this short tutorial, we will take a look at the three-step process of finding, understanding, and using layout files for your design.
Step # 1: Find and download the layout!
You can find almost everything you need on the Internet, and this is also true for device layout files. There are many free and paid layouts, and we recommend that you check both options to decide for yourself which one is best for your needs.
Once you find what you are looking for, download the file. Most layout files contain a folder that usually contains sets of the following files: .psd, .jpg, and .txt or .pdf. Let's analyze the purpose of each of them:
The .psd file is the source file in which you will work and edit the content to subsequently insert your design there.
A .jpg file is a preview of the layout, designed to see how the layout may look with the design inside it.
.Txt or .pdf - describes the details of the file, such as the author of the layout, licensing information and its composition.
As an example, we will take this iPhone X mockup as an example:
Step # 2: Open the file and find the smart object in it
When we downloaded and unzipped the layout file, it was time to open it in Adobe Photoshop and familiarize ourselves with the layout layers.
Understanding how to edit layers is important, as you will replace the template in the layout with your own design.
Most layouts consist of at least three layers: the background color, the object itself, and the space for the logo. Of course, the layers may vary depending on the number of objects in the layout, as well as how simple or complex the design you want to eventually insert into this layout.
To edit a smart object, click on it, after which you will go to the editing screen.
Smart Objects
A smart object is an object that never loses its quality - no matter how you resize it. It consists of vector or bitmap images, which are image data layers created in Illustrator or Photoshop file format. It is designed to safely store image characteristics regardless of changes made, hence the word “smart”.
Smart objects are non-rasterized files. What does this mean?
Rasterization is an action aimed at converting a vector image (Illustrator file), consisting of points and curves, into a computer or print version with pixel graphics. Some tools, such as eraser, fill and filters, work only with rasterized files.
Smart objects are not rasterized because the rasterization process means that you can no longer scale an image without losing quality.
To find a smart object, find the small icon above the layer, usually located in the lower right corner. When you hover over it, the pop-up text indicates that you are on a smart object.
Step # 3: Post your content
Finally, the last step is to insert the design you created into the layout.
In the editing window containing the smart object, just drag your design onto the screen to replace the contents of the layout with your own work.
Next, click "Save" and return to the original PSD file to see the changes.
In our case, the updated file will look like this:
Conclusion
Layouts will help your client visualize how his design will look in the real world. Layouts are incredibly easy to find and use, and they can significantly affect the perception of your design by customers and users.
Do you find the use of such device mockups useful in design and advertising?
All Articles