The first thing to do when starting a project on Django
Greetings to the community, I faced the challenge of writing a social network. And since the programming language that I more or less speak Python is, I chose the Django framework for implementing the project. In order not to waste time writing HTML templates and CSS styles, I take these files on the Internet with the mark Free. These are mainly templates from Colorlib .
Go.
Immediately make a reservation that I am using PyCharm, so I may not know all the commands from the manage.py file.
After creating the project in the environment, as in any Django project, the first thing to do is make changes to the settings.py file, namely:
Next, create your application with the command
As far as I know, a good way to write applications in Django is to split the project into separate applications, and already in them we describe the functionality that we need. This approach provides easy transfer of applications from one project to another, which is very convenient. Let's go further.
Once the application is created, we need to register it in order to start using it. Add the application to the list of used ones.
Next, you need to determine the url for our application, which is also a good development tone. In the application folder (not to be confused with the project folder), you must first create the urls.py file. And then in the project folder in the urls.py file we import the include function and prescribe the address. This is also written in the comments in the file itself.
If at this point we start the server with the command
on the command line (in PyCharm the “Run” or “Debug” button), we get an error, because in the application folder the urls.py file (hereinafter - account / urls.py) is empty.
Fill it with the following code.
Now an error will come up because account / views.py is empty. We fix it.
Almost done. What has already been done:
It's time to create a template.
When creating a project, we automatically create the 'templates' folder, in it you need to create the my_app folder, inside my_app create the index.html file. To check in the body tag, you can write:
and you can start the server.
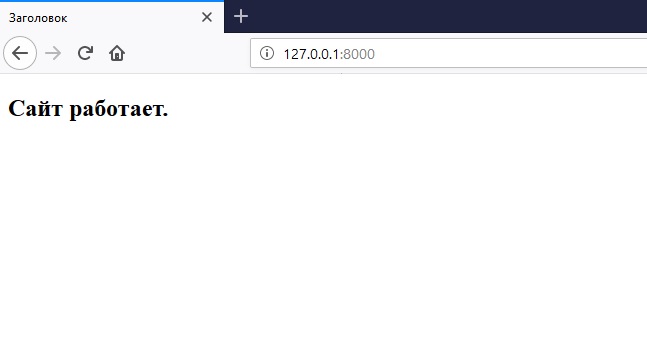
In the end, we should see this (image):
If the site uses any CSS styles or JavaScript files, and this is 10 out of 10 cases, then you need to load them before the DOCTYPE line with the command
In this case, create a “static” folder in the application folder, hold CSS, JS, etc. inside. And in the HTML template, specify the absolute path to the file in the link tag with the href parameter, for example:
Total, the file will look like this:
In general, this is where the introduction ends. Further, all actions will be similar, only the essence will be different. There will be different forms (form tag in HTML) in the forms.py file of the application (you need to create this file first), there will be different application logic described in views.py, well, and the models in the database described in models.py. But the algorithm of actions is the same
+ - a pair of intermediate actions in the form of forms and models.
On the Metanit blog (link below), the essence of the Model - Template - Presentation is well described, I am not going to copy paste, I also have a theory about forms and models.
In the “Django Girls Handbook” (link below), you can learn more about expanding HTML templates (an extremely useful feature of Django), about creating an administrator account, and about adding data to the created models.
And I end here. In the next part, there will be a code for creating a registration form on the site, and in order not to litter on Habré, I will give a link to the github. Success in the main, comrades.
Links to useful resources:
Django Blog - Metanit
Django Girls Guide
Django in examples
Go.
Immediately make a reservation that I am using PyCharm, so I may not know all the commands from the manage.py file.
After creating the project in the environment, as in any Django project, the first thing to do is make changes to the settings.py file, namely:
- Change two variables to
LANGUAGE_CODE = 'ru-ru' TIME_ZONE = ' / ' #: Europe/Moscow
- Add folder for static and media files
# Static files STATIC_URL = '/static/' STATIC_ROOT = os.path.join(BASE_DIR, 'static') # Media files MEDIA_URL = '/media/' MEDIA_ROOT = os.path.join(BASE_DIR, 'media')
Next, create your application with the command
python manage.py startapp my_app
As far as I know, a good way to write applications in Django is to split the project into separate applications, and already in them we describe the functionality that we need. This approach provides easy transfer of applications from one project to another, which is very convenient. Let's go further.
Once the application is created, we need to register it in order to start using it. Add the application to the list of used ones.
INSTALLED_APPS = [ 'django.contrib.admin', ... 'django.contrib.staticfiles', 'my_app',# ]
Next, you need to determine the url for our application, which is also a good development tone. In the application folder (not to be confused with the project folder), you must first create the urls.py file. And then in the project folder in the urls.py file we import the include function and prescribe the address. This is also written in the comments in the file itself.
from django.contrib import admin from django.urls import path, include urlpatterns = [ path('admin/', admin.site.urls), path('', include('account.urls')) ]
If at this point we start the server with the command
python manage.py runserver
on the command line (in PyCharm the “Run” or “Debug” button), we get an error, because in the application folder the urls.py file (hereinafter - account / urls.py) is empty.
Fill it with the following code.
from django.urls import path from . import views urlpatterns = [ path('', views.index, name='login'),# ''( ), ( Django) log ]
Now an error will come up because account / views.py is empty. We fix it.
from django.shortcuts import render # # Create your views here. def index(request):# context = {}# HTML return render(request, 'my_app/index.html', context)# HTML
Almost done. What has already been done:
- Created an application in the project.
- Changed settings.
- The address in the main urls.py project is registered.
- The urls.py file is created in the application and the view is written in it.
- In the view, a function has been created for processing the url of the address and HTML template.
It's time to create a template.
When creating a project, we automatically create the 'templates' folder, in it you need to create the my_app folder, inside my_app create the index.html file. To check in the body tag, you can write:
<!DOCTYPE html> <html lang="ru"> <head> <meta charset="UTF-8"> <title></title> </head> <body> <h2> .</h2> </body> </html>
and you can start the server.
In the end, we should see this (image):
If the site uses any CSS styles or JavaScript files, and this is 10 out of 10 cases, then you need to load them before the DOCTYPE line with the command
{%load staticfiles%}
In this case, create a “static” folder in the application folder, hold CSS, JS, etc. inside. And in the HTML template, specify the absolute path to the file in the link tag with the href parameter, for example:
<link href="{% static 'css/style.css' %}" rel="stylesheet">
Total, the file will look like this:
{%load staticfiles%} <!DOCTYPE html> <html lang="ru"> <head> <meta charset="UTF-8"> <title></title> <link href="{% static 'css/style.css' %}" rel="stylesheet"> </head> <body> <h2> .</h2> </body> </html>
In general, this is where the introduction ends. Further, all actions will be similar, only the essence will be different. There will be different forms (form tag in HTML) in the forms.py file of the application (you need to create this file first), there will be different application logic described in views.py, well, and the models in the database described in models.py. But the algorithm of actions is the same
- Create an address.
- Create a view (logic).
- Create an HTML template.
- We tie everything together.
+ - a pair of intermediate actions in the form of forms and models.
On the Metanit blog (link below), the essence of the Model - Template - Presentation is well described, I am not going to copy paste, I also have a theory about forms and models.
In the “Django Girls Handbook” (link below), you can learn more about expanding HTML templates (an extremely useful feature of Django), about creating an administrator account, and about adding data to the created models.
And I end here. In the next part, there will be a code for creating a registration form on the site, and in order not to litter on Habré, I will give a link to the github. Success in the main, comrades.
Links to useful resources:
Django Blog - Metanit
Django Girls Guide
Django in examples
All Articles