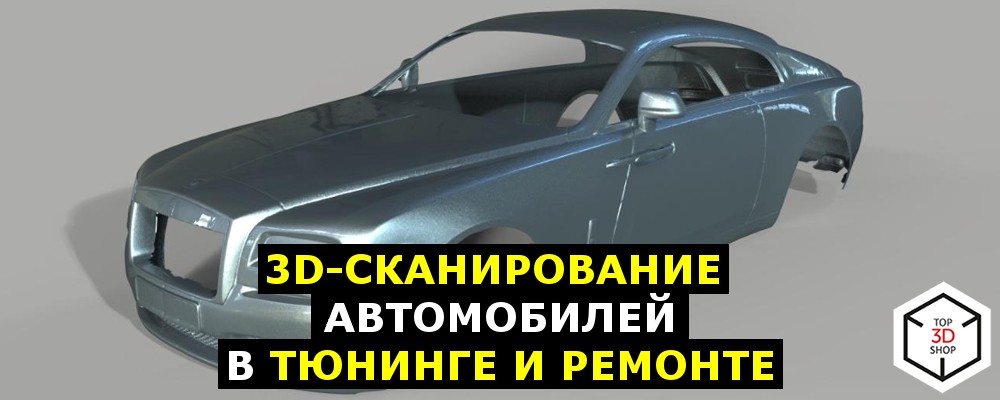
3D scanning of cars in tuning and repair
What is the article about?
3D scanning has long been used in the automotive industry at the design stage, but it can be useful not only to design engineers and body designers.
Today we will talk about the use of 3D-scanning in the field of automobile tuning. The very process of scanning can be found in more detail in our review “How we scanned Rolls-Royce Wraith for tuning”
For whom
This article may be useful to anyone who is engaged in self-tuning car or provides such services. The review will be based on completed orders of our company.
Purpose, tasks
Tuning a car is quite a costly matter, besides not a quick one. If the project was unsuccessful or with errors, you can get an unsatisfactory result by spending a fair amount of money and time. And here a 3D scan can help a lot. Having received a high-quality model of the body, the designer can simulate any element of tuning and provide a visualization of how it will look on the car, which allows you to immediately evaluate the possible appearance.

It is possible to model all the necessary fastenings and make the whole structure tougher and more reliable than when fitting standard parts on glue and self-tapping screws “by the eye”. The resulting models of parts can be made using 3D printing, if there are no special requirements for strength, or used to make a matrix on a CNC machine.
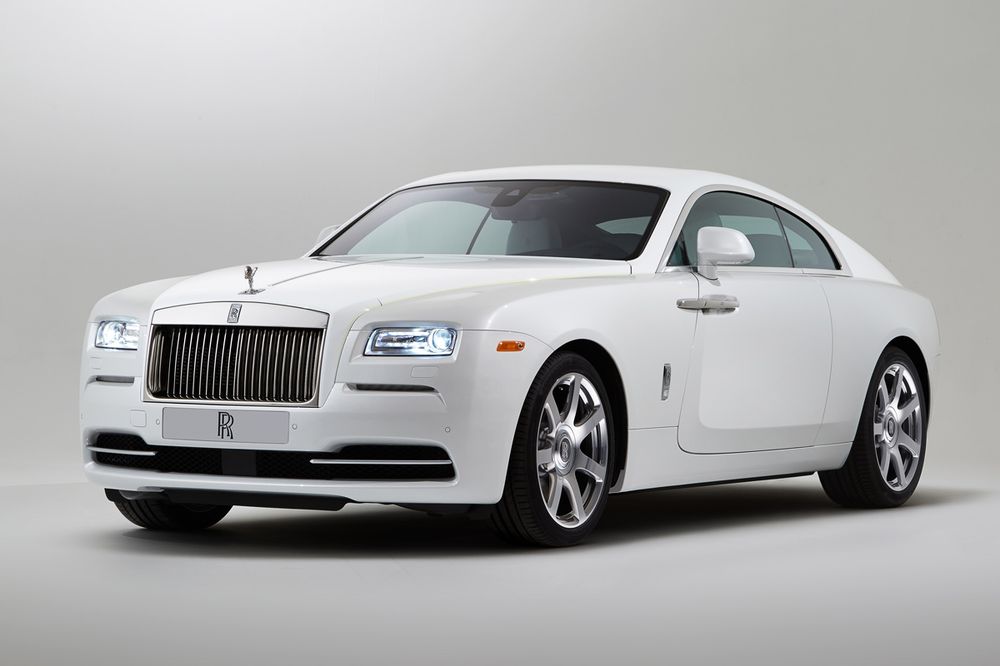
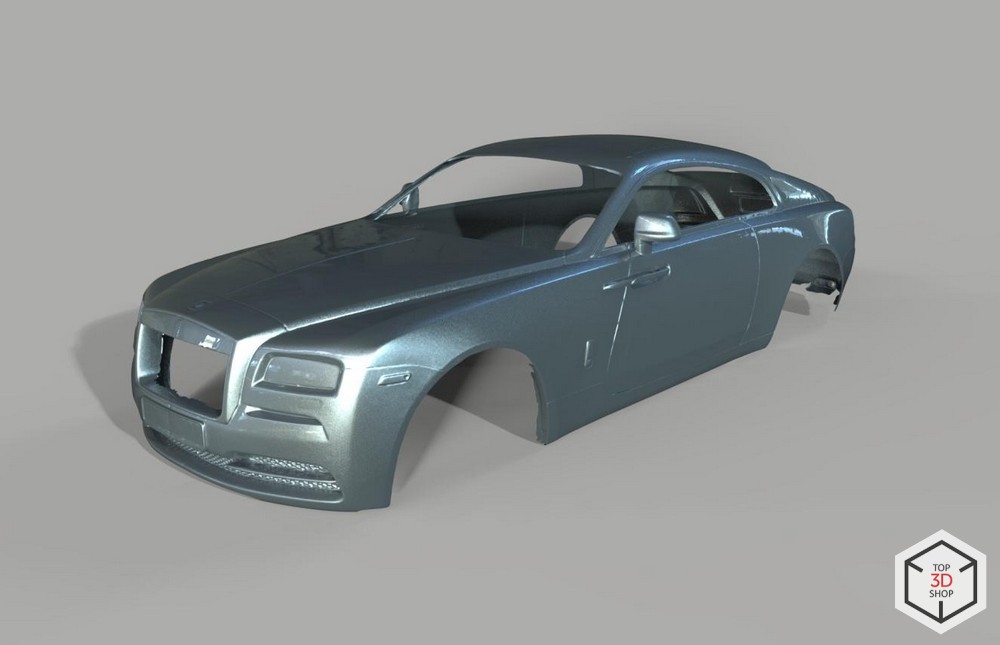
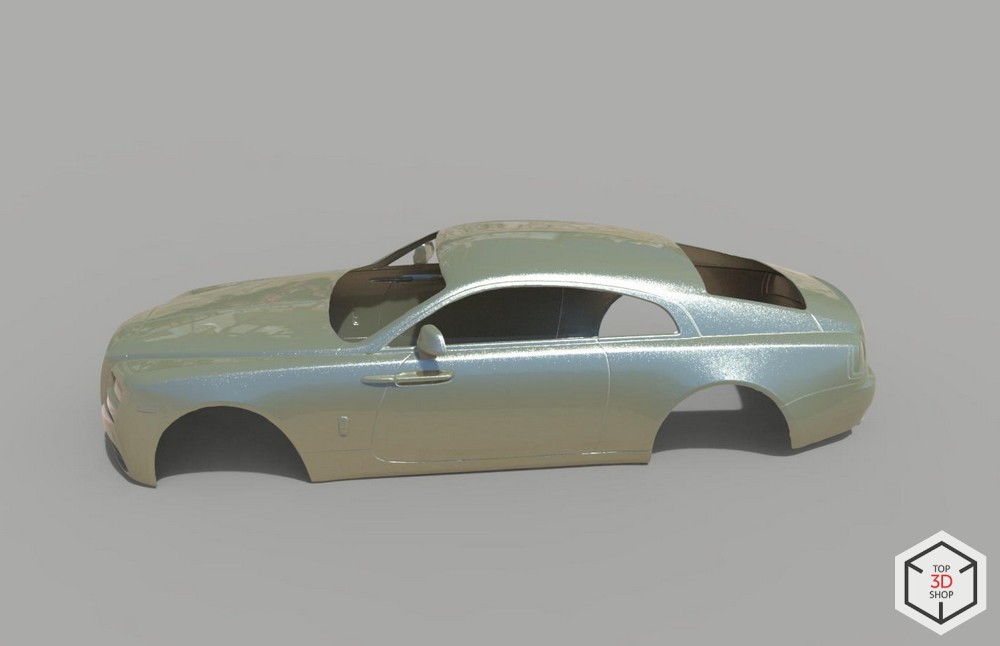
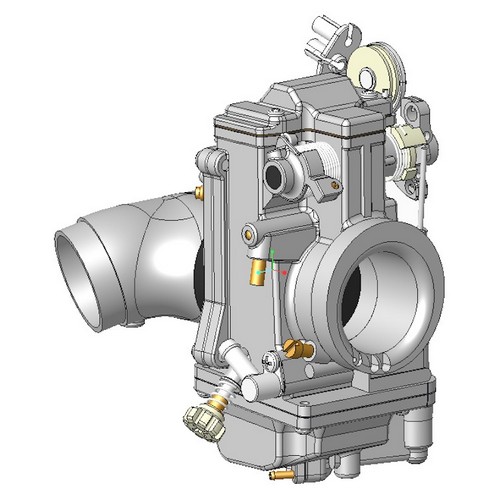
Example: a customer needs a serious Rolls Roys Wraith body modding. What is required 3D-model of the body, for a fine fit of all elements. We used the Artec Eva 3D scanner.

How it was done without 3D scanning
Scanning has been used in the automotive industry for a long time to check the accuracy of the assembly line, to digitize a design that was originally molded by a clay sculptor, to design ergonomic chairs.
In the field of auto-tuning 3D scanning has come relatively recently. Previously, tuning in car dealerships was done using plasticine, foam, fiberglass and manual fitting of parts, which required a considerable amount of time and effort, besides creating problems with the symmetry of the finished design, because the mirror detail had to be sculpted from scratch as well.
Initially, the technique included the manufacture of 3 methods:
Fiberglass / fiberglass / epoxy:
The base of the future body kit is made of foam, then, using assembly foam, plasticine and sharp stationery knives, the desired shape is finally removed, which is then pasted over with fiberglass in layers, the layers are glued together with epoxy resin. When everything hardens, the foam and foam are removed, the places for fastenings are cleaned and brackets for fastening are made on the epoxy. After installation on the body, at the place of rubbed with putty, primed and painted. Pretty simple and affordable way. Of the problems it can be noted that due to the epoxy resin, the product turns out to be quite heavy, and on impact it cleaves and almost cannot be repaired.
Plasticine
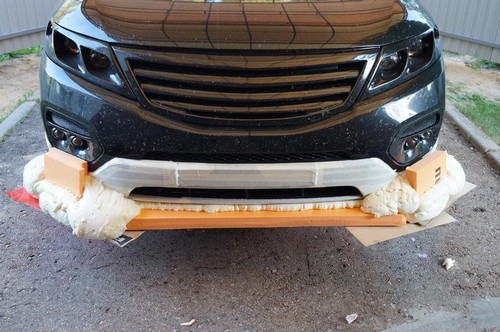
From clay, right on the car, we begin to fashion kit, for example, a bumper. We derive all the lines from the planned sketch. Where a lot of plasticine is required - we lay the bars in thinner places, to preserve the shape - wire. Provide in advance that the bumper can be easily and without damage removed.
Try to display the end result perfectly, otherwise there will be a lot of fuss. Make recesses in advance for additional headlights and air intakes. Before removing the structure, we prepare a wooden box of a size larger than your item, take a stock of 5-7 cm or more on each side. Be sure to provide in the support box for the layout so that the bumper hangs on them, and does not lie on the floor of the box, as the modeling is put in the box “face” down.
Prepare a mixture of gypsum - liquid enough to freely flow around the form - thick cream, not very liquid and not too thick.
Install the bumper on the support, after having smeared it with cream or petroleum jelly, and pour the plaster into the box until it fills the form. It is necessary to do in one go, the mixture will take a lot.
Leave the construction for a while, letting the plaster completely harden. It will take more than one day.
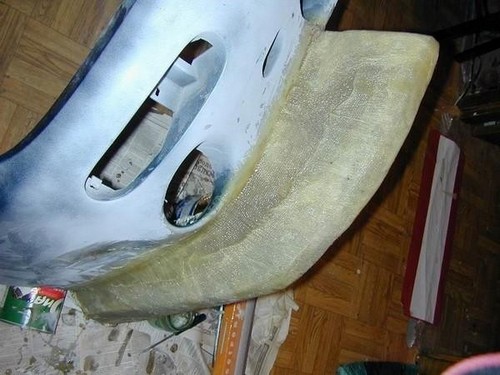
When the structure completely hardens, we take out the plasticine form and get a plaster cavity into which you can glue the bumper.
In the plaster form, be sure to drill thin through holes for air exhaust. Gently coat it with cream or vaseline, trying not to cover up the air ducts. Preparing the epoxy mixture, glass fiber cut into strips. Lay out each layer carefully, expelling air bubbles, especially the first layer.
After, as it will be laid out about 1.5-2 mm, we lay everything with a fine mesh, to strengthen the structure - it can be laid not over the whole area, but only in the places of fastenings. Next, we lay another 1-1.5 mm of fiberglass, not forgetting to provide for the attachment points of the bumper.
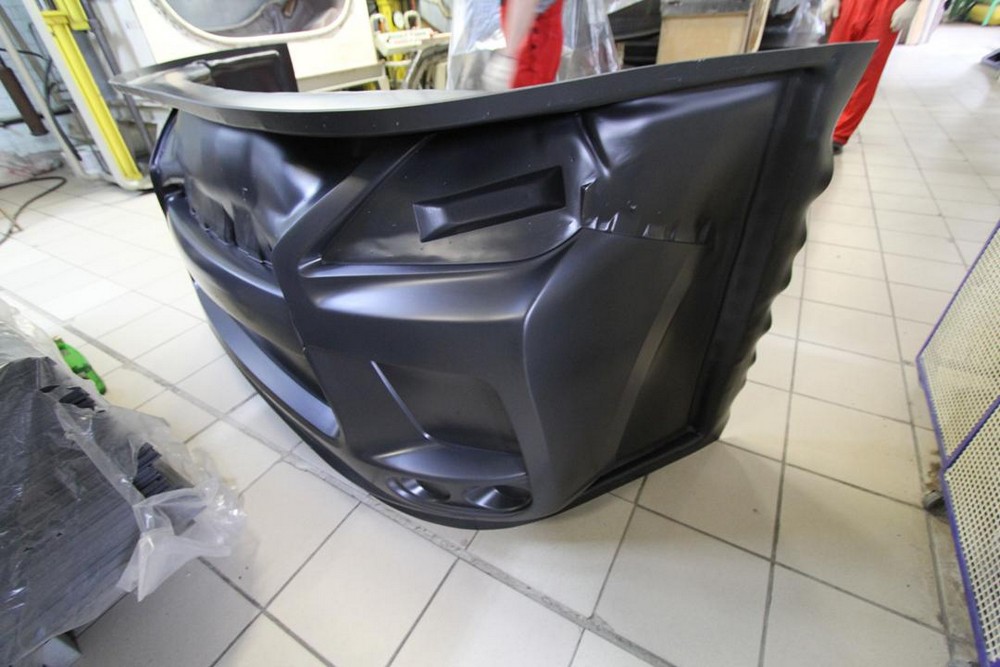
In the end, give the finished bumper a good dry and take out of the form. Next comes the trimming of excess and final finishing, polishing and fitting, then priming and painting. At this stage, the construction of the aerodynamic body kit on the car is completed.
Plastic / molding
The part obtained according to the previous method, or the model that is simply molded from plasticine, can be cast in plaster and a matrix is formed for molding, on which then plastic sheets are molded on the molding machine. The products are light and durable, but there may be problems at the attachment points, since the edge of the sheet has to be cut off manually and various additional equipment and materials are required - a large rig, a lot of gypsum, a molding machine.

Manual fit
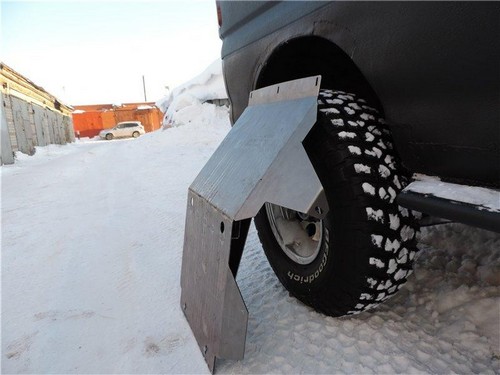
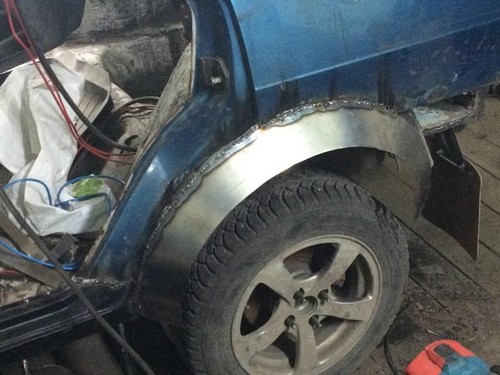
Sheet metal, or other materials, cut the workpiece of the desired size and shape, which are attached by welding or riveted to the surface of the old part and / or to each other. Further, they are puttied, primed and painted. The resulting design is quite resistant to small shocks. Cons: for such work requires serious training and experience, not all forms can be made by a similar method.
Decorative skirts of air ducts are made using the same technology, mainly of fiberglass.
Preparing to scan
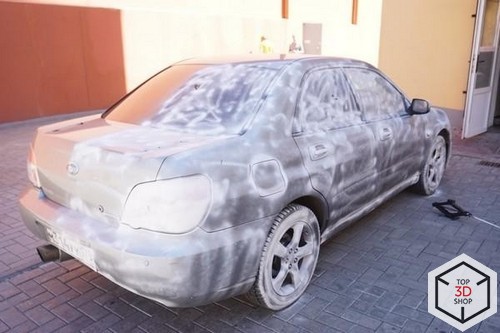
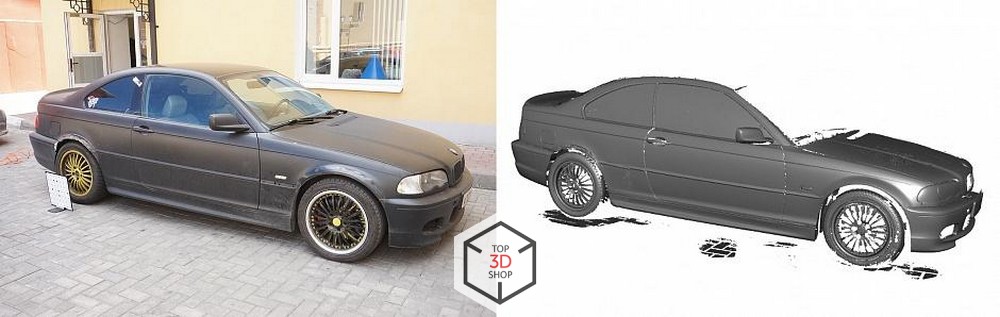
Now consider the 3D scan itself. First of all, 3D scanning has some limitations related to color and texture: black and smooth surfaces are scanned poorly. An example of a bad surface and environment is a shiny black car, daylight.
To scan such surfaces, the car will have to be matted with a special spray; it paints the surface in a white, matte color that is easily scanned.
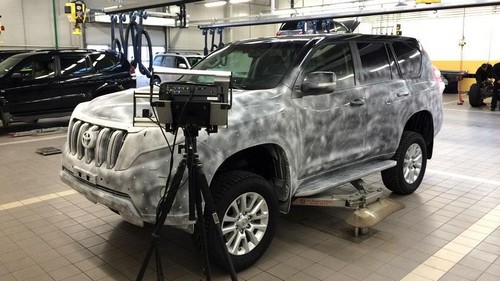
The second problem point is the poorly pronounced geometry and texture on some elements of the car, for example, on the bonnet or doors. When scanning such elements, the scanner has “nothing to cling to,” and the scans are stitched together by the program with great error, or the scanner reports that it has lost its geometry. To solve this problem, use markers - special black and white or reflective stickers.
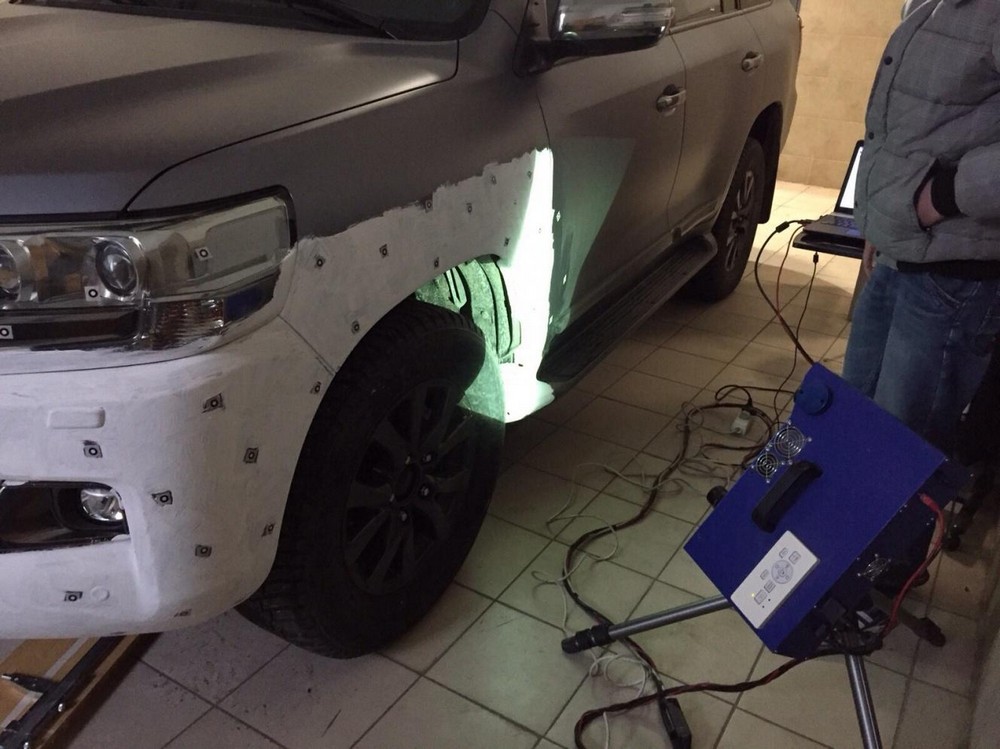
Although these labels do not add geometric features, they increase the texture features of the model, which the scanner can take into account. Some scanners build a marker network from markers, on which fragments of the scanned surface are then applied. Preparation takes considerable time and can last as long as the scan itself, as it is necessary to cover the entire surface of the car with spray and marks.
Another point that is important to consider is that optical scanners do not scan well in the street under bright light, so it is advisable to scan indoors.
An overview of the scanning process with examples
After preparation, you can start scanning. If we scan with a stationary scanner, the scanner will need to be moved and focused to capture each highly detailed frame. If the scanner is manual, everything is easier - slowly move the scanner over the surface of the car, and the scanner removes the data and collects it into the model.
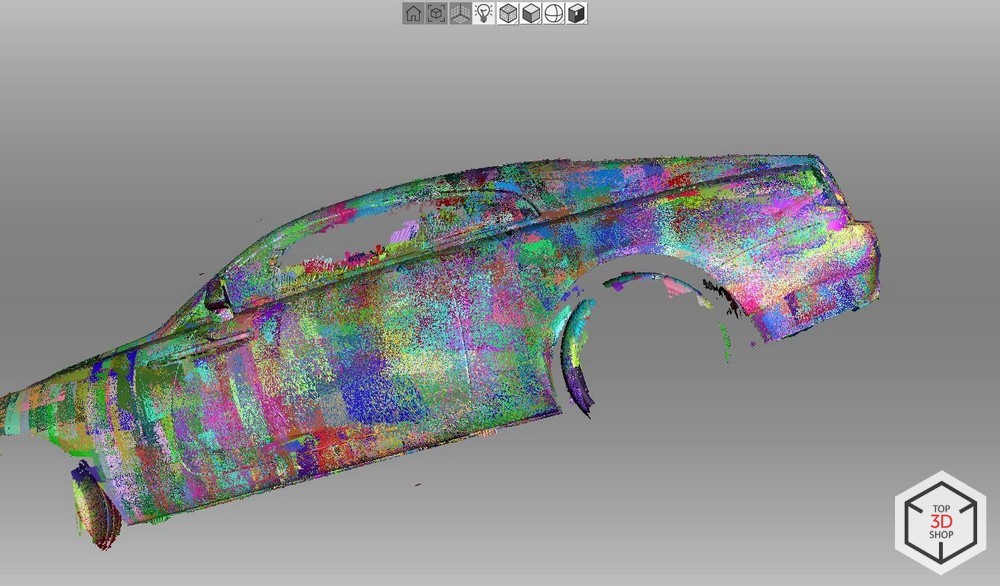
In view of the large amount of data, scanning occurs in stages, in the figure above you can see the individual fragments, highlighted in different colors.

Then all the resulting fragments are stitched into a single model. Here is the result.
An overview of the modeling process with examples
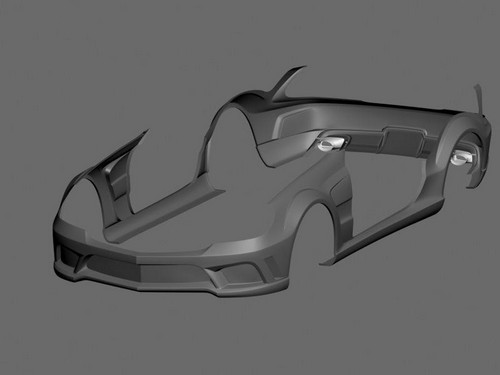
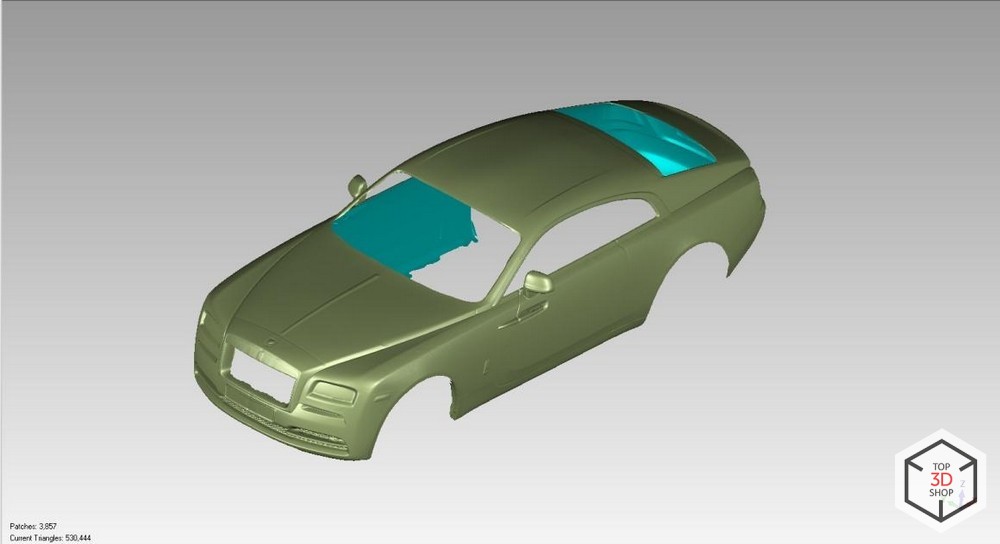
Scanners produce models in a polygonal format, and for accurate engineering modeling it is better to use models in CAD format.
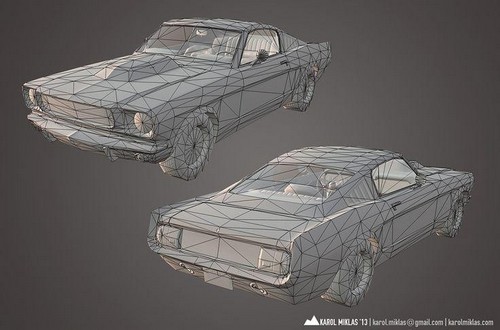
Above, we see an example of polygonal models - their surface consists of individual polygons, it is impossible to use such a model in CNC-cutting, because of the small detail, but you can print it on a 3D printer without any problems.
For accurate modeling, you need to translate models into CAD and do it in several ways. For example, simply rebuild the surface with reference to the vertices of the polygons in Rhinoceros 3D or analogs, or use specialized software such as Geomagic Design, which can transform the surface in an automatic, more accurate, or semi-automatic, more accurate mode.
Each element of a CAD model is an exact mathematical description of its geometry. This model is suitable for designing and subsequent cutting on CNC machines.
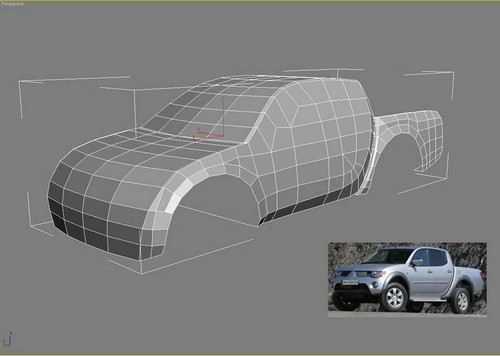
When a suitable 3D model is ready, you can simulate the necessary elements for tuning in any convenient software for 3D modeling.

Overview of production and possible problems
Making elements of tuning with the help of additive technologies or CNC machine tools is not much different from the old ways - this is the same as adding material or removing too much, but instead of manual labor, most of the work is done by machines. This increases productivity and accuracy.
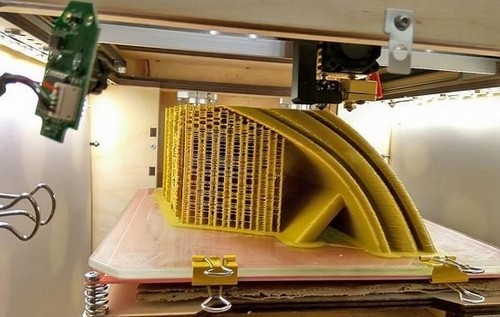
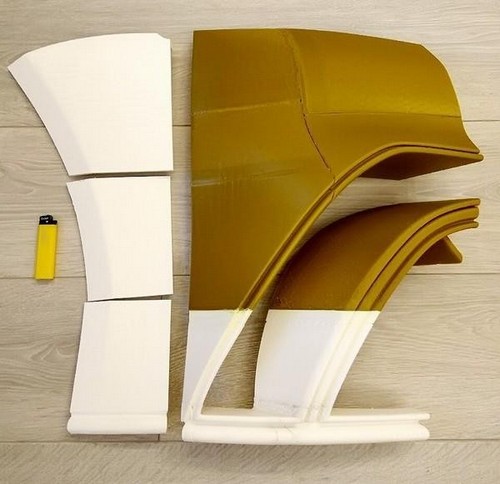
The first, easiest and cheapest option is to print a plastic item on a 3D printer, followed by putty and painting.
This option has its drawbacks - the print area of most printers is not very large, and printing on large industrial printers is usually very expensive, moreover, not all available materials for 3D printing have sufficient strength. Fiberglass can be used to reinforce printed elements. This is one of the most budget options.
The second option is to simulate the matrix for the manufacture of the model, we cut it on the CNC machine and use it as a template for molding plastic sheets, or as a matrix for pouring polyurethane or glass fiber molding. The beauty of this method in the manufacturing speed of the matrix, the accuracy and reliability of the design. You can make perfect mirror elements. If your company provides tuning services, you can sell similar items for cars of the same brand, make them to order - once fabricated, the matrix will bring profit more than once.
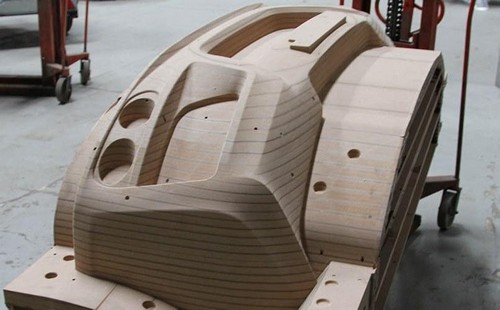
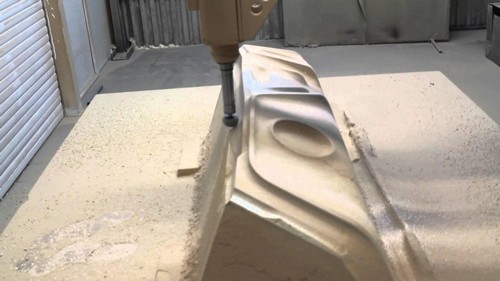
Above are examples of milled matrices for subsequent molding.
Which of the ways of making an element using a matrix is more profitable is a controversial issue. Polyurethanes, for all their remarkable properties, have a fairly high cost, and plastic molding requires additional equipment, such as a molding machine or its substitutes, while glass fiber molding requires manual labor and, consequently, time-consuming.
Conclusion
Compared with traditional production methods, new methods have their pros and cons:
- Accuracy - digital production is out of competition here, compared to traditional
- Repeatability - once-scanned model details can be used repeatedly, the same applies to created forms and matrices
- Lower cost and time when it comes to a series of parts
- Expensive, in the manufacture of a single part
- A lot of time is spent on scanning and processing a digital model, which can be unnecessarily long with a single unique order.
- You need the appropriate equipment, which also costs money.
Forecasts
Given the current trends in the development of the industry of 3D scanning and printing, we expect to simplify scanning and reduce the cost of printing elements.
Scanning is also growing in functionality and convenience - right now there are 3D scanners that do not require a computer connection and run on their own battery. The scan area is also constantly increasing, which allows you to spend less time on the process itself.
In the near future, with increasing resolution and speed of 3D scanners, scanning, which now takes about 3-4 hours, will need no more than 20-30 minutes.
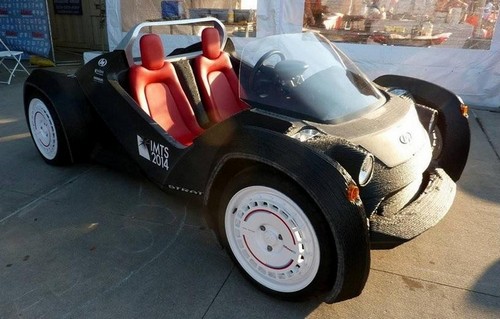
The constant increase in the print area of inexpensive 3D-printers and the improvement of the strength characteristics of the materials will allow you to print the necessary body kit parts right at the auto repair shop.
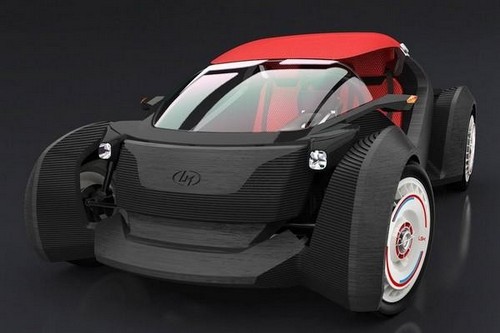
The body of this car is printed on a 3D printer.
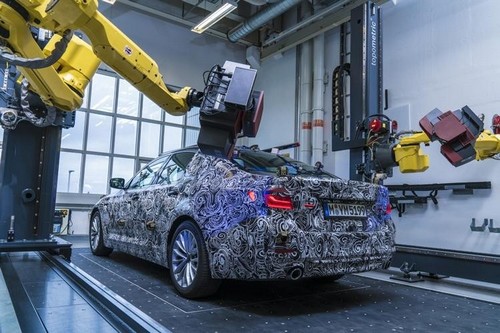
In the illustration above - scanning with the help of robotic manipulators. Fully automated.
3D scanners
Artec Eva
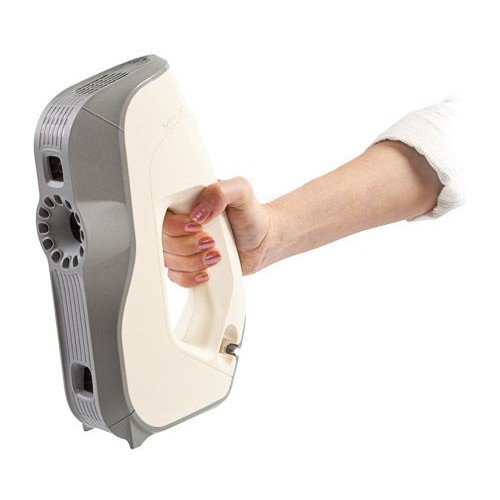
- Scanning area, mm: 214 × 148 - 536 × 371
- Accuracy, micron: 100
- Color: yes
- Price: 945 300 rub.
RangeVision Pro 5M
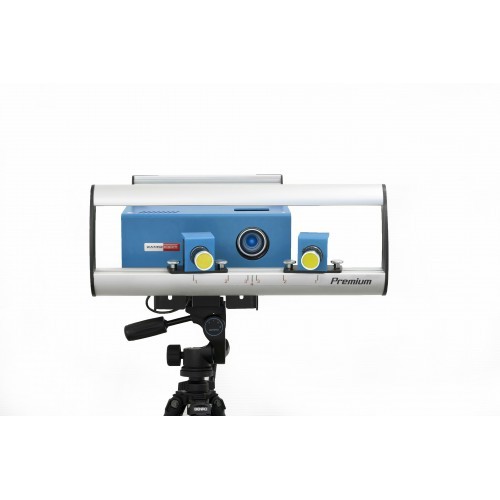
- Scanning area, mm: 920 x 690 x 690
- Accuracy, micron: 30
- Color: no
- Price: 1 180 000 rub.
Shining Einscan Pro +
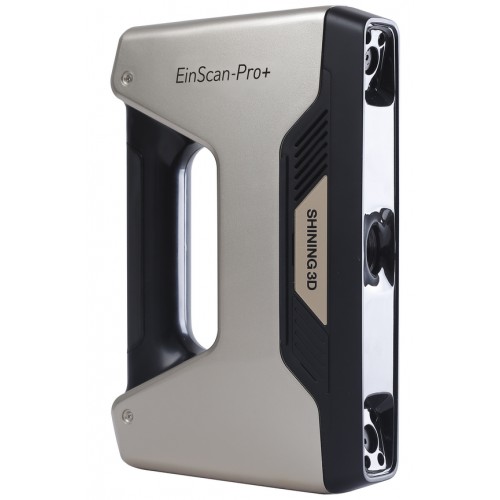
- Scanning area, mm: 300 x 170
- Accuracy, micron: 50/100/300
- Color: with optional module
- Price: 314 910 rub.
Other 3D scanners are also available. For selection of the tool for your requirements, please contact our staff.
findings
3D scanning is already being used to customize cars, both by individuals and in the order of rendering services, by individual craftsmen and car repair shops. While it is not as cheap as traditional methods, but the advantage in accuracy and quality justifies the investment.
You can order 3D scanning services and further manufacturing of necessary parts, as well as purchase equipment necessary for independent work, you can at Top 3D Shop - our qualified engineers will do the necessary work, or help you choose the right materials and equipment and teach you how to work with it.
Want more interesting news from the world of 3D technology?
Subscribe to us in the social. networks:


All Articles