Interactive Projector - interactive software! Part One: Firmware and Key Features

Planning a demonstration of the capabilities of interactive projectors in the continuation of one of the previous posts about interactive Epson projectors , we tried a lot of various applications on the projector screen and want to share our impressions and test results. Strangely enough, it is difficult to say for sure whether it makes sense to isolate the “software for interactive projectors” (panels, boards) into a separate software class , because if you can work with an application using a normal mouse, you can use it without any problems and with an interactive projector.
At the same time, the huge size of the interactive surface created by the projector (over 80 inches) provides some advantages:
- Provides higher touch accuracy than on portable devices, which allows you to find new ways to use input with the help of touch with your fingers and an electronic marker (elementary due to the larger area of the interactive surface);
- The large screen size automatically contributes to co-creation (drawing in children, or brainstorming), or conducting exciting interactive lessons and presentations.
In this post we briefly recall how this works, and tell you who needs it at all.
What makes an interactive projector so "interactive"
As a rule, an interactive projector , or other similar device, displays a video signal from a computer, sending USB information about user interactions with the screen back to USB. In other words, this solution works both as an output device and as an ordinary computer mouse. If you take an interactive projector in its classic form, such as Epson EB-536Wi , then the bundle includes a special marker with which you can interact with the image projected on any flat surface.
If the application you are working with supports the mouse (the standard interface with the cursor is still not Counter-Strike), then you will feel quite comfortable working with familiar applications, but on the big screen.
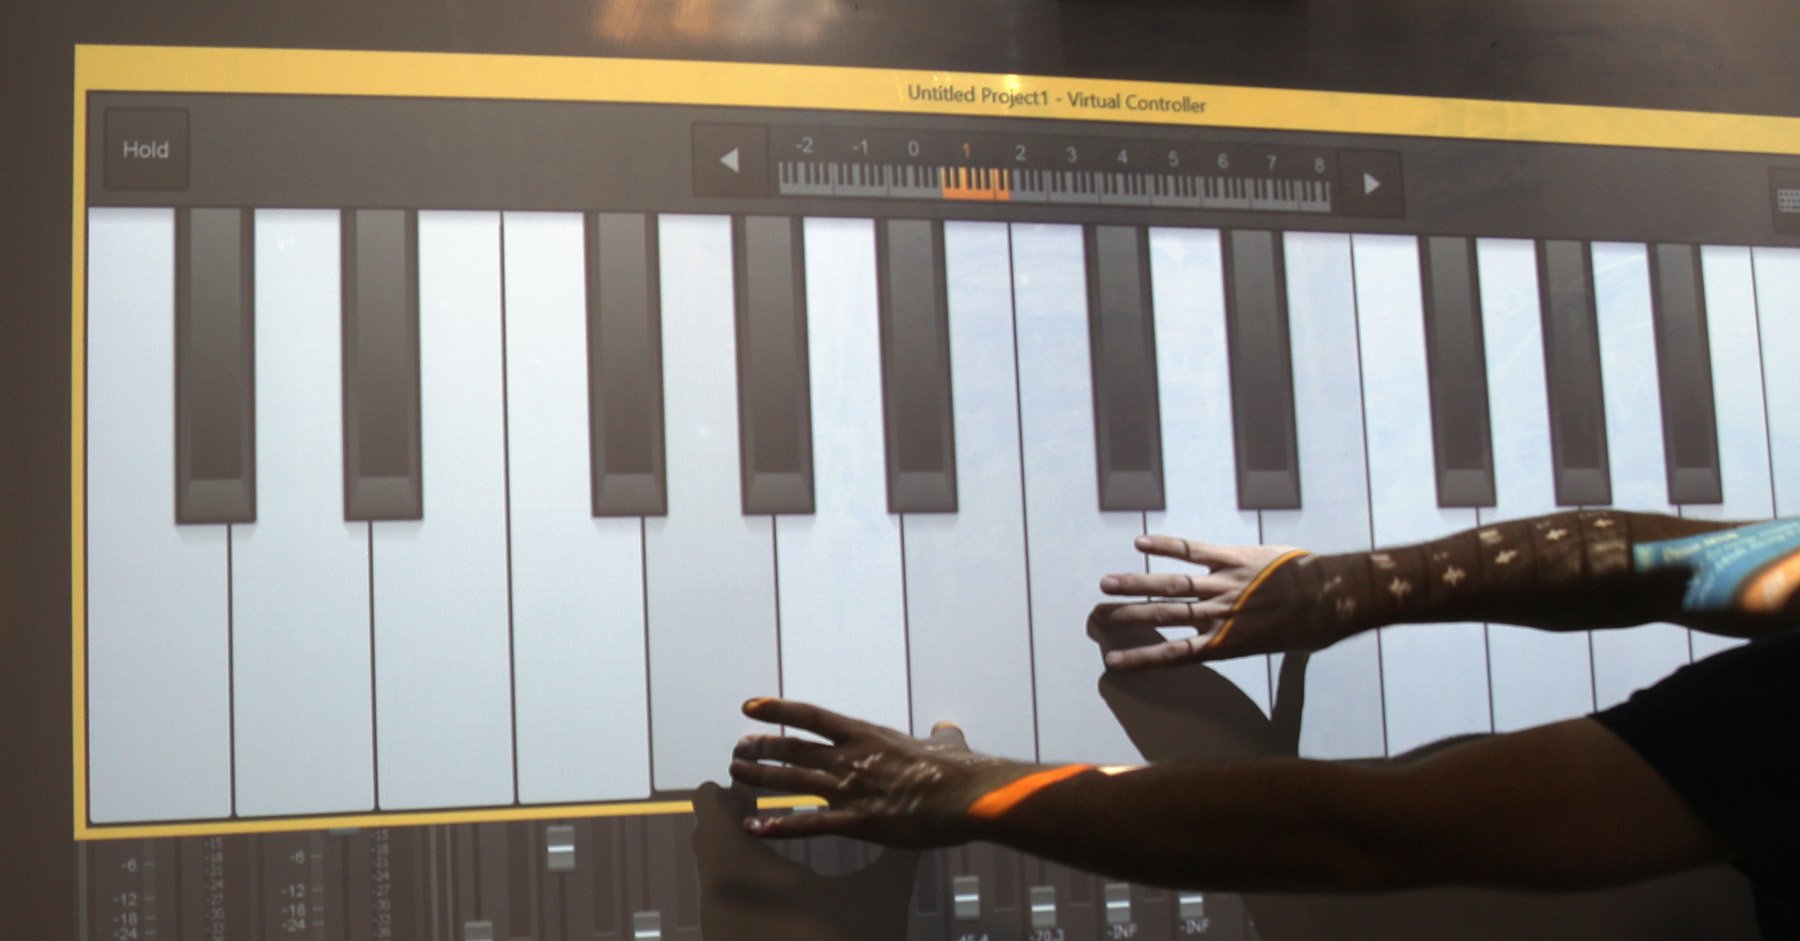
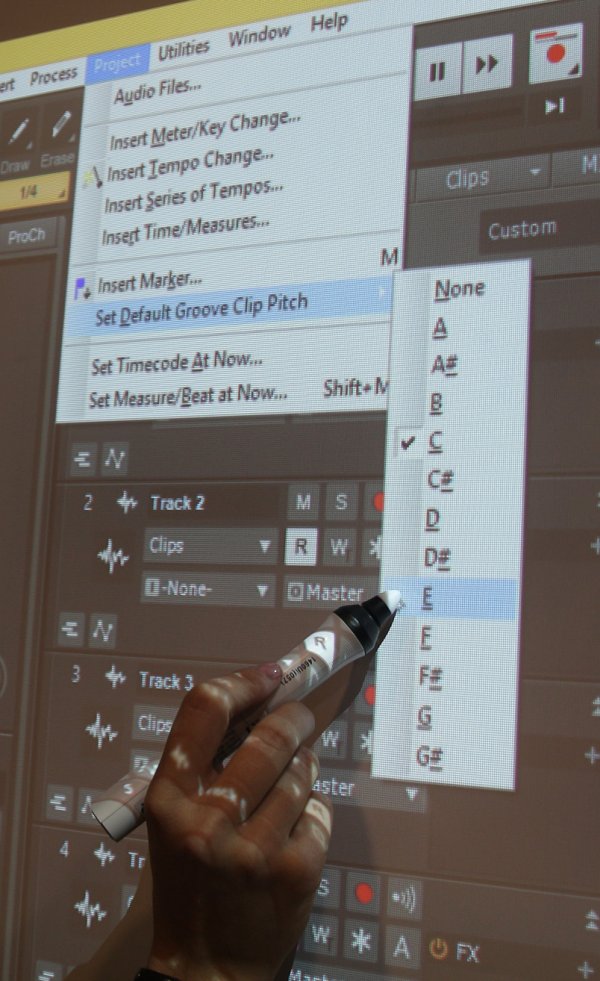
By the way, here we have something to brag about. Epson projectors support marker hovering above the surface - the cursor location is determined when the marker is close to the surface , without touching , just like when working with an art tablet from Wacom. You can't do without it when you need to move the cursor somewhere smoothly, or, as in the picture above, open the nested menu items. Those. This is almost the equivalent of an artistic tablet! True, with only one level of depression and a diagonal of 80+ inches =)
Also in our model range there are projectors with touch support with your fingers , such as the Epson EB-595Wi , which is already well-known in its environment. In most cases, touching the fingers replace the mouse, but, in fact, are a fundamentally different way to enter. For example, when using the marker in the standard Windows 8 interface, you will have to press the up and down buttons and use the scroll bars to navigate. At the same time, touching the finger allows you to simply flip through the pages with gestures supported at the operating system level.
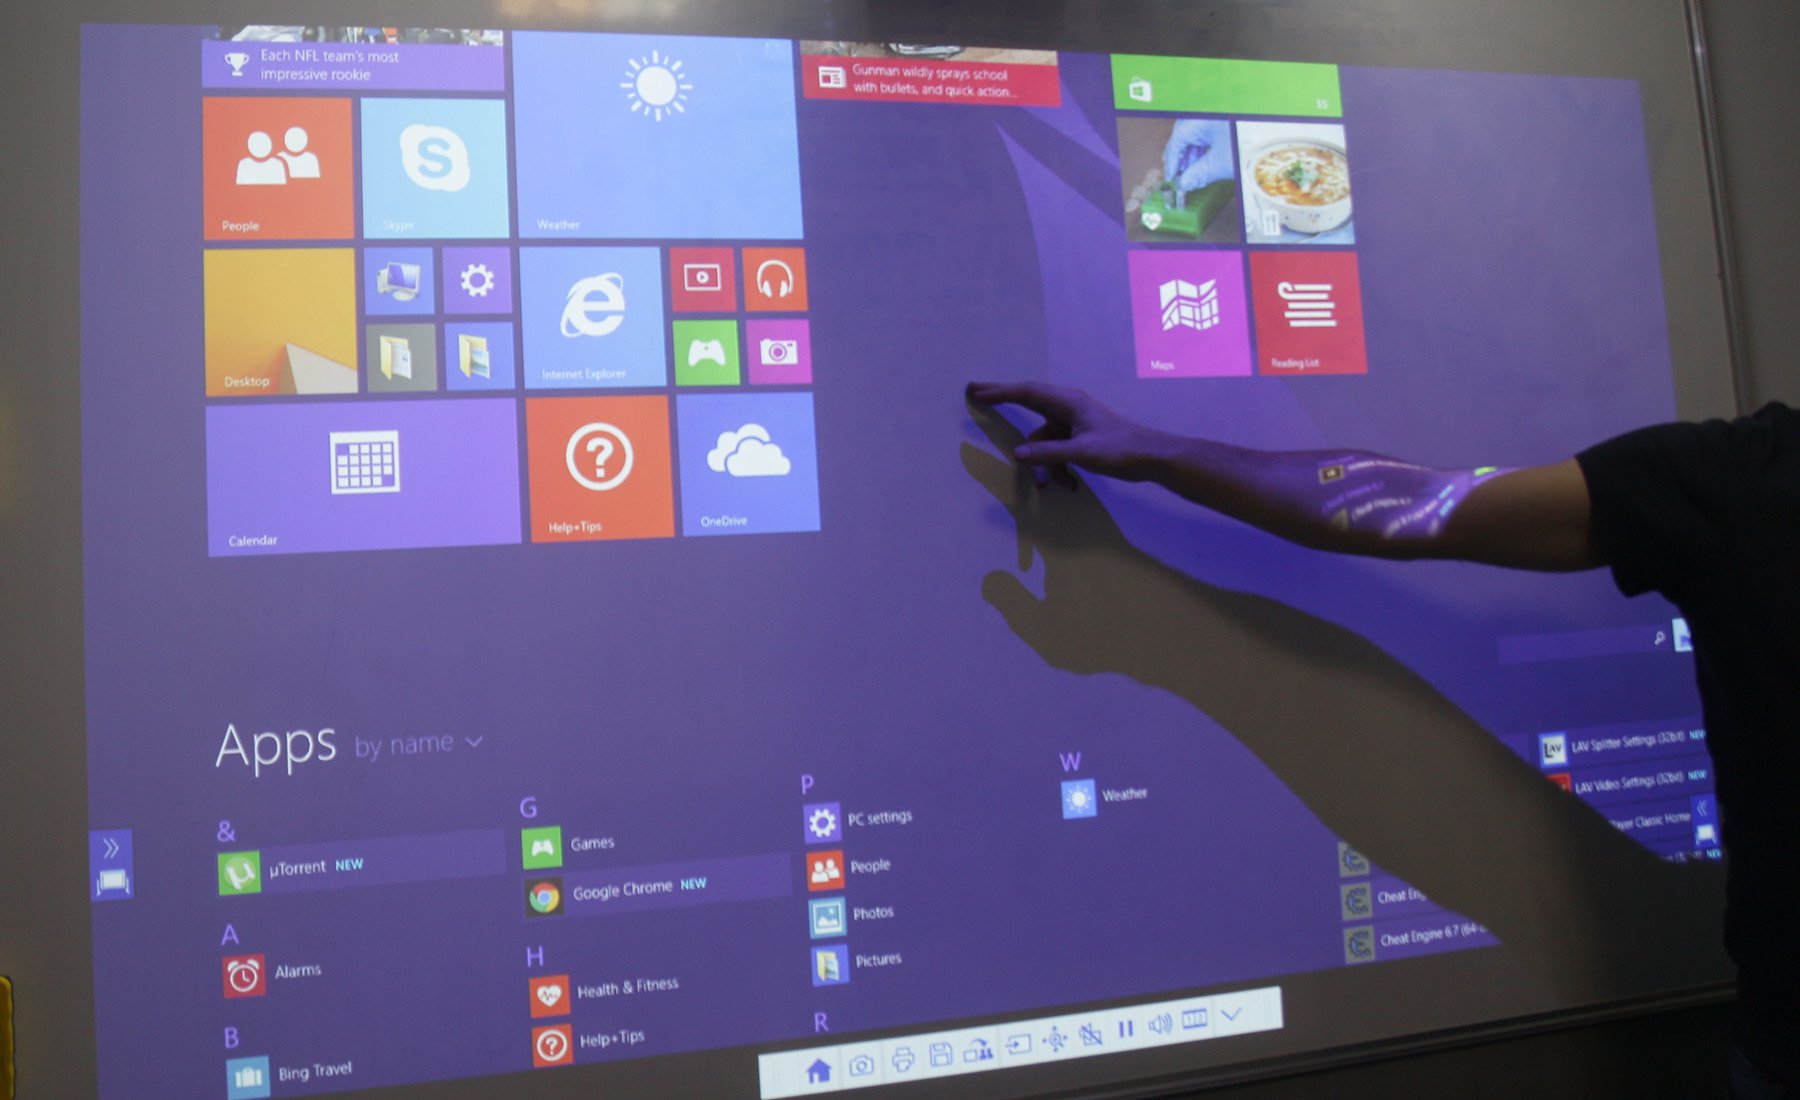
Windows 8.1 interface. Flipping through is already a “gesture”
Such projectors support simultaneous touches of up to six fingers, so more interesting than others will be applications in which these capabilities can be fully realized.
Thus, if the projector recognizes simultaneous touches of two markers and six fingers , we can use it in the following situations in our interactive applications:
- When several people simultaneously write on the screen;
- When several people move objects around the screen;
- When one person uses two touches to change the scale of the screen or the size of the object, or rotate the object (pinch-zoom, turn and all that).
All other cases fall under the “mouse function”. For example, pressing the navigation buttons.
Interactivity minus computer
Before talking about working with PC applications, you need to make an important digression. All Epson interactive projectors are good, but in our office, we traditionally hang Epson EB-14xx series models, including the latest Epson EB-1460Ui. At the time of writing this publication, it was the top model in the Epson line of interactive projectors (although just yesterday the Epson EB-1470Ui with a laser light source went on sale, which could itself become a topic for a separate publication - let me know if you would be interested learn more about it in our blog) .
What makes the Epson EB-14xx series “top-end” and why are these models often referred to as “meeting solutions”? The fact is that initially the Epson approach to creating interactive projectors assumed a high degree of autonomy of these devices, that is, the ability to work independently of the signal source. Any Epson "interactive user", being turned on without any signal source, switches to the electronic board mode by default, since it has a built-in multi-page whiteboard mode (the so-called whiteboard, resembles a strongly simplified analogue of PowerPoint) and a set of tools for drawing (on top of any source, or in the aforementioned whiteboard mode).
So, you draw on top of any signal source (even movies from a DVD player), or you work in multipage mode, and when it is not required and the computer is connected, you do not draw, but work with applications of the connected computer (mouse mode). Switching between mouse, drawing and whiteboard modes is performed instantly using icons located in the side of the screen.
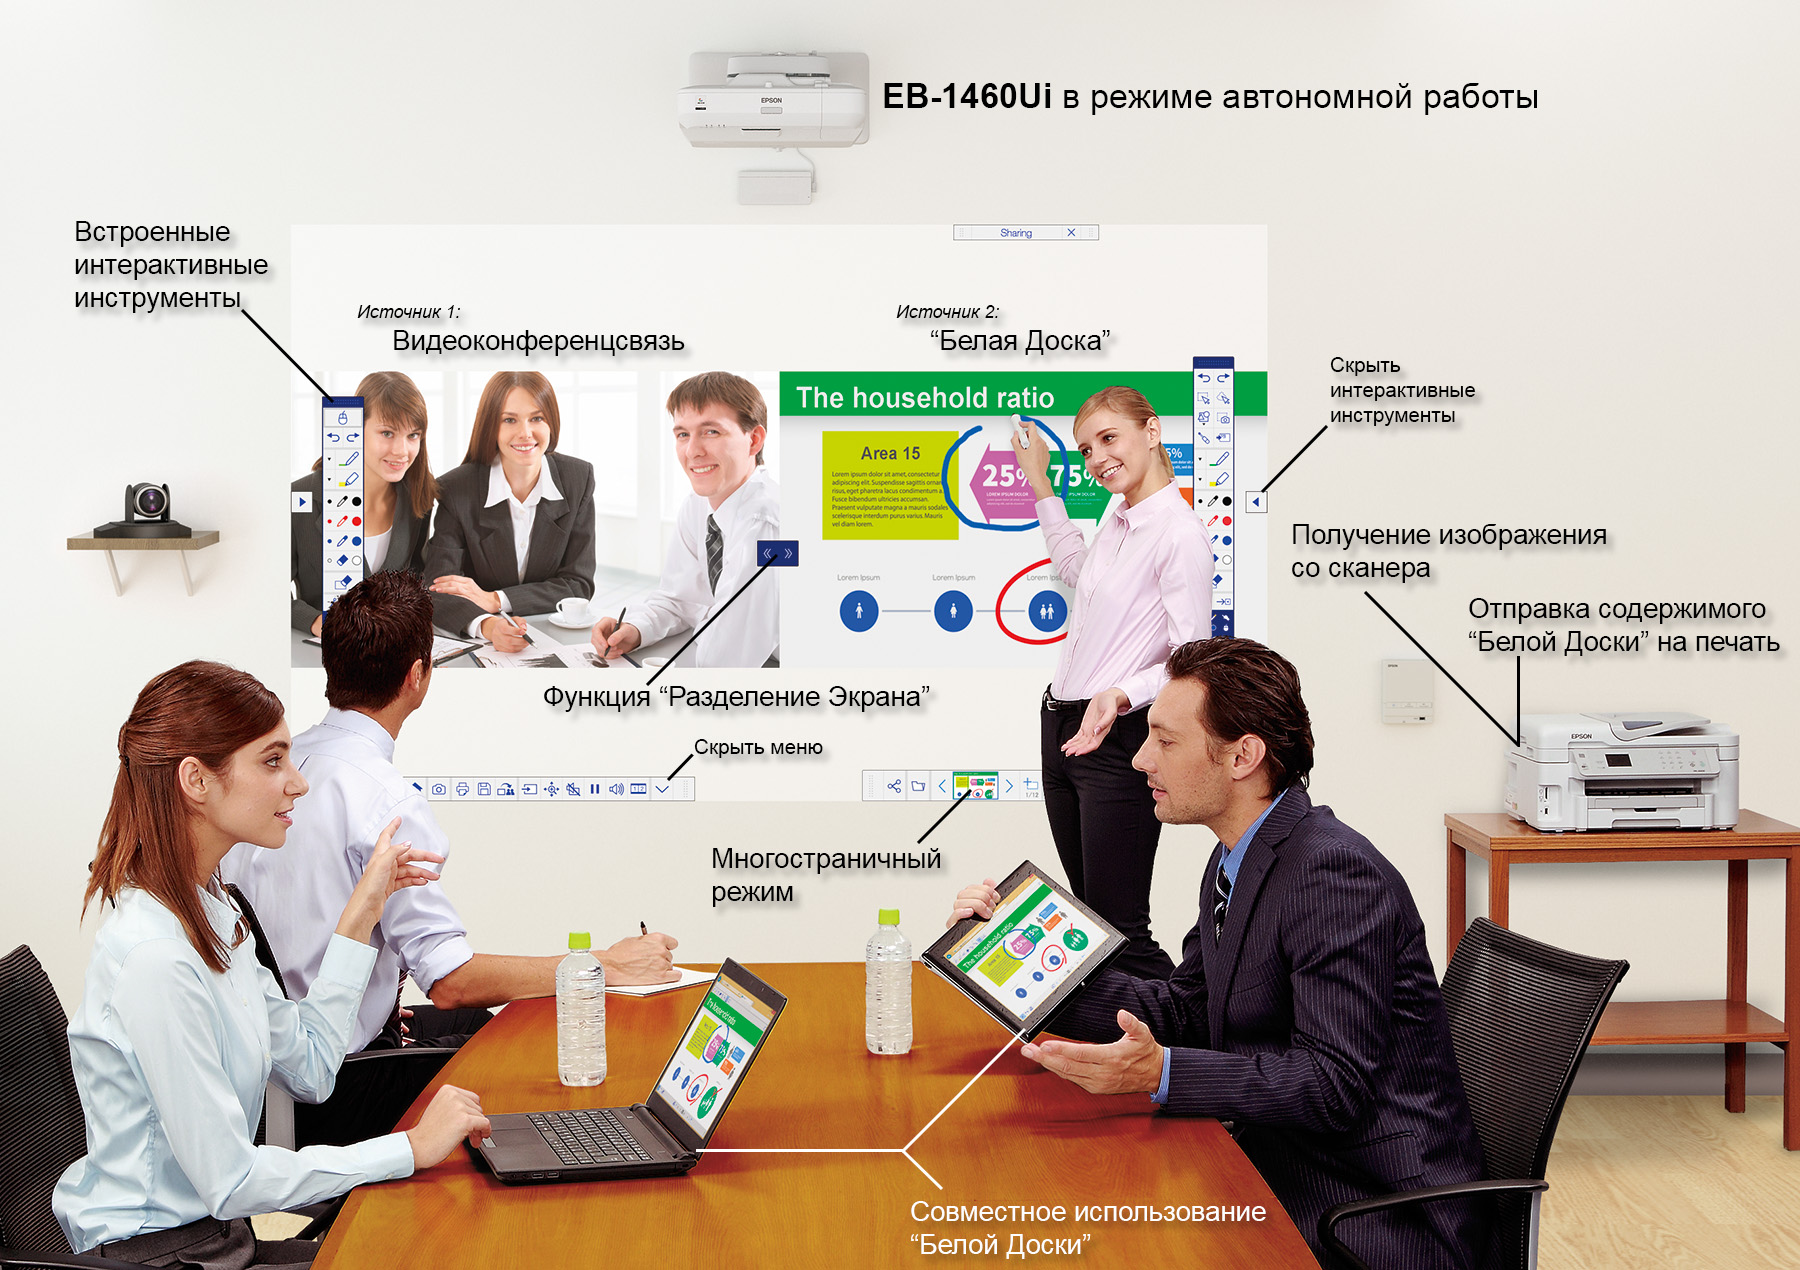
Some interesting features of the Epson meeting solution projector EB-1460Ui
But the aforementioned Epson EB-1460Ui is no longer just “any interactive programmer ”, so in offline mode it can be even more: you can take an image from a scanner, from a flash drive, and, if a computer is connected, you can send a snapshot to it screen. In this case, the “whiteboard” can also be “shared” and connected to it over the network from mobile devices or laptops (via the web interface). In this case, it is allowed not only to add handwritten notes and view any pages (regardless of which one is currently active), but also to upload any images to a common whiteboard. Of course, the capabilities built into the projector have their limitations, but this is, as it is now fashionable to say, a ready - made BYOD environment and, thus, a ready-made solution for meetings.
Built-in software, speak?
Someone will say that the usefulness of built-in interactive features is limited. Well, let's take education as an example.
You have a projector in the audience. You know that in order to portray something on the screen, the projector only needs to be turned on. Point.
You have connected to the projector a “random” computer, on which no specialized “interactive programs” are installed. You open the lesson-ready materials and conduct the lesson with built-in interactive features and standard programs such as Word. Everything you need to do on the computer itself, you can do without leaving the screen. Plus, the built-in interactive feature. Contour maps, children's coloring, workbooks in a foreign language - all this can be fascinatingly presented using only the built-in functions of drawing over the signal from a computer with a static image entering the projector.
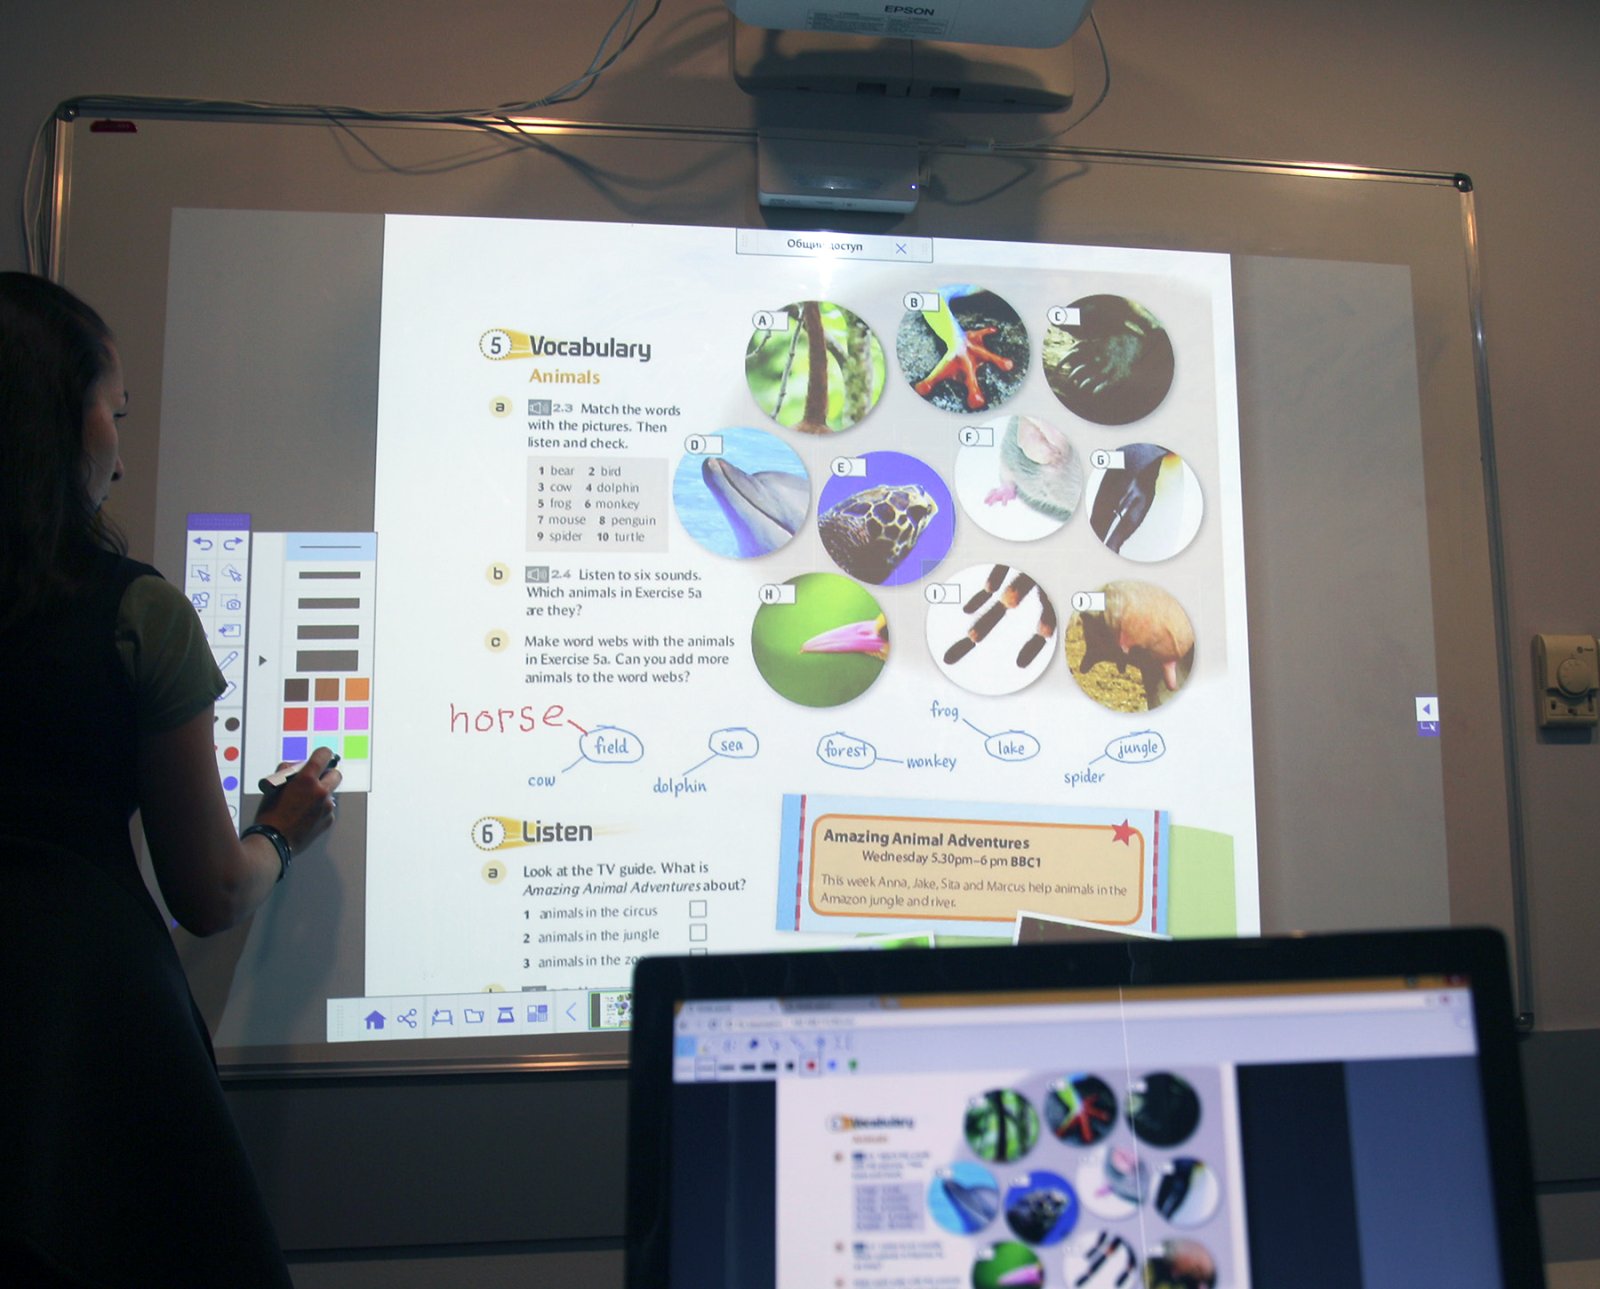
Use PDF demo lessons and drawing tools built into the projector.
For example, we came across interactive lessons from the University of Cambridge, and after downloading the demo, we found in the archive ... a regular PDF file! “Enter the words”, “draw the scheme”, “complete the phrase”, “complete the crossword puzzle”, “sign the pictures”. To prepare such training materials, MS Word or Apple Pages is enough. Then it is enough to bring static material to the class and use the built-in interactive capabilities of Epson projectors, as in the picture above, to turn them into “interactive”.
If you are not satisfied that the drawing is not tied to the pages of the documents (the page is turned over - the inscription remains), then you can first “capture” (ie, make a snapshot) the screen on the “whiteboard” and edit it in this mode. Problem solved!
At the end of a lesson or discussion, you may find that a lot of material has accumulated on the “whiteboard” - save its contents directly from the projector to a USB flash drive, send it to a print or e-mail. He can do all this without a computer! You can use any signal source, and the built-in interactive tools will always be at hand, working on top of everything you connect to the projector.
Even in situations where you prefer to use interactive applications on your computer, the built-in tools will still be useful, but the main thing is that they are always at hand at a distance of a button on the remote control or projector.
It is curious that when using the integrated drawing tools, up to 4 finger touches + 2 markers are recognized, and the projector remembers which tool was assigned to each of the markers, and which one - to the touch . Yes, yes, each input device / mode has its own internal “ID”, which is used to precisely link drawing tools to each of them.
Interactive function without wires!
Today, more than ever, support for the operation of devices over a network is especially relevant. Therefore, here Epson is also in perfect order, and all solutions have been tested for a long time. Put a small application on a computer or smartphone (called Easy MP Network Projection and Epson iProjection, respectively ) and connect to Epson EB-1460Ui via Wi-Fi, both in exclusive mode (alone) or in multi-to-one mode.
In the second case, the connections can be both spontaneous and moderated: up to 50 devices are connected (both mobile and PC), and the moderator displays from 1 to 4 of them side by side.
It would seem, and here "interactive"?
Yes, very simple. Interactive interaction is also possible via Wi-Fi!
Here is an example: there are four laptops indoors connected to a projector. The moderator takes them to the screen in turn, and the owner of the device goes to the projector and uses the touch and markers to work on his PC as easily as if his computer was always connected to this interactive projector. Everything is exactly like this - you came with a laptop, and you are showing the presentation while standing at the projector and using the touch. Then you quickly switch to another laptop, and another participant already uses the interactive. Yes, and he always has at hand all the above described built-in interactive functions of the projector - that's where they are also very “in the subject”, especially in the case of presentations.
And note - no wires! Of course, this method is somewhat different from connecting to the projector with the transfer of a mouse signal over a USB cable (which, of course, is also supported, since it is a standard connection method).
Angle matters!
In our office, one of the “interactive students” is fixed on a drawing board with motorized height and tilt control. At first, it was not quite clear why using such a massive base for a projector, the advantages of which are installation on any flat surface (wall, whiteboard), but only until the entire design was turned into a large button during a demonstration. interactive table .
This simple turn of 90 degrees impressed the audience so much that they immediately ran to open Yandex.Maps and Google Street View. Suddenly, all at once became great strategists and began to play “I was here, but I wasn’t here, and there’s a mistake on the map, I know for sure!”
It is curious that it did not occur to anyone until the moment when the projector was deployed. Such a “being determines consciousness”.
Looks like a construction with a projector like this:
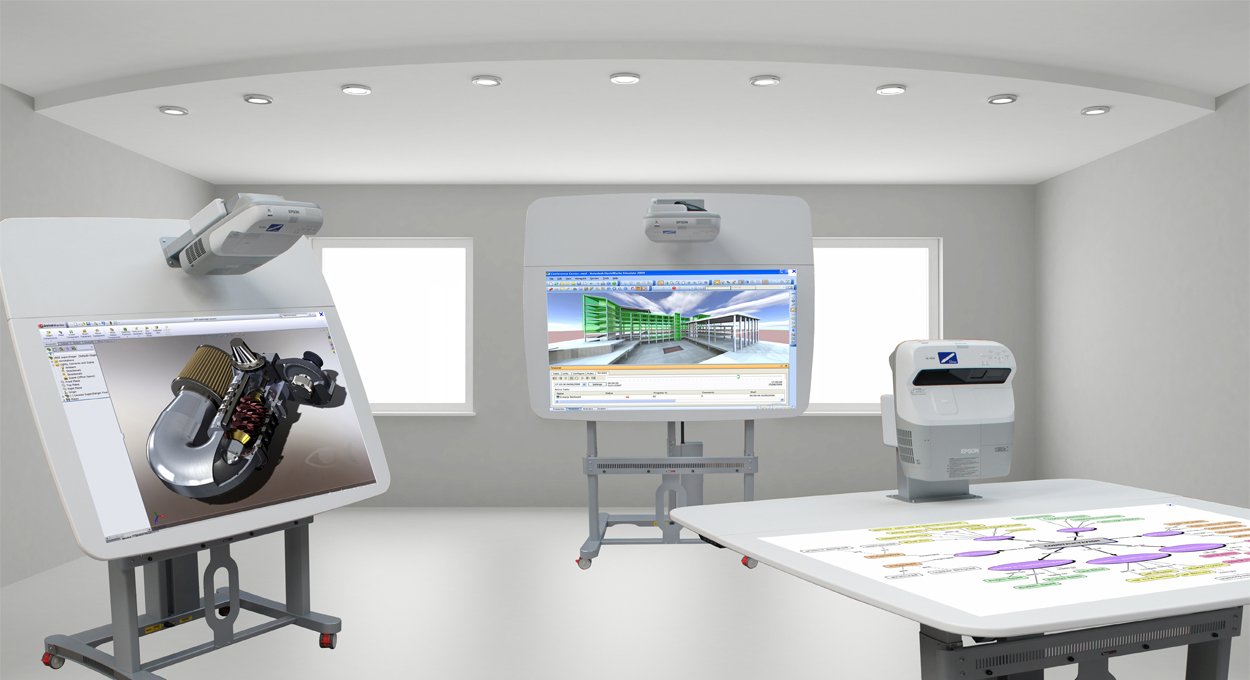
Image from reflex.co.uk
By the way, using two Epson EB-1460Ui projectors, you can create a single widescreen interactive image . Those. dual-screen, but with a common interactive space.
The ability to create an interactive table is standard for Epson ultrashort-focus interactive projectors, and there are even special mounts for them. By the way, one of the old solutions that I saw was to install the projector in a mobile case, so that the children would draw with markers on the floor. But not on the floor, but on the projection, which is on the floor. Well, so as not to draw directly on the floor. Well, you know what I mean.
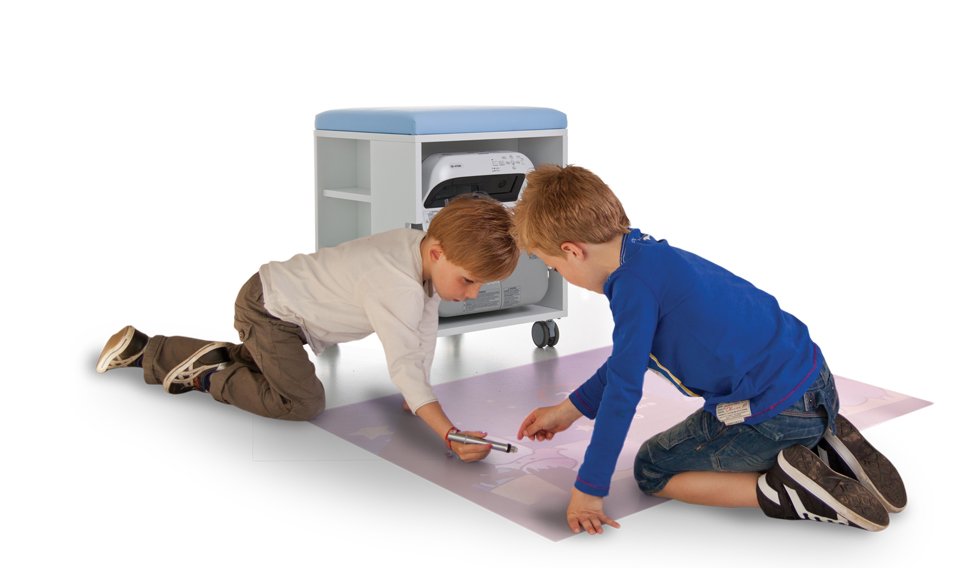
Image from i3-learning.com
To Be Continued ...
This concludes the story about the basic features of Epson interactive projectors, as well as the software built into them. In the second part of the post, let's move on to the “fun” - working with third-party software, as well as with software that supports multitouch.
Subscribe to the blog in order not to miss the second part of this series of posts and follow the news and interesting publications that we post exclusively on our blog at Geektimes.
All Articles