Paint mirrorless in infrared color
I stumbled upon this publication about infrared shooting and decided to write on Geektimes how to remake mirrorless cameras under IR.
Because “you should not copy-copy texts on Geektimes that were previously published on other resources (even if you are the author of such a text)” I can’t write here about the details of reworking each camera model, these articles have already been published elsewhere. But I can write general recommendations that are fair for most of these cameras.
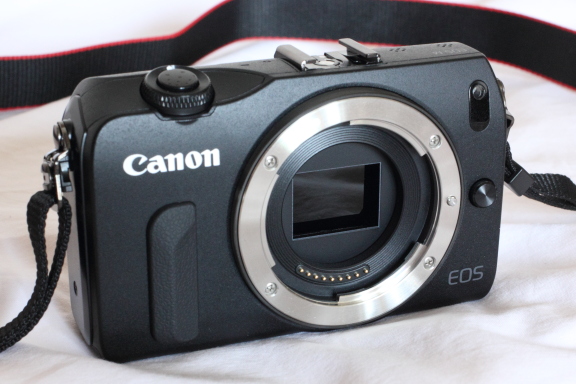
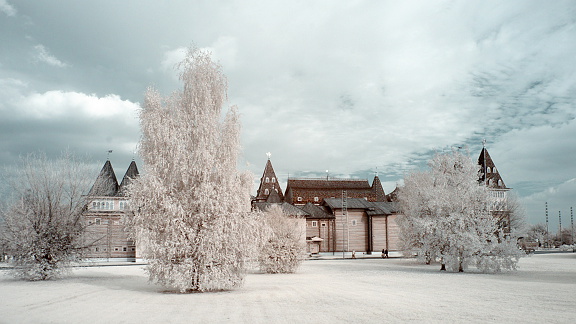
For a start, why bother altering the camera under IR? Then, in the IR range, you can take very unusual photos. Traditionally it is landscapes:
But you can shoot portraits:
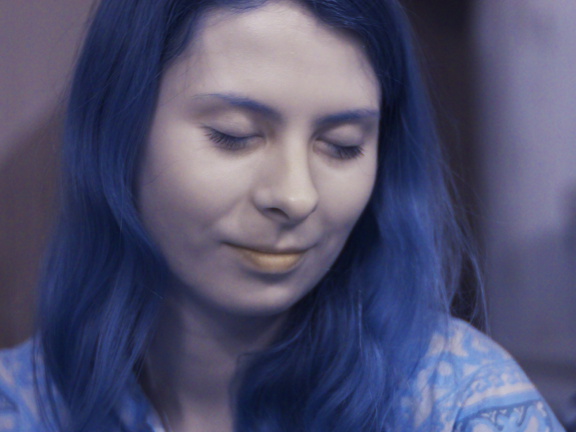
Though selfie!

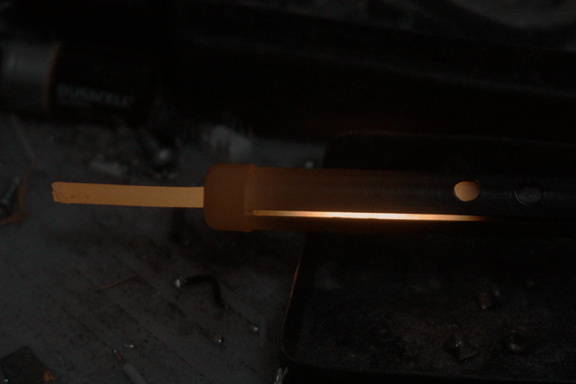
You can even see the objects' own thermal radiation, if they are heated to a temperature of around 300 degrees or higher:
But why exactly remodel, there are IR filters, you put it on a regular camera - and you shoot?
Then, that the landscape above was shot at shutter speed of 1/320. To get such a frame on a standard camera with an IR filter would require an exposure somewhere around 3.2 s ...
Why precisely mirrorless? Because with them you immediately see how the frame will look, the autofocus and the light meter work correctly without unnecessary “tambourine dances”, etc. With the SLR everything will be much more complicated. Well, or it will need to be used in LiveView mode, and then it is not clear why the mirror.
And so, you decided that you want to take infrared photos, bought a used mirror for this (well, you will not redo the camera, which is still under warranty). Where to begin?
First you need to disassemble the camera. For almost any camera on the Internet there are disassembly instructions. IMPORTANT : when disassembling, do not forget to discharge the flash capacitor through the resistor as soon as you get to it! Otherwise, you can get a "cheerfulness charge for the whole day."
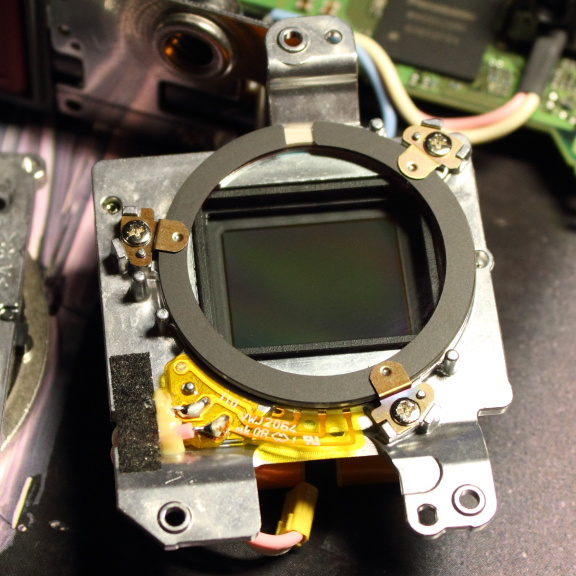
You parse the camera to get to the matrix module. It looks like this:
Now you need to remove the filters installed in front of the matrix.
It is important to remember that there are usually two filters:
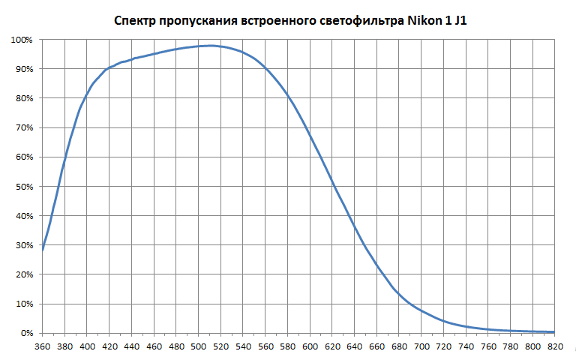
- sufficiently thick gluing of an anti-muar filter and a filter that reduces the sensitivity of the camera to yellow, red and near IR radiation
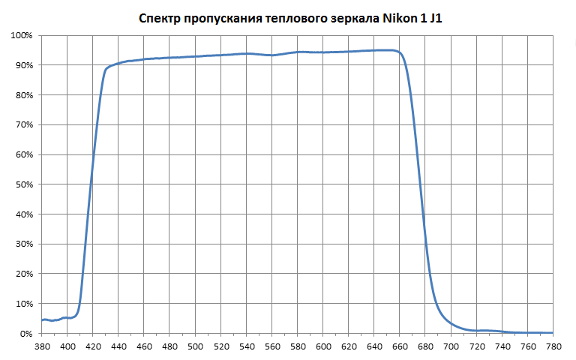
- a thin "thermal mirror" ("Hot-Mirror"), which reflects the bulk of ultraviolet radiation and almost all (99.9%) infrared radiation
They look like this:

You may notice that the ultrasonic “pylepryas”, which cleans the matrix of dust, is mounted on a thermal mirror. Alas, in most cases you will have to accept the loss of this useful device.
Now you have to decide what you want:
In the first case, you still need an infrared light filter for lenses during the rework. It is easy to buy in photo shops or order on AliExpress.
I recommend taking a filter with a boundary wavelength of 720 nm or so. Although such a filter formally skips part of the visible red radiation, all the infrared effects you get with it, while you can get color photographs. When adjusting the white balance on a sheet of white paper in your photos, blue shades will correspond to relatively distant IR, and yellow shades will correspond to the very edge of visible red. In which case, you can always install an additional filter on the lens, removing the visible spectrum completely.
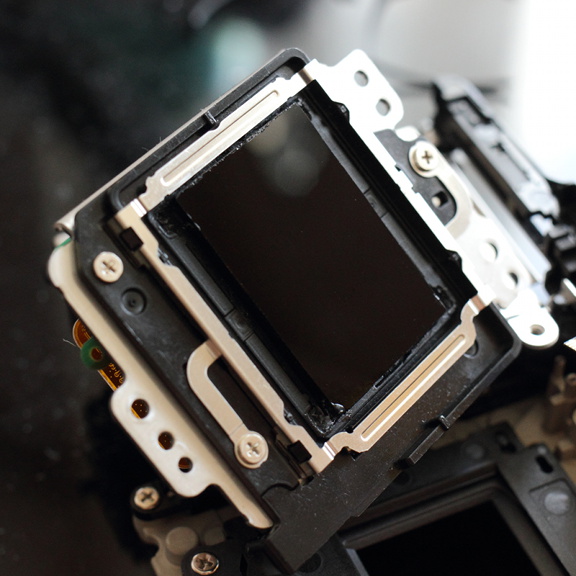
From the filter you need an ordinary glass cutter (if you have not dealt with it - practice on an unnecessary piece of glass) cut a piece with such dimensions as that of a camera filter glue and install it instead of this one. Depending on the design, the filter will need to either simply be inserted into the frame, or glue instead of the native filter torn from it. You should learn something like this:
Now just assemble the camera back. She will immediately give excellent infrared photos!
In the second case, the purchase of filters can wait. But, on the other hand, camera alterations are more difficult ...
You need to measure the thickness of at least the gluing of filters, and better gluing and thermal mirror together.
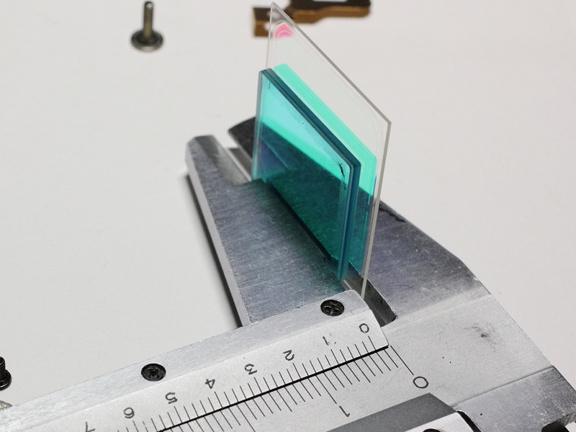
Now divide this number by three - get the minimum distance that you need to bring the matrix to the lens so that the camera can focus correctly. It is precisely at such a distance (assuming their refractive index is about 1.5) that the filters optically approximated the matrix to the lens.
How to move? .. File! More precisely - needle file. It should be about 0.5-1.0 mm, depending on the thickness of the filters, to grind off the seats for the mounting screws and possibly some other elements. It is necessary to grind off as equally as possible, controlling the process with a caliper with an accuracy not worse than 0.05 mm, since the skew of the matrix will lead to different focusing distances in different parts of the frame.
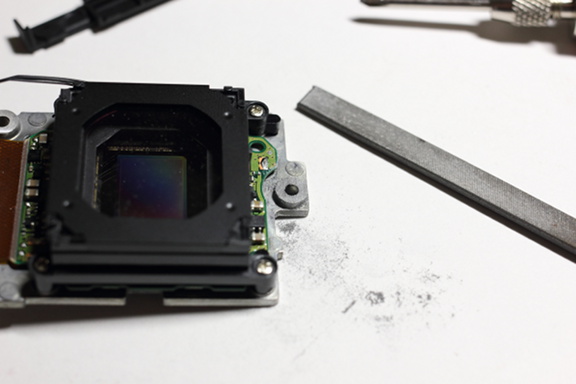
The work requires maximum accuracy, not only because of the required accuracy, but also because of the risk of damaging the matrix itself or the surrounding elements. Of course, at the end of the work, it is necessary to thoroughly clean the matrix of metal dust.
Well, that's it, now you can collect the camera back and enjoy wonderful pictures in all ranges!
Because “you should not copy-copy texts on Geektimes that were previously published on other resources (even if you are the author of such a text)” I can’t write here about the details of reworking each camera model, these articles have already been published elsewhere. But I can write general recommendations that are fair for most of these cameras.

For a start, why bother altering the camera under IR? Then, in the IR range, you can take very unusual photos. Traditionally it is landscapes:

But you can shoot portraits:

Though selfie!

You can even see the objects' own thermal radiation, if they are heated to a temperature of around 300 degrees or higher:

But why exactly remodel, there are IR filters, you put it on a regular camera - and you shoot?
Then, that the landscape above was shot at shutter speed of 1/320. To get such a frame on a standard camera with an IR filter would require an exposure somewhere around 3.2 s ...
Why precisely mirrorless? Because with them you immediately see how the frame will look, the autofocus and the light meter work correctly without unnecessary “tambourine dances”, etc. With the SLR everything will be much more complicated. Well, or it will need to be used in LiveView mode, and then it is not clear why the mirror.
And so, you decided that you want to take infrared photos, bought a used mirror for this (well, you will not redo the camera, which is still under warranty). Where to begin?
First you need to disassemble the camera. For almost any camera on the Internet there are disassembly instructions. IMPORTANT : when disassembling, do not forget to discharge the flash capacitor through the resistor as soon as you get to it! Otherwise, you can get a "cheerfulness charge for the whole day."
You parse the camera to get to the matrix module. It looks like this:

Now you need to remove the filters installed in front of the matrix.
It is important to remember that there are usually two filters:
- sufficiently thick gluing of an anti-muar filter and a filter that reduces the sensitivity of the camera to yellow, red and near IR radiation

- a thin "thermal mirror" ("Hot-Mirror"), which reflects the bulk of ultraviolet radiation and almost all (99.9%) infrared radiation

They look like this:

You may notice that the ultrasonic “pylepryas”, which cleans the matrix of dust, is mounted on a thermal mirror. Alas, in most cases you will have to accept the loss of this useful device.
Now you have to decide what you want:
- get a camera purely for infrared shooting, which in principle will not be able to shoot in any other;
- to get a multispectral camera, which can, depending on the filters installed on the lens, take off in the ultraviolet (I warn you: finding the filter you need is very difficult), visible or infrared, or in the entire spectrum from about 360 to 1000 nm at once.
In the first case, you still need an infrared light filter for lenses during the rework. It is easy to buy in photo shops or order on AliExpress.
I recommend taking a filter with a boundary wavelength of 720 nm or so. Although such a filter formally skips part of the visible red radiation, all the infrared effects you get with it, while you can get color photographs. When adjusting the white balance on a sheet of white paper in your photos, blue shades will correspond to relatively distant IR, and yellow shades will correspond to the very edge of visible red. In which case, you can always install an additional filter on the lens, removing the visible spectrum completely.
From the filter you need an ordinary glass cutter (if you have not dealt with it - practice on an unnecessary piece of glass) cut a piece with such dimensions as that of a camera filter glue and install it instead of this one. Depending on the design, the filter will need to either simply be inserted into the frame, or glue instead of the native filter torn from it. You should learn something like this:

Now just assemble the camera back. She will immediately give excellent infrared photos!
In the second case, the purchase of filters can wait. But, on the other hand, camera alterations are more difficult ...
You need to measure the thickness of at least the gluing of filters, and better gluing and thermal mirror together.

Now divide this number by three - get the minimum distance that you need to bring the matrix to the lens so that the camera can focus correctly. It is precisely at such a distance (assuming their refractive index is about 1.5) that the filters optically approximated the matrix to the lens.
How to move? .. File! More precisely - needle file. It should be about 0.5-1.0 mm, depending on the thickness of the filters, to grind off the seats for the mounting screws and possibly some other elements. It is necessary to grind off as equally as possible, controlling the process with a caliper with an accuracy not worse than 0.05 mm, since the skew of the matrix will lead to different focusing distances in different parts of the frame.

The work requires maximum accuracy, not only because of the required accuracy, but also because of the risk of damaging the matrix itself or the surrounding elements. Of course, at the end of the work, it is necessary to thoroughly clean the matrix of metal dust.
Well, that's it, now you can collect the camera back and enjoy wonderful pictures in all ranges!
All Articles