Arduino on Linux: setting up Qt Creator as your development environment
The Arduino platform is popular, regardless of whether it is scolded or praised. Its creators managed to lower the threshold of entry to the level of a few mouse clicks + a couple of lines of code and voila - here's a flashing LED. And in general, for rapid prototyping of handicrafts on AVR, Arduino is an extremely convenient thing. The only thing that they could not do was IDE, which is difficult to call an IDE. Among the functions of the IDE, it provides only one - the automation of the creation and assembly of the project.
For Windows users, there is an alternative: MS Visual Studio Community + vMicro plugin that allows you to write sketches, but with all the goodies provided by the IDE. The plugin swings without problems in the studio itself through the Tools menu and in the trial it works as much as you like. The paid version in theory supports step-by-step debugging, but they, as the owner of a licensed copy of vMicro, were not very impressed.
For Linux users, everything is as usual: we want a good IDE - we choose a “victim” and try to tie the necessary functionality to it. There are solutions based on Eclipse , but I do not like eclipse, which I once wrote about . I put up with him as an inevitable evil, when there is nothing suitable at hand. Of all the free IDEs, I respect the most powerful and wonderful Qt Creator , in which my team and I have been working for over a year now. Therefore, I will talk about how to turn it into a development environment for Arduino.
Qt Creator is available in the repositories of any more or less self-respecting Linux distribution. For example in Archa get it
In addition, we will need packages related to the Arduino itself.
On the day when we finally forget the Arduino, we will need another compiler, assembler, linker, and the standard C library for AVR, so we’ll set
We will try out the debugger and the emulator in this article, so we’ll install these packages
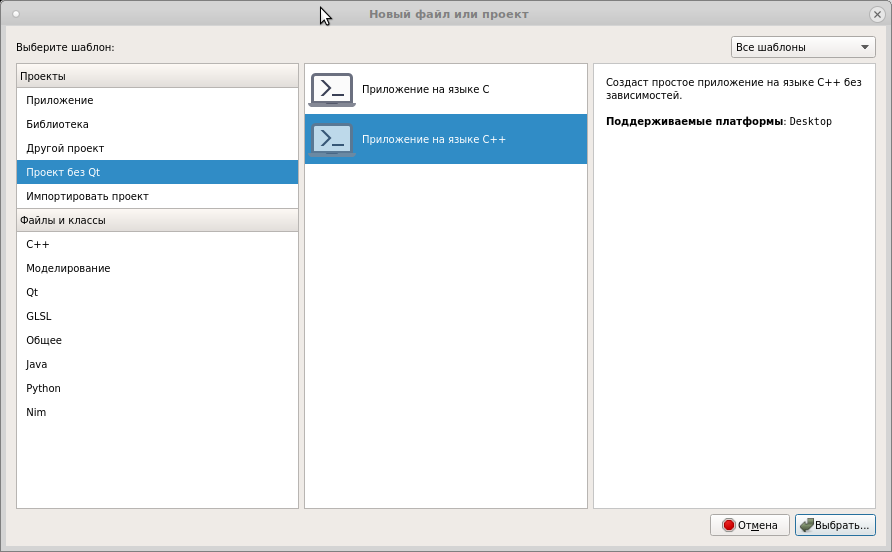
Launch Qt Creator and create a new project without Qt in C ++
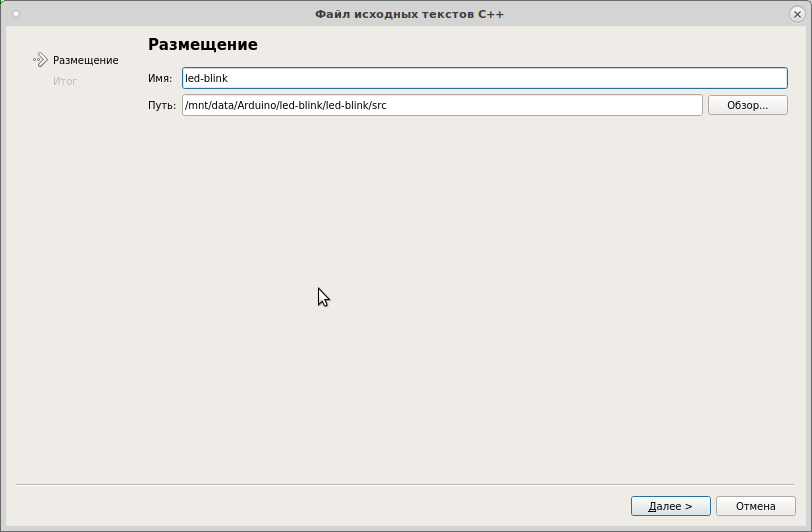
Select the location of the project and give it a name.

As a build system, take a regular qmake

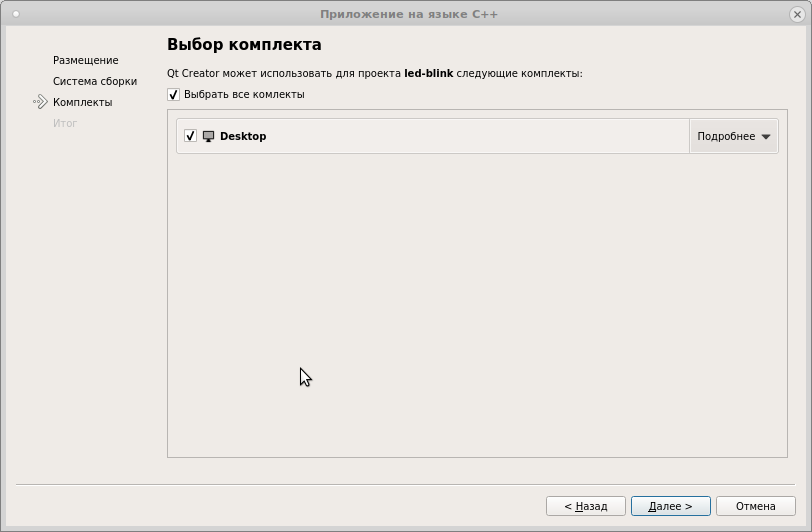
The working set is left by default, fix it later
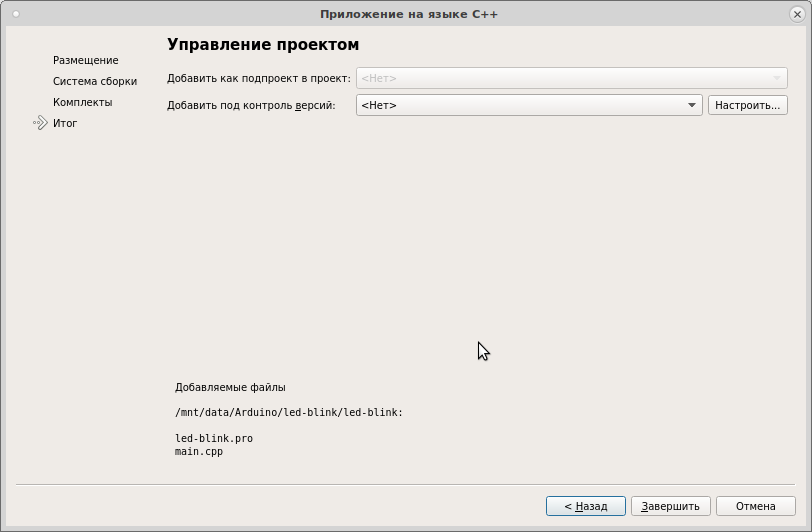
Under the version control, add a project at will.
We get the standard C ++ project

There are only two files in the project: main.cpp and led-blink.pro. We delete the first, clean the second from everything that is written there, getting a completely empty project.

Now, with pens, we begin to write the text in the * .pro file, forming the project structure for the Arduino
Eliminate all Qt from the project and select the project template
Set the directory for the assembled binary and its name
Next, connect the directory search header files
Set the C compiler and its keys
and the C ++ compiler and its keys
we set the linker and its keys
We configure the post-processing of the ELF-file, with the aim of twisting it in Intel HEX for subsequent firmware to the board
Specify which header files are included in the project.
We set files of source texts of Arduino Core
So, well, when will we actually start writing a sketch? Now let's begin, but what we have done, noble dons, is the minimum necessary for the sketch code to work.
Now add the sketch source to the project. Right-click on the project in the tree and select "Add a new ...". Add the C ++ source code file.

To organize the source within the project, in the next window

click “Browse” and create a src folder for * .cpp files

Now give the file a name
Click on the next window "Finish". We get this picture

IDE will add this file to the build script led-blink.pro
but in order not to make long lists of sources, I usually do so
Now let's do something that the Arduino IDE will never provide: we add a header file to the sketch, doing the same actions as described above.

Add the necessary project headers to this file.
configure paths to headers and sources
and now, finally, we write a sketch
Now right-click on the project tree and select "Collect"
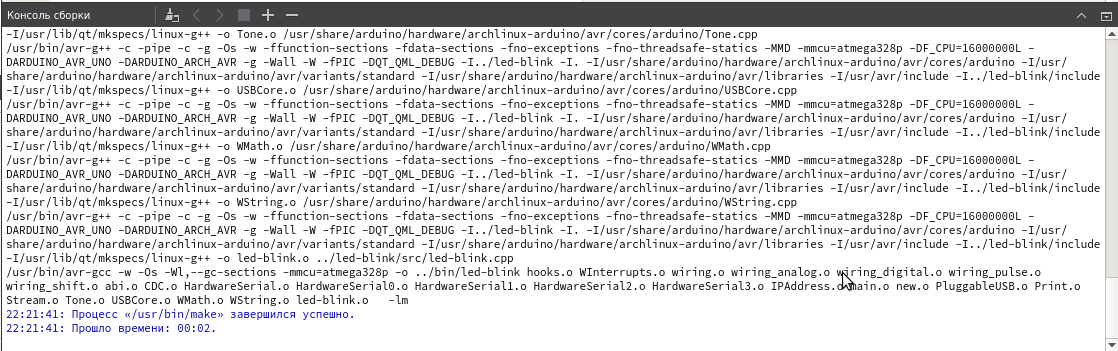
Go to the project folder. We have a directory bin /, in which the products of the compiler work

Everything is OK, there is an ELF, which is useful when debugging and hex for flashing to the controller. Now we will write the next blinker LED on pin 13
We collect the project, we come into bin /. We stick in your fee. In my case, this is Uno, on my system, it sets a port with the name / dev / ttyACM0 for programming. We execute the command
Here
Exhaust like this
informs us that the process was normal. LED will blink at a frequency of 2 Hz.
In principle, you can configure the firmware in the IDE. To do this, we make the launch settings such

and by choosing the launch of the project (by pressing Ctrl + R) we will execute the firmware and launch as precisely as the Arduino IDE does.
The described configuration process is a rather laborious procedure. But in return, we get all the power of one of the most remarkable IDEs that exist on systems based on the Linux kernel (and Windows is also concerned). Autodisplay, refactoring, convenient code navigation - all this can now be successfully used.
This example is made, as they say, "in the forehead." In fact, the Arduino IDE builds the Arduino Core into a separate static library, core.a, and links it with the executable file. As a result, the firmware collected in a standard environment is smaller in size than in the method described in the article. With these nuances, I still have to figure it out. And at the same time in the next post on this topic we will talk about:
in general, we will try to clarify many issues that are useful for understanding the processes that are taking place, without which in the future it will be difficult to move from Arduino to something more advanced.
For Windows users, there is an alternative: MS Visual Studio Community + vMicro plugin that allows you to write sketches, but with all the goodies provided by the IDE. The plugin swings without problems in the studio itself through the Tools menu and in the trial it works as much as you like. The paid version in theory supports step-by-step debugging, but they, as the owner of a licensed copy of vMicro, were not very impressed.
For Linux users, everything is as usual: we want a good IDE - we choose a “victim” and try to tie the necessary functionality to it. There are solutions based on Eclipse , but I do not like eclipse, which I once wrote about . I put up with him as an inevitable evil, when there is nothing suitable at hand. Of all the free IDEs, I respect the most powerful and wonderful Qt Creator , in which my team and I have been working for over a year now. Therefore, I will talk about how to turn it into a development environment for Arduino.
1. Soil preparation
Qt Creator is available in the repositories of any more or less self-respecting Linux distribution. For example in Archa get it
$ sudo pacman -S qtcreator
In addition, we will need packages related to the Arduino itself.
$ sudo pacman -S arduino arduino-avr-core
On the day when we finally forget the Arduino, we will need another compiler, assembler, linker, and the standard C library for AVR, so we’ll set
$ sudo pacman -S avr-gcc avr-binutils avr-libc
We will try out the debugger and the emulator in this article, so we’ll install these packages
$ sudo pacman -S avr-gdb simavr
2. Create a project in Qt Creator
Launch Qt Creator and create a new project without Qt in C ++
Select the location of the project and give it a name.
As a build system, take a regular qmake
The working set is left by default, fix it later
Under the version control, add a project at will.
We get the standard C ++ project
There are only two files in the project: main.cpp and led-blink.pro. We delete the first, clean the second from everything that is written there, getting a completely empty project.
Now, with pens, we begin to write the text in the * .pro file, forming the project structure for the Arduino
# # Arduino Core ARDUINO_DIR=/usr/share/arduino/hardware/archlinux-arduino/avr/ # (Arduino Uno, Nano, Mini) ARDUINO_MCU=atmega328p # ARDUINO_FCPU = 16000000L
Eliminate all Qt from the project and select the project template
# , Qt ! QT -= gui core CONFIG -= qt # - , ELF TEMPLATE = app
Set the directory for the assembled binary and its name
DESTDIR = ../bin TARGET = led-blink
Next, connect the directory search header files
# INCLUDEPATH += $$ARDUINO_DIR/cores/arduino INCLUDEPATH += $$ARDUINO_DIR/variants/standard INCLUDEPATH += $$ARDUINO_DIR/libraries INCLUDEPATH += /usr/avr/include
Set the C compiler and its keys
QMAKE_CC = /usr/bin/avr-gcc QMAKE_CFLAGS += -c -g -Os -w -ffunction-sections -fdata-sections QMAKE_CFLAGS += -MMD -mmcu=$$ARDUINO_MCU -DF_CPU=$$ARDUINO_FCPU QMAKE_CFLAGS += -DARDUINO_AVR_UNO -DARDUINO_ARCH_AVR
and the C ++ compiler and its keys
QMAKE_CXX = /usr/bin/avr-g++ QMAKE_CXXFLAGS += -c -g -Os -w -ffunction-sections -fdata-sections QMAKE_CXXFLAGS += -fno-exceptions -fno-threadsafe-statics QMAKE_CXXFLAGS += -MMD -mmcu=$$ARDUINO_MCU -DF_CPU=$$ARDUINO_FCPU QMAKE_CXXFLAGS += -DARDUINO_AVR_UNO -DARDUINO_ARCH_AVR
we set the linker and its keys
QMAKE_LINK = /usr/bin/avr-gcc QMAKE_LFLAGS = -w -Os -Wl,--gc-sections -mmcu=$$ARDUINO_MCU QMAKE_LIBS = -lm
We configure the post-processing of the ELF-file, with the aim of twisting it in Intel HEX for subsequent firmware to the board
QMAKE_POST_LINK += /usr/bin/avr-objcopy -O ihex -j .text -j .data -S ${TARGET} ${TARGET}.hex
Specify which header files are included in the project.
HEADERS += $$files($$ARDUINO_DIR/cores/arduino/*.h) HEADERS += $$files($$ARDUINO_DIR/variants/standard/*.h)
We set files of source texts of Arduino Core
SOURCES += $$files($$ARDUINO_DIR/cores/arduino/*.c) SOURCES += $$files($$ARDUINO_DIR/cores/arduino/*.cpp)
So, well, when will we actually start writing a sketch? Now let's begin, but what we have done, noble dons, is the minimum necessary for the sketch code to work.
Now add the sketch source to the project. Right-click on the project in the tree and select "Add a new ...". Add the C ++ source code file.
To organize the source within the project, in the next window
click “Browse” and create a src folder for * .cpp files
Now give the file a name
Click on the next window "Finish". We get this picture
IDE will add this file to the build script led-blink.pro
HEADERS += $$files($$ARDUINO_DIR/cores/arduino/*.h) HEADERS += $$files($$ARDUINO_DIR/variants/standard/*.h) # Arduino Core SOURCES += $$files($$ARDUINO_DIR/cores/arduino/*.c) \ src/led-blink.cpp SOURCES += $$files($$ARDUINO_DIR/cores/arduino/*.cpp)
but in order not to make long lists of sources, I usually do so
# Arduino Core HEADERS += $$files($$ARDUINO_DIR/cores/arduino/*.h) HEADERS += $$files($$ARDUINO_DIR/variants/standard/*.h) # Arduino Core SOURCES += $$files($$ARDUINO_DIR/cores/arduino/*.c) SOURCES += $$files($$ARDUINO_DIR/cores/arduino/*.cpp) # SOURCES += $$files(./src/*.cpp)
Now let's do something that the Arduino IDE will never provide: we add a header file to the sketch, doing the same actions as described above.
Add the necessary project headers to this file.
#ifndef LED_BLINK_H #define LED_BLINK_H #include <Arduino.h> #endif // LED_BLINK_H
configure paths to headers and sources
# INCLUDEPATH += ./include HEADERS += $$files(./include/*.h) # SOURCES += $$files(./src/*.cpp)
and now, finally, we write a sketch
#include "led-blink.h" //------------------------------------------------------------------------------ // //------------------------------------------------------------------------------ void setup() { } //------------------------------------------------------------------------------ // //------------------------------------------------------------------------------ void loop() { }
Now right-click on the project tree and select "Collect"
Go to the project folder. We have a directory bin /, in which the products of the compiler work
Everything is OK, there is an ELF, which is useful when debugging and hex for flashing to the controller. Now we will write the next blinker LED on pin 13
#include "led-blink.h" #define LED_STAND_PIN 13 unsigned long time = 0; unsigned long DELAY = 500000; bool on = false; //------------------------------------------------------------------------------ // //------------------------------------------------------------------------------ void setup() { pinMode(LED_STAND_PIN, OUTPUT); } //------------------------------------------------------------------------------ // //------------------------------------------------------------------------------ void loop() { if ( micros() >= time + DELAY ) { time = micros(); on = !on; } uint8_t state = on ? HIGH : LOW; digitalWrite(LED_STAND_PIN, state); }
We collect the project, we come into bin /. We stick in your fee. In my case, this is Uno, on my system, it sets a port with the name / dev / ttyACM0 for programming. We execute the command
$ avrdude -c arduino -p m328p -P /dev/ttyACM0 -b 115200 -U flash:w:led-blink.hex:i
Here
- -P / dev / ttyACM0 - programmer port
- -p m328p - controller model
- -c arduino - type of programmer: built-in Uno board
- -b 115200 - port speed
- -U flash: w: led-blink.hex: i - specify the firmware area, type of operation (write) and firmware file
Exhaust like this
avrdude: AVR device initialized and ready to accept instructions Reading | ################################################## | 100% 0.00s avrdude: Device signature = 0x1e950f (probably m328p) avrdude: NOTE: "flash" memory has been specified, an erase cycle will be performed To disable this feature, specify the -D option. avrdude: erasing chip avrdude: reading input file "led-blink.hex" avrdude: writing flash (2838 bytes): Writing | ################################################## | 100% 0.47s avrdude: 2838 bytes of flash written avrdude: verifying flash memory against led-blink.hex: avrdude: load data flash data from input file led-blink.hex: avrdude: input file led-blink.hex contains 2838 bytes avrdude: reading on-chip flash data: Reading | ################################################## | 100% 0.38s avrdude: verifying ... avrdude: 2838 bytes of flash verified avrdude: safemode: Fuses OK (E:00, H:00, L:00) avrdude done. Thank you.
informs us that the process was normal. LED will blink at a frequency of 2 Hz.
In principle, you can configure the firmware in the IDE. To do this, we make the launch settings such
and by choosing the launch of the project (by pressing Ctrl + R) we will execute the firmware and launch as precisely as the Arduino IDE does.
findings
The described configuration process is a rather laborious procedure. But in return, we get all the power of one of the most remarkable IDEs that exist on systems based on the Linux kernel (and Windows is also concerned). Autodisplay, refactoring, convenient code navigation - all this can now be successfully used.
This example is made, as they say, "in the forehead." In fact, the Arduino IDE builds the Arduino Core into a separate static library, core.a, and links it with the executable file. As a result, the firmware collected in a standard environment is smaller in size than in the method described in the article. With these nuances, I still have to figure it out. And at the same time in the next post on this topic we will talk about:
- the project structure, find out where the main () function is located and show why excessive looping on the Arduino is bad
- step by step debugging using emulators
- let's deal with the compiler options used in the build
in general, we will try to clarify many issues that are useful for understanding the processes that are taking place, without which in the future it will be difficult to move from Arduino to something more advanced.
All Articles