Drive emulator for Atari on Arduino
Greetings. I share the experience of manufacturing an emulator drive for Atari based on Arduino Nano. Under the cut assembly instructions, scheme, firmware and demonstration of work.
In our museum (details in the profile) there are several Atari computers for which I wanted to do something that allows you to quickly load programs. The original 410th tape recorders are not very suitable for this, and even if we had an original drive, it would also create difficulties. Atari uses its own serial interface, Atari SIO , developed by Joe Decour in 1979 to load programs into memory. Remarkably, Joe also participated in the development of standards for dial-up connectivity, USB and Bluetooth. Both the analog tape recorder and the digital disk drive transmitted data to the Atari computer on the same serial bus, the bandwidth of which could reach 120 kbps. Since the protocol is serial, data can be downloaded directly from the computer via the USB-UART adapter and the AspeQt program, which allows you to emulate Atari peripherals. But I wanted something compact and autonomous. I did not want to order and solder the board for the SIO2SD - emulator with an SD card, but in the process of searching I got the SIO2Arduino project, on the basis of which I assembled my device.
The emulator can be assembled in several versions, I wanted a device with a screen where you can choose the image of the desired floppy disk.
The first prototype was assembled in a couple of hours, the cable was removed from the non-working tape recorder Atari XC12, if it were not there, I would have to tinker with the connector.

The prototype was tested on the Atari 800XL , earned immediately, without any modifications and settings.

It was possible to move to the second phase - a full-fledged device.
Instead of a large Arduino, UNO decided to build everything based on the Arduino Nano. Everything was mounted on the circuit board and soldered by the good old MGTF.
View from the Arduino

View from the side of the screen

In terms of size, the Kradex Z119 chassis fits well. On the front panel, the screen, a button for switching disk images and an LED that hangs on the TX leg and shows the boot process.
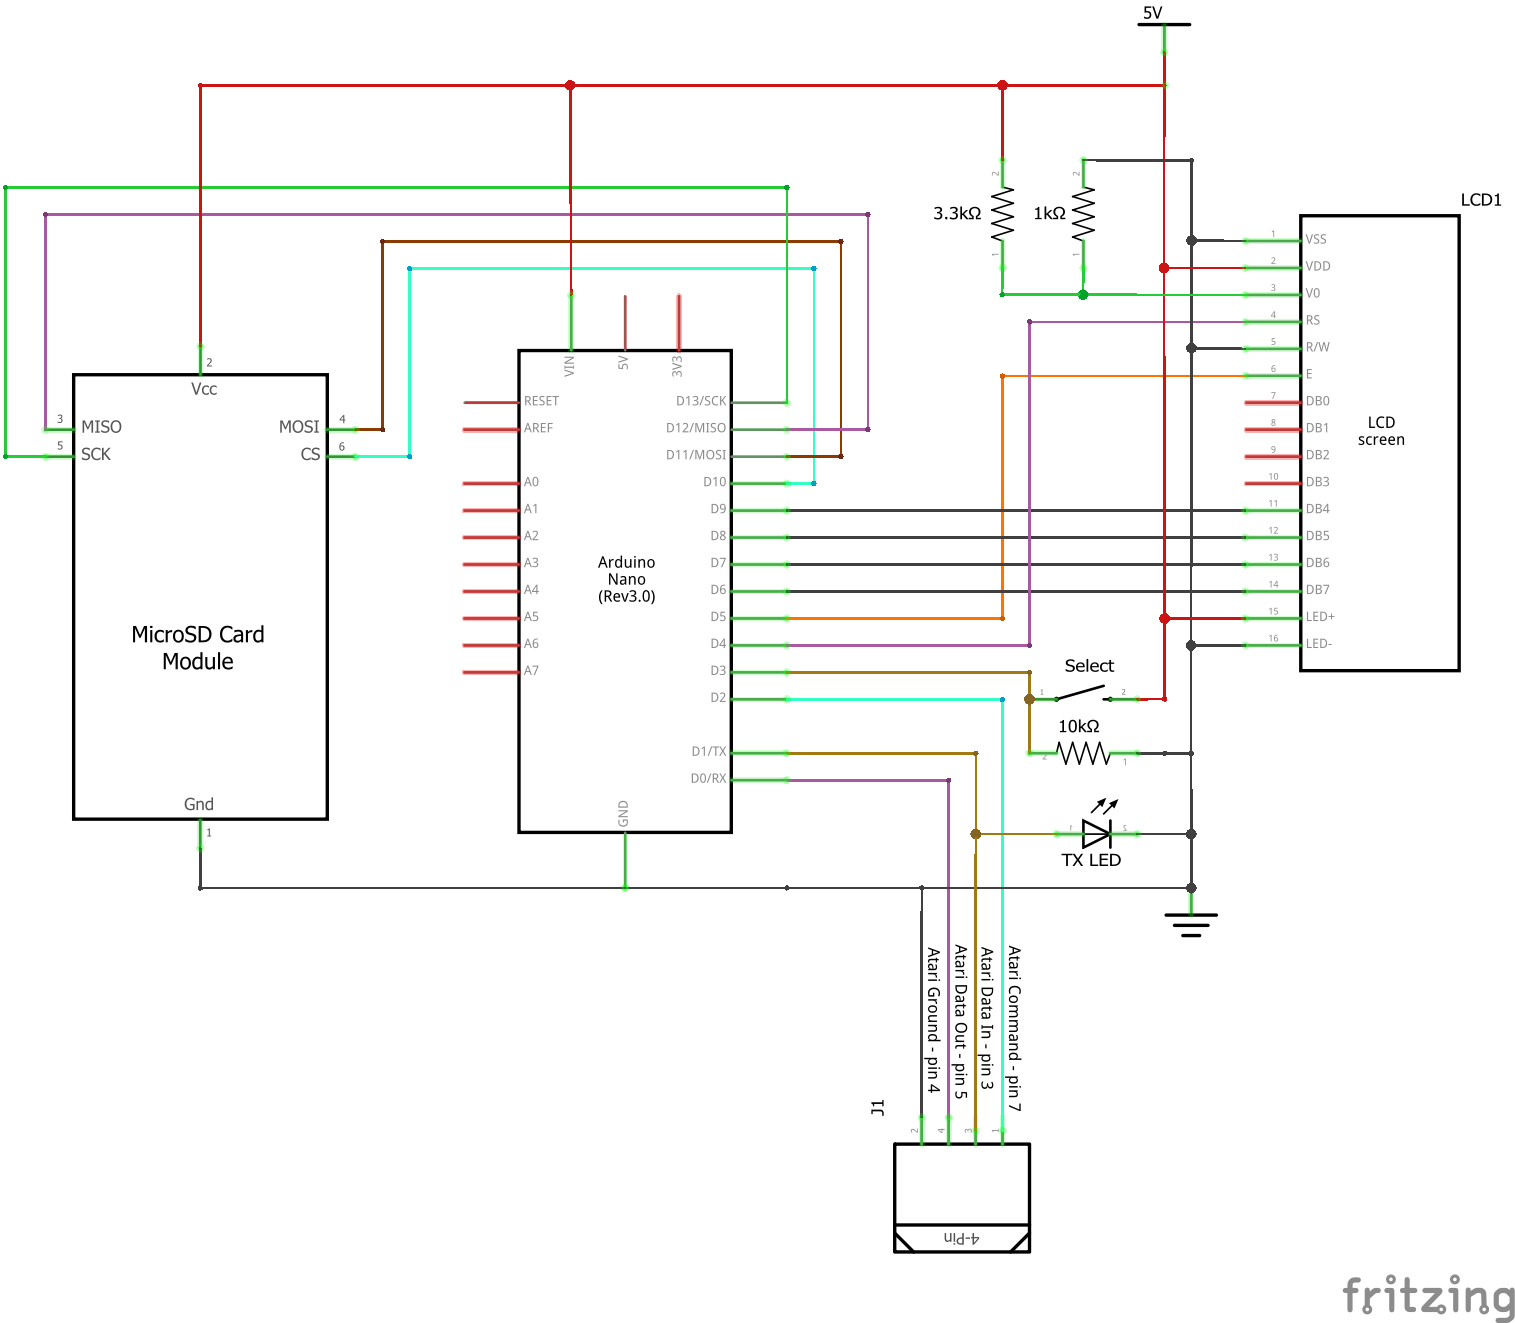
There was no concept on the project site, I drew it myself. Resistances that regulate the contrast of the display were selected for a blue display with white letters. For other colors may be different, it is better to pre-configure the trimmer resistor. If the resistance values are incorrect, the characters are not visible on the screen, this is confusing when the prototype is first turned on.
When flashing a finished device, you need to remember to change the Arduino IDE board from Uno to Nano, it turns out they are a bit incompatible and the IDE did not see the Nano until you changed the settings. The entire project for the Arduino IDE with the settings for the screen and the button is available by reference.
When assembled, it turned out such a device:

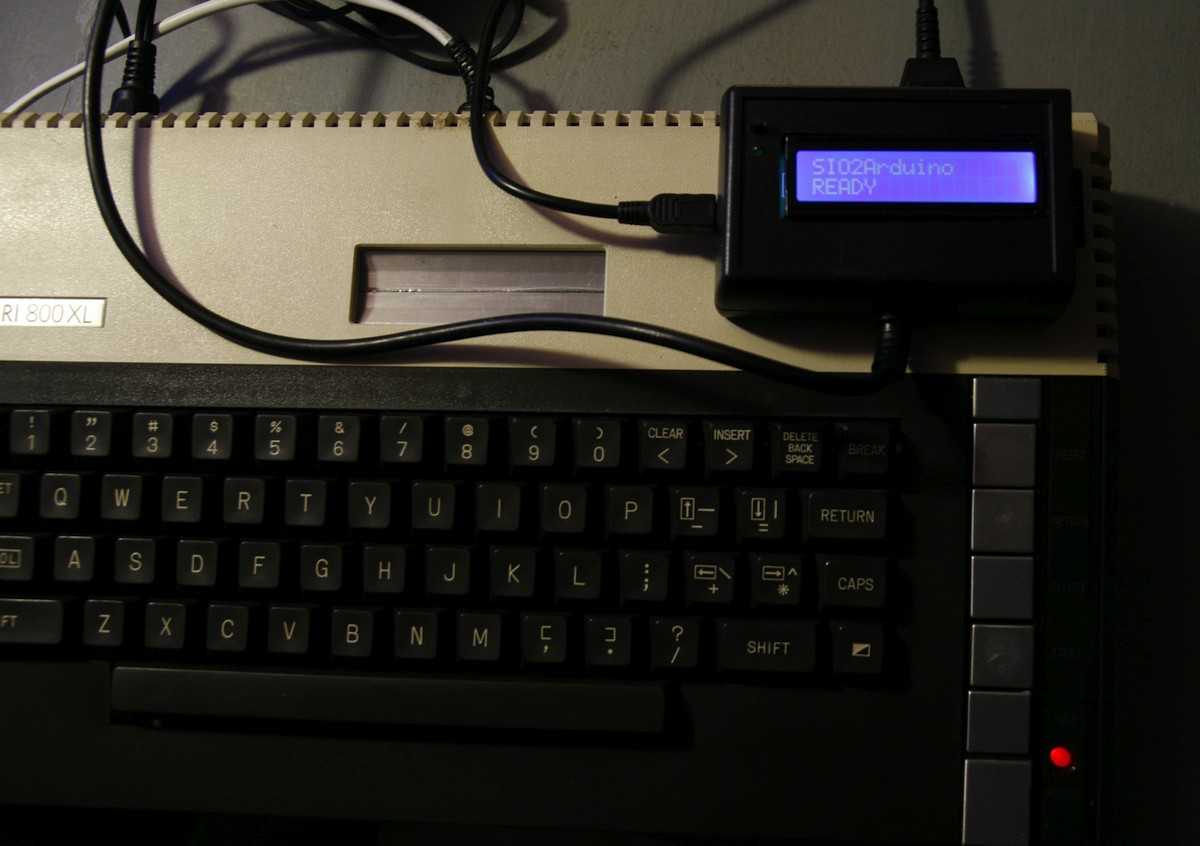
Powered by a micro-usb cable, the memory card is formatted in FAT32, copied disk images in ATR and XEX format to the root, a large archive of images is on archive.org
For the Atari 800XL, the workflow is as follows:
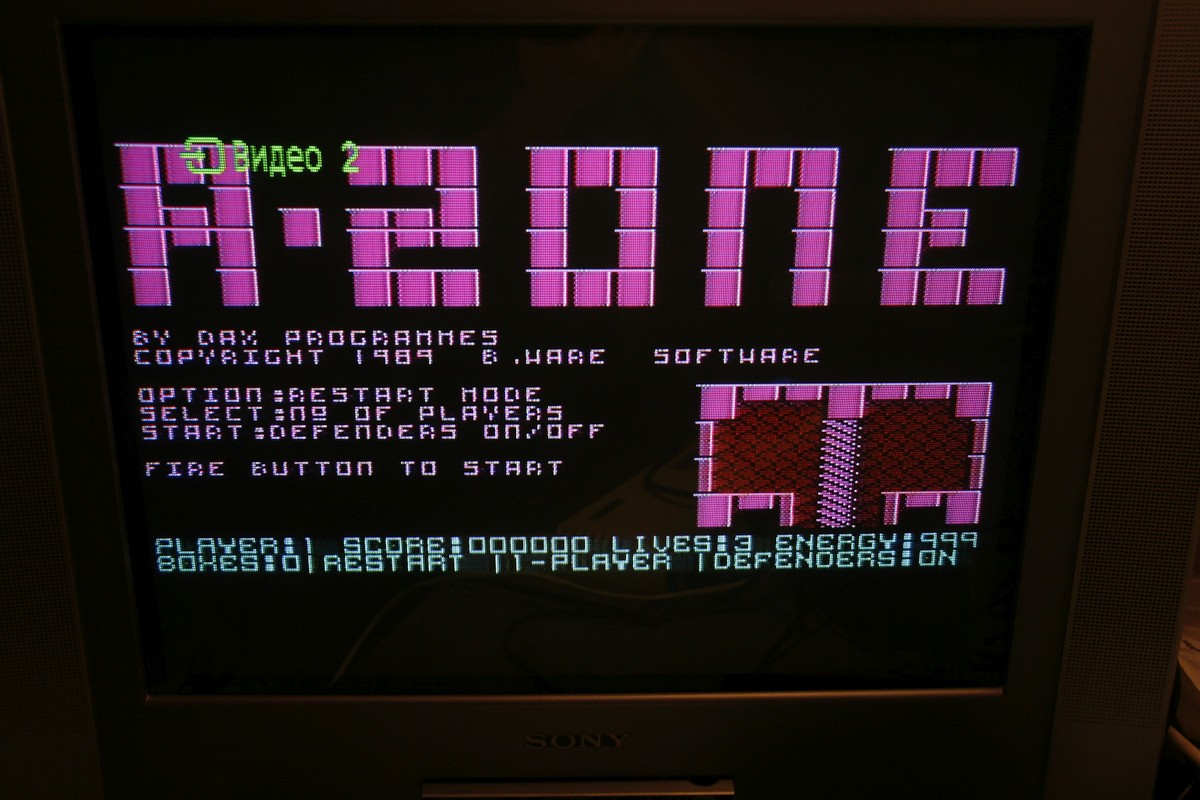
The download starts automatically after power up or reset, as indicated by the brightly flashing LED on the TX line. The game A-Zone , the image of which takes 92 KB, loads about 30 seconds. The largest images in the archive occupy 130 KB.
Result on the screen:
Thank you for attention
In our museum (details in the profile) there are several Atari computers for which I wanted to do something that allows you to quickly load programs. The original 410th tape recorders are not very suitable for this, and even if we had an original drive, it would also create difficulties. Atari uses its own serial interface, Atari SIO , developed by Joe Decour in 1979 to load programs into memory. Remarkably, Joe also participated in the development of standards for dial-up connectivity, USB and Bluetooth. Both the analog tape recorder and the digital disk drive transmitted data to the Atari computer on the same serial bus, the bandwidth of which could reach 120 kbps. Since the protocol is serial, data can be downloaded directly from the computer via the USB-UART adapter and the AspeQt program, which allows you to emulate Atari peripherals. But I wanted something compact and autonomous. I did not want to order and solder the board for the SIO2SD - emulator with an SD card, but in the process of searching I got the SIO2Arduino project, on the basis of which I assembled my device.
The emulator can be assembled in several versions, I wanted a device with a screen where you can choose the image of the desired floppy disk.
The first prototype was assembled in a couple of hours, the cable was removed from the non-working tape recorder Atari XC12, if it were not there, I would have to tinker with the connector.
The prototype was tested on the Atari 800XL , earned immediately, without any modifications and settings.
It was possible to move to the second phase - a full-fledged device.
Instead of a large Arduino, UNO decided to build everything based on the Arduino Nano. Everything was mounted on the circuit board and soldered by the good old MGTF.
View from the Arduino
View from the side of the screen
In terms of size, the Kradex Z119 chassis fits well. On the front panel, the screen, a button for switching disk images and an LED that hangs on the TX leg and shows the boot process.
There was no concept on the project site, I drew it myself. Resistances that regulate the contrast of the display were selected for a blue display with white letters. For other colors may be different, it is better to pre-configure the trimmer resistor. If the resistance values are incorrect, the characters are not visible on the screen, this is confusing when the prototype is first turned on.
When flashing a finished device, you need to remember to change the Arduino IDE board from Uno to Nano, it turns out they are a bit incompatible and the IDE did not see the Nano until you changed the settings. The entire project for the Arduino IDE with the settings for the screen and the button is available by reference.
When assembled, it turned out such a device:
Powered by a micro-usb cable, the memory card is formatted in FAT32, copied disk images in ATR and XEX format to the root, a large archive of images is on archive.org
For the Atari 800XL, the workflow is as follows:
- Turn on SIO2Arduino
- Use the button to select the desired floppy image.
- Turn on Atari
The download starts automatically after power up or reset, as indicated by the brightly flashing LED on the TX line. The game A-Zone , the image of which takes 92 KB, loads about 30 seconds. The largest images in the archive occupy 130 KB.
Result on the screen:
Thank you for attention
All Articles