Wireless VR and motion capture on HTC Vive equipment
Foreword
Earlier, I already wrote about my impulse project - a suit of motion capture based on inertial sensors. First of all, I want to thank everyone who left their feedback, one way or another, helped the project. I must say that the project did not receive much development, the drift problem was not solved by 9-axis sensors, but compensation using the digital compass helped a lot, and the use of simple optical tracking (for example, 2 LED markers on the head) allows us to obtain an average drift value. But today is not about that. I want to talk about the relatively inexpensive way to capture motion for virtual reality systems based on HTC Vive without a collective farm and a soldering iron, as well as how to get rid of the wire that inevitably connects the head and the computer, which creates a lot of inconvenience. I'll also tell you how we managed to achieve a tracking area of ~ 80 meters square.
Let's start
The system will work on HTC Vive equipment, this is a regular helmet, 2 controllers and 2 base stations, I recommend purchasing HTC Vive 2 , it showed itself well, probably because of the updated base stations. Now, the price is reduced to 50 thousand rubles.
In addition to the standard set, I will recommend the VIVE Deluxe Audio add-on, it’s not just a headset (which is already convenient), it’s an extremely convenient solution for a more comfortable use of the helmet, especially this addition is relevant when using a helmet with several players or attraction riders. Also, this mount will allow you to reliably mount the wireless connection system, and it looks cool:
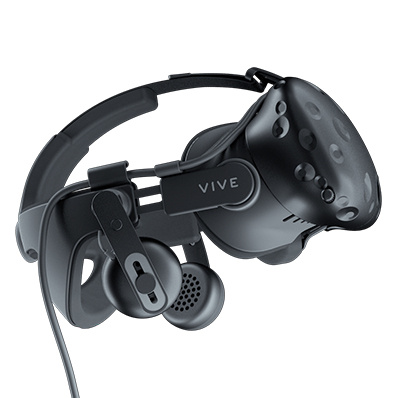
VIVE Deluxe Audio . Issue price of 10 thousand rubles.
Down with the wire
First of all, you need to break with this “leash” and feel real freedom in VR space without heavy and heated laptops behind your back. To do this, you need an addon TPCast - a device that will allow Vive to switch to wireless mode.

TPCast . Equipment.
The whole system consists of several modules, more about each:
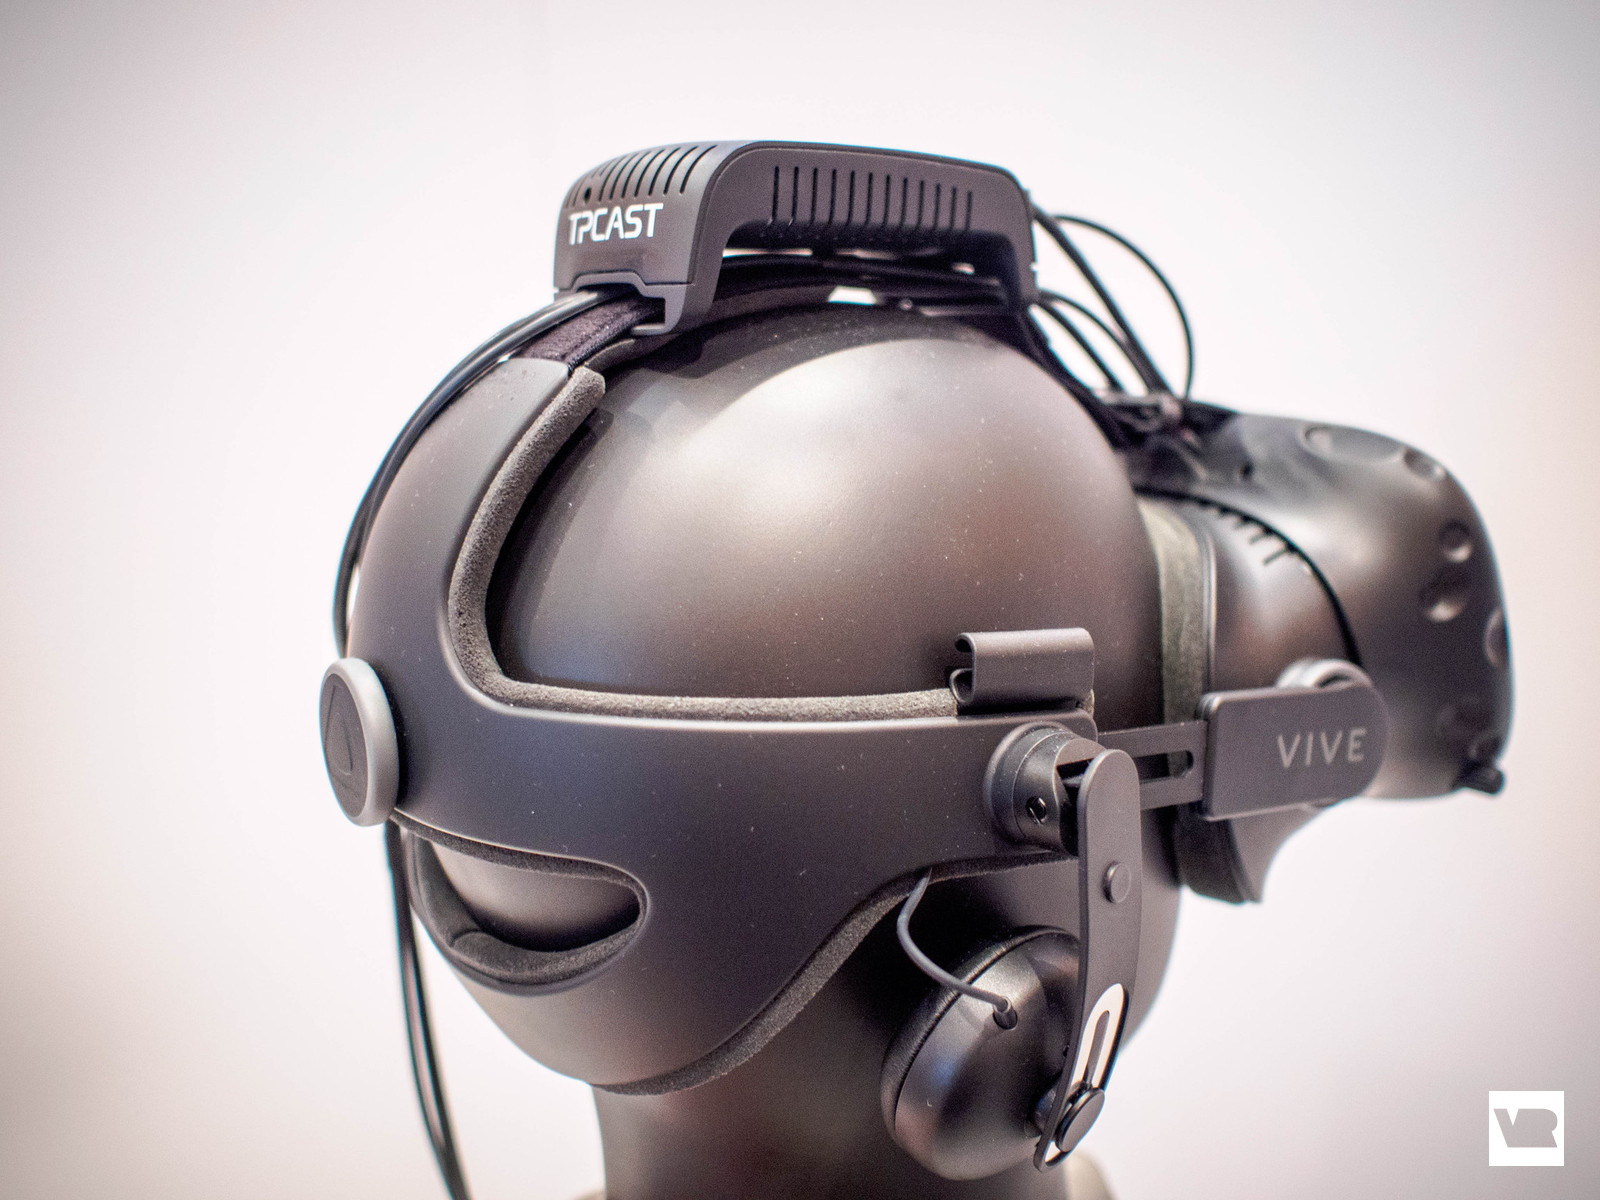
Receiver 
Perfectly mounted on VIVE Deluxe Audio. It is connected to the helmet with short wires USB and HDMI, the other 2 wires (USB and power) are connected to the adapter to the battery.
Power box 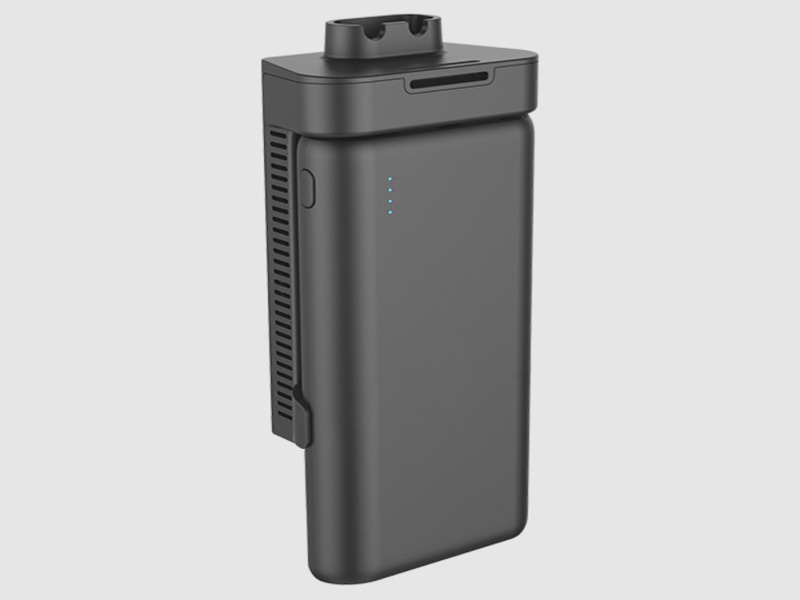
Next, you need to put aside the standard Vive linkbox, and connect the following module (transmitter) directly to your computer via HDMI:
Transmitter 
You can use the standard wire, or 10-meter HDMI. Power supply from the standard linkbox must be connected to the TPCast transmitter. I must note that you can use the combination with the linkbox, simply by connecting the transmitter instead of the helmet (without connecting one of the three wires - USB). The transmitter should be placed at a point in the room where the helmet will always be visible, since Since the transmitter operates at high frequencies, then any obstacle will interfere with the transmission of the signal, the same head if the person turned away. In other words, provide direct visibility. The best option is to place the transmitter exactly in the center of the room on the ceiling, sending it perpendicular to the floor.
That's not all, the kit also has a router, which should be connected in the context of the Internet connection of the PC. Simply put, an ethernet cable to the WAN port of the router, and connect the PC to the router via the LAN. If such a connection is unacceptable, an additional network card should be used. Now almost everything is ready, it remains only to download the software and drivers from the official TPCast website:
Wireless connection assistant for VIVE 
After installation, the application will ask you to enter data to connect to the access point, the login and password are indicated on the sticker on the adapter for the battery. Then you just click Start and start SteamVR after a successful connection. If something went wrong, then there is a Switch channel item in the top right menu. In general, it is easy to restore the loss of the connection with one click of a button, you can also change the battery on the fly.
Wiring diagram 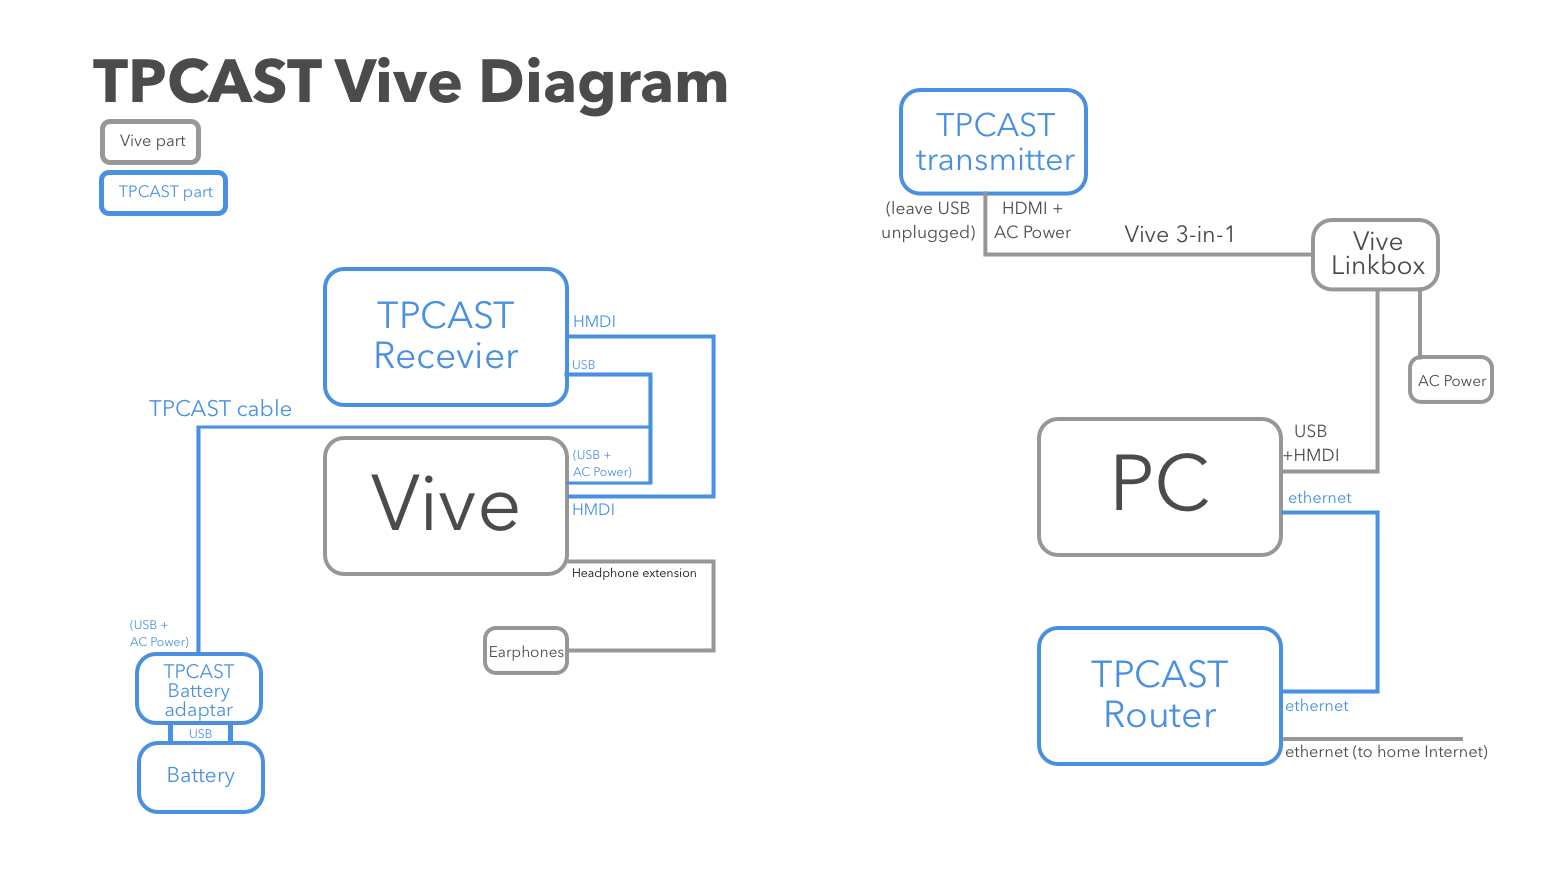
TPCast Assembled . Issue price of 35-40 thousand rubles, but here are the characteristics:
- 2K resolution (typical for HTC Vive)
- 90 FPS
- Delay less than 2ms
Of course, for home use it is impractical, it is possible to suffer the wire, but for a commercial solution it is a great option, especially if you expand the tracking area.
Now you can try to walk on Steam Home and not remember about the wire, kinks, nodes, and more, except that the battery is charged, and it is better to buy extra. They are enough for 4-5 hours of active use.
We go beyond the boundaries of what is permitted
Without a wire, you will quickly feel cramped, you may want to take a little walk, but in standard 16 square meters this will not work. The first thing you need is a room (100 square meters will fit), and with higher ceilings (3.5 meters). This is the most difficult. The TPCast transmitter is located in the center of the ceiling of the room. To the side of it under the ceiling are attached base stations HTC Vive. the distance between - 5 meters, so that the stations are located on one line (perpendicular to two walls and parallel to two others), passing through the center of the room (in the center of the transmitter). Further, the station must be tilted at an angle of 30 degrees to each other (ie, to a greater extent they are directed to the floor).
Stations need to be connected with a wire for synchronization (optical will not work stably), station channels set to A and b. After installation, calibrate the room by standard means. It is worth noting that at the stage of building the chaperone (the blue grid denoting the boundaries of the real room) it is worthwhile to select the advanced mode, which will allow you to specify only the corners of the room, the grid will be a flat square. The game area is better placed in the center. This configuration will provide a large area of sufficiently accurate tracking with a minimum number of blind zones and will allow you to effectively use regular stations. Before diving, I recommend setting OpenVR Advanced settings , their interface will be available directly in VR space in the standard menu. These settings will improve the resolution, supersampling and configure the chaperone (activation area, color, height, visibility, etc.) Of course, you can still play around with the placement of base stations, change the angle of inclination or a little distance between them for a certain room. The result is impressive, it is possible to navigate through the standard Steam Home, without recalling teleportation. In most games, this area is more than enough. In November, Vive threatens to add support for working with a large number of base stations, but it is not yet clear whether the current equipment will be able to absorb more than two, or only new helmets and controllers will be capable of it.
Stop being a ghost
In general, all VR games can be defined as a single subgenre - “ghost simulator”, you can pick up objects, rush them and so on. There are exceptions where you can see your fixed body, which is very dissonant. Anyway, to draw a truly moving body to a virtual protagonist, you need something from the area of motion capture. Capturing movement is not the cheapest pleasure, if you reject myopic connection and the like, which is ineffective in this area of tracking. Two things come to the rescue - the HTC Vive Tracker and inverse kinematics (IR). The first is needed in order to determine the position of anything in the tracking area, the second to recreate the position of the body in virtual space, knowing the position of only 6 points (this is the minimum for a full body).
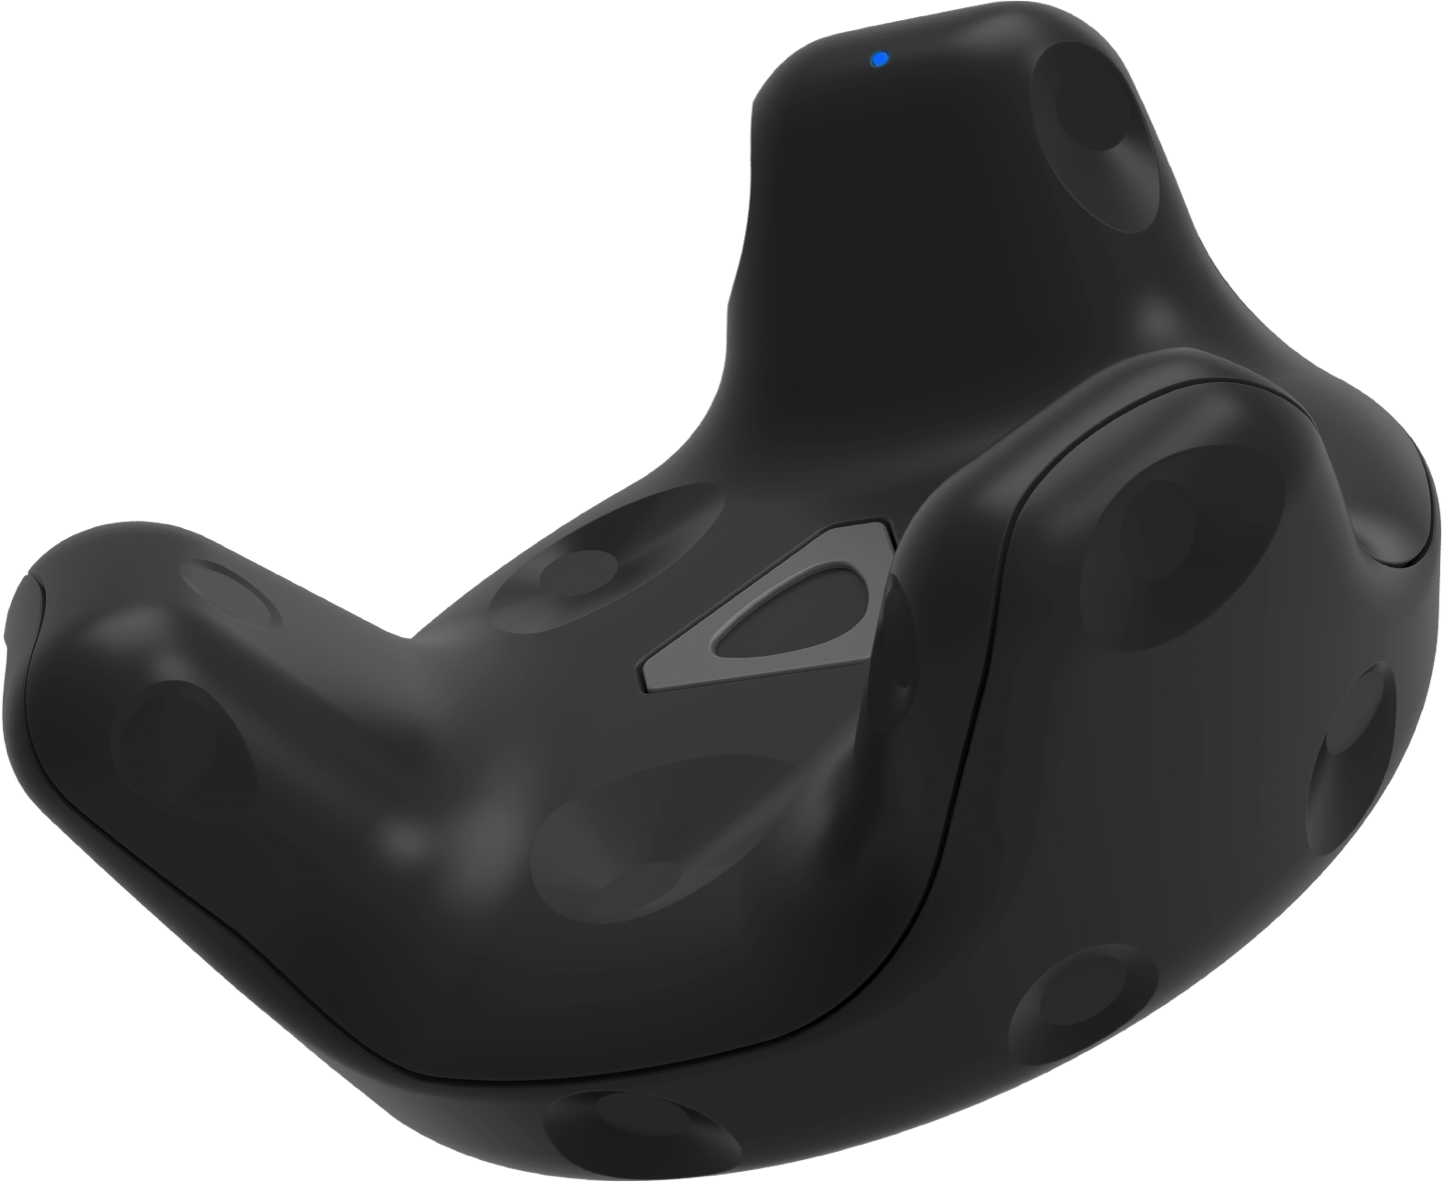
Vive Tracker . The tracker costs about 8 thousand rubles.
For the minimum set you need 3 such trackers. In general, these are the same standard controllers, only trimmed and in a slightly different package. Each such tracker is defined in SteamVR, the only difference is that you need special dongles (included) to connect them, although you can tie them to the helmet instead of controllers. On the back are the pad for connecting custom buttons (you can use the USB connector on the tracker). It can be a trigger pistol, a button to activate the lightsaber, anything. Pressing such buttons is handled in the same way as pressing the buttons on the controller, from the point of view of developing software, there is no difference. In general, they can be used to track game objects, such as weapons or tools, even furniture and doors, but we are interested in capturing movement.
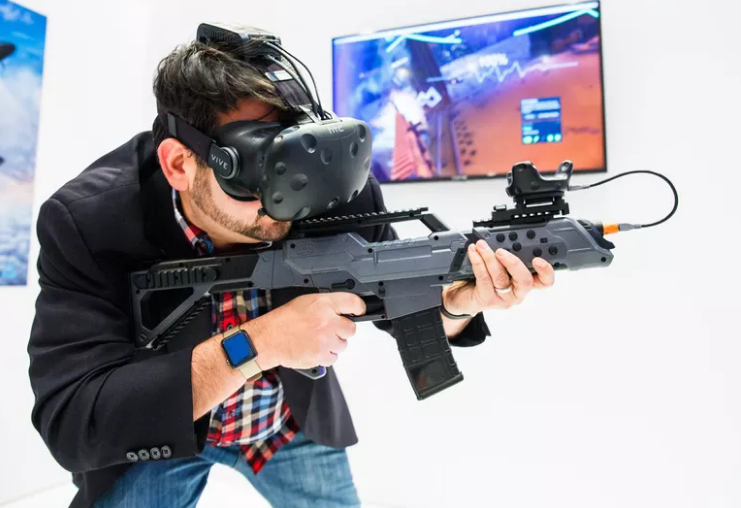
It is possible to determine the position of the head with a helmet, hands - with the help of controllers. 2 trackers should be placed on the shoe (on top of the feet), the rest will feel good on the belt at the back. This setup will allow you to play some games that support this configuration, but if we talk about the development of your software, then the character animation will need IR solutions. The principal difference between inverse kinematics and the straight line is that in the case of a straight line, the position is calculated, knowing the angles, and in the inverse case, the angles are calculated, knowing the position. Thus, a very simple model can be made by yourself, knowing the position of the two joints to calculate an intermediate one, taking into account how the human body usually bends. But there are ready-made solutions, such as Final IK , VRIK, and other procedural animation tools. There are studios that provide solutions of this type. One of these is IKinema and its product called Project Orion - software that allows you to capture motion based on data obtained from SteamVR and broadcast them via the VRPN protocol to any other application (for Unity and Unreal there are ready-made plug-ins and assets). For a budget solution, it is better to use the previous funds, which show themselves quite well.
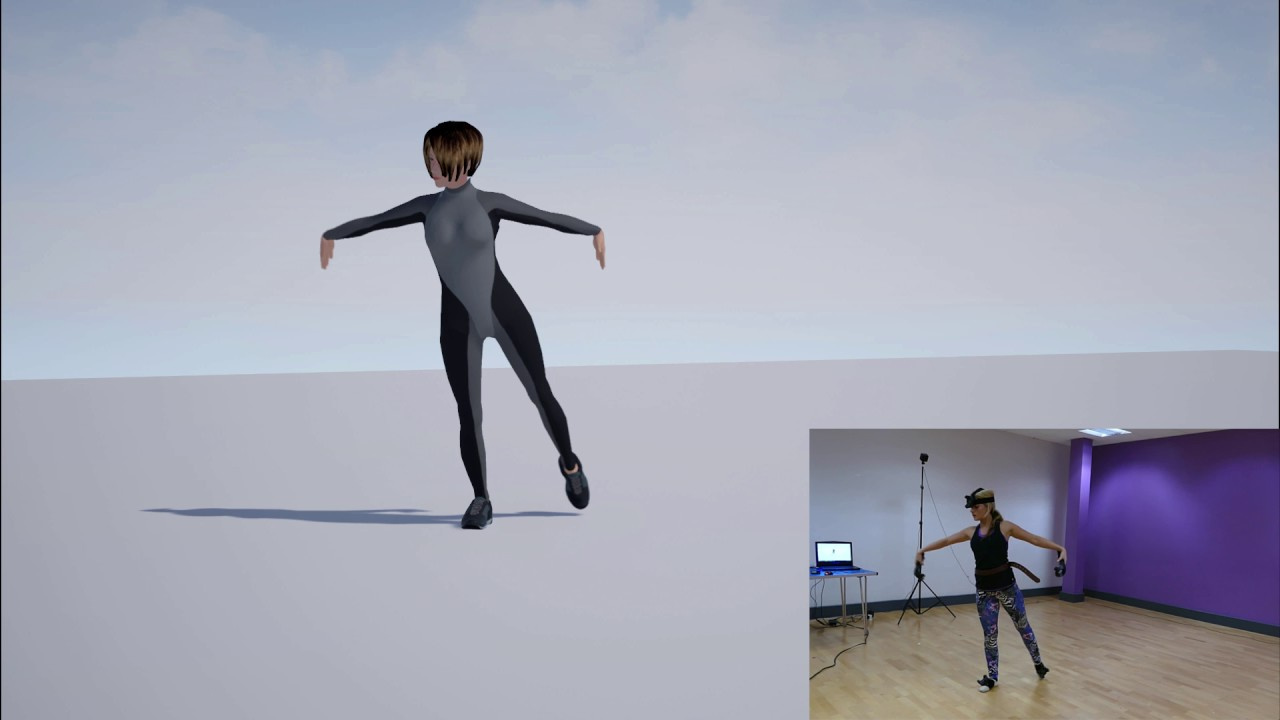
IKinema Orion (video)
Further, already in the engine, the resulting animation can be slightly cleaned, although Orion copes with this, remove the slip stop, calculate the compensation for the unevenness of the virtual floor. IKinema has a solution in the form of a plug-in for Unreal:
LiveAction
By and large, plug-ins cope with such tasks and even easier, even free ones.
To capture the movements of the fingers, these gloves will come off, for example:

Manus vr
Conclusion
Today, the capture of movement is becoming more accessible, as well as virtual reality, which certainly pleases. A number of games are coming, in which there will be support for trackers and animation of the main character in accordance with the movements of the player. Of course, all this is not yet as convenient and affordable as we would like, but it is already possible now to assemble such a system for a relatively low cost. To say that a mass player could afford to equip their playing space in this way is not necessary, but in the form of an attraction, this will be a qualitatively new level.
A few observations:
To abandon the wire, the wire in general has become more.
After acquiring a virtual body, it seems that the degree of realism increases, but seeing your moving shadow in the virtual space is still a challenge for the brain, dizziness begins, so it’s best to turn it off (this is individual)
With the tracking of the body and objects opens a huge number of opportunities to create game mechanics and the effect of immersion in general.
The result of the assembly of such a system on video at the beginning of the post. Also an example of character animation in real time:
All Articles