
多くの組織では、ネットワーク構造には、ターミナルサーバー、パーソナルコンピューター、モバイルデバイスの使用が含まれます。 この出版物では、各デバイスのブラウザ設定を再度設定せずに、Squidプロキシサーバーを介してこれらすべてを起動する方法について説明します。 Squidの設定に関する記事はたくさんありますが、どこでも断片的です。 すべてをまとめ、最初から最後まで作業構成を説明することにしました。
ターミナルサーバーでは、明示的なプロキシをActive Directoryグループに基づく承認と共に使用します(サーバーはドメイン内に存在する必要があり、ユーザーはドメインアカウントを使用して接続する必要があります)。 デバイスの場合-インターセプションプロキシ認証はMACアドレスに基づいて行われるため、IPアドレスの範囲に縛られることなく、アクセスルールをより柔軟に構成できます。

CentOS Linux 7.X.XXXおよびSquid 4.0.23を使用します。
混乱を避けるため、明示的プロキシは「不透明な」プロキシサーバーであり、プロキシサーバーのアドレスはクライアントのブラウザーで指定されます。プロキシサーバーがクライアントのゲートウェイとして指定されている場合、インターセプションプロキシは「透過」モードです。知っている。
Squidは3つのポートでリッスンします:
- ポート3127-代行受信プロキシ中のHTTPSトラフィック用。 つまり、このポートでは、iptablesを使用して、プロキシサーバーがゲートウェイとして登録されているクライアントからHTTPS要求をリダイレクトします。
- ポート3128-明示的プロキシを使用したHTTPおよびHTTPSトラフィック用。 この場合、HTTPスプリット
ブラウザはプロキシサーバーを介して機能することを理解しているため、HTTPSポートは必要ありません。
- ポート3129-Interception Proxyを使用したHTTPトラフィック用。 つまり、iptablesを使用して、プロキシサーバーがゲートウェイとして登録されているクライアントからHTTP要求をリダイレクトします。
プリセット
2つのイーサネットインターフェイスがあります。eth0-ローカルネットワークを調べ、eth1-グローバルネットワークを調べます。 以下で説明する場合、ターミナルサーバーとデバイスはネットワーク192.168.0.0/24にあります。 プロキシサーバーのアドレスは192.168.0.133です。
設定ファイル/ etc / sysconfig / network-scripts / ifcfg-eth0をこのフォームに追加します(値を代入します):
TYPE=Ethernet
BOOTPROTO=none
DEFROUTE=no
PEERDNS=yes
PEERROUTES=no
IPV4_FAILURE_FATAL=yes
IPV6INIT=no
IPV6_FAILURE_FATAL=no
NAME=eth0
UUID=f34ec600-6c46-485f-9216-0fd8954a9013
DEVICE=eth0
ONBOOT=yes
USERCTL=NO
NM_CONTROLLED=no
IPADDR=192.168.0.133
NETMASK=255.255.255.0
DNS1=192.168.0.19
DNS2=192.168.0.18
DOMAIN=balt.local
SEARCH=balt.local
DOMAINおよびSEARCHディレクティブでは、ドメイン名を指定する必要があります。
構成ファイル/ etc / sysconfig / network-scripts / eth1をこの形式にします(値を代入します):
TYPE=Ethernet
BOOTPROTO=none
DEFROUTE=yes
PEERDNS=no
PEERROUTES=no
IPV4_FAILURE_FATAL=yes
IPV6INIT=no
IPV6_FAILURE_FATAL=no
NAME=eth1
UUID=2e6072a6-a5fd-4f39-8786-501fa14e6015
DEVICE=eth1
ONBOOT=yes
USERCTL=no
NM_CONTROLLED=no
IPADDR=112.132.114.190
NETMASK=255.255.255.252
GATEWAY=112.132.114.189
ホスト名を設定します。
# hostnamectl set-hostname SRV-M29-PRX-03
DNSサーバーAにプロキシサーバーのエントリを登録して、ローカルネットワークから解決するようにします。
ローカルネットワークがサブネットで構成されており、プロキシサーバーをゲートウェイとするデバイス上で互いに通信できるようにするには、ルートを構成し、転送を有効にする必要があります。
ファイル/ etc / sysconfig / network-scripts / route-eth0を作成し、必要なルートを追加します。次に例を示します。
192.168.0.0/24 via 192.168.0.78 dev eth0
192.168.2.0/24 via 192.168.0.78 dev eth0
192.168.3.0/24 via 192.168.0.78 dev eth0
10.254.253.0/24 via 192.168.0.78 dev eth0
/etc/sysctl.confに追加します。
net.ipv4.ip_forward = 1
再起動します。
ファイアウォールを構成します。 Squid 4.X.XXは、firewalldとiptablesの両方で動作します。 誰にとってより便利です。 この記事では、iptablesを使用します。
firewalldを停止して削除します。
# systemctl stop firewalld # yum remove firewalld.noarch
iptablesをインストールして実行します。
# yum install iptables-services # systemctl enable iptables # systemctl enable ip6tables # systemctl start iptables # systemctl start ip6tables
ローカルネットワークからのみSSHとICMPを許可します。
# iptables -R INPUT 4 -i eth0 -p tcp -m state --state NEW -m tcp --dport 22 -j ACCEPT # iptables -R INPUT 2 -i eth0 -p icmp -j ACCEPT
http 80およびhttps 443ポートから対応するSquidポート3129および3127へのトラフィックリダイレクションを構成します。また、ipsetを使用して、Squidにリダイレクトされないが通過する宛先アドレスのリストを作成します。 これは、たとえば銀行のクライアント、電報などに必要です。
例外のリストを作成します。
# ipset create no_proxy_net_dst hash:net
必要なアドレスを追加します。 たとえば、デバイスからのテレグラムトラフィックをプロキシしないために、次のことを示します。
# ipset add no_proxy_net_dst 149.154.160.0/20
作成されたipset設定は再起動後に消去され、iptablesの起動も失敗します。 したがって、再起動後にルールデータを復元するスクリプトを作成しています。
ipset設定をファイルにダウンロードします。
# ipset save -file /etc/sysconfig/ipset-lists.conf
スクリプト/usr/scripts/system/ipset-restore.bashを作成します。このスクリプトをロードすると、最初にすべてのルールが消去され、次に/etc/sysconfig/ipset-lists.confから構成が復元されます。
#!/bin/bash
ipset destroy
ipset restore -file /etc/sysconfig/ipset-lists.conf
このスクリプトは、iptablesが起動する前に実行する必要があるため、/ etc / systemd / system / basic.target.wants / iptables.serviceサービスに次の行を追加します。
ExecStartPre=/usr/scripts/system/ipset-restore.bash
systemdを再起動します。
# systemctl daemon-reload
iptablesでリダイレクトルールを作成します。
# iptables -t nat -A PREROUTING -p tcp -m tcp -s 192.168.0.0/24 --dport 443 -m set ! --match-set no_proxy_net_dst dst -j REDIRECT --to-ports 3127 # iptables -t nat -A PREROUTING -p tcp -m tcp -s 192.168.0.0/24 --dport 80 -m set ! --match-set no_proxy_net_dst dst -j REDIRECT --to-ports 3129
つまり、192.168.0.0 / 24ネットワークからのすべてのhttpおよびhttpsトラフィックは、宛先アドレスがno_proxy_net_dstで指定されている場合を除き、Squidに送信されます。
FORWARDチェーンを編集し、パケットがすべてのサブネット間のLAN内を自由に通過できるようにし、192.168.0.0 / 24ネットワークからWANインターフェイスeth1を通過させます。
# iptables -I FORWARD 1 -i eth0 -o eth0 -p all -j ACCEPT # iptables -I FORWARD 2 -i eth0 -o eth1 -s 192.168.0.0/24 -j ACCEPT # iptables -I FORWARD 3 -i eth1 -o eth0 -d 192.168.0.0/24 -j ACCEPT
eth1でSNATを構成します。
# iptables -t nat -A POSTROUTING -s 192.168.0.0/24 -o eth1 -j SNAT --to-source 112.132.114.190
さて、内部インターフェイスで必要なポートを開きます。
# iptables -I INPUT 1 -i eth0 -p tcp --dport 80 -j ACCEPT # iptables -I INPUT 1 -i eth0 -p tcp --dport 443 -j ACCEPT # iptables -I INPUT 1 -i eth0 -p tcp --dport 3127 -j ACCEPT # iptables -I INPUT 1 -i eth0 -p tcp --dport 3128 -j ACCEPT # iptables -I INPUT 1 -i eth0 -p tcp --dport 3129 -j ACCEPT
iptables設定を保存します。
# /sbin/iptables-save > /etc/sysconfig/iptables
また、安心のために、sshに内部インターフェイスのみでリッスンするように指示することもできます。 / etc / ssh / sshd_configの編集:
ListenAddress 192.168.0.133
Kerberosを使用してADで認証します。 このプロトコルでは、ネットワーク時間を同期する必要があります。 したがって、ドメインコントローラーから時間情報を取得するようにプロキシサーバーを構成します。 NTPを使用します。
インストール:
# yum install ntp
指定したcentos.pool.ntp.orgサーバーの代わりに、構成ファイル/etc/ntp.confを編集します。
server srv-m29-dc-03.balt.local iburst
server srv-m29-dc-01.balt.local iburst
そして、内部インターフェイスのみを使用することを示します。
interface ignore wildcard
interface listen 192.168.0.133
interface ignore ipv6
以下を開始します。
# systemctl enable ntpd # systemctl start ntpd
次のコマンドを使用して動作を確認できます。
# ntpq -4 -c peers # ntpstat
SELinuxを無効にするのは間違っていることは知っていますが、SquidとSELinuxのセットアップにはまだ行っていません。 すぐにこの問題に戻る予定です。 したがって、私はSELinuxを無効にしますが、残りのことをするために動揺しないでください。 時間があるなら、あなたとダン・ウォルシュの両方がそれを理解し、正しくやる方が良いでしょう。
SELinuxをPermissiveモードにし、ファイル/ etc / sysconfig / selinuxを編集します。
SELINUX=permissive
再起動します。
Squidをインストールする
準備は終わりました。 次に、Squidのインストールに進みます。
CentOS公式リポジトリにはSquid 3.5のみがあります。 Squid 4.0.23をインストールします。
したがって、Squid自体をダウンロードします。
# wget http://www1.ngtech.co.il/repo/centos/7/beta/x86_64/squid-debuginfo-4.0.23-1.el7.centos.x86_64.rpm # wget http://www1.ngtech.co.il/repo/centos/7/beta/x86_64/squid-debuginfo-4.0.23-1.el7.centos.x86_64.rpm
ヘルパー:
# wget http://www1.ngtech.co.il/repo/centos/7/beta/x86_64/squid-helpers-4.0.23-1.el7.centos.x86_64.rpm
ヘルパーは、特定の機能をSquidに追加するスクリプトです。 たとえば、ext_kerberos_ldap_group_aclを使用します。これを使用して、Active Directoryのグループのユーザーのメンバーシップを確認します。
依存関係を配置します。
# wget http://www1.ngtech.co.il/repo/centos/7/x86_64/libecap-1.0.0-3.el7.centos.x86_64.rpm # wget http://www1.ngtech.co.il/repo/centos/7/x86_64/libecap-debuginfo-1.0.0-3.el7.centos.x86_64.rpm # wget http://www1.ngtech.co.il/repo/centos/7/x86_64/libecap-devel-1.0.0-3.el7.centos.x86_64.rpm # yum -y --nogpgcheck localinstall libecap-1.0.0-3.el7.centos.x86_64.rpm # yum -y --nogpgcheck localinstall libecap-devel-1.0.0-3.el7.centos.x86_64.rpm # yum -y --nogpgcheck localinstall libecap-debuginfo-1.0.0-3.el7.centos.x86_64.rpm # yum install libtool-ltdl openssl-devel cyrus-sasl-gssapi gnutls epel-release perl-Crypt-OpenSSL-X509 perl-DBI perl-Digest-MD5 perl-URI gcc gcc-c++ perl-Digest-SHA
Squidをインストールします。
# rpm -Uhv squid-4.0.23-1.el7.centos.x86_64.rpm # rpm -Uhv squid-debuginfo-4.0.23-1.el7.centos.x86_64.rpm # rpm -Uhv squid-helpers-4.0.23-1.el7.centos.x86_64.rpm
squidが使用するディレクトリの所有者を変更します。
# chown -R squid:squid /var/spool/squid/ # chown -R squid:squid /usr/bin/squidclient # chown -R squid:squid /etc/squid/ # chown -R squid:squid /usr/share/squid # chown -R squid:squid /usr/lib64/squid # chown -R squid:squid /var/log/squid/
/etc/squid/squid.confのわずかにデフォルトの構成を変更します。
acl localnet src fe80::/10 # RFC 1918 local private network (LAN)
#
acl localnet src 192.168.0.0/16 # RFC 1918 local private network (LAN)
acl localnet src fc00::/7 # RFC 4193 local private network range
acl localnet src fe80::/10 # RFC 4291 link-local (directly plugged) machines
acl SSL_ports port 443
acl Safe_ports port 80 # http
acl Safe_ports port 21 # ftp
acl Safe_ports port 443 # https
acl Safe_ports port 70 # gopher
acl Safe_ports port 210 # wais
acl Safe_ports port 1025-65535 # unregistered ports
acl Safe_ports port 280 # http-mgmt
acl Safe_ports port 488 # gss-http
acl Safe_ports port 591 # filemaker
acl Safe_ports port 777 # multiling http
acl CONNECT method CONNECT
#
http_access deny !Safe_ports
# CONNECT SSL
http_access deny CONNECT !SSL_ports
# cachemgr
http_access allow localhost manager
http_access deny manager
# localhost
http_access allow localhost
# ,
http_access deny all
# Squid
http_port 192.168.0.133:3128
# DNS.
dns_nameservers 192.168.1.2 192.168.0.18
dns_v4_first on
#
cache_dir ufs /var/spool/squid 100 16 256
coredump_dir /var/spool/squid
refresh_pattern ^ftp: 1440 20% 10080
refresh_pattern ^gopher: 1440 0% 1440
refresh_pattern -i (/cgi-bin/|\?) 0 0% 0
refresh_pattern . 0 20% 4320
編集した構成ファイルの正確性は、次を使用して確認できます。
# squid -k parse
設定では、キャッシュを使用することを示しました。 したがって、キャッシュを保存するディレクトリツリーを作成する必要があります。 コマンドを実行します。
# squid -z
そして、Squidを起動します:
# systemctl enable squid # systemctl start squid
明示的プロキシの設定
デフォルトの構成では、IPアドレスに基づいた認証を使用した「不透明な」プロキシの操作が提供されます。ローカルネットワーク上のすべてのコンピューターはインターネットへのアクセスが許可されます。
ドメイングループに基づく承認を使用したActive Directoryドメインでの認証に関心があります。 ADでの認証には、Kerberosプロトコルを使用します。 negotiate_kerberos_authヘルパーはこれを支援します。 グループによる承認には、 ext_kerberos_ldap_group_aclヘルパーを使用します。
まず、Kerberosクライアントをインストールします。
# yum install krb5-workstation
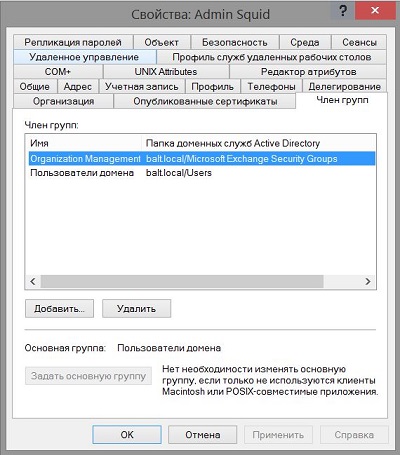
Active Directoryにユーザーを作成する必要があります。 admin_squidにします。 このユーザーには、ドメイングループに属するドメインユーザーを読み取る権限が必要です。 したがって、たとえば、組織管理グループにユーザーを追加します。
! UPD:ほとんどの構成では、すべてのユーザーがこの権利を持っているため、グループを追加する必要はありません。 そうでない場合は、組織組織よりも制限された権限を持つグループを使用することをお勧めします。
ドメインコントローラーでキータブファイルを生成します。 このファイルは、Kerberosフレームワークでの認証に使用されます。 同時に、ユーザーはユーザー名とパスワードを入力する必要がなく、Squidはキータブファイルを使用してユーザーを認証します。
# ktpass -princ HTTP/srv-m29-prx-03.balt.local@BALT.LOCAL -mapuser BALT\admin_squid -pass 3EYldza1sR -crypto All -ptype KRB5_NT_PRINCIPAL -out C:\keytabs\PROXY.keytab
!UPD:セキュリティ設定に従って「crypto」オプションを指定します。
princ、mapuser、pass、outは自然に私たち自身に変わります。 最終ファイルPROXY.keytabを/ etc / squidのプロキシサーバーにコピーし、その権利を変更する必要があります。
# chown squid:squid /etc/squid/PROXY.keytab # chmod 640 /etc/squid/PROXY.keytab
プロキシサーバー/etc/krb5.confのKerberos構成ファイルを編集します。
includedir /etc/krb5.conf.d/
[logging]
default = FILE:/var/log/krb5libs.log
kdc = FILE:/var/log/krb5kdc.log
admin_server = FILE:/var/log/kadmind.log
[libdefaults]
dns_lookup_realm = false
dns_lookup_kdc = false
ticket_lifetime = 24h
renew_lifetime = 7d
forwardable = true
rdns = false
default_realm = BALT.LOCAL
default_ccache_name = KEYRING:persistent:%{uid}
default_keytab_name = /etc/squid/PROXY.keytab
[realms]
BALT.LOCAL = {
kdc = srv-m29-dc-03.balt.local
kdc = srv-m29-dc-01.balt.local
admin_server = srv-m29-dc-03.balt.local
default_domain = balt.local
}
[domain_realm]
.balt.local = BALT.LOCAL
balt.local = BALT.LOCAL
ここに
default_realm、default_domain-ドメインFQDN
default_keytab_name-キータブファイルへのパス
kdc、admin_server-ドメインコントローラー
私たちはチェックします:
# kinit -kV -p HTTP/srv-m29-prx-03.balt.local
すべてが正しければ、それに応じて「Kerberos v5に対して認証済み」になります。
前の手順でKerberosサーバーから受け取ったチケットを削除します。
# kdestroy
次に、「squid起動スクリプト」/ etc / sysconfig / squidを変更して、squidがkeytabファイルの場所を認識できるようにします。
KRB5_KTNAME=/etc/squid/PROXY.keytab
export KRB5_KTNAME
/etc/squid/squid.confに追加します。
auth_param negotiate program /usr/lib64/squid/negotiate_kerberos_auth -s HTTP/srv-m29-prx-03.balt.local
auth_param negotiate children 10
auth_param negotiate keep_alive on
これらの行は、すべてのaclの前にファイルの先頭にある必要があります。 これらは、Kerberosを使用した実際の認証について説明しています。 auth_paramパラメーターに関する情報は、 auth_paramリンクにあります。
また、Kerberos検証に合格し、アクセスを許可したすべてのユーザーに対応するaclを追加します。
acl kerb_auth proxy_auth REQUIRED
http_access allow kerb_auth
設定を再読み込みするようにSquidに指示します。
# squid -k reconfigure
これらの操作の後、ドメインアカウントを持つユーザーはオンラインになります。 ブラウザsrv-m29-prx-03.balt.localでターミナルサーバーをポイントし、プロキシサーバー設定でポート3128を確認します。 この段階で、各ドメインアカウントのアクセスルールを既に作成できます。 たとえば、ユーザーpetrov.eがgmail.comにログインすることを禁止する場合、構成に追加します。
acl petrov-e proxy_auth petrov.e@BALT.LOCAL
acl gmail url_regex -i mail\.google\.com
acl gmail url_regex -i gmail\.com
http_access deny petrov-e gmail
グループ認証にも興味があります。 これを行うには、ADで必要なグループを作成します。
SQUID-INTERNET-STANDART
企業内の制限付きサイトへのアクセスが制限されている標準グループ
SQUID-INTERNET-FULL-ACCESS
任意のサイトへのアクセスが許可されるグループ
SQUID-INTERNET-EXTENDED
許可されたサイトのリストがSQUID-INTERNET-STANDARTのリストよりも広いグループ
また、プロキシサーバー上にファイルを作成し、それらに必要なサイトのリストを作成します。
blocked-http.txt
禁止されているhttp / httpsサイトのリスト
allowed-http-always.txt
常に許可されるhttp / httpsサイトのリスト(たとえば、企業ポータルに例外なく全員がアクセスできるようにする場合)
allowed-http-extended.txt
-SQUID-INTERNET-EXTENDEDグループの追加許可サイトのリスト。
たとえば、msn.comとvk.comをblocked-http.txtに追加します。
www\.msn\.com
vk\.com
上記のファイルでは、サイトへのリンクは正規表現を使用して示されています。
ドメイングループへのユーザーのエントリをチェックするようにSquidを構成します。 これを行うには、 ext_kerberos_ldap_group_aclヘルパーを使用します。 /etc/squid/squid.confに追加します。
external_acl_type SQUID-INTERNET-FULL_ACCESS ttl=300 negative_ttl=60 %LOGIN /usr/lib64/squid/ext_kerberos_ldap_group_acl -a -m 0 -S srv-m29-dc-03 -g SQUID-INTERNET-FULL_ACCESS -D BALT.LOCAL
external_acl_type SQUID-INTERNET-EXTENDED ttl=300 negative_ttl=60 %LOGIN /usr/lib64/squid/ext_kerberos_ldap_group_acl -a -m 0 -S srv-m29-dc-03 -g SQUID-INTERNET-EXTENDED -D BALT.LOCAL
external_acl_type SQUID-INTERNET-STANDART ttl=300 negative_ttl=60 %LOGIN /usr/lib64/squid/ext_kerberos_ldap_group_acl -a -m 0 -S srv-m29-dc-03 -g SQUID-INTERNET-STANDART -D BALT.LOCAL
acl SQUID-INTERNET-FULL_ACCESS external SQUID-INTERNET-FULL_ACCESS
acl SQUID-INTERNET-STANDART external SQUID-INTERNET-STANDART
acl SQUID-INTERNET-EXTENDED external SQUID-INTERNET-EXTENDED
繰り返しますが、external_acl_typeはexternal_acl_typeと読むことができます。この記事はすでに非常に大きいからです。 ドメインコントローラ名srv-m29-dc-03およびドメイン名BALT.LOCALは、独自のものに置き換えています。
http / httpsアドレスを使用してaclを説明します。
acl allowed-http-always url_regex -i "/etc/squid/allowed-http-always.txt"
acl blocked-http url_regex -i "/etc/squid/blocked-http.txt"
acl allowed-http-extended url_regex -i "/etc/squid/allowed-http-extended.txt"
そして、これらのACLに基づいてルールを作成します。
http_access allow allowed-http-always
http_access allow SQUID-INTERNET-FULL_ACCESS
http_access allow SQUID-INTERNET-EXTENDED allowed-http-extended
http_access allow SQUID-INTERNET-EXTENDED !blocked-http
http_access allow SQUID-INTERNET-STANDART !blocked-http
http_access allow kerb_authの行についてコメントします。これは、サーバーに登録されているユーザーがどこに行くにも必要ないためです。
最終的なsquid.confは次のようになります。
# Kerberos
auth_param negotiate program /usr/lib64/squid/negotiate_kerberos_auth -s HTTP/srv-m29-prx-03.balt.local
auth_param negotiate children 10
auth_param negotiate keep_alive on
#
acl localnet src 192.168.0.0/16 # RFC 1918 local private network (LAN)
acl localnet src fc00::/7 # RFC 4193 local private network range
acl localnet src fe80::/10 # RFC 4291 link-local (directly plugged) machines
acl SSL_ports port 443
acl Safe_ports port 80 # http
acl Safe_ports port 21 # ftp
acl Safe_ports port 443 # https
acl Safe_ports port 70 # gopher
acl Safe_ports port 210 # wais
acl Safe_ports port 1025-65535 # unregistered ports
acl Safe_ports port 280 # http-mgmt
acl Safe_ports port 488 # gss-http
acl Safe_ports port 591 # filemaker
acl Safe_ports port 777 # multiling http
acl CONNECT method CONNECT
# acl,
external_acl_type SQUID-INTERNET-FULL_ACCESS ttl=300 negative_ttl=60 %LOGIN /usr/lib64/squid/ext_kerberos_ldap_group_acl -a -m 0 -S srv-m29-dc-03 -g SQUID-INTERNET-FULL_ACCESS -D BALT.LOCAL
external_acl_type SQUID-INTERNET-EXTENDED ttl=300 negative_ttl=60 %LOGIN /usr/lib64/squid/ext_kerberos_ldap_group_acl -a -m 0 -S srv-m29-dc-03 -g SQUID-INTERNET-EXTENDED -D BALT.LOCAL
external_acl_type SQUID-INTERNET-STANDART ttl=300 negative_ttl=60 %LOGIN /usr/lib64/squid/ext_kerberos_ldap_group_acl -a -m 0 -S srv-m29-dc-03 -g SQUID-INTERNET-STANDART -D BALT.LOCAL
acl SQUID-INTERNET-FULL_ACCESS external SQUID-INTERNET-FULL_ACCESS
acl SQUID-INTERNET-STANDART external SQUID-INTERNET-STANDART
acl SQUID-INTERNET-EXTENDED external SQUID-INTERNET-EXTENDED
#
acl allowed-http-always url_regex -i "/etc/squid/allowed-http-always.txt"
acl blocked-http url_regex -i "/etc/squid/blocked-http.txt"
acl allowed-http-extended url_regex -i "/etc/squid/allowed-http-extended.txt"
# acl, ,
acl kerb_auth proxy_auth REQUIRED
#http_access allow kerb_auth
#
http_access deny !Safe_ports
# CONNECT SSL
http_access deny CONNECT !SSL_ports
# cachemgr
http_access allow localhost manager
http_access deny manager
# localhost
http_access allow localhost
#
http_access allow allowed-http-always
http_access allow SQUID-INTERNET-FULL_ACCESS
http_access allow SQUID-INTERNET-EXTENDED allowed-http-extended
http_access allow SQUID-INTERNET-EXTENDED !blocked-http
http_access allow SQUID-INTERNET-STANDART !blocked-http
# ,
http_access deny all
# Squid
http_port 192.168.0.133:3128
# DNS.
dns_nameservers 192.168.1.2 192.168.0.18
dns_v4_first on
#
cache_dir ufs /var/spool/squid 100 16 256
coredump_dir /var/spool/squid
refresh_pattern ^ftp: 1440 20% 10080
refresh_pattern ^gopher: 1440 0% 1440
refresh_pattern -i (/cgi-bin/|\?) 0 0% 0
refresh_pattern . 0 20% 4320
イカのオーバーロード:
# systemctl restart squid
これらの操作の後、ユーザーがSQUID-INTERNET-STANDARTドメイングループに入ると、msn.comおよびvk.comへのアクセスが拒否されます。 どのグループのメンバーでもないユーザーは、インターネットへのアクセスを一切許可されません。
これで、明示的プロキシの構成が完了しました。
インターセプションプロキシを構成する
グループユーザーを使用してドメインユーザーのプロキシサーバー設定を決定し、ターミナルサーバーでプロキシサーバーアドレスを設定して使用します。 ただし、ドメインの一部ではないコンピューターや異なるモバイルデバイスでは、グループポリシーは機能せず、毎回手動でプロキシ設定を設定するのは便利ではありません。 また、登録したとしても、たとえば、デバイスを持って帰宅したとき、そのデバイスからインターネットにアクセスすることはできません。 したがって、「透明な」プロキシサーバーを追加で構成する必要があります。 IPアドレスの範囲を選択し、Squidでそのためのルールを作成できますが、デバイスのMACアドレスを使用する方が便利です(私にとって)。
これを行うには、MACアドレスのリストを作成します(これは、以前に明示的プロキシ用に作成したドメイングループに類似しています)。
/etc/squid/ allowed-mac.txt
これには標準アクセスのデバイスが含まれます
/etc/squid/allowed-mac-extended.txt
これにはアクセスデバイスが含まれます
/etc/squid/allowed-mac-full-access.txt
これにはフルアクセスのデバイスが含まれます
ファイルでは、新しい各デバイスを新しい行に示す必要があります。 コメントは#で始まります。 たとえば、私にとっては次のようになります。
## (TEL)
94:E9:6A:D3:E0:CB
## (NB) (Wi-Fi)
24:0A:64:74:2D:71
さらに、httpsトラフィックの透過プロキシには追加の設定が必要です。 httpsサイトに切り替えると、ログにはCONNECTリクエストのみが表示されます。つまり、ユーザーがこのサイトのどこに行ったのか正確にはわかりません。 アクティビティをより詳細に表示するには、TLS接続を切断し、実際に「中間者」攻撃を実装する必要があります。 したがって、ユーザーがhttpsリソースで何をしていたかを正確に監視する場合は、自分のデバイスに自己署名プロキシサーバー証明書をインストールする必要があります。 それ以外の場合、クライアント側で追加のアクションは必要ありません。
自己署名CA証明書の公開鍵と秘密鍵を作成します。 Squidはこれらを使用して、顧客が要求するサイトの動的証明書を生成します。
証明書のディレクトリを作成します。
# mkdir /etc/squid/ssl_cert # chown -R squid:squid /etc/squid/ssl_cert/ # chmod 700 /etc/squid/ssl_cert # cd /etc/squid/ssl_cert
生成します:
# openssl req -new -newkey rsa:2048 -sha256 -days 365 -nodes -x509 -extensions v3_ca -keyout myCA.pem -out myCA.pem
データを入力してください。
https盗聴が必要な場合は、クライアントデバイスにインストールするための証明書も生成します。
# openssl x509 -in myCA.pem -outform DER -out srv-m29-prx-03.der
クライアント側では、信頼されたルート証明書にインストールする必要があります。
動的証明書用のディレクトリを作成します。 これを行うには、ssl_crtdヘルパーを使用します。
# /usr/lib64/squid/security_file_certgen -c -s /etc/squid/ssl_db -M 4MB # chown -R squid:squid /etc/squid/ssl_db/
httpsサイトのリストを作成します。
/etc/squid/blocked_https.txt
ブロックされたhttpsサイト
/etc/squid/allowed-https-extended.txt
追加の承認済みhttpsサイト
/etc/squid/allowed-https-always.txt
常にhttpsサイトを許可
/etc/squid/monitored-https.txt
トラフィックを復号化するサイト
構成/etc/squid/squid.confを編集します。
httpsのポート3127およびhttpのポート3129でInterception Proxyを実行するようにsquid.confに指示します。
http_port 192.168.0.133:3129 intercept
https_port 192.168.0.133:3127 intercept ssl-bump cert=/etc/squid/ssl_cert/myCA.pem generate-host-certificates=on dynamic_cert_mem_cache_size=4MB
httpsトラフィックとMACアドレスのACLを作成します。
acl allowed-mac arp "/etc/squid/allowed-mac.txt"
acl allowed-mac-extended arp "/etc/squid/allowed-mac-extended.txt"
acl allowed-mac-full-access arp "/etc/squid/allowed-mac-full-access.txt"
acl step1 at_step SslBump1
acl allowed-https-always ssl::server_name_regex -i "/etc/squid/allowed-https-always.txt"
acl blocked-https ssl::server_name_regex -i "/etc/squid/blocked-https.txt"
acl allowed-https-extended ssl::server_name_regex -i "/etc/squid/allowed-https-extended.txt"
acl monitored-HTTPS ssl::server_name_regex -i "/etc/squid/monitored-HTTPS.txt"
デバイスとHTTPトラフィックの許容ルールを追加します。
http_access allow allowed-mac-full-access
http_access allow allowed-mac-extended allowed-http-extended
http_access allow allowed-mac-extended !blocked-http
http_access allow allowed-mac !blocked-http
デバイスとhttpsトラフィックの許容ルールを追加します。
ssl_bump peek step1
ssl_bump bump allowed-mac-full-access monitored-HTTPS
ssl_bump bump allowed-mac-extended monitored-HTTPS
ssl_bump bump allowed-mac monitored-HTTPS
ssl_bump splice allowed-https-always
ssl_bump splice allowed-mac-full-access
ssl_bump splice allowed-mac-extended allowed-https-extended
ssl_bump splice allowed-mac-extended !blocked-https
ssl_bump splice allowed-mac !blocked-https
ssl_bump terminate all
そして、動的証明書を作成するための設定:
sslcrtd_program /usr/lib64/squid/security_file_certgen -s /etc/squid/ssl_db -M 4MB
Squidを再起動します。
プロキシサーバーをデバイス上のゲートウェイとして登録すると、クライアント側に証明書をインストールせずにすべてが機能するはずです。
httpsのプロキシについて少し説明します。 Squid 3.5以降では、いわゆるSslBump Peek and Splice機能がこれらの目的に使用されます。 その本質は、既知のクライアントSNIとWebサーバー証明書がクライアントの要求に応じて送信されるときに、SquidがTLSハンドシェイクプロセスを「スパイ」するという事実にあります。 SNIは、クライアントがTLS接続を確立したいホスト名です。 このデータに基づいて、Squidが次に何を行うか(ブロックまたはスキップ)を決定できます。
実際、SquidはTLS Client Helloメッセージをスキャンし、同一のメッセージを作成して、宛先Webサーバーに送信します。 サーバーはTLS Server Helloメッセージで応答しますが、これも分析できます。
つまり、3つのステージ(ステップ)があります。
- クライアントからCONNECTを取得します。 このステップでは、リクエストされたサイトのドメイン名はわかりません。 TCPレベルの情報のみ-IPアドレスとポート。 したがって、ドメイン名に基づいて決定を下すことは現在不可能です。
- クライアントからtlsクライアントhelloを受け取ります。 すでにSNIがあります。つまり、宛先サーバーの名前はすでにわかっています。
- サーバー証明書を持つサーバーからtlsサーバーhelloを取得します。
各ステップで、ピーク、スプライス、凝視、バンプ、終了の5つのアクションのいずれかを実行できます。 どのステップから実行されるかは、接続のさらなる処理に依存します。 それは多くのテキストが判明するので、私はすべてを説明しません。 ここでSslPeekAndSpliceの内容と方法をお読みください。
構成のみを説明します。
文字列「acl step1 at_step SslBump1」は、最初のステップを説明するだけです。
「ssl_bump peek step1」という行は、最初のステップでpeekを実行することを意味します。その結果、2番目のステップに移行し、TLS Client Helloを処理してSNIを取得します。
行:
ssl_bump bump allowed-mac-full-access monitored-HTTPS
ssl_bump bump allowed-mac-extended monitored-HTTPS
ssl_bump bump allowed-mac monitored-HTTPS
SNIから抽出されたサーバー名がmonitored-https.txtファイルにあり、クライアントのmacデバイスアドレスが許可リストにある場合、サーバーへのTLS接続を確立し(クライアントSNIを使用)、クライアントへのTLS接続を確立します(偽の動的サーバー証明書を使用) 。 つまり、実際には「中間者」を編成しています。 クライアントの証明書は偽物なので、ブラウザは誓います。 このために、クライアントデバイスにインストールする必要がある上記のsrv-m29-prx-03.der証明書を作成しました。
行:
ssl_bump splice allowed-https-always
ssl_bump splice allowed-mac-full-access
ssl_bump splice allowed-mac-extended allowed-https-extended
ssl_bump splice allowed-mac-extended !blocked-https
ssl_bump splice allowed-mac !blocked-https
SNIから抽出されたサーバー名がhttpsリスト付きの許可されたファイルにある場合、接続をデコードせずにtcpトンネルを作成します。 つまり、クライアントとサーバーは、プロキシサーバーが存在しないかのように直接通信します。 ブラウザは、プロキシサーバーからの偽の証明書ではなく、Webサーバーから通常の証明書を受信し、当然のことながら誓いません。
その結果、TLS接続を復号化する必要がある場合は、デバイスに自己署名プロキシサーバー証明書をインストールする必要があります。 このサイトにアクティビティログがなくても、サイトにクライアントを配置するかどうかを決定する必要がある場合は、証明書をインストールできません。
最終構成:
# Kerberos
auth_param negotiate program /usr/lib64/squid/negotiate_kerberos_auth -s HTTP/srv-m29-prx-03.balt.local
auth_param negotiate children 10
auth_param negotiate keep_alive on
#
acl localnet src 192.168.0.0/16 # RFC 1918 local private network (LAN)
acl localnet src fc00::/7 # RFC 4193 local private network range
acl localnet src fe80::/10 # RFC 4291 link-local (directly plugged) machines
acl SSL_ports port 443
acl Safe_ports port 80 # http
acl Safe_ports port 21 # ftp
acl Safe_ports port 443 # https
acl Safe_ports port 70 # gopher
acl Safe_ports port 210 # wais
acl Safe_ports port 1025-65535 # unregistered ports
acl Safe_ports port 280 # http-mgmt
acl Safe_ports port 488 # gss-http
acl Safe_ports port 591 # filemaker
acl Safe_ports port 777 # multiling http
acl CONNECT method CONNECT
# acl,
external_acl_type SQUID-INTERNET-FULL_ACCESS ttl=300 negative_ttl=60 %LOGIN /usr/lib64/squid/ext_kerberos_ldap_group_acl -a -m 0 -S srv-m29-dc-03 -g SQUID-INTERNET-FULL_ACCESS -D BALT.LOCAL
external_acl_type SQUID-INTERNET-EXTENDED ttl=300 negative_ttl=60 %LOGIN /usr/lib64/squid/ext_kerberos_ldap_group_acl -a -m 0 -S srv-m29-dc-03 -g SQUID-INTERNET-EXTENDED -D BALT.LOCAL
external_acl_type SQUID-INTERNET-STANDART ttl=300 negative_ttl=60 %LOGIN /usr/lib64/squid/ext_kerberos_ldap_group_acl -a -m 0 -S srv-m29-dc-03 -g SQUID-INTERNET-STANDART -D BALT.LOCAL
acl SQUID-INTERNET-FULL_ACCESS external SQUID-INTERNET-FULL_ACCESS
acl SQUID-INTERNET-STANDART external SQUID-INTERNET-STANDART
acl SQUID-INTERNET-EXTENDED external SQUID-INTERNET-EXTENDED
# http
acl allowed-http-always url_regex -i "/etc/squid/allowed-http-always.txt"
acl blocked-http url_regex -i "/etc/squid/blocked-http.txt"
acl allowed-http-extended url_regex -i "/etc/squid/allowed-http-extended.txt"
# https
acl allowed-https-always ssl::server_name_regex -i "/etc/squid/allowed-https-always.txt"
acl blocked-https ssl::server_name_regex -i "/etc/squid/blocked-https.txt"
acl allowed-https-extended ssl::server_name_regex -i "/etc/squid/allowed-https-extended.txt"
acl monitored-HTTPS ssl::server_name_regex -i "/etc/squid/monitored-HTTPS.txt"
#
acl allowed-mac arp "/etc/squid/allowed-mac.txt"
acl allowed-mac-extended arp "/etc/squid/allowed-mac-extended.txt"
acl allowed-mac-full-access arp "/etc/squid/allowed-mac-full-access.txt"
acl step1 at_step SslBump1
# acl, ,
acl kerb_auth proxy_auth REQUIRED
#http_access allow kerb_auth
#
http_access deny !Safe_ports
# CONNECT SSL
http_access deny CONNECT !SSL_ports
# cachemgr
http_access allow localhost manager
http_access deny manager
# localhost
http_access allow localhost
#
http_access allow allowed-http-always
http_access allow SQUID-INTERNET-FULL_ACCESS
http_access allow SQUID-INTERNET-EXTENDED allowed-http-extended
http_access allow SQUID-INTERNET-EXTENDED !blocked-http
http_access allow SQUID-INTERNET-STANDART !blocked-http
# mac http
http_access allow allowed-mac-full-access
http_access allow allowed-mac-extended allowed-http-extended
http_access allow allowed-mac-extended !blocked-http
http_access allow allowed-mac !blocked-http
# ,
http_access deny all
# mac https
ssl_bump peek step1
ssl_bump bump allowed-mac-full-access monitored-HTTPS
ssl_bump bump allowed-mac-extended monitored-HTTPS
ssl_bump bump allowed-mac monitored-HTTPS
ssl_bump splice allowed-https-always
ssl_bump splice allowed-mac-full-access
ssl_bump splice allowed-mac-extended allowed-https-extended
ssl_bump splice allowed-mac-extended !blocked-https
ssl_bump splice allowed-mac !blocked-https
# https,
ssl_bump terminate all
# Squid
http_port 192.168.0.133:3128
http_port 192.168.0.133:3129 intercept
https_port 192.168.0.133:3127 intercept ssl-bump cert=/etc/squid/ssl_cert/myCA.pem generate-host-certificates=on dynamic_cert_mem_cache_size=4MB
# DNS.
dns_nameservers 192.168.1.2 192.168.0.18
dns_v4_first on
#
sslcrtd_program /usr/lib64/squid/security_file_certgen -s /etc/squid/ssl_db -M 4MB
#
cache_dir ufs /var/spool/squid 100 16 256
coredump_dir /var/spool/squid
refresh_pattern ^ftp: 1440 20% 10080
refresh_pattern ^gopher: 1440 0% 1440
refresh_pattern -i (/cgi-bin/|\?) 0 0% 0
refresh_pattern . 0 20% 4320
イカのオーバーロード:
# systemctl restart squid
オプショナル
統計を表示するために、多数の異なるログ分析ソフトウェアが作成されています。
最も有名なSARG、ScreenSquid、lightsquid、SquidAnalyzer。
上記の構成では、ログインとMACアドレスではなく完全なユーザー名がレポートに含まれるように、自己記述型のログアナライザーを使用する必要がありました。 perlとphpを知っている人は、ニーズに合わせてScreenSquidをリメイクできます。 私のpythonは定期的にaccess.logを解析し、結果をmysqlにアップロードし、リクエストに応じてhtmlドキュメントに統計をアップロードします。 しかし、これは議論のための別のトピックです。
また、単純なpython 3スクリプトを使用して、URLリストファイル内のサイトの存在を確認します(必要に応じて、ファイル内のMACアドレスを決定するために同じことを実行できます)。
import re allowed_http_extended = '/etc/squid/allowed-http-extended.txt' allowed_https_extended = '/etc/squid/allowed-https-extended.txt' blocked_http = '/etc/squid/blocked-http.txt' blocked_https = '/etc/squid/blocked-https.txt' monitored_HTTPS = '/etc/squid/monitored-HTTPS.txt' dict_blocked_http = {} with open(blocked_http,'r',encoding="utf-8") as f: for i, l in enumerate(f,start=1): if l.strip() != '': dict_blocked_http[i] = l.lower() dict_blocked_https = {} with open(blocked_https,'r',encoding="utf-8") as f: for i, l in enumerate(f,start=1): if l.strip() != '': dict_blocked_https[i] = l.lower() dict_allowed_http_extended = {} with open(allowed_http_extended,'r',encoding="utf-8") as f: for i, l in enumerate(f,start=1): if l.strip() != '': dict_allowed_http_extended[i] = l.lower() dict_allowed_https_extended = {} with open(allowed_https_extended,'r',encoding="utf-8") as f: for i, l in enumerate(f,start=1): if l.strip() != '': dict_allowed_https_extended[i] = l.lower() dict_monitored_HTTPS = {} with open(monitored_HTTPS,'r',encoding="utf-8") as f: for i, l in enumerate(f,start=1): if l.strip() != '': dict_monitored_HTTPS[i] = l.lower() checked_site = input(" : ") checked_site = checked_site.lower().strip() for i in dict_blocked_http: dict_key = dict_blocked_http.get(i).strip() result = re.search(dict_key,checked_site) if result != None: print (" 'blocked-http.txt', '" + str(i) + "' '" + dict_key + "'") for i in dict_blocked_https: dict_key = dict_blocked_https.get(i).strip() result = re.search(dict_key,checked_site) if result != None: print (" 'blocked-https.txt', '" + str(i) + "' '" + dict_key + "'") for i in dict_allowed_http_extended: dict_key = dict_allowed_http_extended.get(i).strip() result = re.search(dict_key,checked_site) if result != None: print (" 'allowed_http_extended.txt', '" + str(i) + "' '" + dict_key + "'") for i in dict_allowed_https_extended: dict_key = dict_allowed_https_extended.get(i).strip() result = re.search(dict_key,checked_site) if result != None: print (" 'allowed_https_extended.txt', '" + str(i) + "' '" + dict_key + "'") for i in dict_monitored_HTTPS: dict_key = dict_monitored_HTTPS.get(i).strip() result = re.search(dict_key,checked_site) if result != None: print (" 'monitored_HTTPS.txt', '" + str(i) + "' '" + dict_key + "'")
スクリプトを実行し、URLリンクを入力して、一致した行番号を持つファイルのリストを取得します。
以上です。