さて、電話は受け入れられました。私たちは好みと遊女でピッカーを書きます。
これは私たちが作成する一種のピッカーです。
(ウィジェットを使用するだけの場合-記事の最後にあるGitへのリンク)
私が最初に答えなければならなかったのは、それはどのような種類のピッカーであり、何ができるべきなのかということでした。
もちろん、フェルトペンは味と色が異なりますが、競合するピッカーのスタイルを比較すると、私の意見では正しいものが勝ちます:
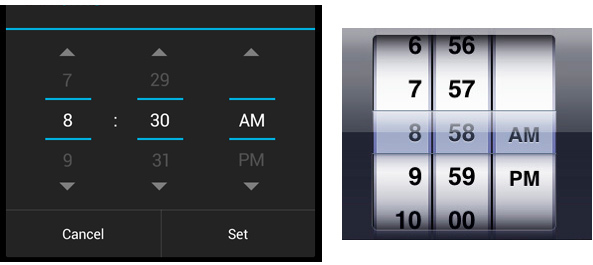
Android(左)とiOS(右)のタイムピッカー
私は自分で答えなければなりませんでした-なぜ正しいピッカーがより魅力的ですか?
答えは1つではありませんでした。
- 良く見える
- 直感的な切り替え
- 余分な要素はありません
しかし、気分はもっと欲しかったので、新しいピッカーに存在するはずのポイントがすぐに追加されました。
- デザインを犠牲にすることなくサイズ変更が簡単
- 時間だけでなく、...はい、あらゆる情報を示す機能
- それでも、それはリンゴよりもアンドロイドでなければなりません
それで、目標が設定されました。始めましょう。
パレット
一般に、パレットのすべての色は、要素を追加する前に手動で選択されていました。 色を比較して調整しました。 結果は次のパレットでした:
パレット
<color name="datepickerBackground">#ffffff</color> <color name="datepickerText">#000000</color> <color name="datepickerSelectedValue">#3770e4</color> <color name="datepickerSelectedValueShadow">#ffffff</color> <color name="datapickerGradientStart">#55000000</color> <color name="datapickerSelectedValueeLineG1">#22ffffff</color> <color name="datapickerSelectedValueeLineG2">#227d98ff</color> <color name="datapickerSelectedValueeLineG3">#336585ff</color> <color name="datapickerSelectedValueeLineG4">#336d8dff</color> <color name="datapicketSelectedValueBorder">#9a9da4</color> <color name="datapicketSelectedBorderTop">#f8fcff</color> <color name="datapicketSelectedBorderBttom">#a1a7bf</color> <color name="datapickerBlackLines">#000000</color> <color name="datapickerGrayLines">#cfcdd8</color>
色の名前はそれ自体を物語っていると思いますが、いずれにせよ、コードには説明があるので、簡単に理解できます。
このコードをcolor.xmlに貼り付けます。
ピッカーを作成
ピッカーはビュー要素を参照します。つまり、DataPickerクラスを作成します。
public class DataPicker extends View { ... }
次の変数が必要になります。
使用される変数
public Context dataPickercontext=null; // Context private OnChangeValueListener mListener=null; // public int nowTopPosition = 0; // private int minTopPosition = 0; // private int upMaxTopPosition = 0; // , private int maxTopPosition = 0; // private int maxValueHeight = 0; // private ArrayList<dpValuesSize> dpvalues = new ArrayList<dpValuesSize>(); // private int canvasW =0; // private int canvasH=0; // private int selectedvalueId=0; // private boolean needAnimation=false; // private int needPosition=0; // public int valpadding = 30; // private int scrollspeed=0; // private boolean scrolltoup=false; // private float dpDownY=0; // private float canvasDownY=0; // private long actdownTime=0; //
コンストラクターを定義します。
public DataPicker(Context context) { super(context); dataPickercontext = context; } public DataPicker(Context context, AttributeSet attrs) { super(context, attrs); dataPickercontext = context; } public DataPicker(Context context, AttributeSet attrs, int defStyle) { super(context, attrs, defStyle); dataPickercontext = context; }
パラメーター、スタイルなどをコンストラクターに転送することができます。 この記事の枠組み内でこれらの余剰金すべてを必要とするわけではありません。
次に、onSizeChangedメソッドをオーバーライドする必要があります。
@Override protected void onSizeChanged(int w, int h, int oldw, int oldh) { canvasW = w ; canvasH = h ; maxValueHeight = (canvasH - (valpadding*2))/2; nowTopPosition = 0; super.onSizeChanged(w, h, oldw, oldh); }
これは、キャンバスのサイズを変更するたびに、すべての要素が正しく描画されるようにするために必要です。 キャンバスのサイズを常に把握しているため、すべての領域を確実に埋めることができます。
次のステップは、ピッカーの機能を決定することです。 まず、表示する必要のある値を取得する必要があります。 このためのメソッドを作成しましょう:
private Handler dpHandler = new Handler(); public void setValues(final String[] newvalues) { if (canvasW == 0 || canvasH == 0) { dpHandler.postDelayed(new Runnable() { @Override public void run() { if (canvasW == 0 || canvasH == 0) { dpHandler.postDelayed(this, 100); } else { dpvalues.clear(); for (int i = 0; i < newvalues.length; i++) { dpvalues.add(new dpValuesSize(newvalues[i], canvasW, canvasH)); } } } }, 100); } dpvalues.clear(); for (int i = 0; i < newvalues.length; i++) { dpvalues.add(new dpValuesSize(newvalues[i], canvasW, canvasH)); } }
このメソッドには、ハンドラーが必要でした。 実際には、作成時のキャンバスの寸法は幅と高さの両方で0です。 このメソッドでは、値とそのパラメーターが含まれるデータクラスを参照します。 ただし、念のため、キャンバスにサイズが指定されているかどうかを確認します。 サイズがまだ決定されていない場合は、この関数の実行を延期します。
値とそのパラメーターを持つクラスは次のようになります。
class dpValuesSize { public int dpWidth = 0; // public int dpHeight = 0; // public String dpValue = ""; // public int dpTextSize = 0; // public int valpadding = 30; // public int valinnerLeftpadding = 20; // /* , . - , View, . . , . - . , */ public dpValuesSize(String val, int canvasW, int canvasH) { try { int maxTextHeight = (canvasH - (valpadding * 2)) / 2; boolean sizeOK = false; dpValue = val; while (!sizeOK) { Rect textBounds = new Rect(); Paint textPaint = new Paint(); dpTextSize++; textPaint.setTextSize(dpTextSize); textPaint.getTextBounds(val, 0, val.length(), textBounds); if (textBounds.width() <= canvasW - (valinnerLeftpadding * 2) && textBounds.height() <= maxTextHeight) { dpWidth = textBounds.width(); dpHeight = textBounds.height(); } else { sizeOK = true; } } } catch (Exception e) { e.printStackTrace(); } } }
次にすべきことは、スクロールすることでピッカーの値を変更する機能です。
このためにOnTouchメソッドをオーバーライドします。
@Override public boolean onTouchEvent(MotionEvent motionEvent) { //. , Y if (motionEvent.getAction() == MotionEvent.ACTION_DOWN) { canvasDownY = motionEvent.getY(); dpDownY = motionEvent.getY() - nowTopPosition; needAnimation = false; actdownTime = motionEvent.getEventTime(); } // , nowTopPosition . , . if (motionEvent.getAction() == MotionEvent.ACTION_MOVE) { if ((int) (motionEvent.getY() - dpDownY) > maxTopPosition) { nowTopPosition = maxTopPosition; return true; } if ((int) (motionEvent.getY() - dpDownY) < upMaxTopPosition) { nowTopPosition = upMaxTopPosition; return true; } nowTopPosition = (int) (motionEvent.getY() - dpDownY); } /* - , , ( roundingValue(). scrollspeed. , - , . */ if (motionEvent.getAction() == MotionEvent.ACTION_UP) { if (canvasDownY > motionEvent.getY()) { scrolltoup = false; } else { scrolltoup = true; } if ((motionEvent.getEventTime() - actdownTime < 200) && (Math.abs(dpDownY - motionEvent.getY()) > 100)) { scrollspeed = (int) (1000 - (motionEvent.getEventTime() - actdownTime)); } else { scrollspeed = 0; roundingValue(); } needAnimation = true; } return true; }
実際、スクロールを停止した後に値を揃える方法:
private void roundingValue() { // needPosition, . needPosition = (((nowTopPosition - maxTopPosition - (maxValueHeight / 2)) / (maxValueHeight + valpadding))) * (maxValueHeight + valpadding) + maxTopPosition; // , selectedvalueId = Math.abs(((needPosition - valpadding - (maxValueHeight / 2)) / (maxValueHeight + valpadding))); // , . onSelected(selectedvalueId); }
ご覧のとおり、前の方法ではonSelected関数を使用して、ユーザーが値を選択したことをピッカーが通知できるようにしました。
これのリスナーを作成し、イベントを定義します。
public interface OnChangeValueListener { public void onEvent(int valueId); } public void setOnChangeValueListener(OnChangeValueListener eventListener) { mListener = eventListener; } //, protected void onSelected(int selectedId) { if (mListener != null) { mListener.onEvent(selectedId); } } protected void onSelected(int selectedId) { if (mListener != null) { mListener.onEvent(selectedId); } } // public int getValueid() { try { return selectedvalueId; } catch (Exception e) { } return -1; }
定義したすべての基本的な方法が揃ったら、最も重要な方法に進みます。 キャンバスにピッカーを描画する必要があります。 onDrawメソッドはレンダリングを担当します 。
@Override protected void onDraw(Canvas canvas) { super.onDraw(canvas); try { // , Picker' if (dpvalues.size() == 0) { return; } // , upMaxTopPosition = -(((dpvalues.size() - 1) * (maxValueHeight + valpadding))); // ( ) canvas.drawColor(Color.argb(0, 255, 255, 255)); //, ( - ) if (needAnimation) { if (scrollspeed > 0) { scrollspeed -= 30; if (scrolltoup) { int currentPos = nowTopPosition + 30; if ((currentPos) > maxTopPosition) { nowTopPosition = maxTopPosition; scrollspeed = 0; roundingValue(); } else { nowTopPosition = currentPos; } } if (!scrolltoup) { int currentPos = nowTopPosition - 30; if ((currentPos) < upMaxTopPosition) { nowTopPosition = upMaxTopPosition; scrollspeed = 0; roundingValue(); } else { nowTopPosition = currentPos; } } if (scrollspeed <= 0) { roundingValue(); } } else { if (nowTopPosition > needPosition) { nowTopPosition -= 20; if (nowTopPosition < needPosition) { nowTopPosition = needPosition; } } if (nowTopPosition < needPosition) { nowTopPosition += 20; if (nowTopPosition > needPosition) { nowTopPosition = needPosition; } } if (nowTopPosition == needPosition) { needAnimation = false; } } } // for (int i = 0; i < dpvalues.size(); i++) { try { Paint paint = new Paint(); paint.setColor(dataPickercontext.getResources().getColor(R.color.datepickerText)); if (selectedvalueId == i) { paint.setColor(dataPickercontext.getResources().getColor(R.color.datepickerSelectedValue)); Paint shadowText = new Paint(); shadowText.setColor(dataPickercontext.getResources().getColor(R.color.datepickerSelectedValueShadow)); shadowText.setTextSize(dpvalues.get(i).dpTextSize); shadowText.setAntiAlias(true); canvas.drawText(dpvalues.get(i).dpValue, (canvasW / 2) - (dpvalues.get(i).dpWidth / 2), ((maxValueHeight + valpadding) * i) + (valpadding + maxValueHeight) + (dpvalues.get(i).dpHeight / 2) + nowTopPosition + 2, shadowText); } paint.setTextSize(dpvalues.get(i).dpTextSize); paint.setAntiAlias(true); canvas.drawText(dpvalues.get(i).dpValue, (canvasW / 2) - (dpvalues.get(i).dpWidth / 2), ((maxValueHeight + valpadding) * i) + (valpadding + maxValueHeight) + (dpvalues.get(i).dpHeight / 2) + nowTopPosition, paint); } catch (Exception e) { } }
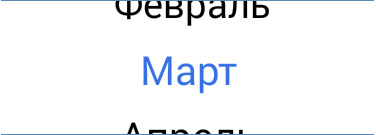
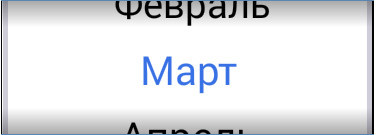
次のようになります。
// Paint lPBorders = new Paint(); lPBorders.setColor(dataPickercontext.getResources().getColor(R.color.datapickerBlackLines)); canvas.drawLine(0,0,0,canvasH,lPBorders); canvas.drawLine(1,0,1,canvasH,lPBorders); canvas.drawLine(canvasW-1,0,canvasW-1,canvasH,lPBorders); canvas.drawLine(canvasW-2,0,canvasW-2,canvasH,lPBorders); canvas.drawLine(canvasW,0,canvasW,canvasH,lPBorders); lPBorders=new Paint(); lPBorders.setColor(dataPickercontext.getResources().getColor(R.color.datapickerGrayLines)); canvas.drawRect(2,0,7,canvasH,lPBorders); canvas.drawRect(canvasW-7,0,canvasW-2,canvasH,lPBorders);
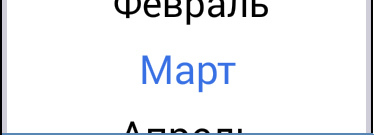
結果:
// Paint framePaint = new Paint(); framePaint.setShader(new LinearGradient(0, 0, 0, getHeight() / 5, dataPickercontext.getResources().getColor(R.color.datapickerGradientStart), Color.TRANSPARENT, Shader.TileMode.CLAMP)); canvas.drawPaint(framePaint); framePaint.setShader(new LinearGradient(0, getHeight(), 0, getHeight() - getHeight() / 5, dataPickercontext.getResources().getColor(R.color.datapickerGradientStart), Color.TRANSPARENT, Shader.TileMode.CLAMP)); canvas.drawPaint(framePaint);
影がすでに良くなっている場合:
// Path pathSelect = new Path(); pathSelect.moveTo(0, canvasH / 2 - maxValueHeight / 2 - valpadding / 2); pathSelect.lineTo(canvasW, canvasH / 2 - maxValueHeight / 2 - valpadding / 2); pathSelect.lineTo(canvasW, canvasH / 2); pathSelect.lineTo(0, canvasH / 2); pathSelect.lineTo(0, canvasH / 2 - maxValueHeight / 2); Paint pathSelectPaint = new Paint(); pathSelectPaint.setShader(new LinearGradient(0, 0, 0, maxValueHeight / 2, dataPickercontext.getResources().getColor(R.color.datapickerSelectedValueeLineG1), dataPickercontext.getResources().getColor(R.color.datapickerSelectedValueeLineG2), Shader.TileMode.CLAMP)); canvas.drawPath(pathSelect, pathSelectPaint); pathSelect = new Path(); pathSelect.moveTo(0, canvasH / 2); pathSelect.lineTo(canvasW, canvasH / 2); pathSelect.lineTo(canvasW, canvasH / 2 + maxValueHeight / 2 + valpadding / 2); pathSelect.lineTo(0, canvasH / 2 + maxValueHeight / 2 + valpadding / 2); pathSelect.lineTo(0, canvasH / 2); pathSelectPaint = new Paint(); pathSelectPaint.setShader(new LinearGradient(0, 0, 0, maxValueHeight / 2, dataPickercontext.getResources().getColor(R.color.datapickerSelectedValueeLineG3), dataPickercontext.getResources().getColor(R.color.datapickerSelectedValueeLineG4), Shader.TileMode.CLAMP)); canvas.drawPath(pathSelect, pathSelectPaint);
)、dataPickercontext.getResources()。GETCOLOR(R.color.datapickerSelectedValueeLineG2)、Shader.TileMode // Path pathSelect = new Path(); pathSelect.moveTo(0, canvasH / 2 - maxValueHeight / 2 - valpadding / 2); pathSelect.lineTo(canvasW, canvasH / 2 - maxValueHeight / 2 - valpadding / 2); pathSelect.lineTo(canvasW, canvasH / 2); pathSelect.lineTo(0, canvasH / 2); pathSelect.lineTo(0, canvasH / 2 - maxValueHeight / 2); Paint pathSelectPaint = new Paint(); pathSelectPaint.setShader(new LinearGradient(0, 0, 0, maxValueHeight / 2, dataPickercontext.getResources().getColor(R.color.datapickerSelectedValueeLineG1), dataPickercontext.getResources().getColor(R.color.datapickerSelectedValueeLineG2), Shader.TileMode.CLAMP)); canvas.drawPath(pathSelect, pathSelectPaint); pathSelect = new Path(); pathSelect.moveTo(0, canvasH / 2); pathSelect.lineTo(canvasW, canvasH / 2); pathSelect.lineTo(canvasW, canvasH / 2 + maxValueHeight / 2 + valpadding / 2); pathSelect.lineTo(0, canvasH / 2 + maxValueHeight / 2 + valpadding / 2); pathSelect.lineTo(0, canvasH / 2); pathSelectPaint = new Paint(); pathSelectPaint.setShader(new LinearGradient(0, 0, 0, maxValueHeight / 2, dataPickercontext.getResources().getColor(R.color.datapickerSelectedValueeLineG3), dataPickercontext.getResources().getColor(R.color.datapickerSelectedValueeLineG4), Shader.TileMode.CLAMP)); canvas.drawPath(pathSelect, pathSelectPaint);
)、dataPickercontext.getResources()。GETCOLOR(R.color.datapickerSelectedValueeLineG4)、Shader.TileMode // Path pathSelect = new Path(); pathSelect.moveTo(0, canvasH / 2 - maxValueHeight / 2 - valpadding / 2); pathSelect.lineTo(canvasW, canvasH / 2 - maxValueHeight / 2 - valpadding / 2); pathSelect.lineTo(canvasW, canvasH / 2); pathSelect.lineTo(0, canvasH / 2); pathSelect.lineTo(0, canvasH / 2 - maxValueHeight / 2); Paint pathSelectPaint = new Paint(); pathSelectPaint.setShader(new LinearGradient(0, 0, 0, maxValueHeight / 2, dataPickercontext.getResources().getColor(R.color.datapickerSelectedValueeLineG1), dataPickercontext.getResources().getColor(R.color.datapickerSelectedValueeLineG2), Shader.TileMode.CLAMP)); canvas.drawPath(pathSelect, pathSelectPaint); pathSelect = new Path(); pathSelect.moveTo(0, canvasH / 2); pathSelect.lineTo(canvasW, canvasH / 2); pathSelect.lineTo(canvasW, canvasH / 2 + maxValueHeight / 2 + valpadding / 2); pathSelect.lineTo(0, canvasH / 2 + maxValueHeight / 2 + valpadding / 2); pathSelect.lineTo(0, canvasH / 2); pathSelectPaint = new Paint(); pathSelectPaint.setShader(new LinearGradient(0, 0, 0, maxValueHeight / 2, dataPickercontext.getResources().getColor(R.color.datapickerSelectedValueeLineG3), dataPickercontext.getResources().getColor(R.color.datapickerSelectedValueeLineG4), Shader.TileMode.CLAMP)); canvas.drawPath(pathSelect, pathSelectPaint);
すでに面白いもの:

// Paint selValLightBorder = new Paint(); Paint selValTopBorder = new Paint(); Paint selValBottomBorder = new Paint(); selValLightBorder.setColor(dataPickercontext.getResources().getColor(R.color.datapicketSelectedValueBorder)); selValTopBorder.setColor(dataPickercontext.getResources().getColor(R.color.datapicketSelectedBorderTop)); selValBottomBorder.setColor(dataPickercontext.getResources().getColor(R.color.datapicketSelectedBorderBttom)); canvas.drawLine(0, canvasH / 2 - maxValueHeight / 2 - valpadding / 2, canvasW, canvasH / 2 - maxValueHeight / 2 - valpadding / 2, selValLightBorder); canvas.drawLine(0, canvasH / 2 - maxValueHeight / 2 - valpadding / 2 + 1, canvasW, canvasH / 2 - maxValueHeight / 2 - valpadding / 2 + 1, selValTopBorder); canvas.drawLine(0, canvasH / 2 + maxValueHeight / 2 + valpadding / 2, canvasW, canvasH / 2 + maxValueHeight / 2 + valpadding / 2, selValLightBorder); canvas.drawLine(0, canvasH / 2 + maxValueHeight / 2 + valpadding / 2 - 1, canvasW, canvasH / 2 + maxValueHeight / 2 + valpadding / 2 - 1, selValBottomBorder); canvas.drawLine(0, canvasH / 2 - maxValueHeight / 2 - valpadding / 2, 0, canvasH / 2 + maxValueHeight / 2 + valpadding / 2, selValLightBorder); canvas.drawLine(1, canvasH / 2 - maxValueHeight / 2 - valpadding / 2, 1, canvasH / 2 + maxValueHeight / 2 + valpadding / 2, selValLightBorder); canvas.drawLine(canvasW - 1, canvasH / 2 - maxValueHeight / 2 - valpadding / 2, canvasW - 1, canvasH / 2 + maxValueHeight / 2 + valpadding / 2, selValLightBorder); canvas.drawLine(canvasW - 2, canvasH / 2 - maxValueHeight / 2 - valpadding / 2, canvasW - 2, canvasH / 2 + maxValueHeight / 2 + valpadding / 2, selValLightBorder); canvas.drawLine(canvasW, canvasH / 2 - maxValueHeight / 2 - valpadding / 2, canvasW, canvasH / 2 + maxValueHeight / 2 + valpadding / 2, selValLightBorder);
はるかに良い:
// "" Paint selectedTextPaint = new Paint(); selectedTextPaint.setColor(dataPickercontext.getResources().getColor(R.color.datepickerSelectedValue)); Paint shadowText = new Paint(); shadowText.setColor(dataPickercontext.getResources().getColor(R.color.datepickerSelectedValueShadow)); shadowText.setTextSize(dpvalues.get(selectedvalueId).dpTextSize); shadowText.setAntiAlias(true); canvas.drawText(dpvalues.get(selectedvalueId).dpValue, (canvasW / 2) - (dpvalues.get(selectedvalueId).dpWidth / 2), ((maxValueHeight + valpadding) * selectedvalueId) + (valpadding + maxValueHeight) + (dpvalues.get(selectedvalueId).dpHeight / 2) + nowTopPosition + 2, shadowText); selectedTextPaint.setTextSize(dpvalues.get(selectedvalueId).dpTextSize); selectedTextPaint.setAntiAlias(true); canvas.drawText(dpvalues.get(selectedvalueId).dpValue, (canvasW / 2) - (dpvalues.get(selectedvalueId).dpWidth / 2), ((maxValueHeight + valpadding) * selectedvalueId) + (valpadding + maxValueHeight) + (dpvalues.get(selectedvalueId).dpHeight / 2) + nowTopPosition, selectedTextPaint);
理想:
エラーをキャッチしてレンダリングfpsを設定することにより、onDrawメソッドを完成させます。
}catch(Exception e){e.printStackTrace();} // FPS. this.postInvalidateDelayed( 1000 / 60); }
できた!
Pickerの便利さは、それらを組み合わせてより便利な値を選択できることです。
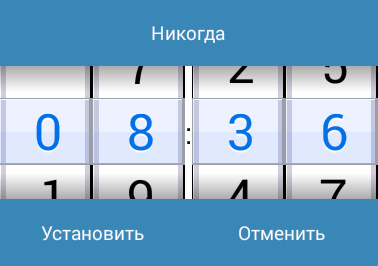
たとえば、4つのコンポーネントを組み合わせてリマインダー時間を選択できます。
完成した料理の例 

ピッカーに加えて、属性処理、カスタムパラメーター、アダプターの操作を追加できます。アクティビティのフィールドはすでに無尽蔵にあり、1つの記事で回避することはできません。 しかし、コミュニティが継続に興味を持っている場合-私は継続して喜んでいるでしょう。
既製のソースのGitへのリンク。