
ロボットのプログラミングは興味深いです。
多くの人が日本のヒューマノイドロボット、またはフランスのNAOトレーニングロボットを見たと思われます。 ドイツのKUKA産業用マニピュレーターは古典的です。 誰かがコンベアシステムをプログラミングしています(フィルタリング、ソート)。 デルタロボット。 層全体があります-クアドロコプター制御/安定化アルゴリズム。 そしてもちろん、在庫のシンプルなハードワーカー-ラインフォロワー。
しかし、これは通常、安価なおもちゃではないため、ロボットへのアクセスは、資金を受け取った専門の研究所または研究所/学校であり、これらの分野があります。 他のすべての開発者(ロボット工学に興味のある人)-lookましく見えるままです。
少し前に、スイスの会社Coppelia Roboticsの3D V-REP robosimulatorというかなり興味深いシステムに出会いました。
私の(楽しい)驚きに、私はこのシステムが次のことを発見しました。
- 優れた機能を備えています(システムは2010年3月から開発されています)
- 完全にオープンソース(2013年にオープンアクセスでレイアウト)
- クロスプラットフォーム-Windows、Mac、Linux(Qtで動作)
- C / C ++、Python、Java、Lua、Matlab、OctaveまたはUrbiを介してロボットを操作するためのAPIとライブラリがあります
- 非営利使用の場合は無料です!
このシステムでプログラムされているすべてのオブジェクト-物理法則の観点から実世界で「ライブ」は重力です。オブジェクト、衝突、距離センサー、ビデオセンサーなどをキャプチャできます。
このシステムをしばらく使用した後、Habrの読者にそのことを伝えることにしました。
はい、写真にV-REPのスクリーンショットとロボットモデルがあります。これをプログラムして、コンピューターで直接動作を見ることができます。
設置
[ ダウンロード]セクションでコンピューターにこのシステムをインストールします。
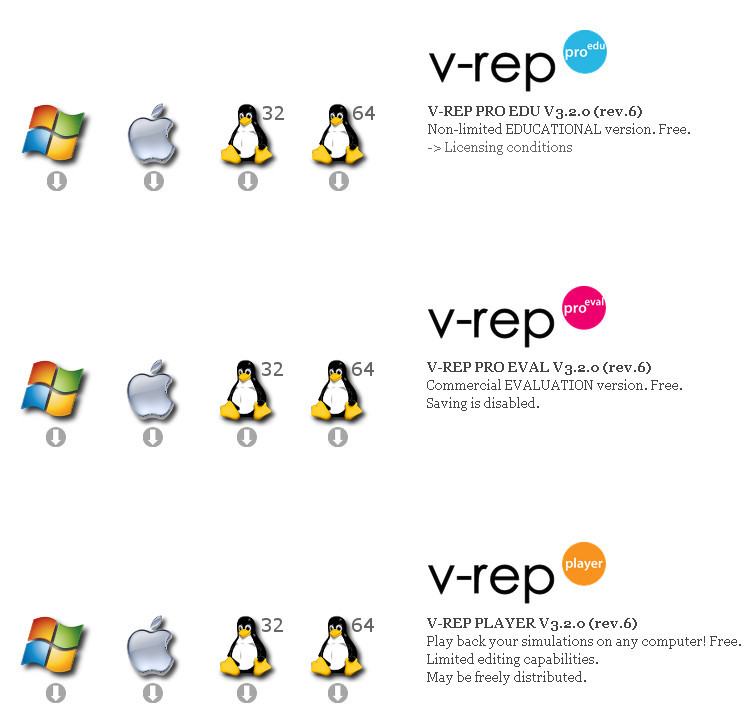
教育(EDU)、試用版(EVAL)、およびプレイヤー(プレイヤー)の3つのオプションがあります。
プレーヤーは、フルバージョンで作成されたシーンを再生できるプログラムです(つまり、編集機能はありません)-無料です。
試用版は完全に機能するバージョンであり、保存する方法はありません。 ライセンス制限はありません。
Educationalは、ライセンス制限付きのフル機能のパッケージです;ライセンスのテキストは、 ここで読むことができます 。 その本質は、機関、学校、愛好家がこのソフトウェアを無料で使用できることです。 使用は商業的ではありませんが、教育的であるという事実にもかかわらず。
あなたと私は趣味の定義にかなり適合しています(ロボットを教育的にプログラムしたいため)。オペレーティングシステムのEDU PROバージョンを安全にダウンロードできます。
現在バージョン3.2.0、ここにWindowsオプションへの直接リンクがあります: V-REP_PRO_EDU_V3_2_0_Setup (98 Mb)
開始する
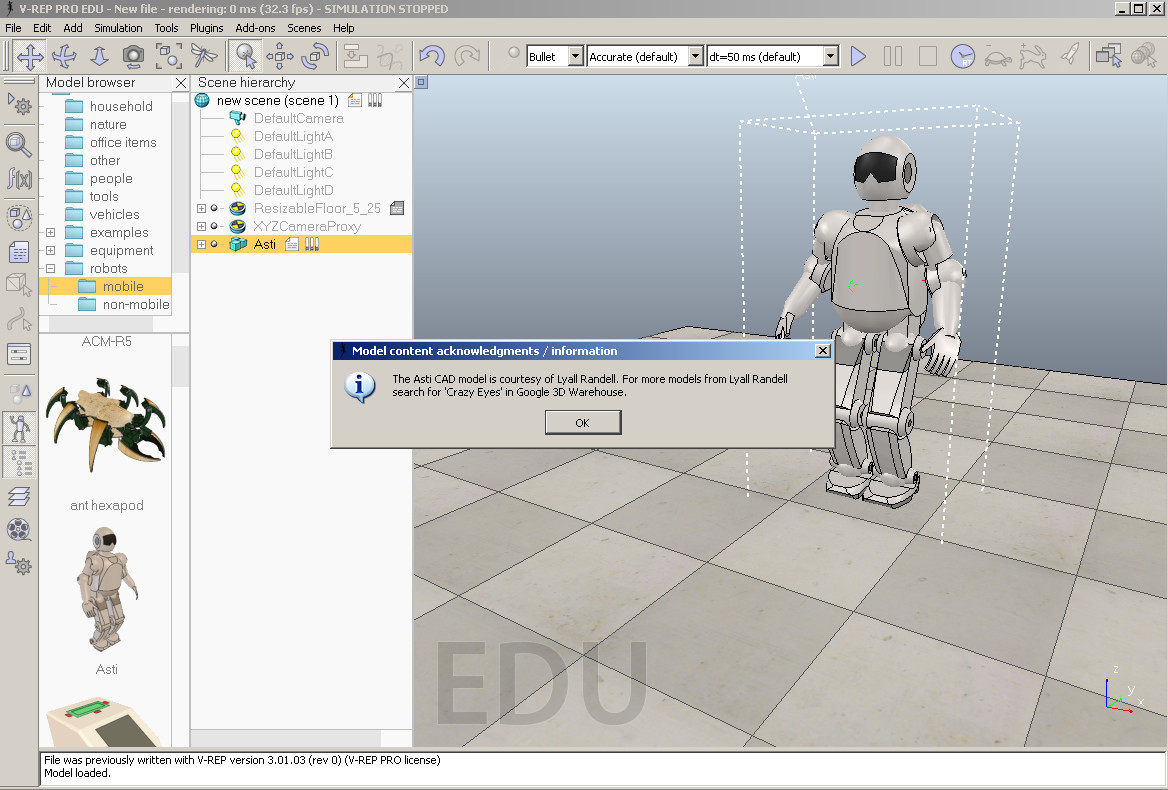
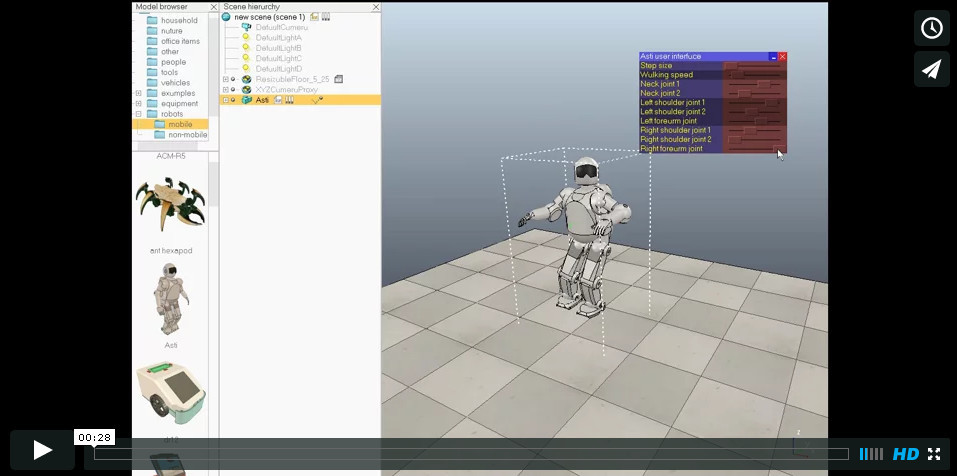
インストールして開始すると、次の画面が表示されます。

ここでは、次のオブジェクトが表示されます。
-シーン-すべてのアクションはここで行われ、現時点では空です(セックスのみがあります)
-左側には、モデルライブラリを備えたブロックがあります-フォルダーの上部とその下-選択したフォルダーのコンテンツが表示されます(ロボット/非モバイルが選択されています-つまり、固定ロボット-マニピュレーター)
-その後、世界階層が表示されます
階層には、すべてのオブジェクトが配置されているルートオブジェクト(ワールド)が含まれます。
この例では、これは次のとおりです。
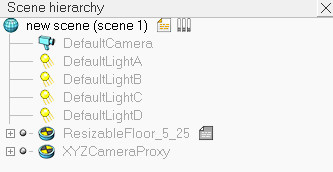
光源、床を実装するためのオブジェクト(これはテクスチャ付きのソリッドサーフェスです)、およびカメラのグループが表示されます。
シーンとその上のすべてのオブジェクトを制御するメインスクリプトオブジェクトがあり、各オブジェクトは独自のスクリプトを持つことができます。内部スクリプトはLua言語で実装されます 。
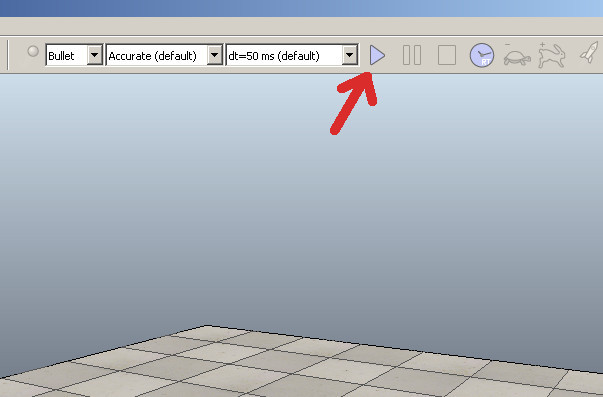
上部と左側にツールバー-メニューがあります。 最も重要なボタンは、再生( シミュレーションの開始 )ボタンです。その後、シーンシミュレーションが開始されます。
シナリオは次のとおりです。
-DragAndDropを使用して、モデルライブラリからオブジェクトをドラッグします。
-場所を修正します
-スクリプトをカスタマイズする
-シミュレーターを開始する
-シミュレーターを停止する
実際に試してみましょう。
クイックスタート
ロボットを復活させてみましょう。
これを行うには、左側のロボット/モバイルフォルダーを選択し、リストで[Ansi]を選択して取得し、ステージに転送してリリースすると、ロボットがステージに表示され、作成者に関する情報が表示されます。
[シミュレーションの開始 ]をクリックして、ロボットの動きを確認し、頭と腕の位置を制御できます(カスタムユーザーインターフェイスを使用して実装)。ビデオを次に示します。
次に、シミュレーションを停止します。

制御スクリプト
開いて、ロボットに行くことを教えたコードを見ることができます(ロボットの自律的な動きを制御します)。 これを行うには、Astiモデルの反対側のオブジェクト階層で、「ファイル」アイコンをダブルクリックします。

ロボットの動きを実装するLuaプログラムは次のとおりです。
Asti Robot Motion Controlスクリプト
if (sim_call_type==sim_childscriptcall_initialization) then asti=simGetObjectHandle("Asti") lFoot=simGetObjectHandle("leftFootTarget") rFoot=simGetObjectHandle("rightFootTarget") lPath=simGetObjectHandle("leftFootPath") rPath=simGetObjectHandle("rightFootPath") lPathLength=simGetPathLength(lPath) rPathLength=simGetPathLength(rPath) ui=simGetUIHandle("astiUserInterface") simSetUIButtonLabel(ui,0,simGetObjectName(asti).." user interface") dist=0 correction=0.0305 minVal={0, -- Step size 0, -- Walking speed -math.pi/2, -- Neck 1 -math.pi/8, -- Neck 2 -math.pi/2, -- Left shoulder 1 0, -- Left shoulder 2 -math.pi/2, -- Left forearm -math.pi/2, -- Right shoulder 1 0, -- Right shoulder 2 -math.pi/2} -- Right forearm rangeVal={ 2, -- Step size 0.8, -- Walking speed math.pi, -- Neck 1 math.pi/4, -- Neck 2 math.pi/2, -- Left shoulder 1 math.pi/2, -- Left shoulder 2 math.pi/2, -- Left forearm math.pi/2, -- Right shoulder 1 math.pi/2, -- Right shoulder 2 math.pi/2} -- Right forearm uiSliderIDs={3,4,5,6,7,8,9,10,11,12} relativeStepSize=1 nominalVelocity=0.4 neckJoints={simGetObjectHandle("neckJoint0"),simGetObjectHandle("neckJoint1")} leftArmJoints={simGetObjectHandle("leftArmJoint0"),simGetObjectHandle("leftArmJoint1"),simGetObjectHandle("leftArmJoint2")} rightArmJoints={simGetObjectHandle("rightArmJoint0"),simGetObjectHandle("rightArmJoint1"),simGetObjectHandle("rightArmJoint2")} -- Now apply current values to the user interface: simSetUISlider(ui,uiSliderIDs[1],(relativeStepSize-minVal[1])*1000/rangeVal[1]) simSetUISlider(ui,uiSliderIDs[2],(nominalVelocity-minVal[2])*1000/rangeVal[2]) simSetUISlider(ui,uiSliderIDs[3],(simGetJointPosition(neckJoints[1])-minVal[3])*1000/rangeVal[3]) simSetUISlider(ui,uiSliderIDs[4],(simGetJointPosition(neckJoints[2])-minVal[4])*1000/rangeVal[4]) simSetUISlider(ui,uiSliderIDs[5],(simGetJointPosition(leftArmJoints[1])-minVal[5])*1000/rangeVal[5]) simSetUISlider(ui,uiSliderIDs[6],(simGetJointPosition(leftArmJoints[2])-minVal[6])*1000/rangeVal[6]) simSetUISlider(ui,uiSliderIDs[7],(simGetJointPosition(leftArmJoints[3])-minVal[7])*1000/rangeVal[7]) simSetUISlider(ui,uiSliderIDs[8],(simGetJointPosition(rightArmJoints[1])-minVal[8])*1000/rangeVal[8]) simSetUISlider(ui,uiSliderIDs[9],(simGetJointPosition(rightArmJoints[2])-minVal[9])*1000/rangeVal[9]) simSetUISlider(ui,uiSliderIDs[10],(simGetJointPosition(rightArmJoints[3])-minVal[10])*1000/rangeVal[10]) end if (sim_call_type==sim_childscriptcall_cleanup) then end if (sim_call_type==sim_childscriptcall_actuation) then -- Read desired values from the user interface: relativeStepSize=minVal[1]+simGetUISlider(ui,uiSliderIDs[1])*rangeVal[1]/1000 nominalVelocity=minVal[2]+simGetUISlider(ui,uiSliderIDs[2])*rangeVal[2]/1000 simSetJointTargetPosition(neckJoints[1],minVal[3]+simGetUISlider(ui,uiSliderIDs[3])*rangeVal[3]/1000) simSetJointTargetPosition(neckJoints[2],minVal[4]+simGetUISlider(ui,uiSliderIDs[4])*rangeVal[4]/1000) simSetJointTargetPosition(leftArmJoints[1],minVal[5]+simGetUISlider(ui,uiSliderIDs[5])*rangeVal[5]/1000) simSetJointTargetPosition(leftArmJoints[2],minVal[6]+simGetUISlider(ui,uiSliderIDs[6])*rangeVal[6]/1000) simSetJointTargetPosition(leftArmJoints[3],minVal[7]+simGetUISlider(ui,uiSliderIDs[7])*rangeVal[7]/1000) simSetJointTargetPosition(rightArmJoints[1],minVal[8]+simGetUISlider(ui,uiSliderIDs[8])*rangeVal[8]/1000) simSetJointTargetPosition(rightArmJoints[2],minVal[9]+simGetUISlider(ui,uiSliderIDs[9])*rangeVal[9]/1000) simSetJointTargetPosition(rightArmJoints[3],minVal[10]+simGetUISlider(ui,uiSliderIDs[10])*rangeVal[10]/1000) -- Get the desired position and orientation of each foot from the paths (you can also use a table of values for that): t=simGetSimulationTimeStep()*nominalVelocity dist=dist+t lPos=simGetPositionOnPath(lPath,dist/lPathLength) lOr=simGetOrientationOnPath(lPath,dist/lPathLength) p=simGetPathPosition(rPath) rPos=simGetPositionOnPath(rPath,(dist+correction)/rPathLength) rOr=simGetOrientationOnPath(rPath,(dist+correction)/rPathLength) -- Now we have the desired absolute position and orientation for each foot. -- Now transform the absolute position/orientation to position/orientation relative to asimo -- Then modulate the movement forward/backward with the desired "step size" -- Then transform back into absolute position/orientation: astiM=simGetObjectMatrix(asti,-1) astiMInverse=simGetInvertedMatrix(astiM) m=simMultiplyMatrices(astiMInverse,simBuildMatrix(lPos,lOr)) m[8]=m[8]*relativeStepSize m=simMultiplyMatrices(astiM,m) lPos={m[4],m[8],m[12]} lOr=simGetEulerAnglesFromMatrix(m) m=simMultiplyMatrices(astiMInverse,simBuildMatrix(rPos,rOr)) m[8]=m[8]*relativeStepSize m=simMultiplyMatrices(astiM,m) rPos={m[4],m[8],m[12]} rOr=simGetEulerAnglesFromMatrix(m) -- Finally apply the desired positions/orientations to each foot -- We simply apply them to two dummy objects that are then handled -- by the IK module to automatically calculate all leg joint desired values -- Since the leg joints operate in hybrid mode, the IK calculation results -- are then automatically applied as the desired values during dynamics calculation simSetObjectPosition(lFoot,-1,lPos) simSetObjectOrientation(lFoot,-1,lOr) simSetObjectPosition(rFoot,-1,rPos) simSetObjectOrientation(rFoot,-1,rOr) end
他のモデル
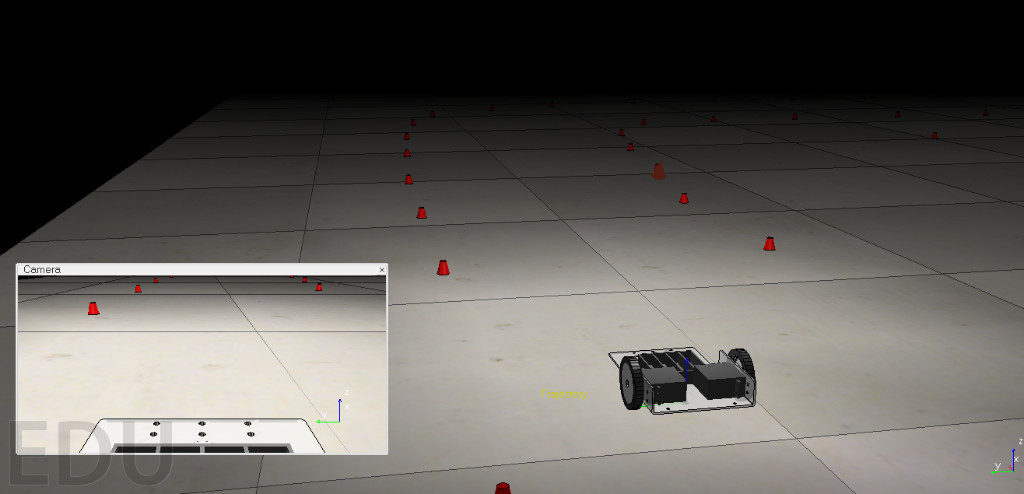
モデルを削除できます。そのためには、モデルを選択し、[削除]をクリックする必要があります。 また、他のモデルの動作を確認することもできます。一部のモデルにはバッテリー寿命のスクリプトがあります。
移動ロボット

静止ロボット(マニピュレーター)

シーンの例
また、プログラムにすぐに付属する多数の例(シーン)もあります。 これを行うには、メニューで「ファイル/シーンを開く」を選択し、フォルダー「V-REP3 / V-REP_PRO_EDU / scenes」に移動します。
シーンの例(拡張子が* .tttのファイル):
サンプルシーンファイル
2IndustrialRobots.ttt
3DoFHolonomicPathPlanning.ttt
6DoFHolonomicPathPlanning.ttt
BarrettHandPickAndPlace.ttt
blobDetectionWithPickAndPlace.ttt
ConstraintSolverExample.ttt
controlTypeExamples.ttt
e-puckDemo.ttt
environmentMapping.ttt
externalIkDemo.ttt
fabricationBlocks.ttt
fastClientServerCommunication.ttt
forwardAndInverseKinematics1.ttt
forwardAndInverseKinematics2.ttt
gearMechanism.ttt
genericDialogDemo.ttt
ghostDemo.ttt
ImageProcessingExample.ttt
inverseKinematicsOf144DofManipulator.ttt
jansenMechanism.ttt
katanaRobotWithCableSimulation.ttt
khepera3.ttt
LineTracer-threaded.ttt
millingMachine.ttt
millingRobot.ttt
motionPlanningAndGraspingDemo.ttt
motionPlanningDemo1.ttt
motionPlanningDemo2.ttt
motionPlanningDemo3.ttt
mouseTestScene.ttt
naturalSelectionAlgo.ttt
NonHolonomicPathPlanning.ttt
objectHandling.ttt
PaintingRobot.ttt
ParallelForwardAndInverseKinematics.ttt
racticalPathPlanningDemo.ttt
proximitySensorDemo.ttt
reflexxesMotionLibraryType4Demo.ttt
robotCollaboration1.ttt
robotCollaboration2.ttt
robotLanguageControl.ttt
rosTopicPublisherAndSubscriber.ttt
SocketAndTubeCommunicationExample.ttt
StripeScanner.ttt
WeldingRobot.ttt
wirelessTransmission.ttt
youBotAndHanoiTower.ttt
参照資料
* V-REPメインサイト
* ユーザーマニュアル(英語)
* 多数のビデオ、V-REPの例
この興味深いシステムのロシア語での普及をサポートするために、 ロシア語を話すV-REPのグループが作成されました 。
教育プロセスでの適用
私の意見では、V-REPには教育プロセスで使用する良い可能性があります。 教育プロセスでのシステムの使用に興味がある場合-学校、研究所、ロボットクラブなど - フォームに記入できます。 努力を統合し、ロシア語の教材を作成することが可能かもしれません。
今後の計画
もちろん、これはV-REPシステムの機能のごく一部にすぎません。 次の出版物では、例として、一人称ロボットマシンでのレーシングシミュレーターのタスクの作成を検討します。 APIを検討してください。 オブジェクトの作成、シーンのセットアップ、ユーザーとの対話。