 公式のPebbleモバイルアプリのおかげで、彼らはスマートフォンの状態を通知する素晴らしい仕事をすることができます-着信メッセージ、通話情報、その他の通知を表示します。 しかし、スマートフォンのバッテリーの状態、未読のSMSや電子メールの数など、このような必要な「些細なこと」が時計のアプリケーションで使用できない場合はどうでしょうか。 自分で実装するオプション。
そのため、PebbleKit Androidを使用して、PebbleとAndroidアプリケーションを統合する方法については、例として不在着信数の通知を使用します。コードの一部、 ドキュメントの抜粋の翻訳[1]およびごくわずかな写真。
論文は、モバイルアプリケーションとwatchapppの相互作用の仕組みです。
- コンパニオンアプリケーションは、PebbleKitライブラリを介してPebbleを認識、接続、および交換します。
- watchapp(watchface)とモバイルアプリケーションは双方向モードでメッセージを交換し、チャネルはPebbleアプリケーションのUUIDによって両側で識別されます。
- Pebbleアプリケーションとモバイルアプリケーションの間の交換は、 Dictionaryオブジェクト[2]によって実行されます。
問題を解決するには、不在着信の数に関する通知を時計に表示します。
- コンパニオンアプリケーションから情報を受信、処理、表示できるペブルアプリケーション。
- 通話を追跡し、未応答の数をウォッチ上のアプリケーションに送信するAndroidアプリケーション。
Watchapp
Pebbleアプリケーションでは、PebbleKit JSの場合と同様に、 AppMessage APIメカニズムが使用されます[3] 。
アプリケーション自体は通信セッションを開始せず、スマートフォン側からのメッセージを待つだけなので、 Synchronizing App UI [4]を使用します-AppMessageの上の補助レイヤーで、watchappとモバイルデバイス間の値の同期を簡素化します。 2つのコールバックのみが使用されます。1つは定義済みの値が変更され、もう1つはエラーが発生した場合です。
タプルを同期するためのキー、AppSync、およびバッファーを定義します。
#define KEY_CALLS_COUNT 41 static AppSync s_sync; static uint8_t s_sync_buffer[32];
別の関数で同期メカニズムとタプルの初期値を初期化します。
/* ... */ static void start_sync() { app_message_open(app_message_inbox_size_maximum(), app_message_outbox_size_maximum()); // (0 ) Tuplet initial_values[] = { TupletInteger(KEY_CALLS_COUNT, 0), }; app_sync_init(&s_sync, s_sync_buffer, sizeof(s_sync_buffer), initial_values, ARRAY_LENGTH(initial_values), sync_changed_handler, sync_error_handler, NULL); } static void init(void) { /* ... */ start_sync(); }
コールバックの定義:
/* ... */ static char s_count_buffer[4]; /* ... */ static void sync_changed_handler(const uint32_t key, const Tuple *new_tuple, const Tuple *old_tuple, void *context) { // snprintf(s_count_buffer, sizeof(s_count_buffer), "%d", (int)new_tuple->value->int32); // layer_mark_dirty(layer); } static void sync_error_handler(DictionaryResult dict_error, AppMessageResult app_message_error, void *context) { APP_LOG(APP_LOG_LEVEL_ERROR, "sync error!"); } /* ... */
NBこの場合、値の交換に使用されるキーは、appinfo.jsonへの登録を必要としません。
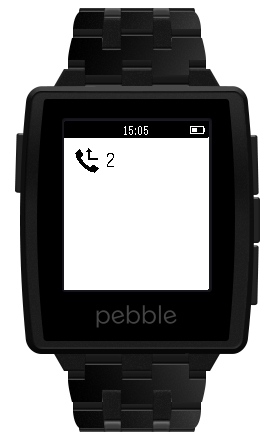
ここで簡単なアプリケーションを実行すると、画面上に孤立したインジケータが表示されます(不在着信はありません):

Androidアプリ
Androidでは、さまざまな方法で不在着信の数を取得できます。この例では、通知付きの「カーテン」から取得します-通知領域。
アプリケーション自体は、データを受信するwatchappのUUIDを入力するMainActivityと、通知を追跡するNotificationListenerサービスの2つのクラスで構成されています。
NotificationListenerServiceを介した通知エリアへのアクセスは、Android 4.3で登場しました。 追加のメタデータNotification.extrasが使用されるため、この例はAndroid 4.4以降でのみ動作することが保証されます。
Android Studioの場合、PebbleKitの追加は、gradleファイルを介して行われます。
app / build.gradleに追加します。
dependencies { compile 'com.getpebble:pebblekit:2.6.0' } repositories { mavenCentral() maven { url "https://oss.sonatype.org/content/groups/public/" } }
同期後、PebbleKitをプロジェクトで使用できます。
通知にアクセスするには、オーバーライドされたメソッドonNotificationPosted()およびonNotificationRemoved()でNotificationListenerServiceから継承されたNotificationListenerクラスを使用します。
public class NotificationListener extends NotificationListenerService { @Override public void onNotificationPosted( StatusBarNotification sbn) { this.getMissedCalls(); } @Override public void onNotificationRemoved( StatusBarNotification sbn) { this.getMissedCalls(); } }
通知を追加または削除すると、アクティブなすべての通知がスキャンされ、不在着信に関する情報がある場合、その番号が時計のアプリケーションに送信されます。
public class NotificationListener extends NotificationListenerService { // int missedCallsCount = 0; /*...*/ void getMissedCalls() { int tCount = 0; for (StatusBarNotification notif : this.getActiveNotifications()) { if (notif.getPackageName().equals("com.android.phone")) { String extras_text = notif.getNotification().extras.getString(Notification.EXTRA_TEXT); if (extras_text.indexOf(" :") != -1) { tCount = Integer.parseInt(extras_text.split(":")[1].trim()); } } } if (tCount != missedCallsCount) { missedCallsCount = tCount; this.sendMissedCalls(missedCallsCount); } } }
ウォッチにデータを送信するには、キーUUIDを決定し、辞書を作成し、sendDataToPebbleメソッドを使用します。
public class NotificationListener extends NotificationListenerService { UUID APPS_UUID; private static final int CALLS_KEY = 41; /*...*/ public void sendMissedCalls(int missedCalls) { APPS_UUID = UUID.fromString(this.getUUID()); PebbleDictionary data = new PebbleDictionary(); data.addUint32(CALLS_KEY, missedCalls); PebbleKit.sendDataToPebble(getApplicationContext(), APPS_UUID, data); } /*...*/ }
アプリケーションに通知へのアクセス権を付与するには、マニフェストに追加する必要があります。
<service android:name=".NotificationListener" android:label="@string/app_name" android:permission= "android.permission.BIND_NOTIFICATION_LISTENER_SERVICE"> <intent-filter> <action android:name= "android.service.notification.NotificationListenerService" /> </intent-filter> </service>
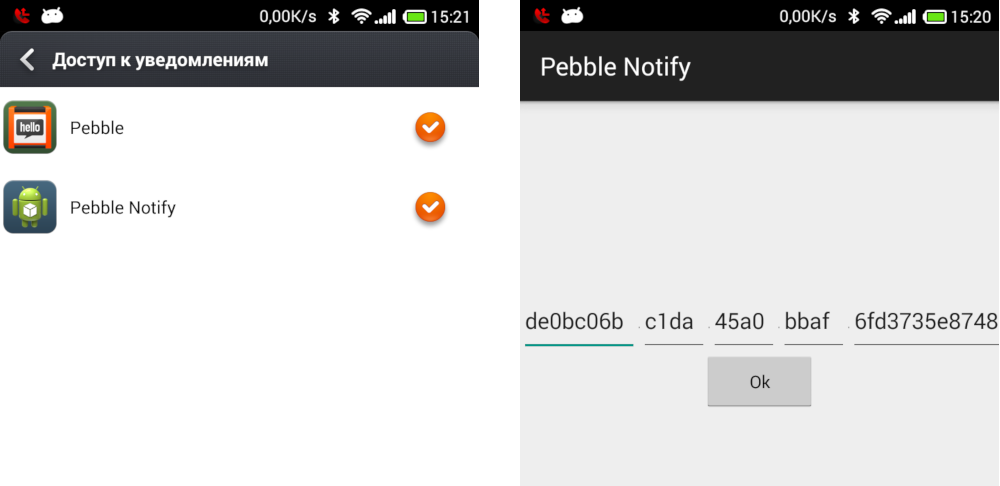
アプリケーションをインストールした後、サービスを有効にする必要があることに注意してください。許可なしでは機能しません。 この設定は、「設定」->「セキュリティ」->「通知アクセス」のパスにあります。 ロシア語ロケールでは、「設定」->「プライバシー」->「通知へのアクセス」があります。

Androidアプリケーションを起動し、PebbleアプリケーションのUUIDを指定し、呼び出して応答しません。ウォッチの通知がどのように変化するかを確認します。

ソース:
watchappに注意-pbw
PebbleNotify(Android Studioプロジェクト)-APK
1. Pebble Developers //モバイルアプリ開発者ガイド
2.ペブル開発者//辞書
3. Pebble Developers //アプリ通信
4. Pebble Developers //アプリUIの同期