
それはすべて、SiriとGoogle Nowの良いレビュー(比較)を見たことから始まりました。 私はどちらが良いかについては議論しませんが、私は個人的にAndroid上でタブレットを持っています。 計算機を完全に音声制御で書くとしたらどうでしょう(便利でしょうか?)。 しかし、まず第一に、私は音声コントロール自体について、より正確には音声入力について少し理解する必要がありました(制御を達成する必要があります)。 さらに、Android Studioをダウンロードしたばかりで、すぐに試してみるのが待ちきれませんでした(ミニプロジェクトで)。 さあ、始めましょう。
ListViewとButtonのアクティビティをスローします。 ListViewでは、コマンド自体、より正確には1つのコマンドのオプションを保存し、ボタンは必要なものを丁寧に尋ねます。 はい、プログラムにはロジックがありません。その助けを借りて、実装自体を見るだけです。
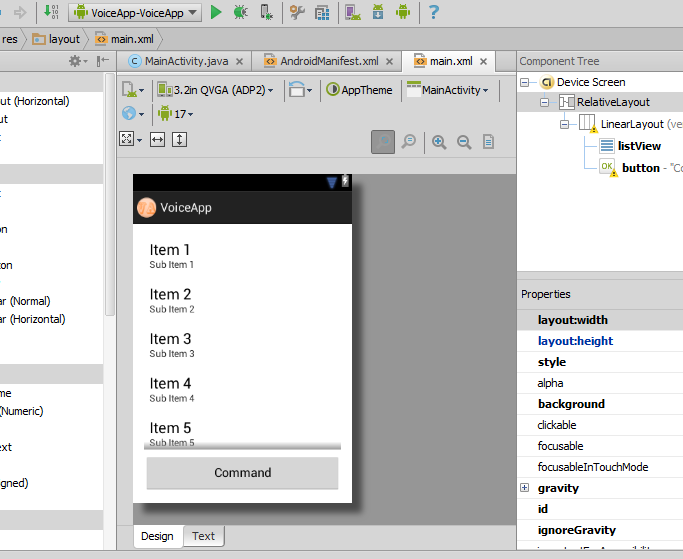
マニフェストにも1つの解像度を追加します
<uses-permission android:name="android.permission.INTERNET" />
これで、プログラミングに直接アクセスできるようになりました。 「必要なコンポーネントを見つける」:
private ListView mList; private Button speakButton; public static final int VOICE_RECOGNITION_REQUEST_CODE = 1234; @Override protected void onCreate(Bundle savedInstanceState) { super.onCreate(savedInstanceState); setContentView(R.layout.main); speakButton = (Button) findViewById(R.id.button); speakButton.setOnClickListener(this); mList = (ListView) findViewById(R.id.listView); }
ボタンのクリックハンドラを記述します。これは、後で説明するstartSpeak()メソッドを呼び出します。
public void onClick(View v) { startSpeak(); }
さて、ついに「水」は終わりました。 「話す」ことを始めます。
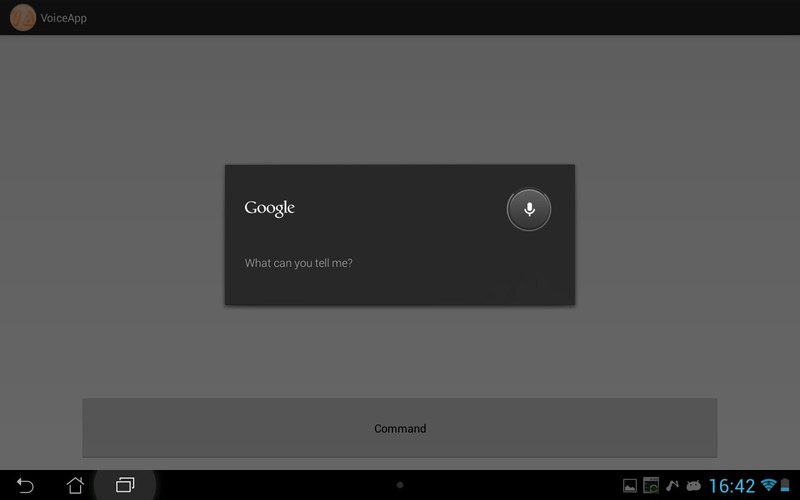
public void startSpeak() { Intent intent = new Intent(RecognizerIntent.ACTION_RECOGNIZE_SPEECH); // () intent.putExtra(RecognizerIntent.EXTRA_LANGUAGE_MODEL, RecognizerIntent.LANGUAGE_MODEL_FREE_FORM); // intent.putExtra(RecognizerIntent.EXTRA_PROMPT, "What can you tell me?"); startActivityForResult(intent, VOICE_RECOGNITION_REQUEST_CODE); // }
想像力を解き放ち、使用するコマンドを決定します。 最初は私自身、テトリス戦車の例で見せたいと思っていました。彼らは彼に「上」、「下」、「左」、「火」などを指示しましたが、
public void onActivityResult(int requestCode, int resultCode, Intent data){ if (requestCode == VOICE_RECOGNITION_REQUEST_CODE && resultCode == RESULT_OK){ ArrayList commandList = data.getStringArrayListExtra(RecognizerIntent.EXTRA_RESULTS); mList.setAdapter(new ArrayAdapter(this, android.R.layout.simple_list_item_1, commandList)); // , . // if (commandList.contains("red")){ speakButton.setText("red"); speakButton.setBackgroundColor(Color.RED); } if (commandList.contains("blue")){ speakButton.setText("blue"); speakButton.setBackgroundColor(Color.BLUE); } if (commandList.contains("green")){ speakButton.setText("green"); speakButton.setBackgroundColor(Color.GREEN); } if (commandList.contains("yellow")){ speakButton.setText("yellow"); speakButton.setBackgroundColor(Color.YELLOW); } if (commandList.contains("white")){ speakButton.setText("white"); speakButton.setBackgroundColor(Color.WHITE); } if (commandList.contains("black")){ speakButton.setText("black"); speakButton.setBackgroundColor(Color.BLACK); } // if (commandList.contains("finish")){ finish(); } // if (commandList.contains("maps")){ Intent i = new Intent(); PackageManager manager = getPackageManager(); i = manager.getLaunchIntentForPackage("com.google.android.apps.maps"); i.addCategory(Intent.CATEGORY_LAUNCHER); startActivity(i); } // if (commandList.contains("google")){ finish(); Intent browserIntent = new Intent(Intent.ACTION_VIEW, Uri.parse("http://www.google.com")); startActivity(browserIntent); } if (commandList.contains("facebook")){ finish(); Intent browserIntent = new Intent(Intent.ACTION_VIEW, Uri.parse("http://www.facebook.com")); startActivity(browserIntent); } // // - "android.permission.REBOOT", () if (commandList.contains("reboot")){ try { Process proc = Runtime.getRuntime() .exec(new String[]{ "su", "-c", "reboot -p" }); proc.waitFor(); } catch (Exception ex) { ex.printStackTrace(); } } } super.onActivityResult(requestCode, resultCode, data); }
これは、コマンド記録ウィンドウの外観です。
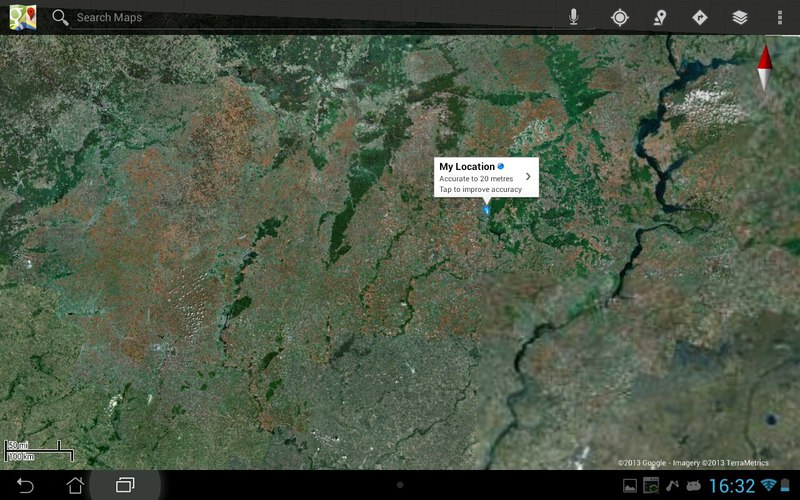
美しい英語のアクセント「マップ」で発声してください。 Googleマップと呼ばれる:
「青」:
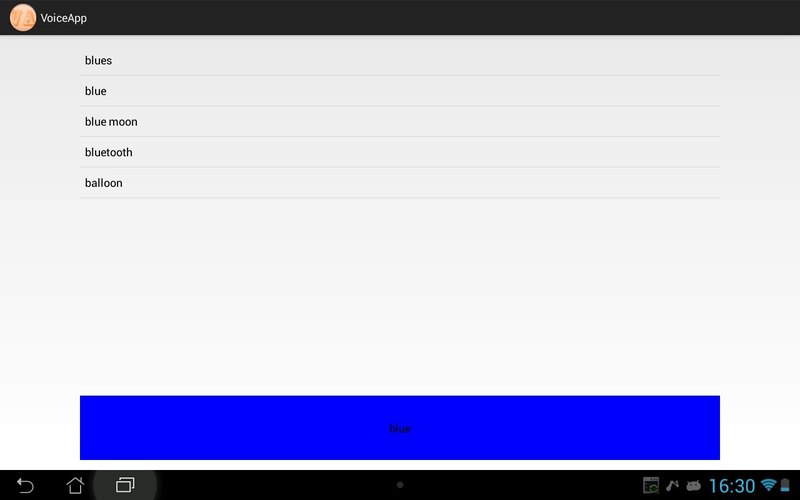
ご覧のように、リストにはすべての可能な(類似の)単語が表示され、それらから必要なものがすでに選択されています。
まあ、「フィニッシュ」で、私は魂のない(またはそうではない)マシンと話をしました。
私の短い記事が、誰かの日常生活を簡素化し、数百万人をもたらす有望なプロジェクトを作成するように(ターミネーターではなく)誰かに奨励するか、少なくとも有用であることを願っています。 がんばれ!
PS: ドキュメントとソースへの便利なリンク