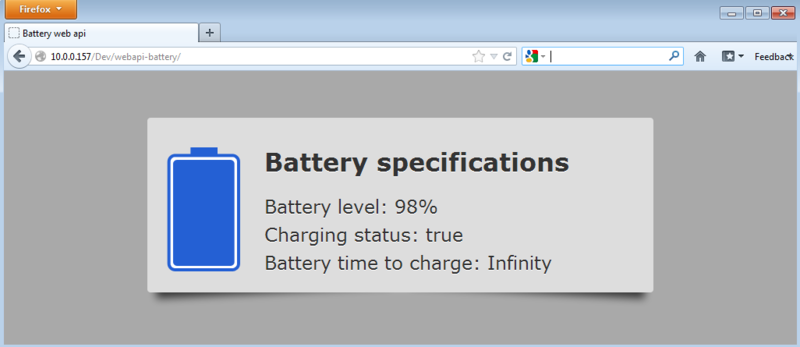
このAPIをMozillaの最新ベータバージョンからテストしましたが、Macではまだ動作しません(ただし、iOS、Android、Windowsでは動作します)。 また、充電状態の肯定的な結果を得ることができませんでしたが、放電時間とバッテリーレベルは正しく機能しました。 この小さな例では、次のような単純なページにAPIからの情報を表示します(タブレットの画面)。
この記事では、次のことを検討します。
- バッテリーAPIの使用
- APIからの情報を表示するフィールドを作成する
- バッテリーの状態を表示する画像を作成する
- eventListenerを使用して情報を更新する
APIの簡単な紹介から始めましょう。
バッテリーAPIの使用
非常に単純です-APIには、アクセスできるプロパティがいくつかあります(仕様から)。
[NoInterfaceObject] interface BatteryManager : EventTarget { readonly attribute boolean charging; readonly attribute double chargingTime; readonly attribute double dischargingTime; readonly attribute double level; };
充電プロパティは、充電に接続されているかどうかを示し、chargeingTimeは完全に充電されるまでの残り時間を返し、discardingTimeは完全に放電されるまでの時間を示し、levelは残量をパーセンテージで示します。 とても簡単です。
これらのプロパティに加えて、APIはいくつかのコールバックを定義します。
[TreatNonCallableAsNull] attribute Function? onchargingchange; [TreatNonCallableAsNull] attribute Function? onchargingtimechange; [TreatNonCallableAsNull] attribute Function? ondischargingtimechange; [TreatNonCallableAsNull] attribute Function? onlevelchange;
プロパティの1つが変更されるたびに実行されるこれらのコールバックの関数を登録できます。
APIからの情報を表示するフィールドを作成する
バッテリーに関する情報を表示するいくつかの簡単なフィールドから始めましょう。 次のHTMLを使用します。
<div id="box"> <div id="battery"></div> <div id="text"> <span style="display: block;margin-bottom:15px;font-size: xx-large;"><strong>Battery specifications</strong></span> <span style="display: block" id="level">Battery level: unknown</span> <span style="display: block" id="status">Charging status: unknown</span> <span style="display: block" id="charged">Battery charged: unknown</span> </div> </div>
そして、javascript:
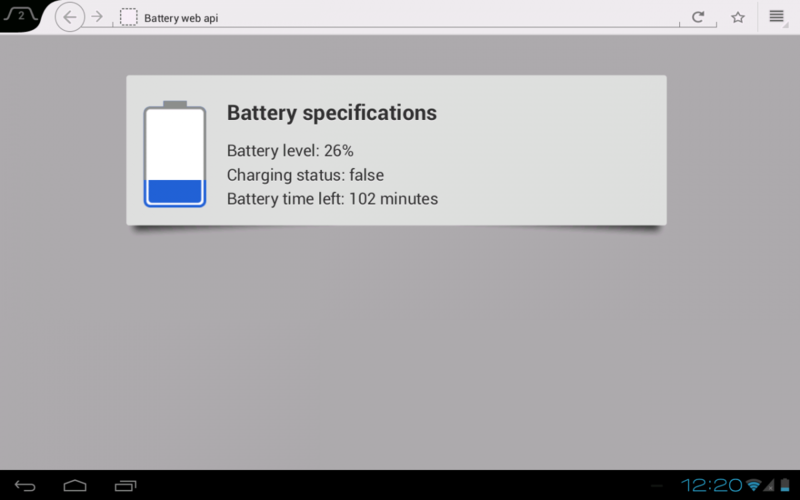
// get the battery information var battery = navigator.mozBattery; // get the battery information to be displayed $('#level').text("Battery level: " + Math.round(battery.level * 100) + "%"); $('#status').text("Charging status: " + ((battery.charging) ? "true" : "false")); if (battery.charging) { $('#charged').text("Battery time to charge: " + battery.chargingTime); } else { $('#charged').text("Battery time left: " + (Math.round(battery.dischargingTime / 60)) + " minutes"); }
上記のコードからわかるように、これ以上簡単なものはありません。 バッテリー残量も表示します。
バッテリーの状態を表示する画像を作成する
むしろ退屈なので、詳細には触れません。 しかし、まだ興味がある場合は、ソースコードを参照してください 。 この例では、(Nokiaの例に基づいて)単純なバッテリーオブジェクトを作成し、updateBatteryメソッドを呼び出すことで、バッテリーレベルを設定できます。 初期化には、次のコードを使用します。
var b = new Battery("assets/bat_empty.png", "assets/bat_full.png", 96, 168); $("#battery").append(b.domElement); b.updateBattery(battery.level * 100);
eventListenerを使用して情報を更新する
最後に、バッテリーのプロパティが変更されるたびに実行されるeventListenersをいくつか追加します。
// when the loader is connected battery.addEventListener("chargingchange", function (e) { $('#status').text("Charging status: " + ((battery.charging) ? "true" : "false")); }, false); // when charging time changes update the time to charge / time left battery.addEventListener("chargingtimechange", function (e) { if (battery.charging) { $('#charged').text("Battery time to charge: " + battery.chargingTime); } else { $('#charged').text("Battery time left: " + (Math.round(battery.dischargingTime / 60)) + " minutes"); } }, false); // when dischargingtime changes update the time to charge / time left battery.addEventListener("dischargingtimechange", function (e) { if (battery.charging) { $('#charged').text("Battery time to charge: " + (Math.round(battery.dischargingTime / 60)) + " minutes"); } else { $('#charged').text("Battery time left: " + (Math.round(battery.dischargingTime / 60)) + " minutes"); } }, false); // listener that is notified when the level changes battery.addEventListener("levelchange", function (e) { $('#level').text("Battery level: " + Math.round(battery.level * 100) + "%"); b.updateBattery(100 * battery.level) }, false);
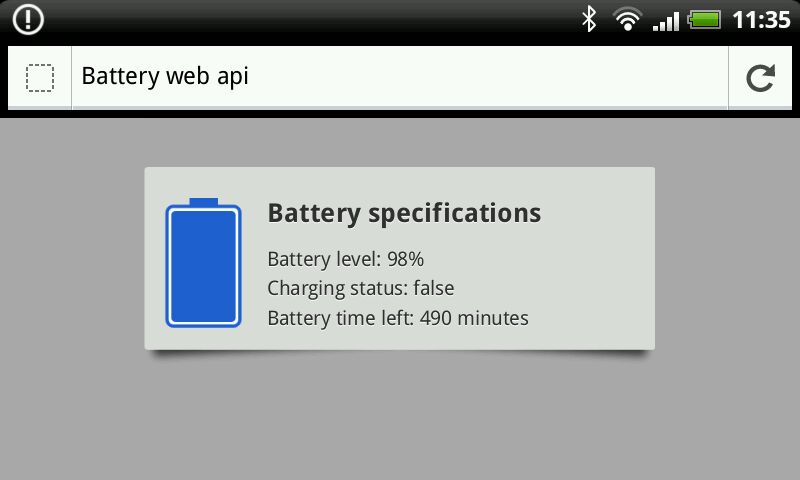
ちょうどいい? 本当に良いニュースは、APIがすべてのデバイスで機能することです。 私の携帯電話では次のようになります。
Windows(VM上で実行)では、次のようになります。