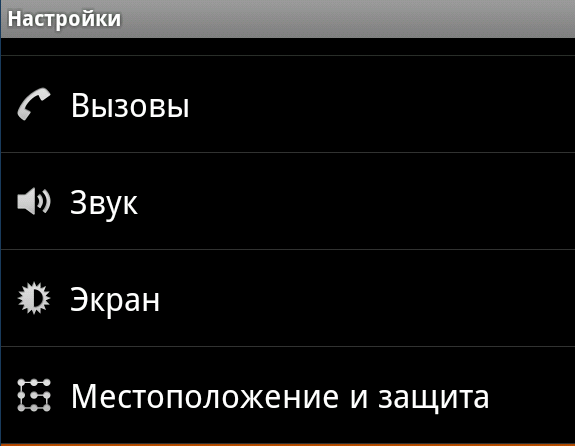
そのような外観を得るには、Settings.apkシステムアプリケーションから借用したコードを使用します。これは、オープンソースがこれを可能にするためです。
したがって、次のものが必要です。
1.クラスIconPreferenceScreen.java;
2.値フォルダー内のattrs.xmlファイル。
3.レイアウトpreference_icon.xml。
4.自分のクラスPreferencesActivity.java;
5.アプリケーション設定ファイルのpreferences.xml
最初の3つのファイルはソースアプリケーションの設定にありますが、トピックでそのテキストを提供します。
IconPreferenceScreen.javaクラス:
public class IconPreferenceScreen extends Preference { private Drawable mIcon; public IconPreferenceScreen(Context context, AttributeSet attrs) { this(context, attrs, 0); } public IconPreferenceScreen(Context context, AttributeSet attrs, int defStyle) { super(context, attrs, defStyle); setLayoutResource(R.layout.preference_icon); TypedArray a = context.obtainStyledAttributes(attrs, R.styleable.IconPreferenceScreen, defStyle, 0); mIcon = a.getDrawable(R.styleable.IconPreferenceScreen_icon); } @Override public void onBindView(View view) { super.onBindView(view); ImageView imageView = (ImageView) view.findViewById(R.id.icon); if (imageView != null && mIcon != null) { imageView.setImageDrawable(mIcon); } } public void setIcon(Drawable icon) { if ((icon == null && mIcon != null) || (icon != null && !icon.equals(mIcon))) { mIcon = icon; notifyChanged(); } } public Drawable getIcon() { return mIcon; } }
Attrs.xmlファイル:
<?xml version="1.0" encoding="utf-8"?> <resources> <declare-styleable name="IconPreferenceScreen"> <attr name="icon" format="reference" /> </declare-styleable> </resources>
レイアウトpreference_icon.xml
<?xml version="1.0" encoding="utf-8"?> <LinearLayout android:id="@+android:id/iconpref" xmlns:android="http://schemas.android.com/apk/res/android" android:layout_width="match_parent" android:layout_height="wrap_content" android:minHeight="?android:attr/listPreferredItemHeight" android:gravity="center_vertical" android:paddingRight="?android:attr/scrollbarSize"> <ImageView android:id="@+id/icon" android:layout_width="wrap_content" android:layout_height="wrap_content" android:layout_marginLeft="6dip" android:layout_marginRight="6dip" android:layout_gravity="center" /> <RelativeLayout android:layout_width="wrap_content" android:layout_height="wrap_content" android:layout_marginLeft="2dip" android:layout_marginRight="6dip" android:layout_marginTop="6dip" android:layout_marginBottom="6dip" android:layout_weight="1"> <TextView android:id="@+android:id/title" android:layout_width="wrap_content" android:layout_height="wrap_content" android:singleLine="true" android:textAppearance="?android:attr/textAppearanceLarge" android:ellipsize="marquee" android:fadingEdge="horizontal" /> <TextView android:id="@+android:id/summary" android:layout_width="wrap_content" android:layout_height="wrap_content" android:layout_below="@android:id/title" android:layout_alignLeft="@android:id/title" android:textAppearance="?android:attr/textAppearanceSmall" android:maxLines="2" /> </RelativeLayout> </LinearLayout>
次に、PreferencesActivity.javaクラスで、これらのアイテムを説明する行を追加する必要があります。
addPreferencesFromResource(R.xml.preferences); IconPreferenceScreen test = (IconPreferenceScreen) findPreference("key"); Resources res = getResources(); Drawable icon = res.getDrawable(R.drawable.icon1); test.setIcon(icono1);
そして、preferences.xml設定ファイル自体でIconPreferenceScreen
<com.example.app.IconPreferenceScreen android:title="IconPreferenceScreen" android:key="key" />
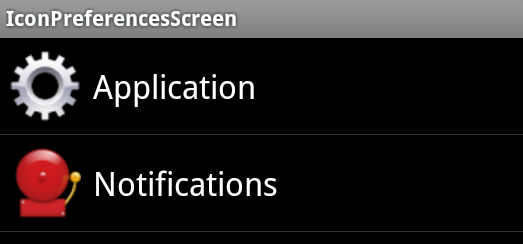
ただし、IconPreferenceScreenは標準のPreferenceScreenではなく、他の要素を追加できないため、クリックしてアクティビティを開く処理を追加します。
test.setOnPreferenceClickListener(new Preference.OnPreferenceClickListener() { @Override public boolean onPreferenceClick(Preference preference) { startActivity(new Intent(PreferencesActivity.this, PreferencesActivity2.class)); return true; } });
それだけです。
ボーナスとして、マニフェスト設定のアクティベーションに次のコードを追加することにより、ダイアログの形で設定ウィンドウを作成できます。
android:theme="@android:style/Theme.Dialog"
また、タイトルなしのダイアログを作成することもできます。この場合、次のコンテンツを含むstyles.xmlファイルを作成します。
<?xml version="1.0" encoding="utf-8"?> <resources> <style name="NoTitleDialog" parent="android:style/Theme.Dialog"> <item name="android:windowNoTitle">true</item> </style> </resources>
マニフェストにアクティビティを登録する
android:theme="@style/NoTitleDialog"

このアプローチの利点:
-美しい設定項目と、1つのウィンドウに配置されたCheckBoxに似た標準のウィジェットを作成する機能。
-視覚美学。
短所:
-標準のPreferenceScreenとは異なり、IconPreferenceScreenで使用するために追加のアクティビティを作成する必要があります。
ダウンロードリンク:
1. 例のソースコード 。
2. サンプルアプリケーション(apk) 。
例3では、アクティベーション、最初はIconPreferenceScreenおよびTheme.Dialogスタイルを使用し、2番目(2つのアイコン項目のいずれかをクリックすると開きます) Androidの設定で使用されます。
はい、アプリケーションの設定ウィンドウを美しくし、世界を飾ります!