Overview of the FLASHFORGE Hunter 3D Printer
Hello! We want to introduce you to the FLASHFORGE Hunter 3D printer, printing photopolymers.
FDM printers from FlashForge left behind only positive emotions - excellent workhorses with well-thought mechanics and a convenient slicer. It was very interesting to test their new photopolymer printer. Looking ahead to say - the printer did not disappoint us =)
FlashForge Hunter works on DLP technology, in which the photopolymer layers are frozen under the influence of UV light. Unlike printers with SLA technology, in which print layers are formed gradually under the influence of a laser, in Hunter the whole layer is exposed at once, which makes printing several times faster.
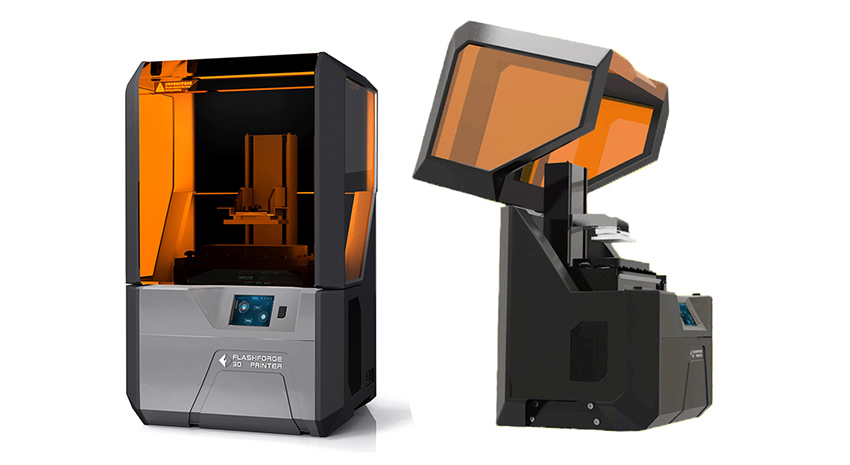
Appearance Hunter makes a pleasant impression - a concise, discreet design. When you open the lid, the printer resembles a spacecraft) The “Hunter” is not bulky, it takes up not much space on the desktop, its dimensions are 360x310x565 mm. Through the cover you can observe the printing process. It is possible to pause printing - the printing platform is rising, and we can see the intermediate result of printing.
Power: 100-240 V, 50-60 Hz, 1A
Size of construction area: 120x67.5x150 mm
XY axis positioning accuracy: 0.0625 mm
Layer thickness: 25 and 50 microns
Light source: 405 nm LED
Connection interface: USB, USB drive, Wi-Fi
Software: FlashPrint
Supported file formats: STL
Printer weight: 17.8 kg
In the kit to the printer, the manufacturer put a whole heap of trifles that will ensure comfortable work with it:

The guys from FlashForge made sure everything was at hand while working with the printer)
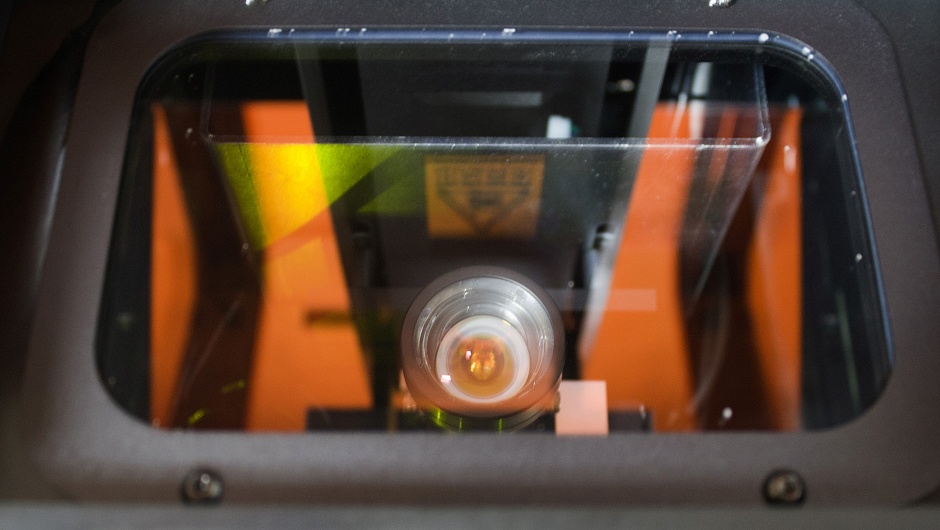
The most interesting thing about the printer in our opinion is the projector. The projector was specially developed by FlashForge engineers and optimized for 3D printing with resins. The resolution of the projector is 1080p, the lifetime is about 50,000 hours. Also, the projector has a "feedback" intensity of illumination, to ensure a more stable operation, high accuracy and detail of printing.
The platform is ribbed. This is done to better adhere to the model. The grooves are not very deep, but the model clings tightly, and sometimes it is not easy to remove the model from the platform)

Along the Z axis, there is already a familiar “trapezoid” with a guide module. The platform is fixed very rigidly and does not play.
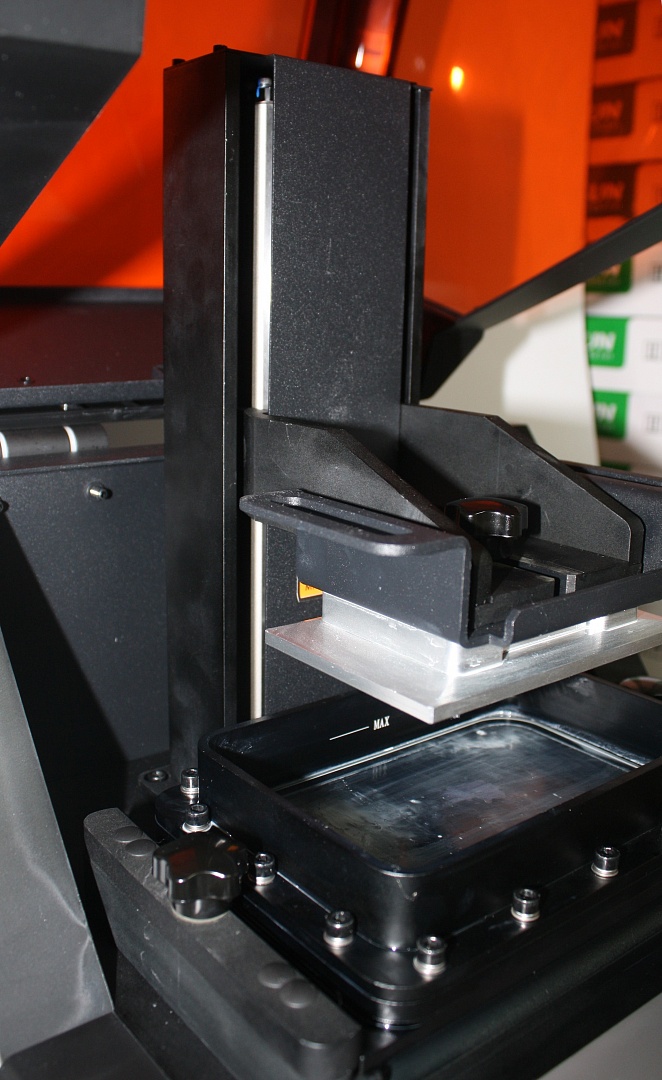
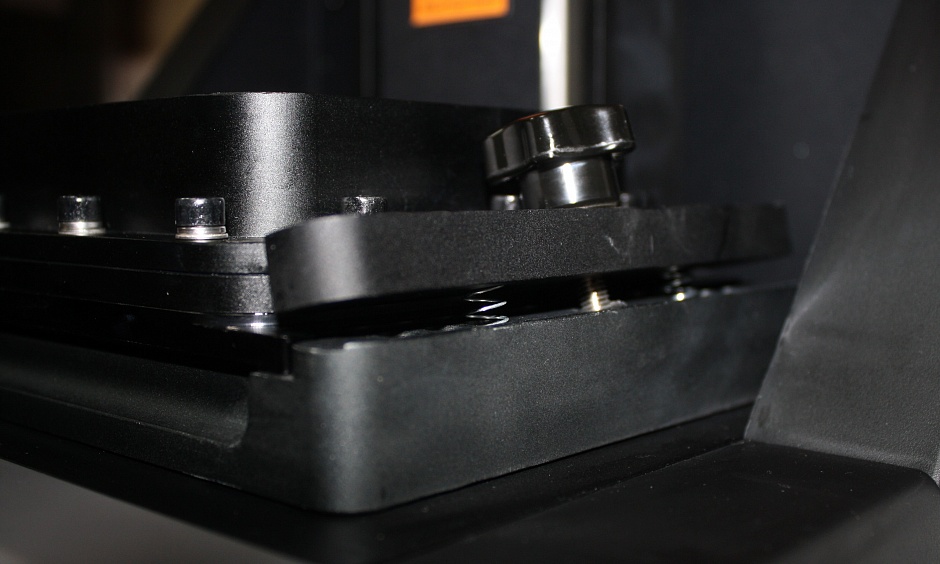
The tray is a “sandwich” of film and lens. The bath is fixed on the printer with two screws and spring-loaded metal holders.
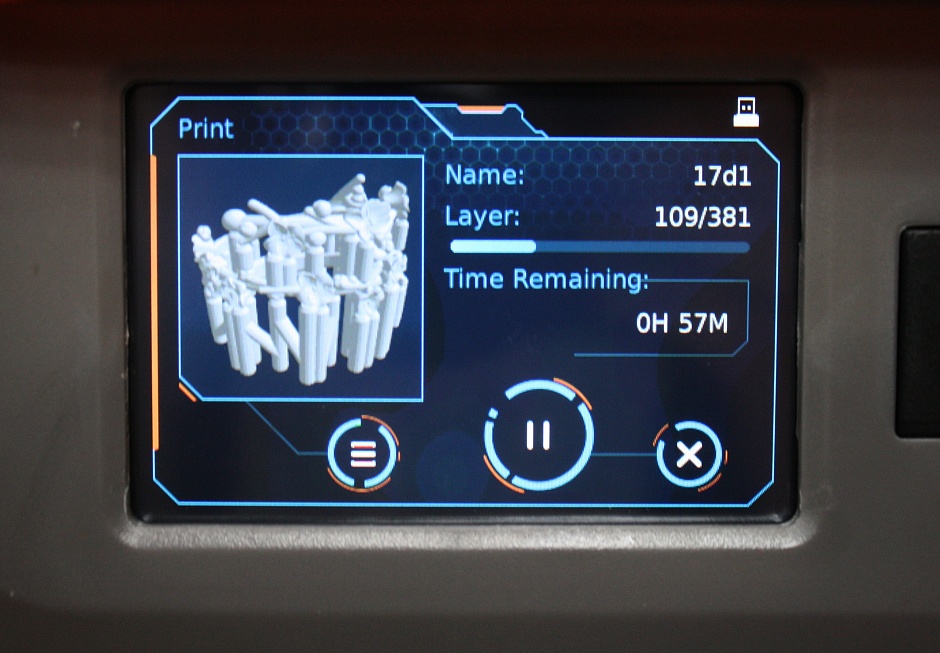
The printer is controlled by a small touch screen. I liked the interface and design very much, it looks unusual and reminds of the menu of some fantastic game.
3d-Printer has a Wi-Fi module and 7 GB of internal memory. Very convenient, now you can not run every time to the printer with a flash drive.

Also, the printer can be contacted via Wi-Fi from the phone through the new Happy 3D app.

Happy 3D is an application for simple modeling from a phone or tablet, with the ability to immediately send a model to print via Wi-Fi. It is perfect for not very complex models, interesting and most important current development.
The native FlashPrint is already used as a slicer, which is good news. In our opinion, one of the most convenient, functional and clear slicers.
In the settings, select our Hunter)

We load model and we try.
Here, again, I was pleased with the prudence of the manufacturer - there is a small list of ready-made profiles for popular types of resins. This greatly facilitates the first launch of the printer.

You can create and your profile for any other resin. The range of settings is quite large. In addition to the layer thickness and time of exposure, you can choose the density of the filling and the wall thickness.
We also have at our disposal the standard features of FlashPrint, namely, the ability to cut a model or convert images into volumetric bas-reliefs.
After unpacking the printer, a pleasant surprise awaited us. Hunter does not need additional assembly, configuration, calibration. Just open the lid and pour the polymer into the tub, slice the model and start printing.
On the flash drive that comes with the printer, there is a test model of the cube. But ... printing cubes is not so interesting, especially on a DLP printer. We decided to start with a ringlet) The thickness of the layer is 50 microns.

Hunter from the factory comes already calibrated. But if during the operation you need to calibrate the printer, it can be done quite easily from the menu.
We lower the platform to zero. Go to the "Z Move" and set the value, how much we need to raise or lower the platform relative to the bath. Save the value. That's it, the calibration is complete.
If you open the top cover while printing - FLASHFORGE Hunter will stop printing and raise the platform. Sometimes it is convenient to use this to see if the part is not stuck. But it is better to pause, as we wrote earlier, without lifting the lid. Otherwise, there is a possibility that the polymer may not light up properly and the model will turn out with a slight, but still deviation!
As a print material, we used Fun To Do Snow White resin with a set of multi-colored pigments.
The printer prints quickly, it takes about 2 seconds to light up one layer. The thickness of the layer, you can choose 2 options - 25 or 50 microns.


The One Ring. The inscription was printed both outside and inside.

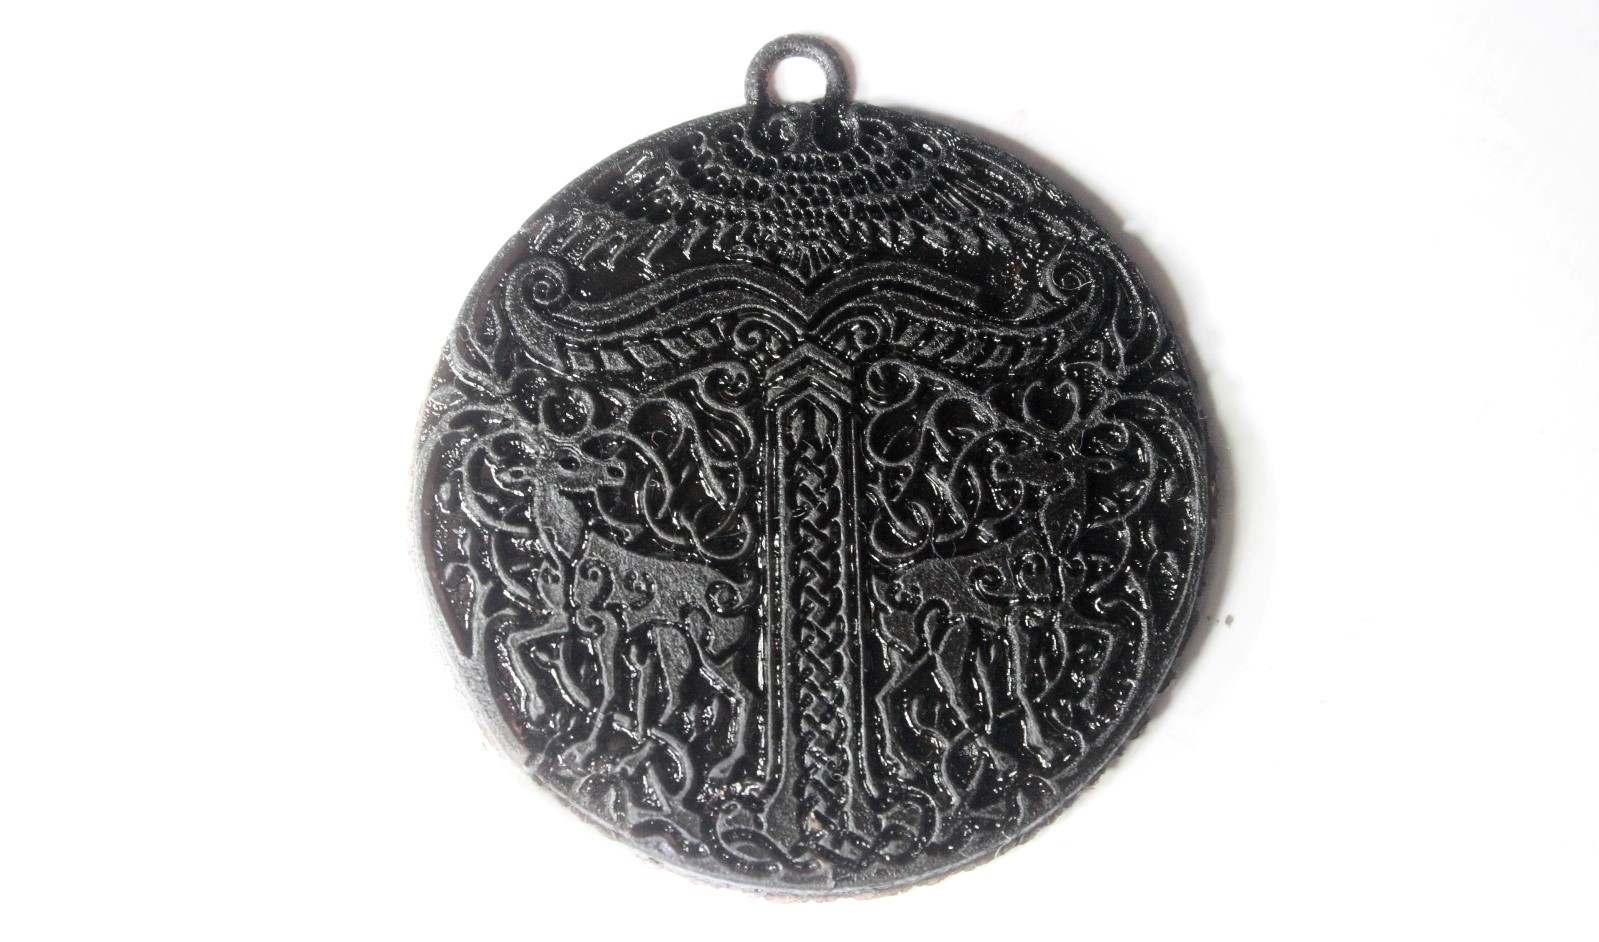
Pendants.


Resin pendant HARZlabs
Dental crowns.

Also the printer coped well with large models. Overlay on the colt.

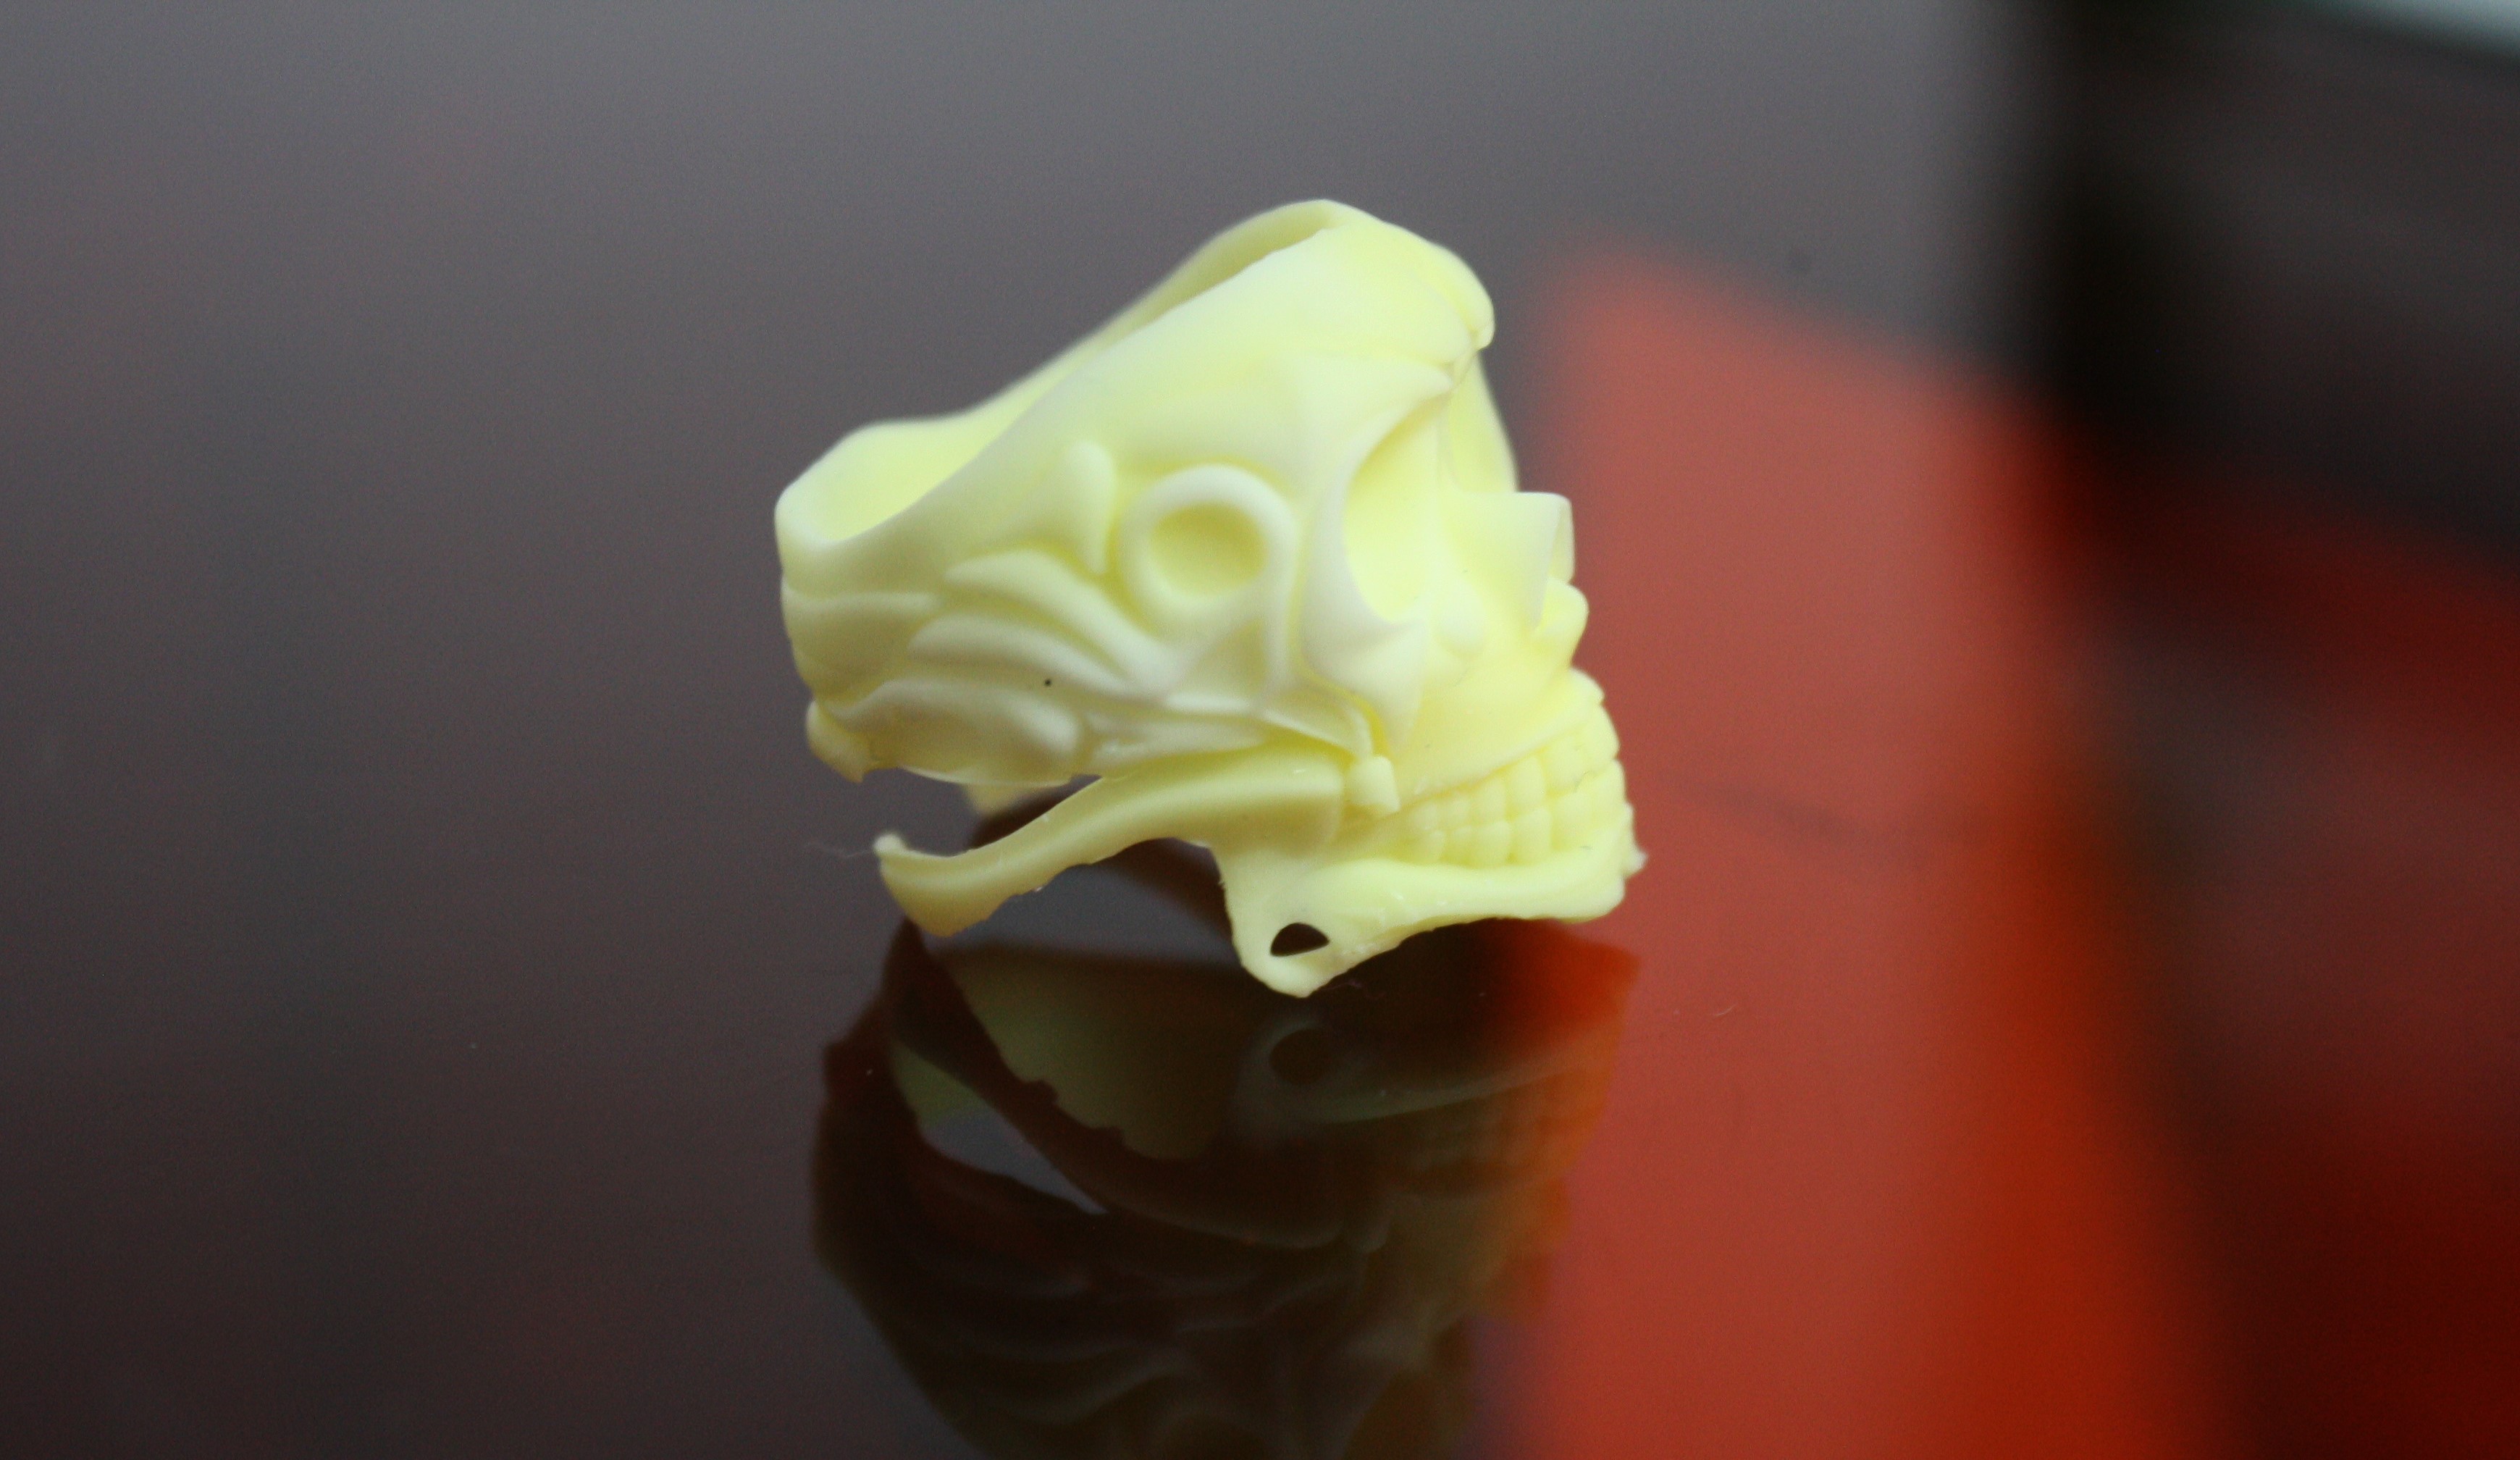
Head from the statuette of a cheshire cat.

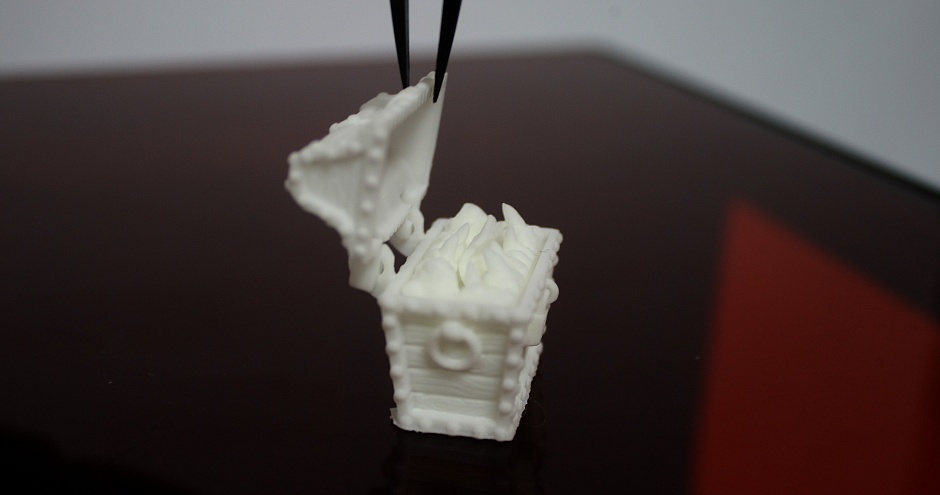
Treasure Chest.
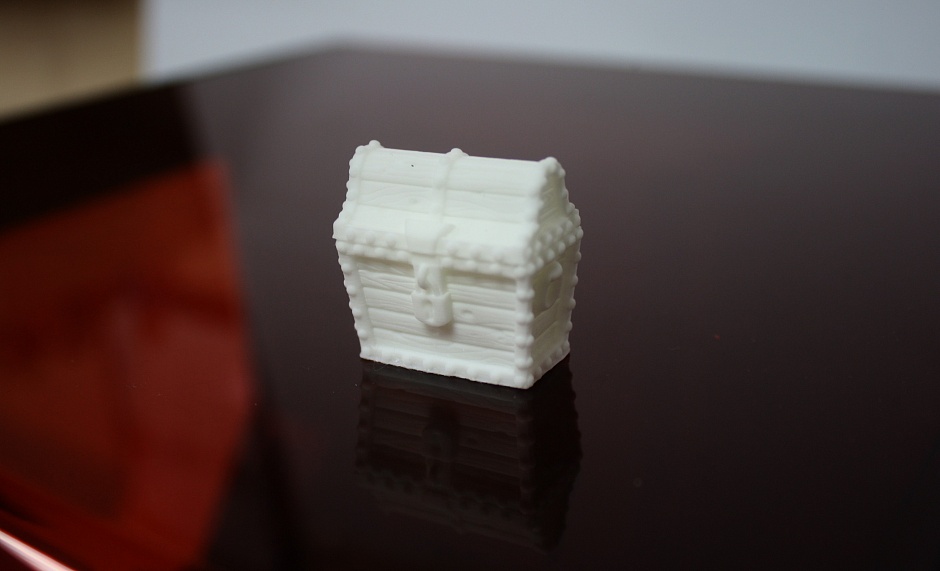
Although not quite with the treasure)
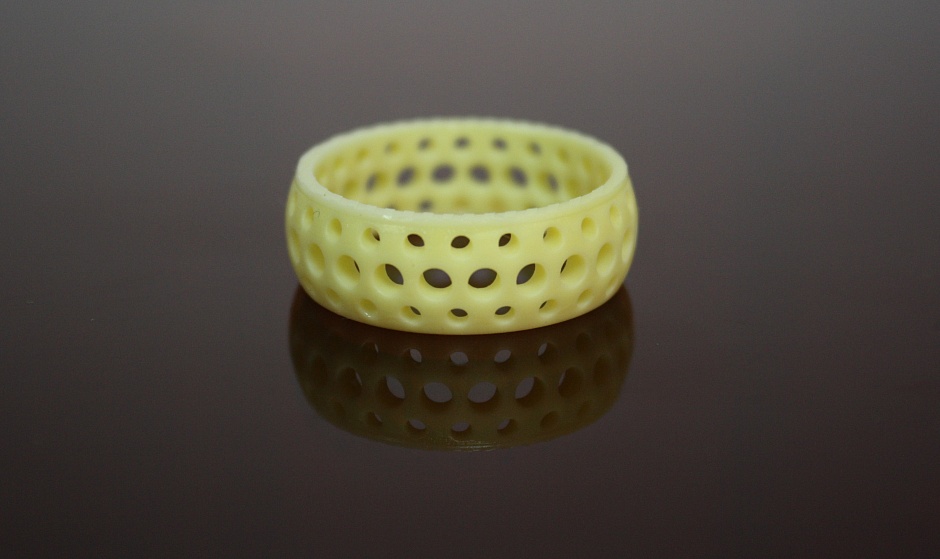
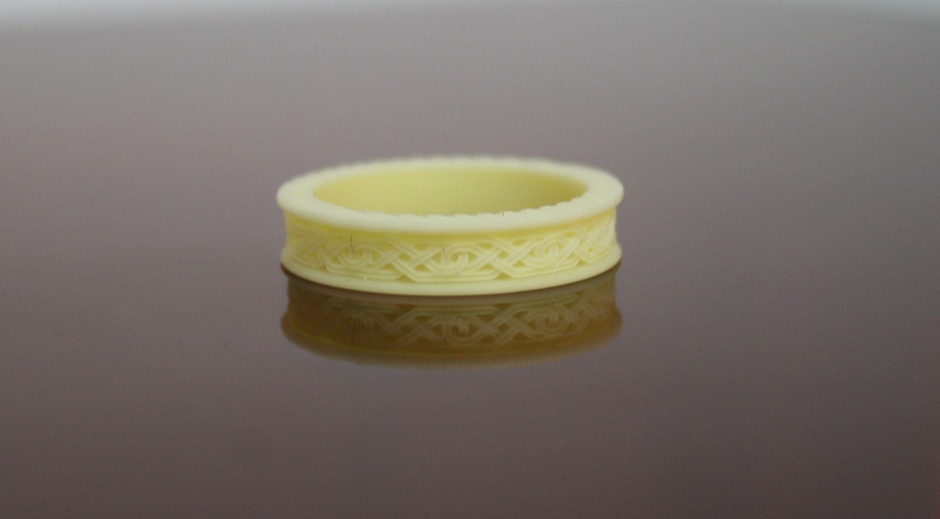
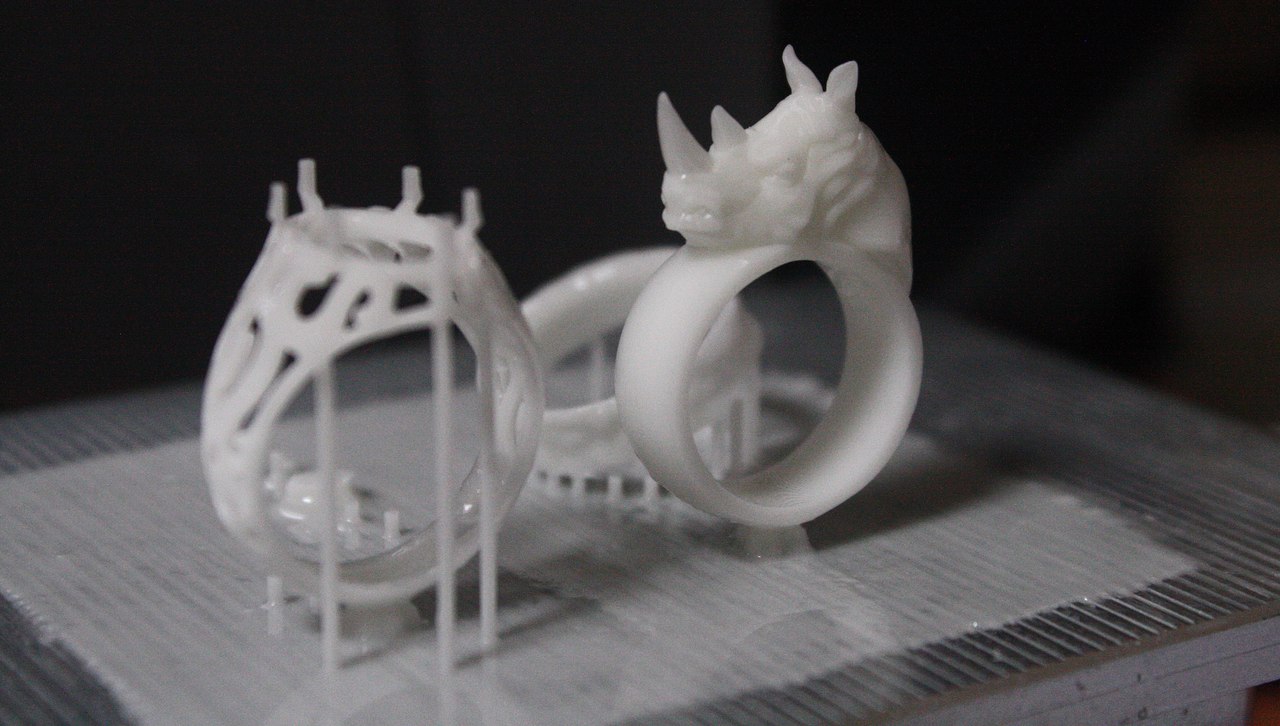
Rings printed with a layer of 50 microns from resin Fun To Do Snow White:

I would also like to say a few words about photopolymers. Hunter is versatile and prints well with any resin with a 405 nm light wave. That is, the choice is wide enough, you can find for your purposes a lot of materials in any price category. Our choice fell on Fun To Do Snow White, it was very interesting to try printing using pigments) When mixing primary colors, very interesting color combinations are obtained.
We plan to test the casting resin at the next stage, we will definitely share the results!
FlashForge Hunter was created primarily for use in medicine and the jewelry business. That is why, when testing, we were interested in trying to print rings, pendants, crowns, jaw fragments. Indeed, Hunter does an excellent job of printing highly detailed and complex models.
Due to its compatibility with various resins (standard, injection molding, biomaterials), the printer can expand the possibilities in completely different areas for creating prototypes, master models, spare parts, correction elements, etc.
FlashForge's DLP printer didn't disappoint. Hunter is a real pro in his own field, a good-looking and thoroughly thought-out machine. The guys from FlashForge tried to consider everything to make the operation of the printer as comfortable as possible.
If we talk about the pros, it is:
- Convenience, ease of use and customization. Cope and inexperienced user.
- Software is not overloaded, Flashprint for Hunter remains user-friendly.
- Print speed is very decent, this can be especially appreciated when printing several models at the same time.
- Low cost of operation. The only costs that you can expect are the purchase of photopolymers and the replacement of a film in a bath (it is inexpensive). Unlike some models of SLA printers that require special expensive cartridges, you can use any resin in Hunter.
The construction area, of course, is more (at Hunter it is 120x67.5x150 mm), but for use, for example, in dentistry or jeweler, this is quite enough.
We were pleased with the quality and accuracy of printing - small elements are printed, even small inscriptions on the rings, the models are smooth without visible transitions from layer to layer.
Join us in the social. networks to keep abreast of the latest developments:
Facebook
VKontakte
YouTube
The team of the company Color World
FDM printers from FlashForge left behind only positive emotions - excellent workhorses with well-thought mechanics and a convenient slicer. It was very interesting to test their new photopolymer printer. Looking ahead to say - the printer did not disappoint us =)
FlashForge Hunter works on DLP technology, in which the photopolymer layers are frozen under the influence of UV light. Unlike printers with SLA technology, in which print layers are formed gradually under the influence of a laser, in Hunter the whole layer is exposed at once, which makes printing several times faster.
Appearance Hunter makes a pleasant impression - a concise, discreet design. When you open the lid, the printer resembles a spacecraft) The “Hunter” is not bulky, it takes up not much space on the desktop, its dimensions are 360x310x565 mm. Through the cover you can observe the printing process. It is possible to pause printing - the printing platform is rising, and we can see the intermediate result of printing.
PRINTER FEATURES
Power: 100-240 V, 50-60 Hz, 1A
Size of construction area: 120x67.5x150 mm
XY axis positioning accuracy: 0.0625 mm
Layer thickness: 25 and 50 microns
Light source: 405 nm LED
Connection interface: USB, USB drive, Wi-Fi
Software: FlashPrint
Supported file formats: STL
Printer weight: 17.8 kg
EQUIPMENT
In the kit to the printer, the manufacturer put a whole heap of trifles that will ensure comfortable work with it:
- Gloves
- Container for washing models and table
- Brush
- Metal spatula
- Plastic spatula
- Flash drive
- USB cable
- Spare film for the bathroom
- Plastic tweezers
- Cleaning cloth optics
- Phillips screwdriver and a small set of hexagons
- Spare Bolts for Bath
- Polymer 500ml
The guys from FlashForge made sure everything was at hand while working with the printer)
TECHNICAL FEATURES
The most interesting thing about the printer in our opinion is the projector. The projector was specially developed by FlashForge engineers and optimized for 3D printing with resins. The resolution of the projector is 1080p, the lifetime is about 50,000 hours. Also, the projector has a "feedback" intensity of illumination, to ensure a more stable operation, high accuracy and detail of printing.
The platform is ribbed. This is done to better adhere to the model. The grooves are not very deep, but the model clings tightly, and sometimes it is not easy to remove the model from the platform)
Along the Z axis, there is already a familiar “trapezoid” with a guide module. The platform is fixed very rigidly and does not play.
The tray is a “sandwich” of film and lens. The bath is fixed on the printer with two screws and spring-loaded metal holders.
The printer is controlled by a small touch screen. I liked the interface and design very much, it looks unusual and reminds of the menu of some fantastic game.
3d-Printer has a Wi-Fi module and 7 GB of internal memory. Very convenient, now you can not run every time to the printer with a flash drive.
Also, the printer can be contacted via Wi-Fi from the phone through the new Happy 3D app.
Happy 3D is an application for simple modeling from a phone or tablet, with the ability to immediately send a model to print via Wi-Fi. It is perfect for not very complex models, interesting and most important current development.
BY
The native FlashPrint is already used as a slicer, which is good news. In our opinion, one of the most convenient, functional and clear slicers.
In the settings, select our Hunter)
We load model and we try.
Here, again, I was pleased with the prudence of the manufacturer - there is a small list of ready-made profiles for popular types of resins. This greatly facilitates the first launch of the printer.
You can create and your profile for any other resin. The range of settings is quite large. In addition to the layer thickness and time of exposure, you can choose the density of the filling and the wall thickness.
We also have at our disposal the standard features of FlashPrint, namely, the ability to cut a model or convert images into volumetric bas-reliefs.
FIRST START
After unpacking the printer, a pleasant surprise awaited us. Hunter does not need additional assembly, configuration, calibration. Just open the lid and pour the polymer into the tub, slice the model and start printing.
On the flash drive that comes with the printer, there is a test model of the cube. But ... printing cubes is not so interesting, especially on a DLP printer. We decided to start with a ringlet) The thickness of the layer is 50 microns.
Hunter from the factory comes already calibrated. But if during the operation you need to calibrate the printer, it can be done quite easily from the menu.
We lower the platform to zero. Go to the "Z Move" and set the value, how much we need to raise or lower the platform relative to the bath. Save the value. That's it, the calibration is complete.
If you open the top cover while printing - FLASHFORGE Hunter will stop printing and raise the platform. Sometimes it is convenient to use this to see if the part is not stuck. But it is better to pause, as we wrote earlier, without lifting the lid. Otherwise, there is a possibility that the polymer may not light up properly and the model will turn out with a slight, but still deviation!
PRINT RESULTS
As a print material, we used Fun To Do Snow White resin with a set of multi-colored pigments.
The printer prints quickly, it takes about 2 seconds to light up one layer. The thickness of the layer, you can choose 2 options - 25 or 50 microns.
The One Ring. The inscription was printed both outside and inside.
Pendants.
Resin pendant HARZlabs
Dental crowns.
Also the printer coped well with large models. Overlay on the colt.
Head from the statuette of a cheshire cat.
Treasure Chest.
Although not quite with the treasure)
Rings printed with a layer of 50 microns from resin Fun To Do Snow White:
PHOTOPOLYMERS
I would also like to say a few words about photopolymers. Hunter is versatile and prints well with any resin with a 405 nm light wave. That is, the choice is wide enough, you can find for your purposes a lot of materials in any price category. Our choice fell on Fun To Do Snow White, it was very interesting to try printing using pigments) When mixing primary colors, very interesting color combinations are obtained.
We plan to test the casting resin at the next stage, we will definitely share the results!
APPLICATIONS
FlashForge Hunter was created primarily for use in medicine and the jewelry business. That is why, when testing, we were interested in trying to print rings, pendants, crowns, jaw fragments. Indeed, Hunter does an excellent job of printing highly detailed and complex models.
Due to its compatibility with various resins (standard, injection molding, biomaterials), the printer can expand the possibilities in completely different areas for creating prototypes, master models, spare parts, correction elements, etc.
SUMMARY
FlashForge's DLP printer didn't disappoint. Hunter is a real pro in his own field, a good-looking and thoroughly thought-out machine. The guys from FlashForge tried to consider everything to make the operation of the printer as comfortable as possible.
If we talk about the pros, it is:
- Convenience, ease of use and customization. Cope and inexperienced user.
- Software is not overloaded, Flashprint for Hunter remains user-friendly.
- Print speed is very decent, this can be especially appreciated when printing several models at the same time.
- Low cost of operation. The only costs that you can expect are the purchase of photopolymers and the replacement of a film in a bath (it is inexpensive). Unlike some models of SLA printers that require special expensive cartridges, you can use any resin in Hunter.
The construction area, of course, is more (at Hunter it is 120x67.5x150 mm), but for use, for example, in dentistry or jeweler, this is quite enough.
We were pleased with the quality and accuracy of printing - small elements are printed, even small inscriptions on the rings, the models are smooth without visible transitions from layer to layer.
Join us in the social. networks to keep abreast of the latest developments:
VKontakte
YouTube
The team of the company Color World
All Articles