Pi-Sonos or DIY portable speakers on the Raspberry Pi

Anyone who has experienced Sonos products will definitely agree that Sonos is Apple from the world of portable speakers (in any case, HomePod has not officially come out yet). Sonos acoustics is a combination of minimalism, quality and convenience that delights from the first touch. I am not the happy owner of this acoustics, but the acquaintance with Sonos Play 1 impressed me so much that I decided to create something similar — portable home acoustics under the control of Raspberry Pi. Under the cut, I'll tell you how I did it.
I dreamed of trying to do something on the Raspberry Pi from the very beginning, but I could not think of a suitable application of the “raspberry” in everyday life. The idea to create acoustics on its basis was born quite by accident, when during a regular get-together at our home, my friend rightly noted that there was not enough background music in the living room. The idea to make my own Sonos immediately captured me.
The requirements for the future acoustic system were obvious: repeat or imitate the convenience of Sonos Play 1 - “plugged into the outlet and control from a smartphone”. In this regard, Raspberry is almost perfect - the scarf already has Wi-Fi and Bluetooth, and you can run Kodi, which chews everything and already has apps for iOS and Android. However, to get the desired output, it was still necessary to implement a number of engineering solutions, namely:
- Pick up speakers
- Output sound from the Raspberry to the speakers.
- Feed all the glands
- Build a beautiful acoustic design for speakers
- Achieve simplicity and ease of management
1. Pick up speakers
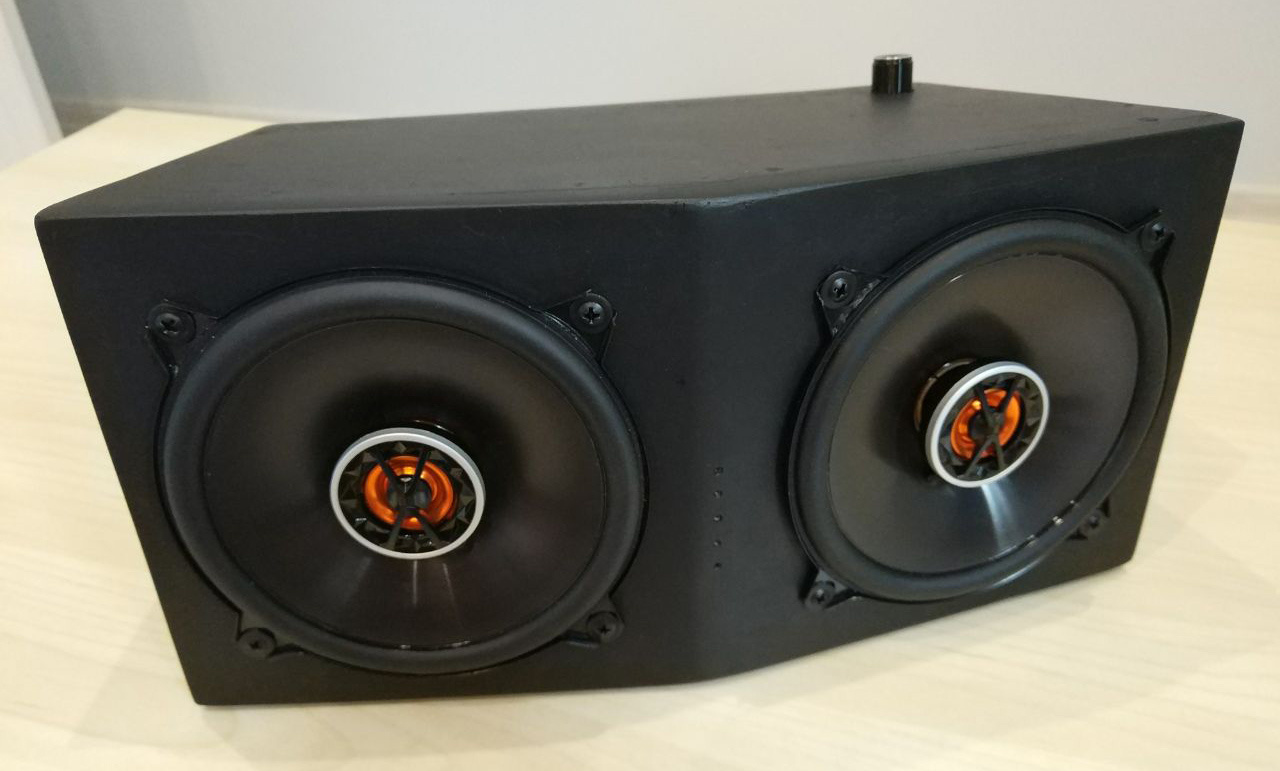
It was necessary to choose the right speakers so that, on the one hand, they were large enough (for a wider frequency range), and on the other, small ones, since the acoustics were planned to be portable. After long agonies of choice, readings of reviews and comparison of characteristics, I stopped at the 5-inch 2-way coaxial car speakers JBL Club 5020. With 40W announced at the ear, these little ones promised to produce sound in the range from 75Hz to 20kHz, which suited me. My personal experience helped me - my shelf speakers in the office start to play already from 50 Hz, while giving out a tangible bass, but in a normal situation I personally start to have a headache from him, so I carefully remove everything below 70 Hz with an equalizer. Actually, therefore, did not overpay for speakers, promising lower frequencies. In addition, JBL has a pretty design, and I immediately got an idea how to beat it.
2. Output the sound from the Raspberry to the speakers
In the "Malinka" there are 3 possibilities for sound output: mini-jack, HDMI and GPIO. The quality of the sound flowing from the mini-jack does not swear only lazy, and HDMI - difficult. But for GPIO there are great options. The first is the Suptronics X400 , which is an audiophile DAC at 384 kHz (PCM5122) and a 20-watt D-class stereo amplifier per channel (TPA3118D2), soldered on a single board. The second is Hifiberry, offering separate DAC + and AMP + boards (DACs and amps, respectively). At the same time, the Suptronics board looks preferable. Besides the fact that this is one payment instead of two, it is also cheaper, and it is easier to buy / deliver in the Russian Federation.
3. Power all glands
The power supply was taken 12V, despite the fact that the Malinka is powered by 5V via micro USB. It's all about cool saptronic - it feeds the “raspberry” through the GPIO. This is a logical and practical solution, given the fact that the audio amplifier consumes much more energy than the “Malinka”. The X400 can be powered by any power supply with a constant voltage of 6 to 24 volts, but it was from 12 volts that the LED operation display of the AC could also be powered, which I used as a piece of Navigator 12V 4.8W / m tape. Actually, BP was ordered from the seller of LED strips on Ali.
4. Build a beautiful acoustic design for speakers
Perhaps this was the biggest problem of the entire project. The choice of material was between 15mm plywood and 8mm MDF I had. For acoustics, of course, it was better to take plywood, but MDF was easier to process, and the strength of MDF was quite enough for a given power and size. Also in the case was supposed to have a number of holes (for the power cable and HDMI, RJ-45 and USB connectors, volume control and phase inverter), which further complicated the task in the case of plywood. In addition, I do not have enough experience and a tool to make something more interesting out of plywood than a simple rectangular box. And I preferred the malleable MDF.
Separately worth mentioning about the FI. It would have been easier to make a “closed box”, but after reading a number of materials, I realized that this would be a mistake. At the planned volume (~ 4.5 liters) inside the closed box, a rather strong acoustic impedance of two five-inch speakers will be created, which ultimately will lead to an increase in the lower frequency of the entire acoustic system as a whole. There was no wish to make the five-liter “squeaker”, and the heat from the constantly warming electronics, too, had to be removed somewhere. As a result, the slit phase inverter was designed for a frequency of 60-65 Hz, slightly lower than the lower frequency of the speakers, with the margin that the internal volume of the case will somewhat decrease due to the hardware and sound-proofing material, and, therefore, the frequency will go up.
Description of the process with photos I hid under the spoiler
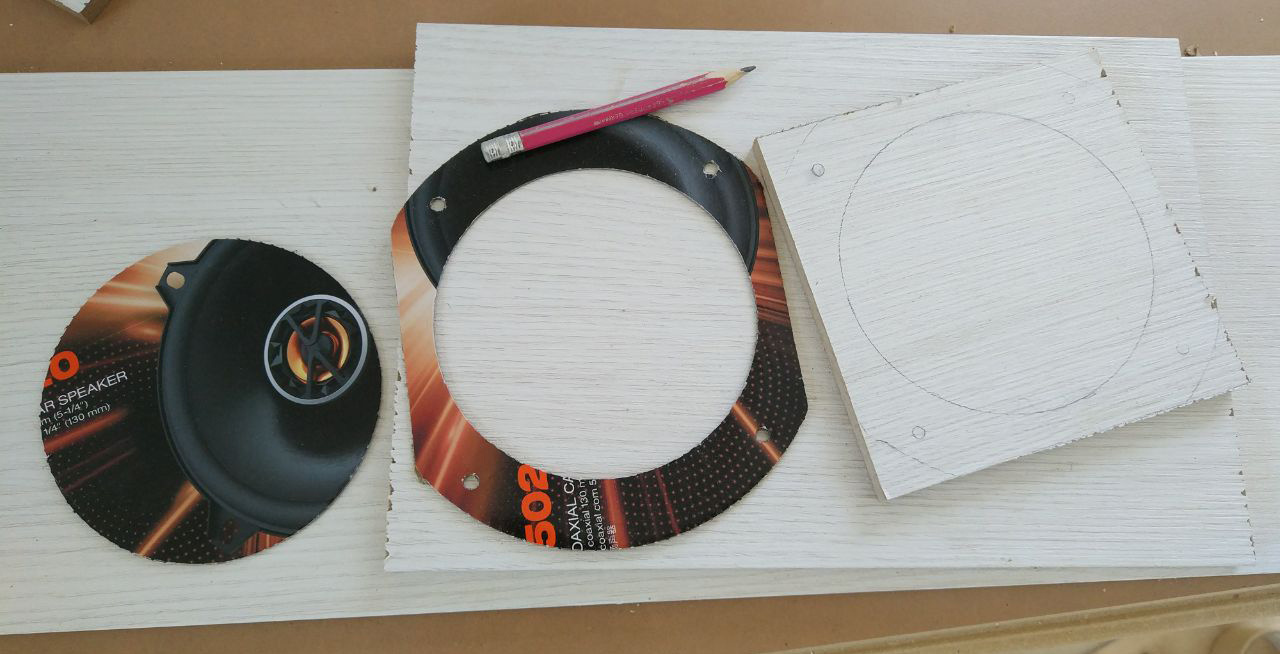
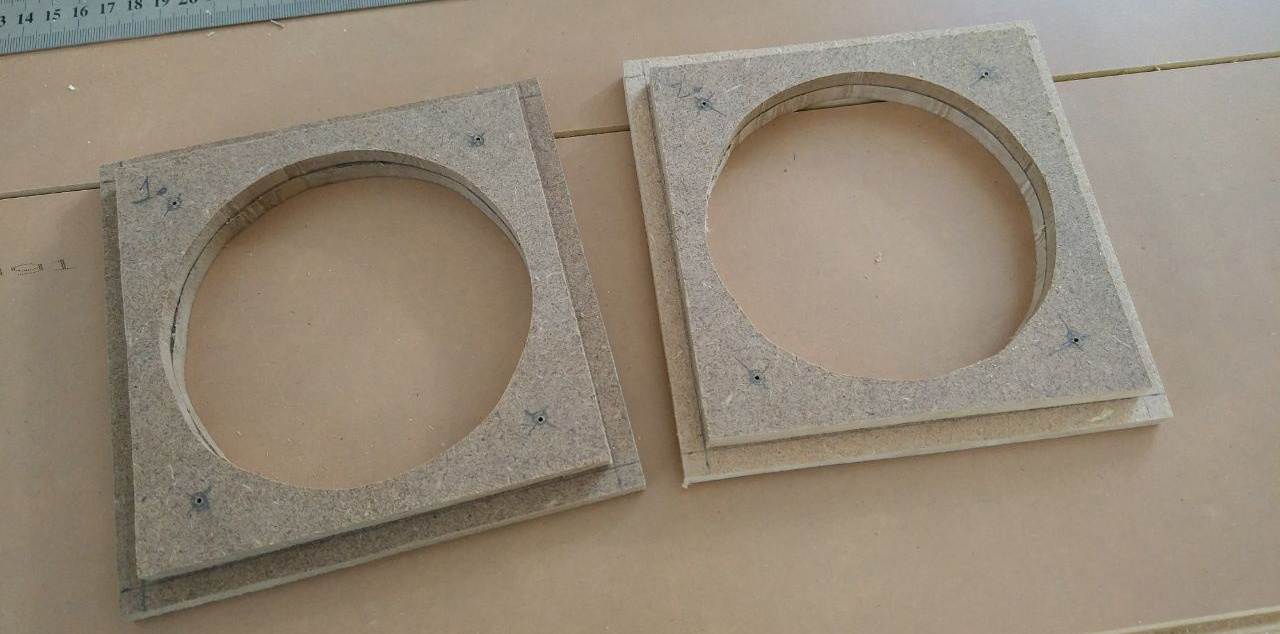
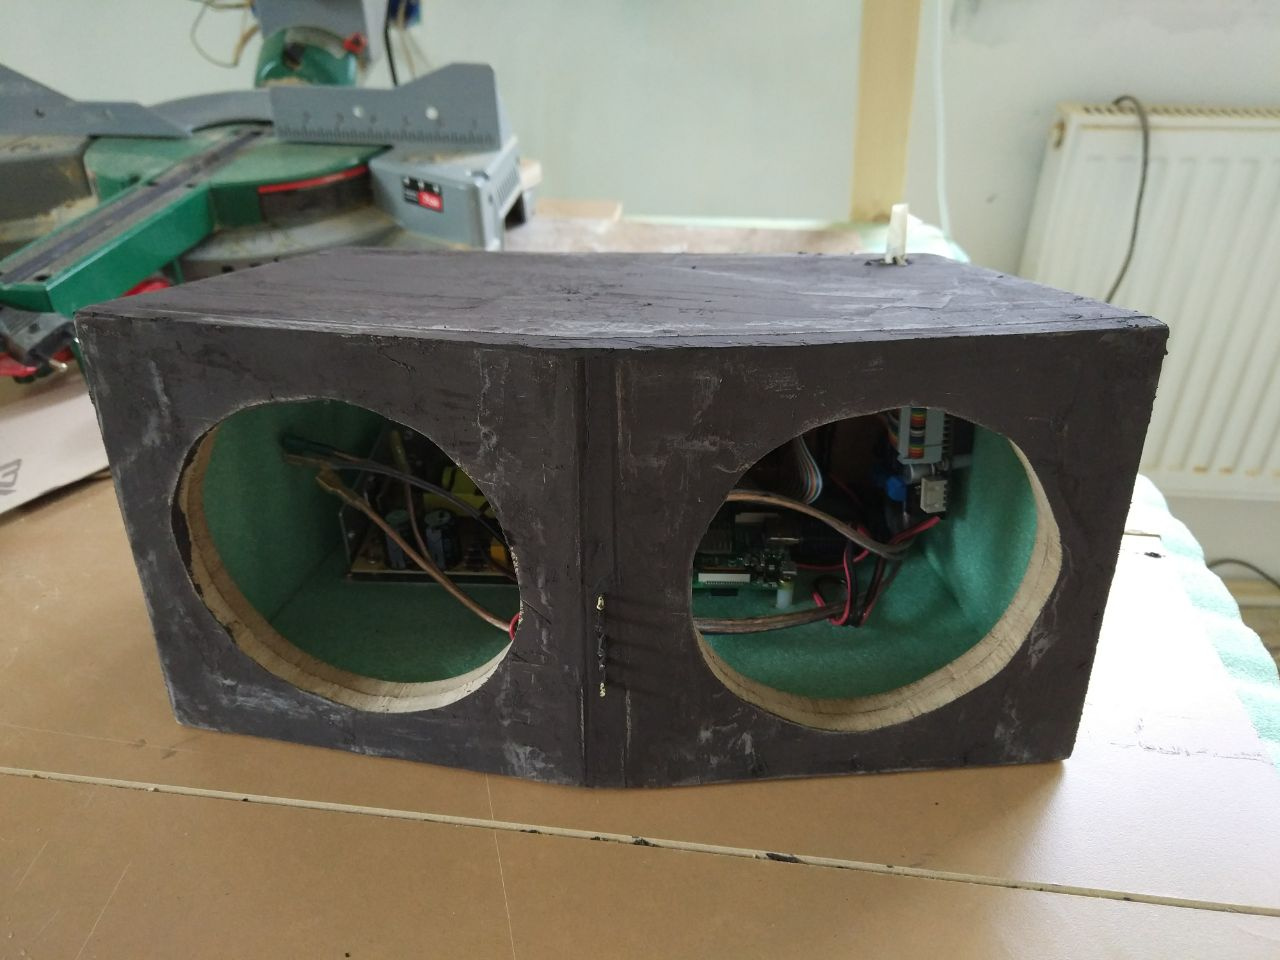
First, the front panels were cut, into which the speakers should be mounted. It was easy - right on the box from the speakers was a special template. For greater strength, I glued 2 layers of MDF with liquid nails - for greater strength, because each speaker weighs half a kilo.
Then from under the jigsaw left the bottom and side walls.
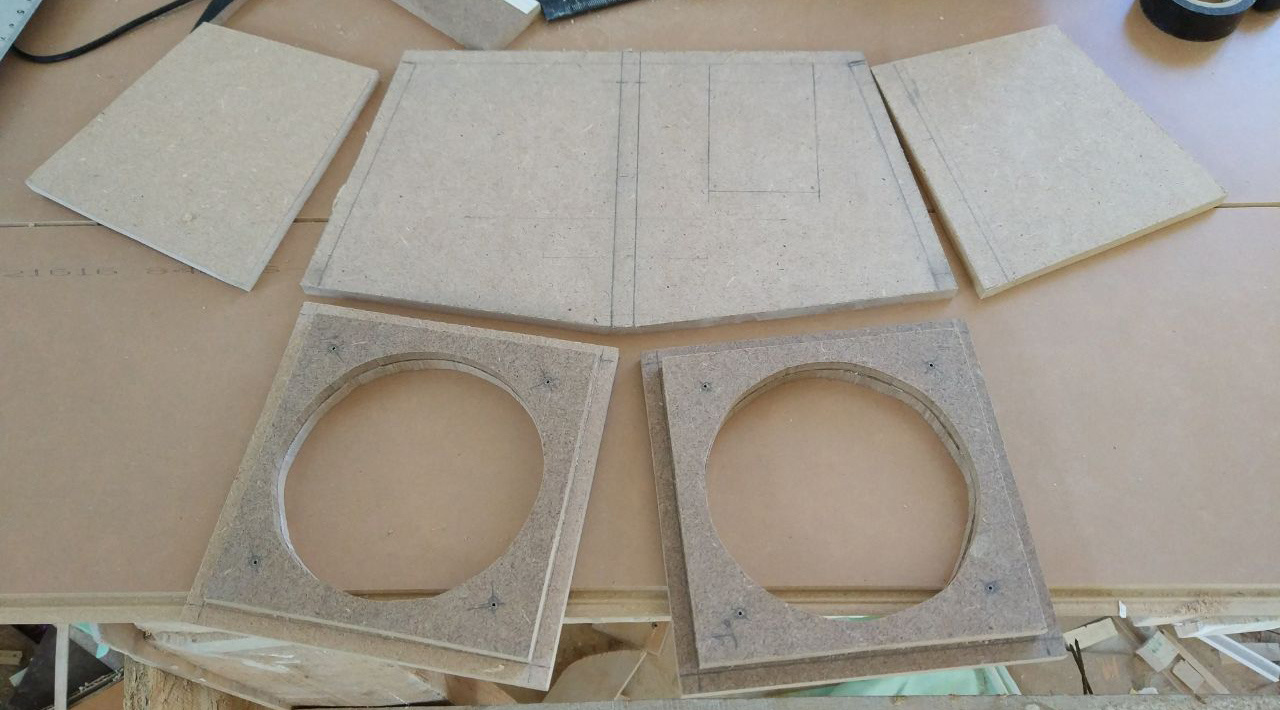
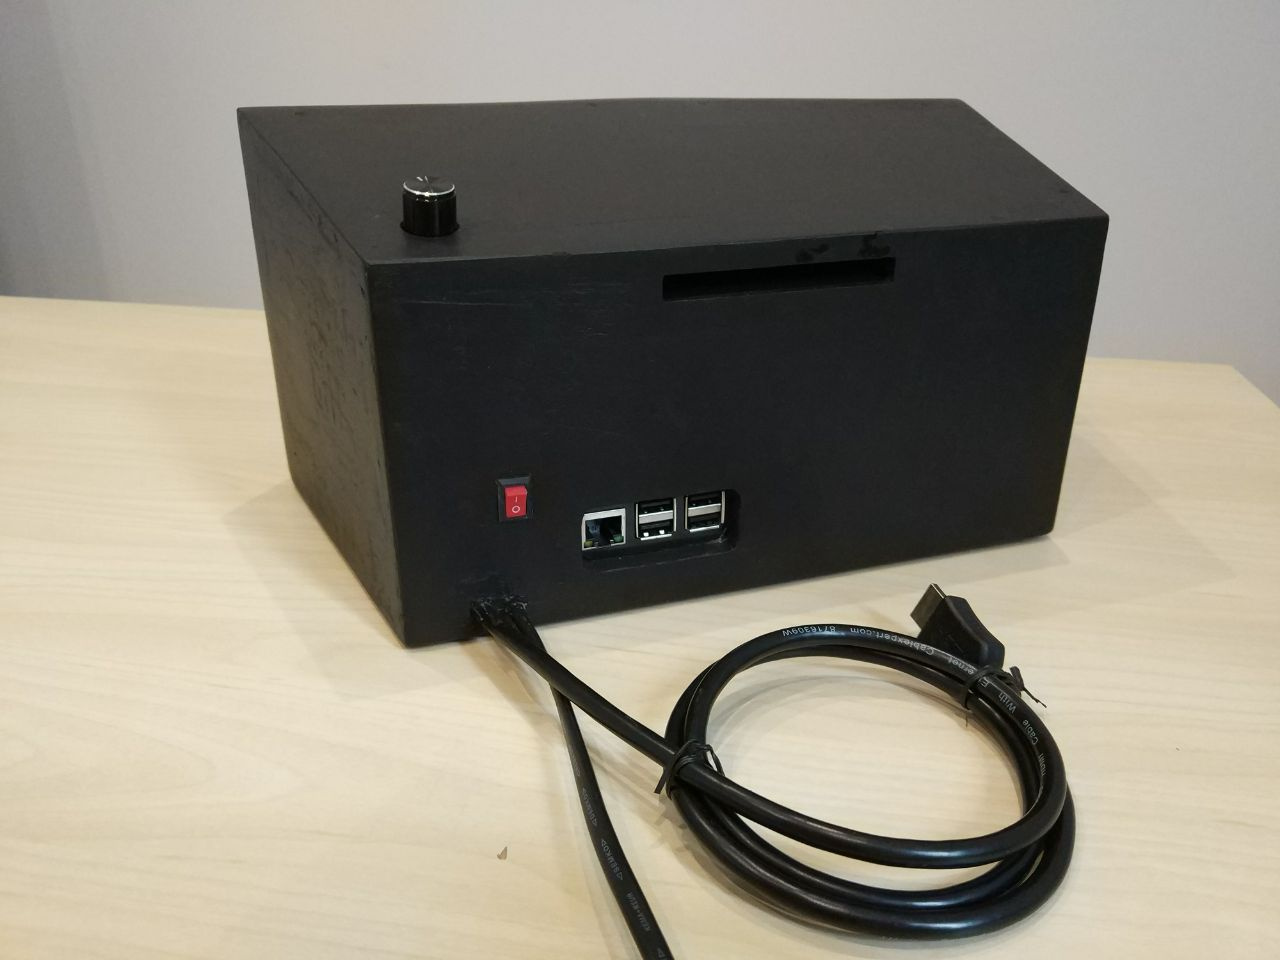
From the top and rear walls had to tinker. In the back wall it was necessary to make a conclusion under the connectors and phase inverter, and at the top - a hole for the volume control. I reworked the back wall three times for various reasons, in the final version it also added a power switch and pins for wires - power and HDMI. I was lucky with the top cover - I managed to adjust the hole for the volume control the first time. Well, phase inverter was generally easy. We also had to drop extra pins under the “tulips” from the Suptronics board in order not to make additional holes on the top cover.
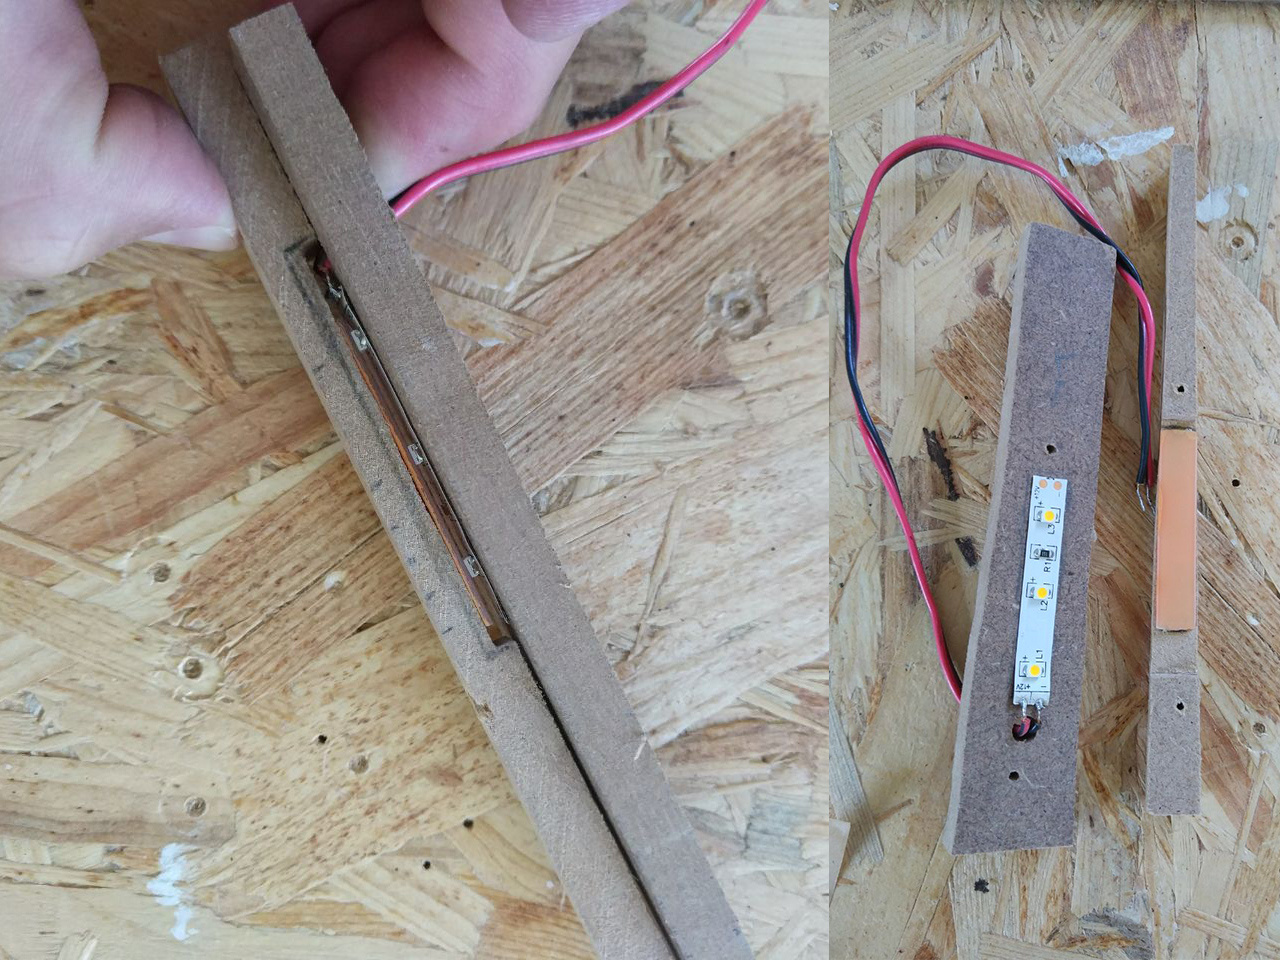
In between the speakers entered the bar with LEDs that light up when you turn on the power. In addition to the beauty of this strap was to serve as an additional stiffener of the whole structure. As planned, the LEDs had to shine orange (in the color of the inserts in the speakers), and for this I had to paint a piece of transparent matte plastic with orange paint.
All parts were covered with foamed polyethylene (substrate for laminate). This material has sufficient insulation primarily from shock and vibration noise. Then everything was assembled with screws and liquid nails. The seams and gaps were smeared with sealant, and to smooth the right angles, sound insulation was additionally glued in them.

Then - the body was plastered, sanded ...
... and painted with enamel in two layers. The speakers were mounted on the case with self-tapping screws with a press washer, the heads of which were then also tinted in the body color.
Then from under the jigsaw left the bottom and side walls.
From the top and rear walls had to tinker. In the back wall it was necessary to make a conclusion under the connectors and phase inverter, and at the top - a hole for the volume control. I reworked the back wall three times for various reasons, in the final version it also added a power switch and pins for wires - power and HDMI. I was lucky with the top cover - I managed to adjust the hole for the volume control the first time. Well, phase inverter was generally easy. We also had to drop extra pins under the “tulips” from the Suptronics board in order not to make additional holes on the top cover.
In between the speakers entered the bar with LEDs that light up when you turn on the power. In addition to the beauty of this strap was to serve as an additional stiffener of the whole structure. As planned, the LEDs had to shine orange (in the color of the inserts in the speakers), and for this I had to paint a piece of transparent matte plastic with orange paint.
All parts were covered with foamed polyethylene (substrate for laminate). This material has sufficient insulation primarily from shock and vibration noise. Then everything was assembled with screws and liquid nails. The seams and gaps were smeared with sealant, and to smooth the right angles, sound insulation was additionally glued in them.
Then - the body was plastered, sanded ...
... and painted with enamel in two layers. The speakers were mounted on the case with self-tapping screws with a press washer, the heads of which were then also tinted in the body color.
Production column:
5. To achieve simplicity and ease of management.
Assembly is still half the battle. The second half is software. Here, too, not everything goes smoothly.
Of course, before you ever seal the Raspberry Pi in the depths of the case, I installed an OSMC image on it. Who does not know - this is the same Kodi, only embedded. This is a media player that replaces the graphical interface of the operating system and allows you to configure networks and services, etc. Between the bunch of Raspbian + Kodi and OSMC all the advantages are definitely on the side of the latter.
After installing the system and setting up the sound card according to the instructions from the Suptronics website, it remained only to add the Radio extension to OSMC and score ten favorite radio stations into it. Then I installed Kodi Remote on my smartphone, and it would seem that everything can be enjoyed.
But unfortunately, Kodi Remote killed the main thing that I wanted to achieve from the acoustics - simplicity and ease of control. The fact is that it was possible to turn on and switch the radio stations only from the Radio expansion menu, and to access it you need to make 5 tapes and 1 scroll. So so ux.
Proof 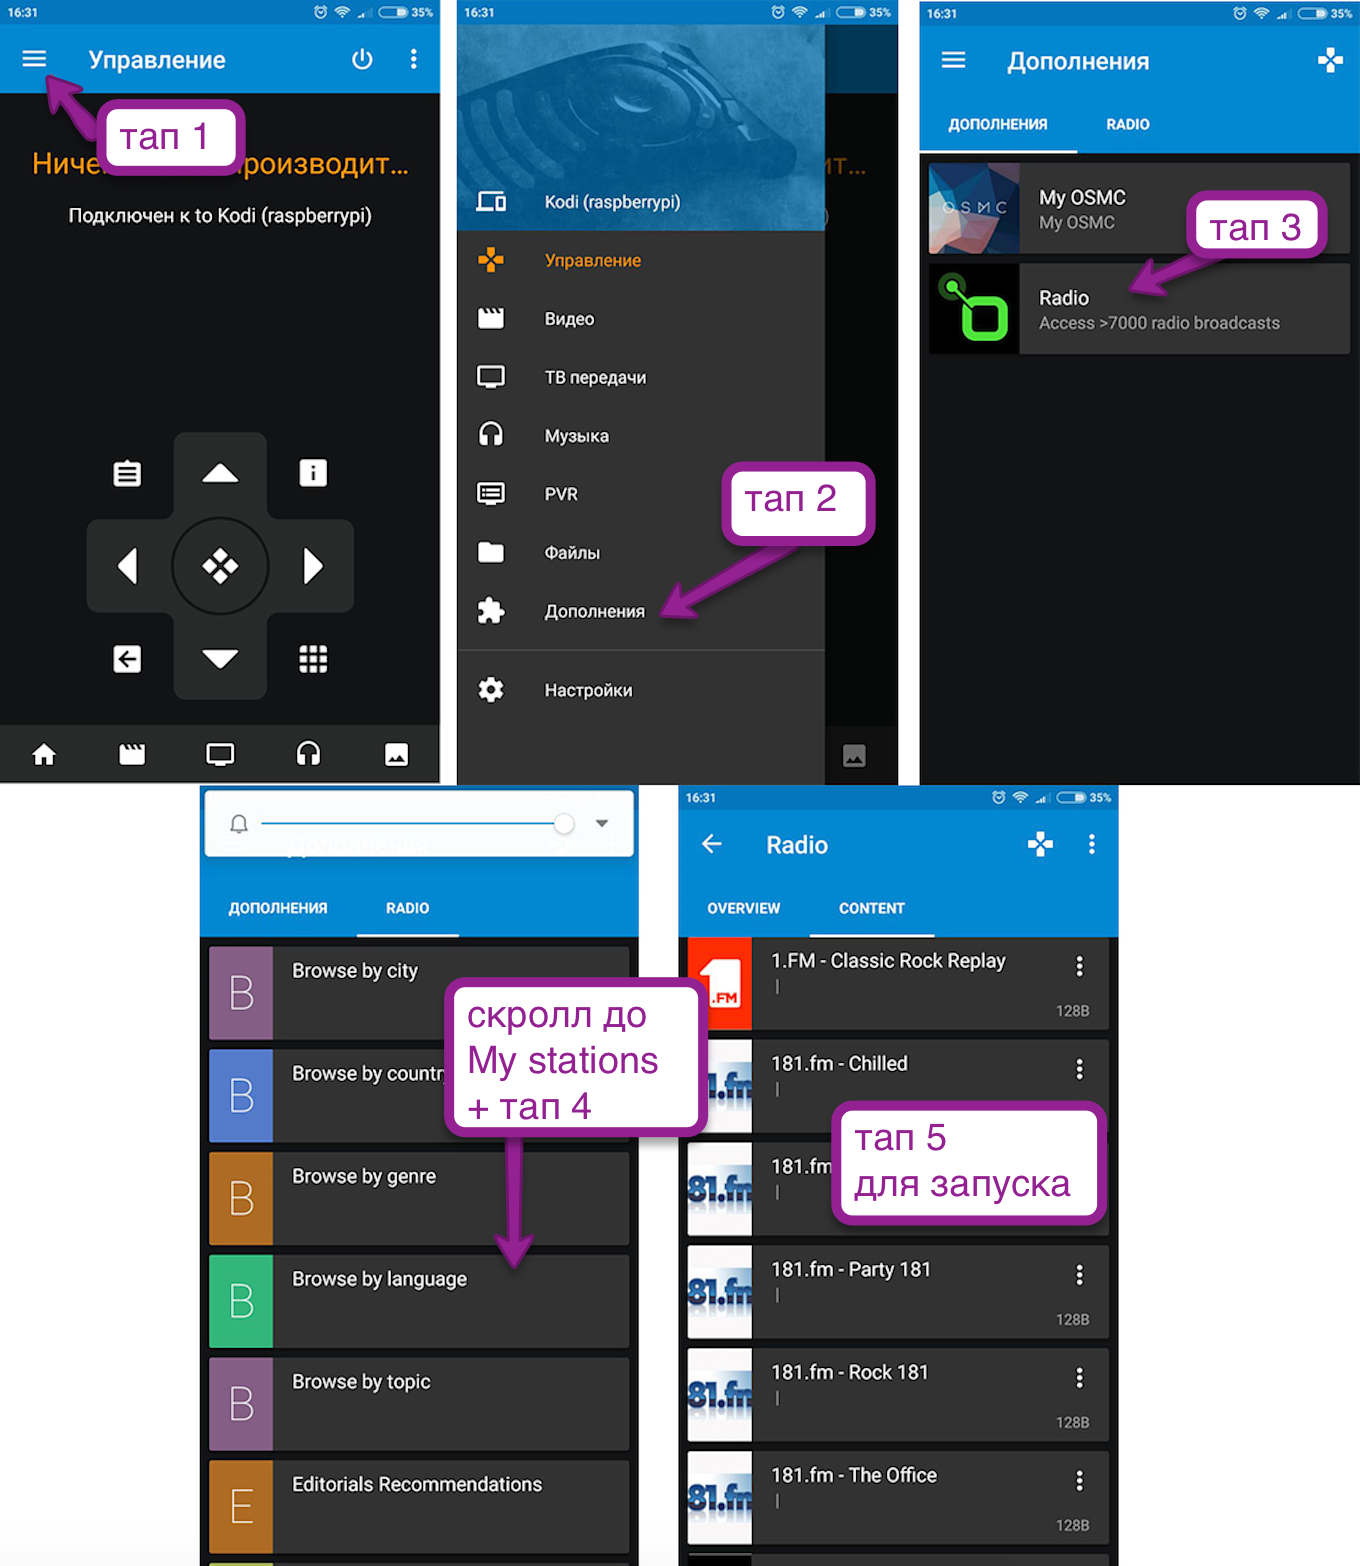
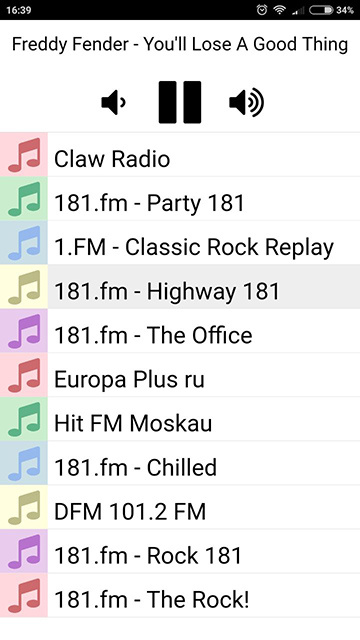
I had to plunge into the wondrous marvelous world of Kodi-API, after which I wrote a simple version of the console on React, with a minimalist design, sharpened exclusively for the radio. The essence of its work is simple - when it starts, it requests the contents of the “My stations” section from the Radio plugin, and then offers to choose any radio station from this list to the user. There is a start-stop playback, volume control and display of the name of the current track. Comme il faut. Sources are published on github .
As a result, the entire iron filling of the project consisted of:
1. Raspberry Pi 3 Model B
2. Suptronics X400
3. 12V 60W power supply
4. JBL Club 5020
5. MicroSDHC Transcend 16GB
Speakers and flash drive were ordered in the nearest online store, everything else - on Ali. A total of iron cost about 7,000 rubles. Another 1000 to 1500 rubles would have to spend on housing materials, wires, paint, etc., if I did not have them.
I like the result, despite the fact that there are a number of complaints about it. For example, it is impossible to edit the list of favorite radio stations without connecting to a monitor and keyboard column - limitations of Kodi / OSMC. There is no possibility to tune the sound with an equalizer, at least I do not know how to do it. I would also like to add an automatic playback of the last station when it is turned on, but for the time being it is also unclear how. If anyone knows - click in the comments, I will be very grateful. There is AirPlay working out of the box, but the Bluetooth A2DP could not be configured either. But all this does not really matter, and in 99 cases out of 100 it is enough to just stick a station on a smartphone by genre or mood.
Separately, it must be said about the sound, because Sonos is a foremost person in terms of sound. Suptronics X400 did not disappoint - 25 squares of the living room are filled with sound at 1/10 of the volume. In general, the sound is detailed, without wheezing and rattling. Bass - lo and behold! - there is, moreover, a powerful one and at the same time not rolling down into a “muttering” - a phase inverter takes out. You can clearly hear the high-hat sounds and the “c” and “c” sounds from the vocal close up. Surprisingly, this unpleasant effect completely disappears if you cover your tweeters with your fingers (who knows why - write in the comments). Of course, Hi-Fi did not come out, but the sound of the resulting acoustics can be safely put on a par with such popular home speakers as the Microlab Solo 6C or Sven SPS-7xx.
Of course, if someone offered me the choice to buy such a “Pi-Sonos” for 8 thousand or Sonos for 18, I, of course, would choose Sonos. But the goal was different - I wanted to immerse myself in new technologies. This is my first experience with Raspberry Pi and generally with SoC, the first attempt to create acoustics, the first completely independent project on React. The creation of acoustics required design skills, soldering, joinery, painting, design, layout, programming. And gave the unforgettable feeling of inspiration and trepidation that accompany the process of creation, for which it is worth getting involved in such adventures!
All Articles