We pump the intercom with the MQTT protocol to control from the phone
 Hello. I will tell you a little about my last turn-out - the completion of the intercom by the WiFi module of the NodeMCU. I apologize in advance for choosing the module - everyone has probably already got this ESP's ...
Of course, the work of ClusterM with its answering machine is not to be surpassed by anyone, but I consider this functionality superfluous. With the birth of my daughter, I just needed to silently open the intercom to the guests so as not to stand at the tube and not wait for the incoming call, which will surely wake up the little one. And sometimes it is easier for yourself to open the door from the phone, rather than climb behind the keys and put the tablet back and forth to make it work (I have a very dumb panel in the entrance). The project turned out to be small, so there are not many letters in the article either, but there are photos.
Iron
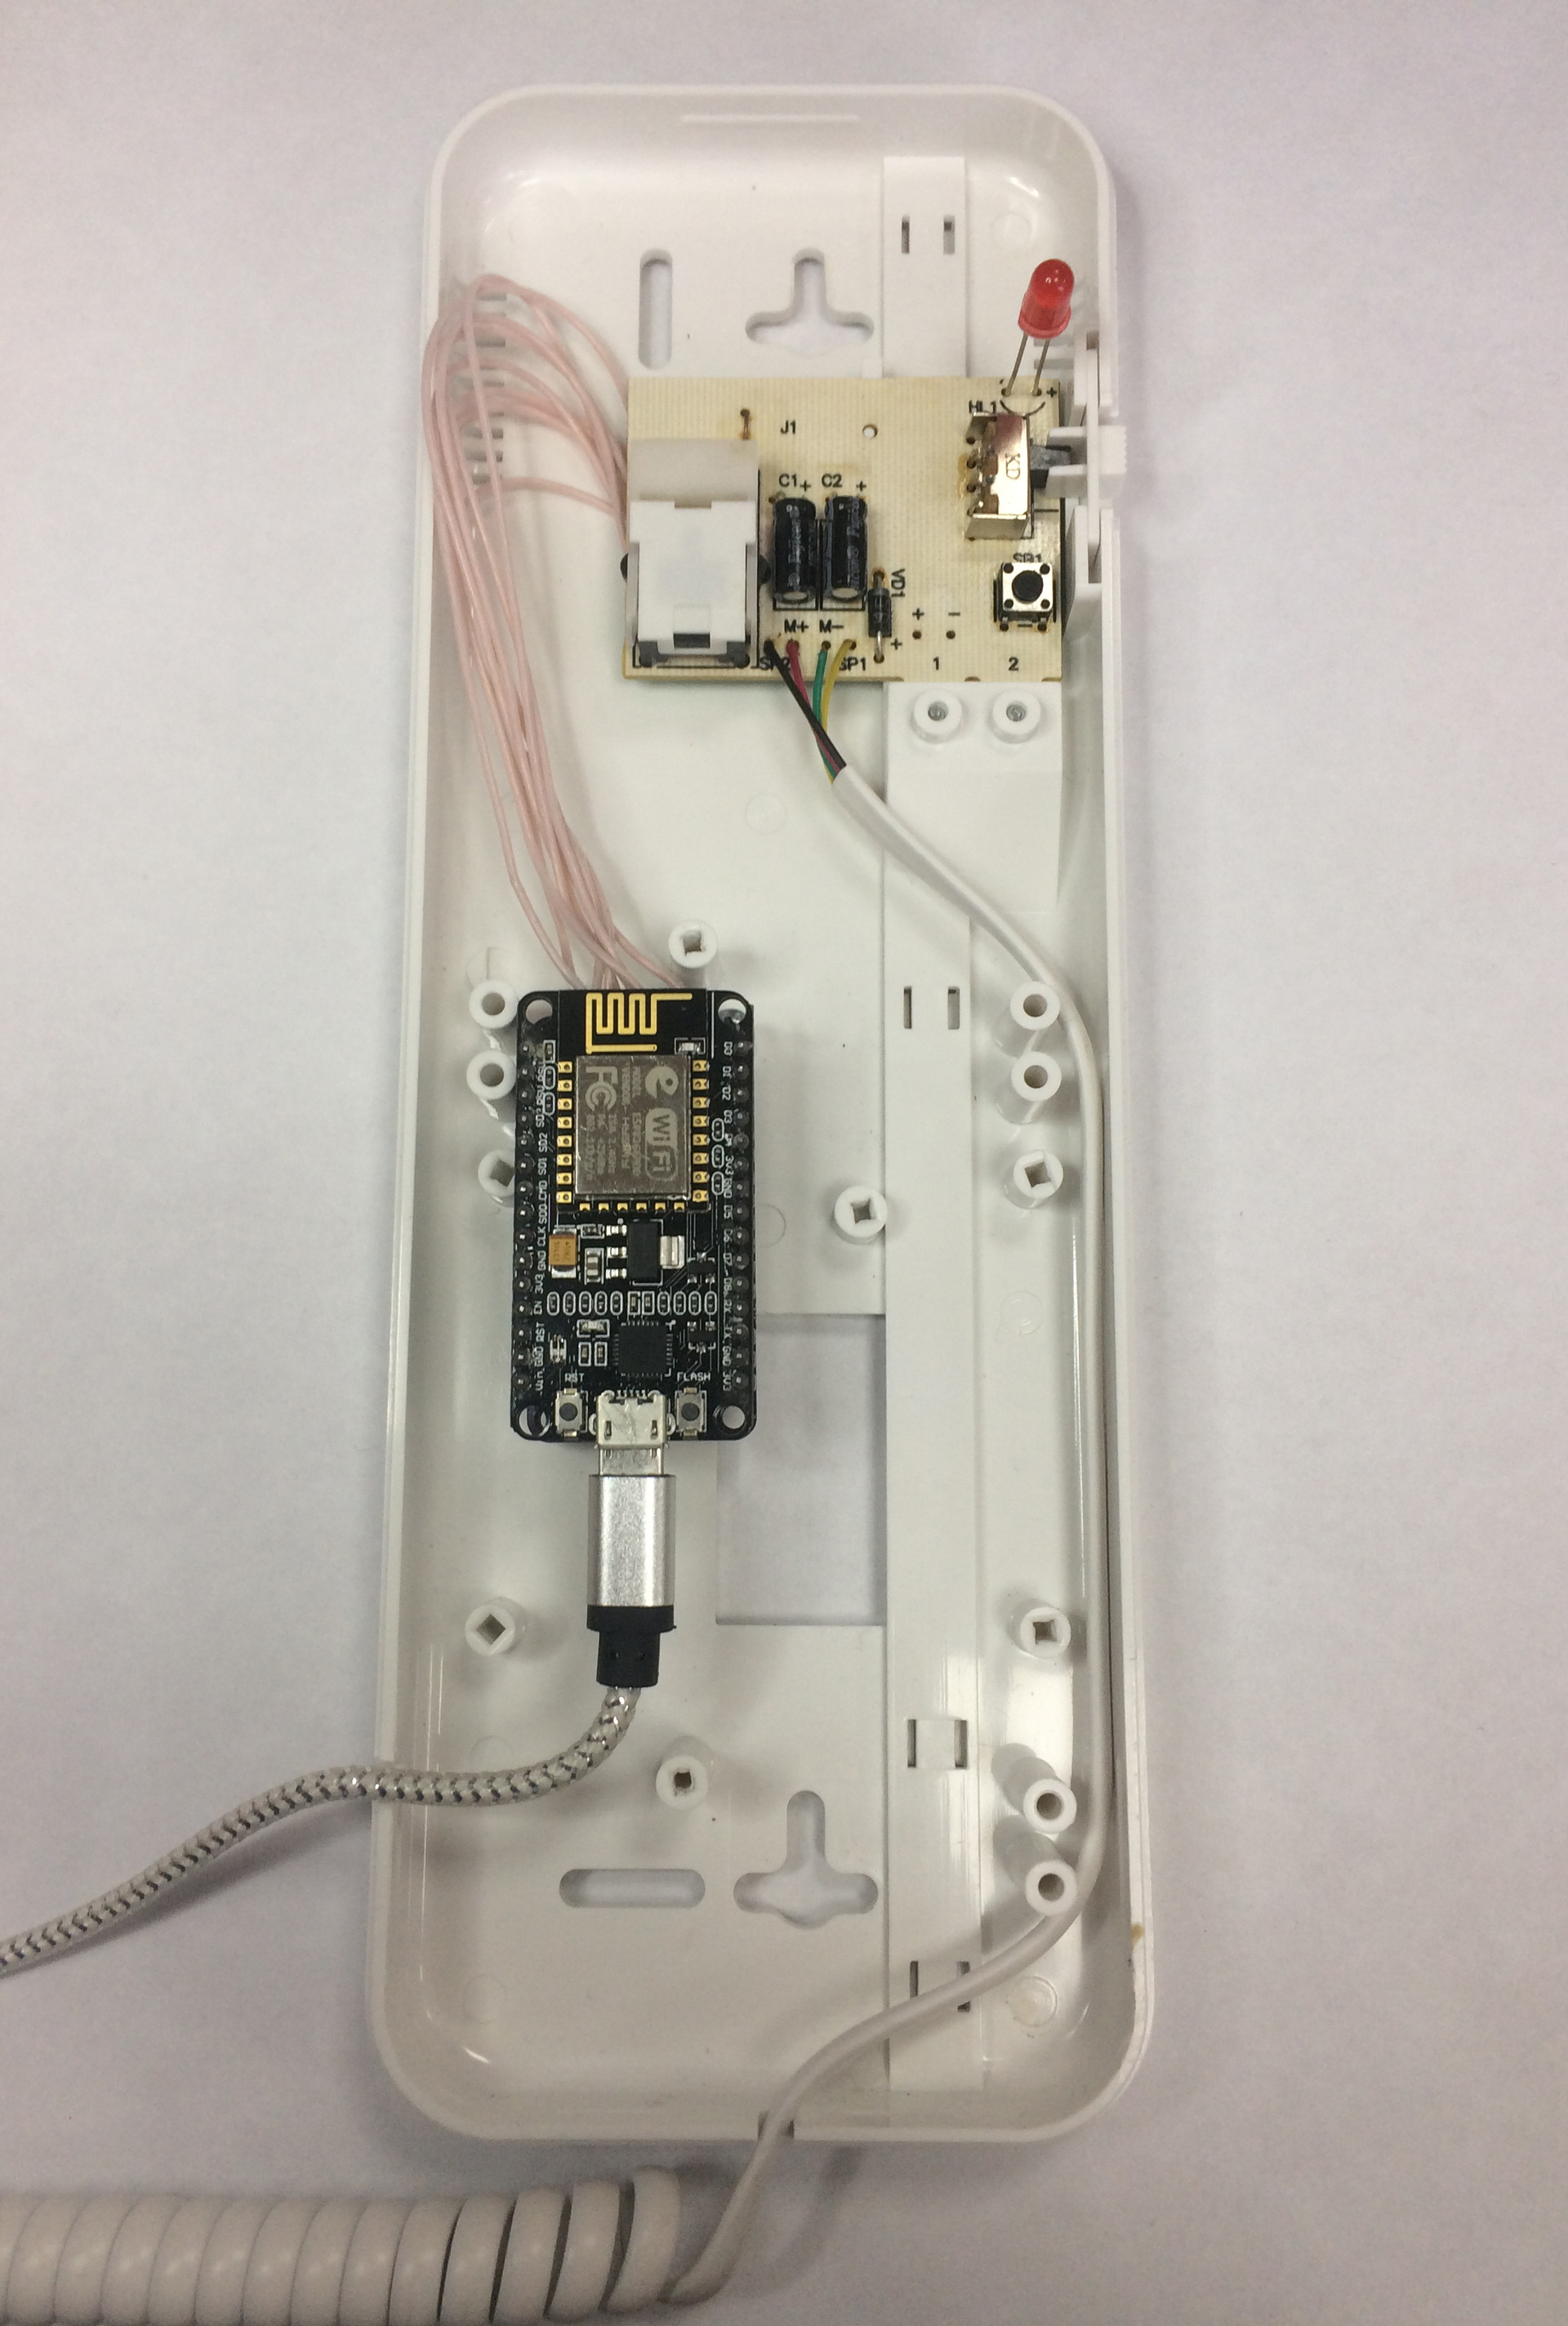
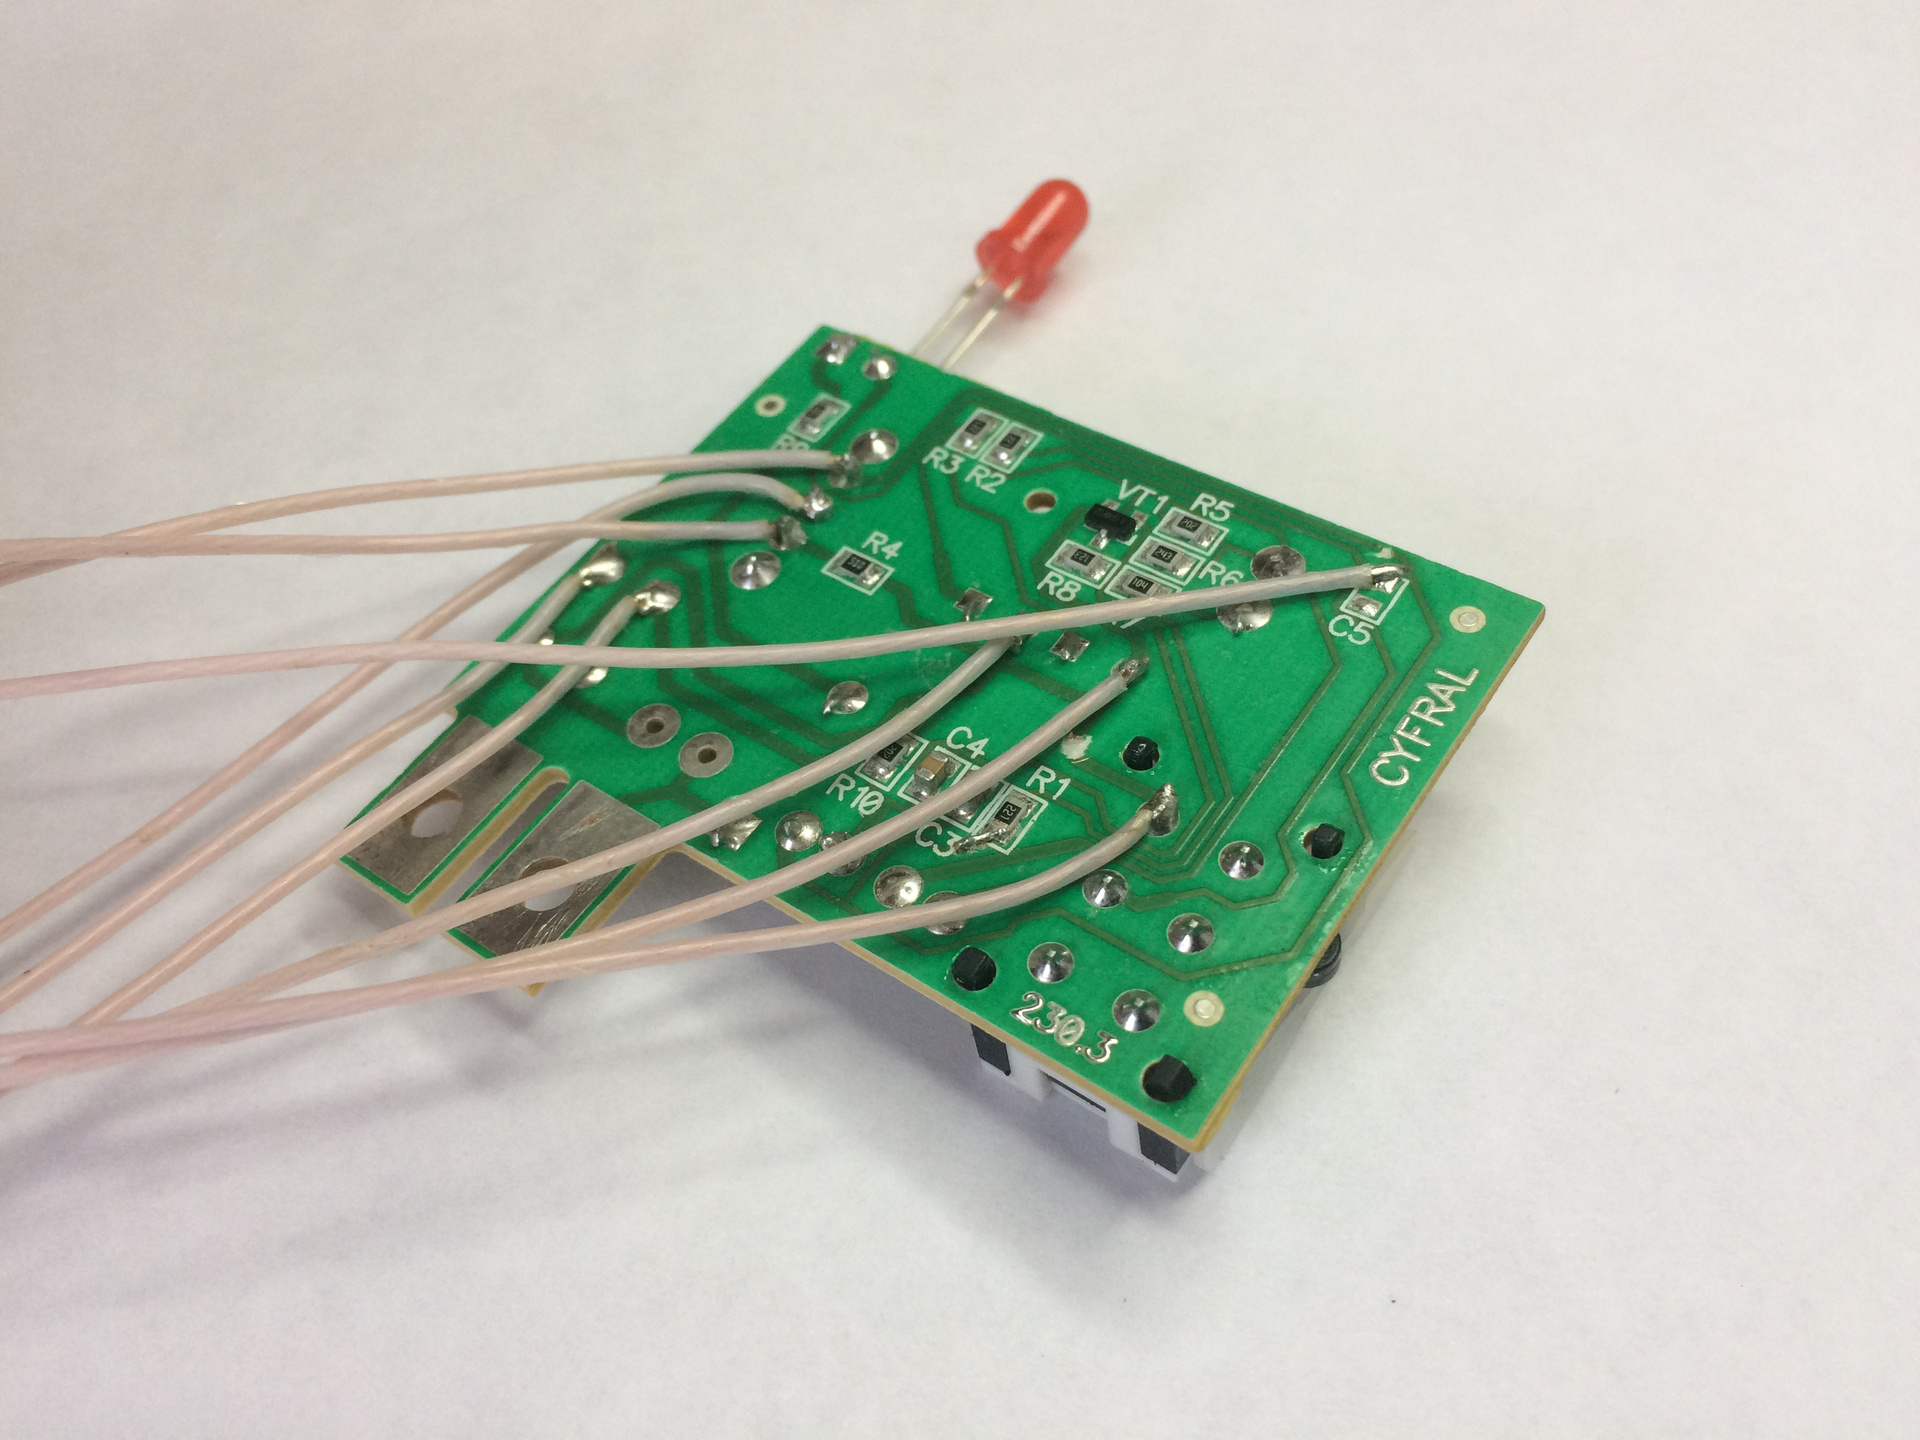
I had several NodeMCU modules available, so having estimated it to the intercom handset, I decided that it would fit in there without problems, I just had to make an expansion card. I always breed in EagleCad, I order the boards either from the Chinese or from the American OSH Park. OSH Park is cheaper if the board area is small, but you get only 3 boards instead of 10 Chinese ones, but for a piece project this is not important. The relyushki PE014005 got on the board perfectly, right between the NodeMCU pins.

Not the cheapest option, but I had them in stock. And so you can put the cheapest Chinese, HUI KE for example (this is not a curse, this is a company like this - they have a series of relyushek HK4100F). I also used two optocouplers 4N35S, one at the entrance - to catch the incoming call, the second to close the button for opening the doorphone.
The resulting layout and topology of the board is here (everything is in the repository, the link is at the end of the article):


Fees from production.

Some photos


Description of the tube
First, a little on the principle of the tube itself - I have the Tsifral CL-2. Here is the scheme from the official site.
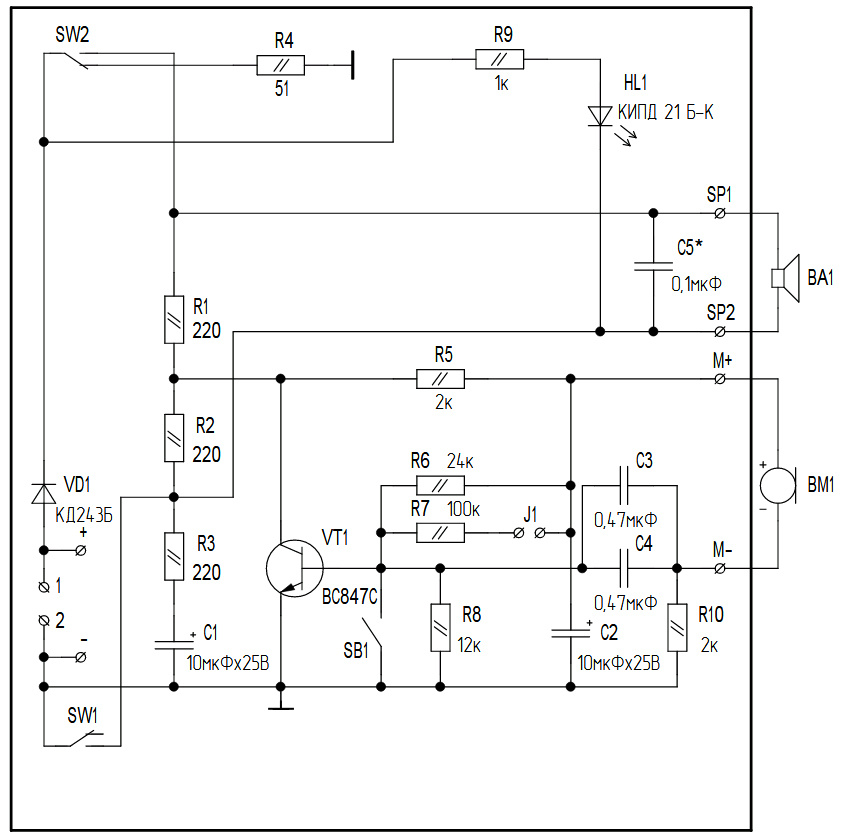
In the diagram: 1.2 - contacts connecting the doorphone line (has polarity, if someone did not know); SW2 - tube sound switch (at the bottom - the sound is turned off, at the top - the sound is turned on); SW1 - talker arm (at the bottom - the tube hangs, at the top - the tube is removed for conversation); SB1 - door open button; BA1 - speaker tube; BM1 - microphone tube, HL1 - LED.
When the access panel gives a call, a meander of 12V amplitude enters the line. The line resistance should be 50 ohms , in any other case an error will be displayed on the panel. If the SW2 switch is in the lower position (the sound on the handset is turned off), then a 50 Ohm resistor is connected to the line - the LED blinks, but we will not hear any sound. If the switch SW2 is in the upper position (sound is on), and the switch SW1 is in the bottom (tube hangs), then the line will have the resistance of the speaker BA1, all the same 50 Ohm , the square wave falls on it and we hear the sound. After picking up the handset, the SW1 moves to the upper position and one speaker output is lifted off the ground, now there will be an analog conversation signal and loudness acceptable to the ear, and not a call for a hundred decibels. If you decide to open the door for the guest, then press the SB1 button, which locks the transistor and the resistance in the line increases dramatically - so the panel understands that it is necessary to open the door.
Now about the modifications

Relay1 - we take control of the sound on ourselves (we believe that the native switch of the tube SW2 is in the upper position, otherwise there will be porridge); Input - optocoupler, twitches during a call (connected before Relay1 to see the call in silent mode); Relay2 - simulates lifting the tube; Open - closes the door open button. I draw your attention to the fact that the relyushki soldered by normally closed contacts in the gap. This means that at any time you can disconnect the intercom from the network (and suddenly the light went out or the Internet disappeared) and it will retain its performance, this is important.
Firmware
I wrote the firmware in PlatformIO (plugin for Atom editor) on the Arduinov libraries. Link to the repository at the end of the article. This, with your permission, IDE will be more comfortable than native Arduinovskaya - who have not tried, be sure to try. As an MQTT client on the phone, I used IoTmanager (hereinafter - just a client). I will not tell a lot about the program (those who want to look at the code), just to describe what she can do:
- connect to the MQTT broker
- publish topics with settings for the client
- subscribe to topics for switching to the client
- send a push notification to the phone when an incoming call
- publish the changed settings when calling (to see the status in the client)
- turn off the sound on the intercom at the command of the client
- open the door one-time
- open an infinite number of times
- just drop the phone
Application screen forms (clickable)

The trick of the IoTmanager program is that all settings are stored in topics, and it only displays what is published. The meaning of the lightweight MQTT protocol is lost a little, but I like this implementation. If desired, you can remake a different MQTT client.
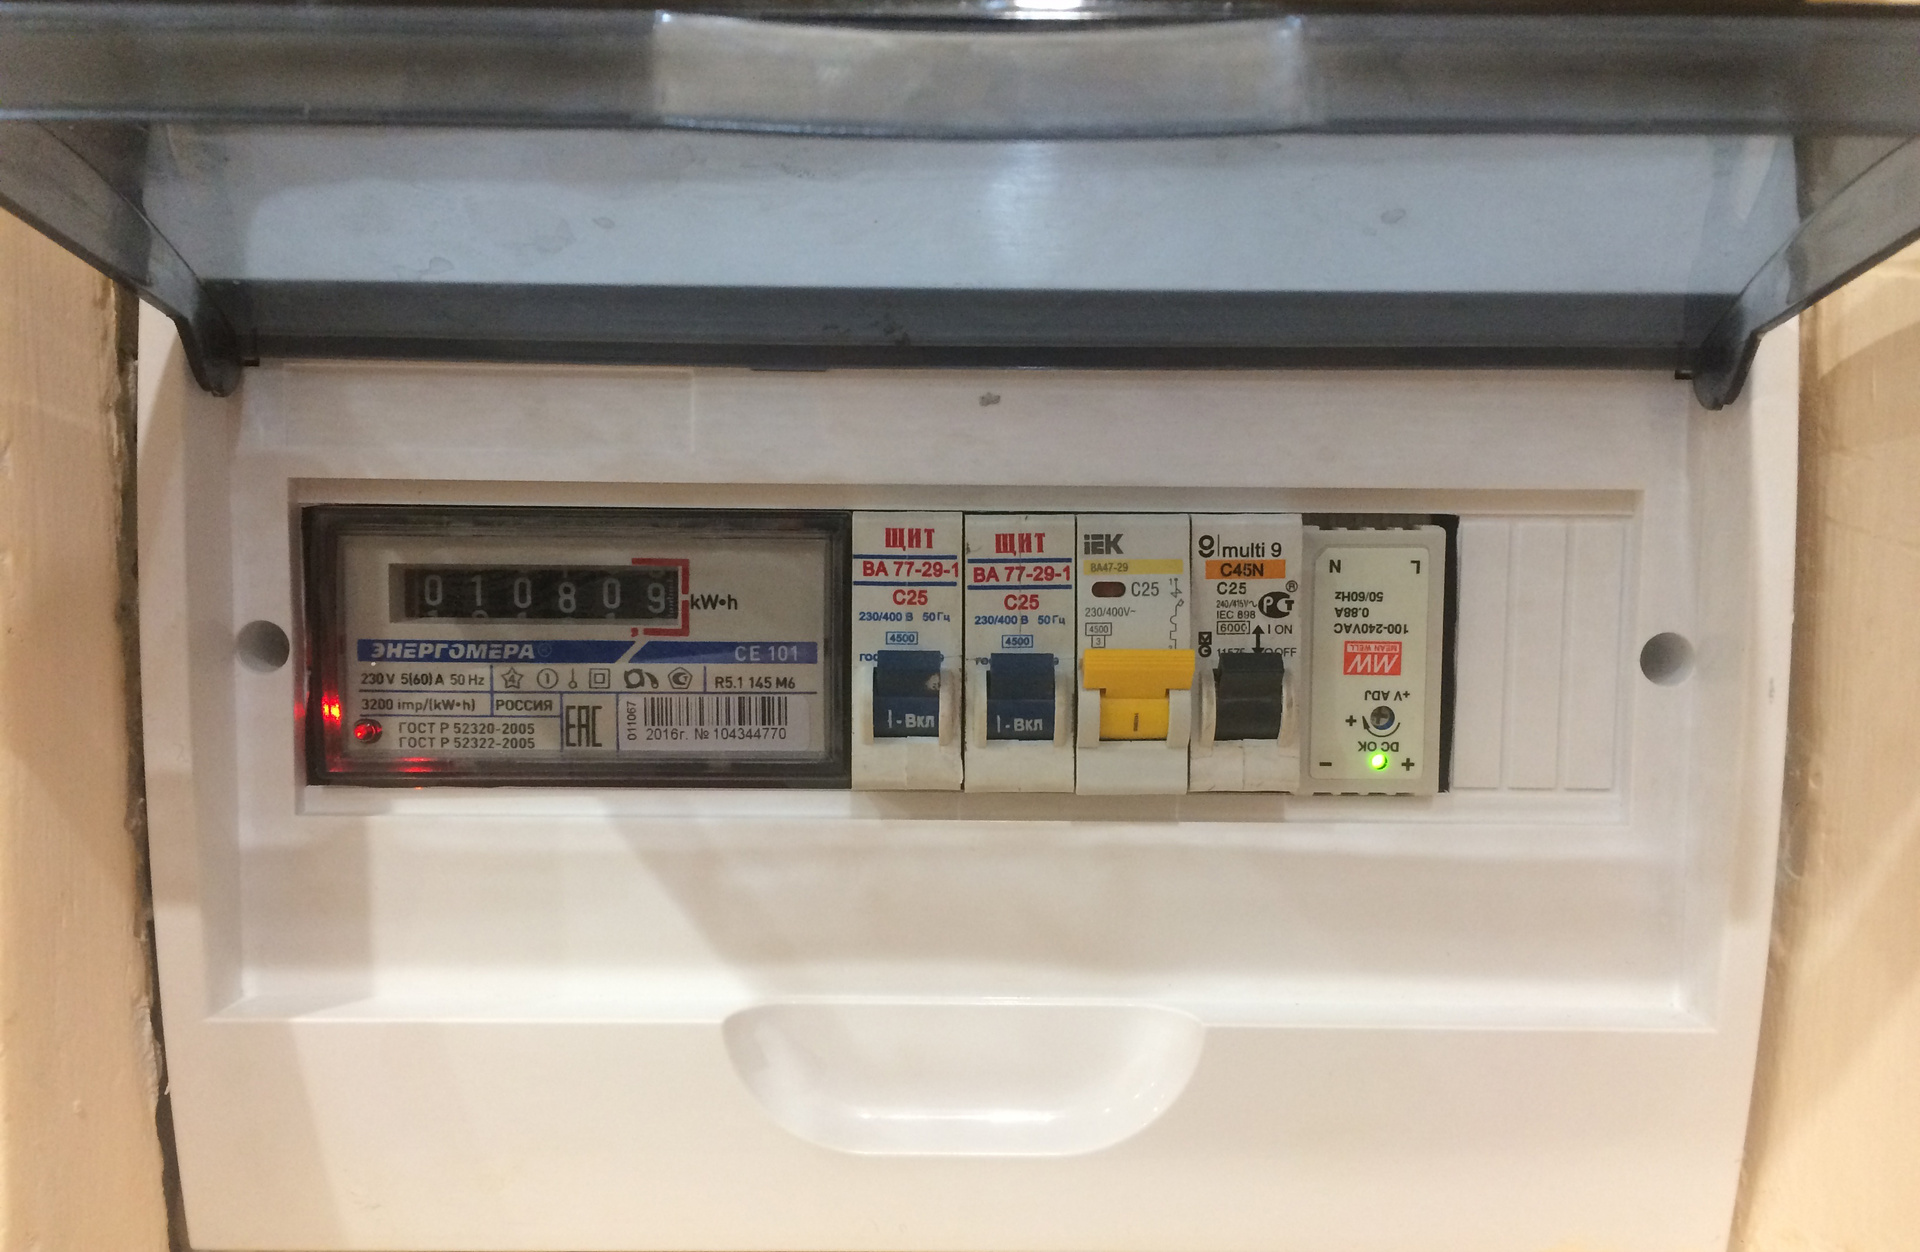
Of course, all this (and even with two electromechanical relays) requires an external power supply and I would have thought about the feasibility of crafts if I needed to start powering 5V from the outlet ... But my meter is inside the apartment, and the intercom is hanging right next door. I just ordered a 220AC / 5VDC module on the din-rail for Ali and powered the intercom from it. In the photo it is turned upside down for ease of interior installation.
Thank you all for your attention. I invite in the comments.
Developed a second version of the device, about which I tell here
Completion of the intercom with the MQTT protocol for control from the phone (version 2.0) .
Useful links:
1. The repository of this project on GitHub - there is a scheme, layout, source code.
2. Creating a smart intercom with an answering machine and an Internet connection - article by Comrade ClusterM, mentioned at the beginning.
3. As I intercom Vizit connected to mqtt - intercom with Arduino and Ethernet shield.
4. Esp8266 control over the Internet using the MQTT protocol - an article about MQTT and ESP8266.
5. Remote control intercom - another article on the topic.
All Articles