Bypass noolite router via mtrf64 + esp8266 + MQTT Buddy Android app
Task
Bypass the noolite router and control the noolite lighting quickly, efficiently and without using a home server. Global decentralization and total use of cloud solutions in home devices and Internet things. What?....
Hello!
Again, with my lapt and tale about how to overcome an expensive noolite router, start controlling the lighting and not bother with the soldering of boards, controllers, and in general - I want to turn on / install the application and it worked without additional dances. Yes ... everyone writes about it, but very few people do, because often all decisions run into complex instructions. And I'll show you, now :) - well, go ahead friends!
All who bought noolite lighting blocks, all rested on the following problems. Let's get straight and honest:
1. I stuck, ok! and then what? how to manage fashionable blocks, but they also appeared with some kind of encryption and feedback ( article )
2. yeah ... they want an Ethernet gateway ... for xxx greens ... to manage - OK! and application? there is yes ...?! good forward
3. I began to manage - but as it is expensive ... it's the same lighting, I want this is cool, but I also want scripts - and where can I get them? (at the end of the article mega bonus scenarios!) and the home server is also necessary: (- all this at the end leads to costs and already ... not very budget.
These (or similar) items also hamper users in expanding home automation.
The task is clear: we need to simplify life and make it convenient - now let's try to solve it by resorting to radical methods. We remove the home server, we remove the noolite Ethernet gateway.
(noolite laughter)
There are lighting control units and ... a user.
(there should be a picture of one user in the field :) with the noolite block)
In order to start managing these blocks, we need to think about the applied technologies first of all, and then understand what hardware will help us to do this.
Recently, the data transfer protocol is very popular: MQTT - yes, this is a cool and very convenient data transfer protocol. With the team of pervert enthusiasts, we developed an application for this protocol that helps Android users (iOS build and windows phone in the process of delivery to the markets). Link to the application at the end of the article, do not consider it a PR;) - well, it’s PR: D - but we need a good application that will help us to make the world better. MQTT is cool - YES!
We take the MQTT protocol - great. The application for it is - great. Now note: the question on the backfill :) - what hardware does MQTT support? - YES, they all said in one voice: of course, ESP 8266.
We cook borshch further and stirring the added ingredients, we go to visit noolite on the site and see what they have there with communication modules ... oh!
So they have modules for communicating with these blocks. We need only exotic. Why? Yes, because we have no home server, nothing but blocks and the notion of "decentralization". Oh ... looking forward to arguments and shouts - but oh well, karma on my head - we go on!
We look, on the site - and we see - 2 modules: MTRF64 USB and MTRF64 - so, one USB, the second just UART. Well, we have found a solution :) - since USB for computers and the power supply there under 5V - and here Mr. Uart himself and 3.3V adapted too - it's beautiful.
What do we have?
1. noolite SLF-1-300 block (block with feedback and encryption)
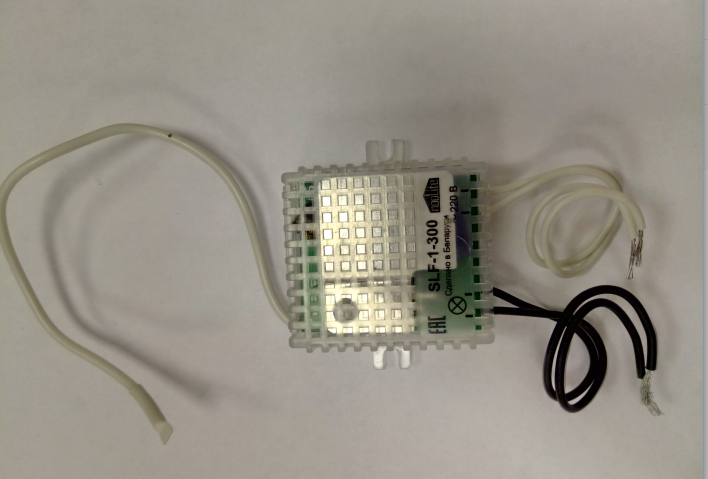
(picture noolite SLF-1-300)
2. MTRF64 UART module (which is cheaper than USB, due to the lack of a chip for working with USB! Simplified to the "plinth" state;))
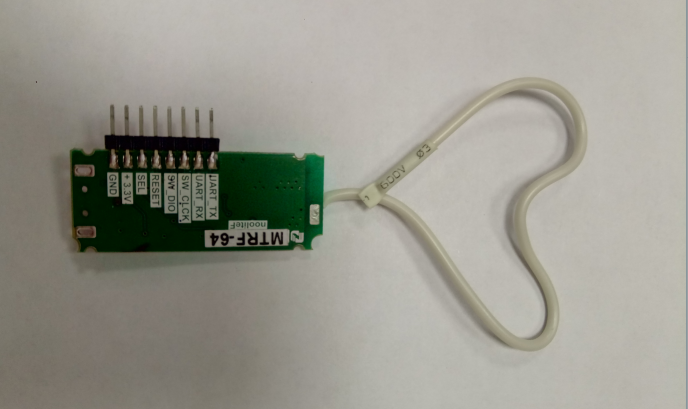
(picture MTRF64 UART)
3. ESP8266 module

(picture ESP8266)
3. application for working with MQTT (MQTT Buddy)
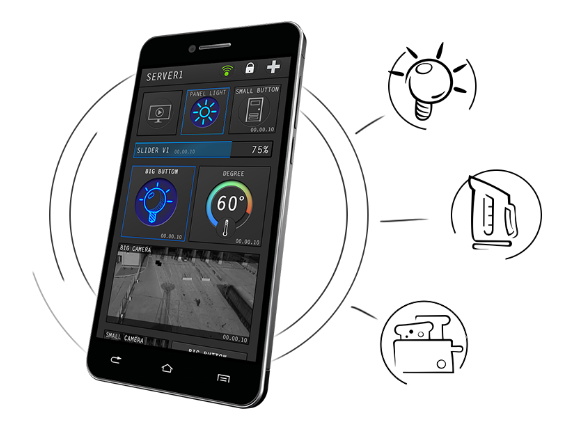
(picture)
(picture noolite SLF-1-300)
2. MTRF64 UART module (which is cheaper than USB, due to the lack of a chip for working with USB! Simplified to the "plinth" state;))
(picture MTRF64 UART)
3. ESP8266 module
(picture ESP8266)
3. application for working with MQTT (MQTT Buddy)
(picture)
Video
Now we need to simplify life and give you a code for the soul - that is. Who wants to sit and write a lot of code, especially with the MTRF64, you have to go to the docks, and there ... there are a lot of useful things ( link ) - but we need to quickly and efficiently. Open Source from our team - welcome: D> GitHub
We also need to prepare ESP8266 - who “burned through it” - knows, it is not difficult - 2 minutes and everything will work for you.
Get ready and take off!
- Download the firmware from the site ( https://nodemcu-build.com ), you can take it directly from the github repository, which is provided with all the code
- We burn ESP8266 with the command:
sudo python esptool.py --port /dev/ttyUSB0 write_flash -fm dio -fs 32m 0x00000 {your_nodemcu_firmware.bin}
- Verify that esp8266 is connected as / dev / ttyUSB0
- Check that {your_nodemcu_firmware.bin} you replaced with the name of your firmware
- If not esptool (download here ;))
- We take ESP8266 dev board - and we burn it, we “burn” to the full!
Now attention, we take and download the ready code : worker.
Read before filling code!
- substitute your data wifi router with login \ pass and substitute your MQTT broker with login and pass. The code uses free MQTT broker from cloudmqtt.com. Our team raised its free broker, which you can use: mqtt.ximxim.com (mqtt \ mqtt)
Link to GitHub repository: mqtt_buddy-mtrf64-noolite-esp8266 - the code was developed by Dmitry Karaba (I thank him so much!).
The code is specially re-released from the closed repository of our company XIM, INC - to an open public for free download.
Be sure to replace the data with your
-- Credentials SSID = "YOUR SSID NAME" PASSWORD = "YOUR PASSWORD" MQTT_SERVER = "m21.cloudmqtt.com" MQTT_SERVER_PORT = 16487 MQTT_USER = "noo" MQTT_PASS = "noo"
Fill the code on the ESP8266 through the ESPLORER tool.
Now connect esp8266 dev board + MTRF64.
esp8266 D7 rx - MTRF64 TX
esp8266 D8 tx - MTRF64 TX
esp8266 GND - MTRF64 GND
esp8266 3V3 - MTRF64 3V3

(photo of connection)
esp8266 D8 tx - MTRF64 TX
esp8266 GND - MTRF64 GND
esp8266 3V3 - MTRF64 3V3
(photo of connection)
As soon as you upload the code to esp8266 - after a reboot, you will not be able to reach it and change something (code) - you need to rewrite the firmware again. Why? because, esp8266 automatically switches to the UART9600 connection and starts communicating with the MTRF64 module. The code uses an alternative connection uart through pins d7 \ d8, the main RX, TX pins are free to work. You can easily add your own “interrupted” transition conditions to the uart9600 to communicate with the MTRF64 - since this was not our goal and main task.
What we have done and how it works
The mtrf64 module is connected via UART with esp8266, which in turn connects to the Internet through your router and connects to the MQTT free broker. On the other hand, as a user, you also connect to this cloud broker via a mobile application and start sending commands to the MQTT channels, which in turn are “parsed” on the fly and, depending on the command, are transmitted via the UART MTRF64 module! Yes! That's how we turned and cool budget! Yes! It's pretty darn cool when you realize that you have built a clear logical chain of technologies that work for you. Thank ;)
Video
Control
Go ahead: we connected and what's next? How to manage;) - it's simple! Merge our app MQTT Buddy from Google Play (link at the end of the article) and add the broker MQTT there - for example mqttcloud.com. Now let's add a new snap button for the noolite block to the MTRF64 - let's befriend them!
Commands to communicate with MTRF64
Dmitry Karaba, the developer of the code for esp8266 under MTRF64 - made the following command format for MQTT to communicate with the module.
From MQTT topics you can see that you can work both with channels directly and with addresses of specific devices, thus you can assign all devices to one channel, but work with each one at a specific address. The address can be found in the mqtt_buddy / sys topic when binding, the module responds with the address of the associated device.
-- mqtt_buddy/noolight/<int:channel> -- mqtt_buddy/noolight/<int:channel>/<XX-XX-XX-XX:address> -- mqtt_buddy/noolight/<int:channel>/bind -- mqtt_buddy/noolight/<int:channel>/unbind -- mqtt_buddy/noolight/<int:channel>/devices
From MQTT topics you can see that you can work both with channels directly and with addresses of specific devices, thus you can assign all devices to one channel, but work with each one at a specific address. The address can be found in the mqtt_buddy / sys topic when binding, the module responds with the address of the associated device.
Add a button to MQTT Buddy (or use your MQTT client, console, python with paho at the end!). In MQTT Buddy - click "+" - enter the name of the button and the topic.
Adding a control button to MQTT Buddy
mqtt_buddy / noolight / 0 and data: "on, off or switch"
and mark one checkbox: publish - so that when you click on a button - we can send a command to the mqtt topic.

and mark one checkbox: publish - so that when you click on a button - we can send a command to the mqtt topic.
Video
We added a button, now we do the standard block binding: click on the block, click on the bind button in our application and see how the block is attached to the module, the blinking indicator on the SLF block goes out.
If you want more information - you can read messages in the topic: mqtt_buddy / sys - all the information from the block arrives there - every time, all 17 bytes of data, where you can find out the addresses of the blocks and what is going on there “in the technical basement” ...
Video
After binding - we create a new control button already with these blocks with the topic.
Block management through MQTT topic in MQTT Buddy
mqtt_buddy / noolight / 0 and data: "on, off or switch"
check the checkboxes in the application settings: switch \ retained \ publish - now when you press the button - a command will be sent to the topic “mqtt_buddy / noolight / 0” - esp8266 will receive this data and parse the topic and send the required command to the MTRF64 noolite module and a miracle will happen ... a miracle of technology that you were able to translate into reality without complicated actions.
check the checkboxes in the application settings: switch \ retained \ publish - now when you press the button - a command will be sent to the topic “mqtt_buddy / noolight / 0” - esp8266 will receive this data and parse the topic and send the required command to the MTRF64 noolite module and a miracle will happen ... a miracle of technology that you were able to translate into reality without complicated actions.
The firmware and control of the first block will take you about 5 minutes if you are already familiar with esp8266 and at least once flashed it.
=================== tear off ============================
Links to hardware and software on the article
- MTRF 64 block
- ESP8266 dev board - Aliexpress \ radio markets \ online stores
- MQTT Buddy Android app (iOS \ windows phone in the adaptation stage)
- mqtt.ximxim.com - our website - we made SHOW room on esp8266 for a bigger fan;) - many thanks to everyone for the positive rating, we are trying to make IOT more real, smart automation team Smart Automation Team> XIM, Inc.
Forgot home selfie stick
Well ... I forgot to stick at home, I had to quickly redo the office vacuum;)

============== MQTT Buddy Bon scripts =========================
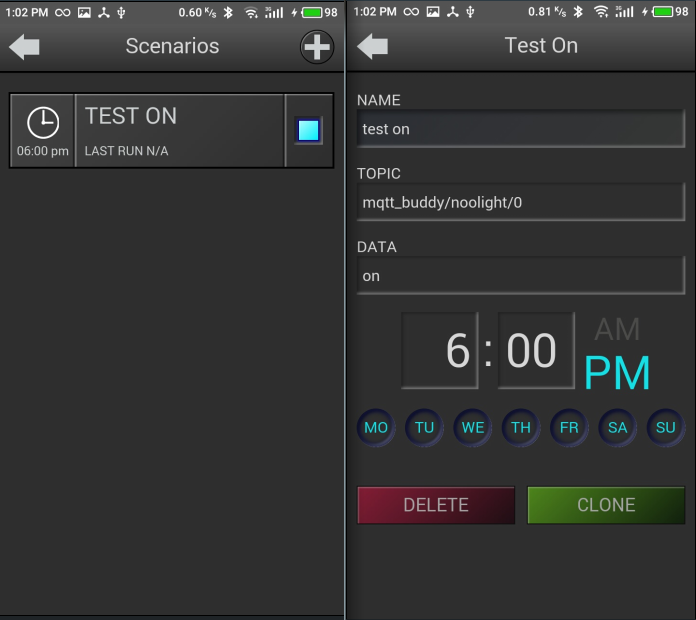
Since the system is decentralized and there is no home server - who will run the scripts? Yes - it works, yes - the author uses this functionality. How does it work and where? In our MQTT Buddy app. Everything is quite simple: you add the MQTT broker and enter it, further up there is a button in the form of a watch - these are the scenarios.
Adding Script to MQTT Buddy
With a click, we add a script and if your broker is available in the Internet environment - then at the right time (attention, time zones are taken into account, you do not need to steam and think about it - just tell the system what time you want and what to send to the topic you need) - working out 100% through QOS = 1 MQTT protocol). We maximally simplified the service for users, so that they would not think about the technical part and bother, but simply said “what I want” :) - and for it to work.
This is a real service that really works. If anyone wants to get the free code MQTT Buddy on the PRO functionality - you can subscribe to the form on the website mqtt.ximxim.com :)) - there you can also find the showroom from the web access. Everything! I bow out!
Have a good day and mood, thank you for your feedback, positive feedback and sensible criticism! Be kinder.
Your automator, Alex B.
All Articles